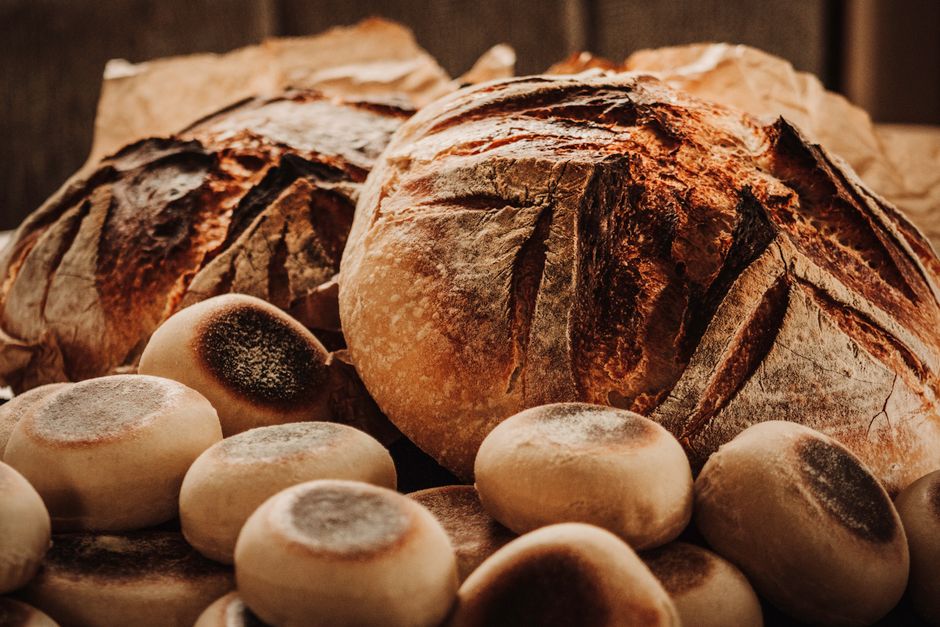
Sourdough Mastery: From Starter to Showstopping Loaves
Recipes

Sourdough Mastery: From Starter to Showstopping Loaves

C
By The Chef
|June 3, 2026|11 Min Read

Embarking on the journey of sourdough baking is like stepping into a world that thrives on patience, science, and a touch of mystery. Unlike conventional bread recipes that rely on commercial yeast, sourdough uses natural fermentation via wild yeast and lactic acid bacteria. This process not only enhances flavor but also yields a memorable crust and crumb structure, elevating simple bread to something extraordinary. It's a beautifully rewarding craft that harkens back centuries and connects us to our culinary heritage. As you begin to master this art, the possibilities become endless, transforming home-baked bread into a profound experience.

In this blog post, we will delve into every aspect of sourdough baking—from creating and nurturing your starter to shaping, scoring, and baking beautiful loaves that are worthy of any artisan bakery. Mastering the technique can seem daunting at first, especially with the initial needs of maintaining a sourdough starter. But don’t be fooled; once you’ve mastered the basics, you will find joy in the process as well as an exhilarating sense of accomplishment. It invites you into a community of passionate bakers and enthusiasts, ready to share tips, tricks, and delicious recipes.

Understanding the importance of the sourdough starter is the key to successful baking. This mystical blend of flour and water evolves into a bubbly, tangy culture over time. With patience and proper care, it develops the flavor, texture, and nutrition that we yearn for in a well-crafted loaf. Mastering the various nuances of sourdough preparation will not only allow you to impress your friends and family but also deepen your understanding of baking fundamentals. So grab your apron and let’s jump into the world of sourdough mastery!

The Sourdough Starter: Your Lifeline

What is a Sourdough Starter?

A sourdough starter is a living culture of flour and water that captures wild yeast and bacteria from the environment. This culture works as a leavening agent, fermenting the dough and giving sourdough its distinct taste and texture. Unlike commercial yeast, which provides a fast rise with minimal time investment, a sourdough starter requires patience to develop.

The fermentation process creates lactic acid, which imparts that signature tanginess and increases the bread's shelf life by lowering the pH. To put it simply, a well-maintained starter is the heart of sourdough baking—without it, the process would be significantly less flavorful.

Creating Your Own Starter

Starting your own sourdough starter requires just two ingredients: flour and water. Here is a simple step-by-step guide:

1.Choose your flour: Whole grain flours like whole wheat or rye contain more nutrients and microorganisms, making them ideal for starting a culture.
2.Mix your ingredients: Combine 100 grams of flour with 100 grams of water in a clean glass jar. Adjust your water temperature to around 78°F (25°C) for optimal fermentation.
3.Stir and cover: Mix the ingredients thoroughly to combine them, then loosely cover the jar with a cloth or a lid, ensuring there's room for air flow but still protecting it from dust.
4.Wait and observe: Leave the jar at a warm room temperature (about 75°F to 85°F or 24°C to 29°C) for 24 hours. Around this time, you should start to see bubbles, which indicate the fermentation is beginning.
5.Feed your starter: For the next several days, discard half of the starter and feed it with equal parts flour and water daily. It typically takes 5 to 7 days for a starter to become strong and ready for baking.

Tips for Optimal Starter Development

●Patience is key: If your starter doesn’t bubble immediately, don’t lose hope. Wild yeast can take time to develop.
●Temperature matters: Keeping your starter in a warm environment can speed up fermentation, but avoid heat sources that could cause fluctuations.
●Consistency is important: As your starter matures, you can adjust its hydration level according to your baking preferences—traditionally, a 1:1 ratio (flour to water) is used for a medium hydration starter.
●Smell test: A healthy sourdough starter should have a pleasant tangy aroma. If it smells off or develops a layer of liquid (called hooch), it may need more frequent feedings.

The Art of Autolyse

What Is Autolyse?

Autolyse is a technique that involves resting your flour and water mixture before adding salt or starter. This resting period allows the flour to fully hydrate, enhancing gluten development and improving the dough’s extensibility.

The Steps of Autolyse

1.Prepare your flour and water: In a large mixing bowl, combine the desired amount of flour with the required water.
2.Mix until combined: Use your hands or a spatula to mix the ingredients until no dry flour remains. You’re not kneading yet—just ensuring everything is integrated.
3.Let it rest: Cover the bowl with a damp cloth or plastic wrap and let it sit for 20 to 90 minutes. This process prepares the dough for easy mixing and enhances flavor development.

Benefits of Autolyse

●Improved texture: The increased hydration allows for better gluten formation, resulting in a chewier and lighter crumb.
●Increased flavor: By allowing the enzymes in the flour to break down starches and proteins, you enhance the overall flavor profile of the sourdough.
●Easier handling: Autolysed dough is generally stickier but more manageable. It allows for a more forgiving kneading or folding process later on.

Mixing and Kneading: Finding the Right Method

Choosing Your Technique

Think of mixing and kneading as essential elements of your dough's development. You can mix the dough either by hand or using a stand mixer. Each method has its advantages, but some bakers prefer the tactile experience of getting their hands in the dough.

Hand Mixing

Hand mixing allows for a more intuitive understanding of the dough's texture. Here’s how you can do it:

1.Incorporate your starter: Add about 100 grams of your matured starter and sprinkle the salt on top.
2.Use the ‘pinch and fold’ method: Pinch pieces of dough together, folding it over itself. Be thorough in ensuring the salt and starter are evenly distributed throughout the dough.
3.Kneading: Once everything is roughly combined, lightly knead for about 5-10 minutes, adding a bit of water if necessary.

Stand Mixer Method

Using a stand mixer can save time and effort. Follow these steps:

1.Attach your dough hook: Combine the autolysed dough mixture with your starter and salt in the mixer bowl.
2.Mix on low: Start mixing on a low speed (speed 2 for KitchenAid mixers) until everything is incorporated, which should take about 3-4 minutes.
3.Increase speed: Once combined, increase to medium (speed 4) and mix for an additional 5-7 minutes. The dough should become smooth and elastic.

Knowing When to Stop

Regardless of your method, knowing when your dough is ready is vital. Use the windowpane test: Take a small piece of dough and stretch it gently. If it can stretch thin without tearing, it’s ready.

Bulk Fermentation: The Power of Patience

What is Bulk Fermentation?

Bulk fermentation is the first rise that occurs after mixing and kneading. During this time, the dough undergoes significant development, as the wild yeast becomes active and starts to produce gas, leading to that desirable rise.

Timing and Temperature

The bulk fermentation stage typically lasts anywhere from 4 to 8 hours at room temperature. However, several factors can affect this time:

●Ambient temperature: Warmer temperatures accelerate fermentation, while cooler temperatures slow it down.
●Dough temperature: For best results, aim for a dough temperature of around 78°F (25°C).

Monitoring Dough Development

To ensure your dough is developing properly throughout bulk fermentation, perform several folds during the process:

1.Initial rise: After 30 minutes, turn the dough out onto a lightly floured surface.
2.Folding technique: Gently stretch the dough from one side and fold it over to the opposite side. Rotate the dough a quarter turn and repeat. Aim to complete this four times, ensuring not to degas the dough too much.
3.Repeat at intervals: Perform 2-3 sets of folds over the total bulk fermentation period, allowing the dough to rest between each set.

Signs of Completion

Your dough should be nearly doubled in size and feel airy and light. If you gently press a finger into the dough, it should spring back slowly—this is a sign that fermentation has created the right balance of strength and elasticity.

Shaping Your Loaf: The Final Touch

The Importance of Shaping

Proper shaping not only improves the loaf’s appearance but also contributes to better oven spring and an even crumb structure. Whether you fancy round or oval loaves, the shaping method has its nuances that can affect the final product.

Shaping Process Step-by-Step

1.Pre-shape: Turn the dough out onto a lightly floured surface. With floured hands, divide the dough according to the weight of your desired loaf.
2.Preshape into rounds: Lightly shape each piece of dough into a ball, tucking the edges under. Allow them to rest for 20-30 minutes on the counter (this is known as bench rest).
3.Final shape: After resting, shape the dough again according to your preference (e.g., round for boules or oval for batards). Use the palms of your hands to tighten the surface tension.
4.Place in proofing basket: Transfer your shaped dough into a proofing basket, seam-side up for round loaves or seam-side down for oval loaves, ensuring it’s well floured to prevent sticking.

Proofing the Dough

Proofing is the final rise before baking and varies based on temperature:

●Room temperature proof: This takes about 2-4 hours and is a fine option for those who want to bake the same day.
●Cold-proof (retardation): Placing the shaped loaves in the fridge overnight can enhance flavor development. This method usually requires 12-14 hours, and the dough can be baked right from the fridge.

Scoring and Baking: The Grand Finale

Why Score Your Loaf?

Scoring your loaf before baking is essential for controlling how it expands in the oven. Without scoring, the gases would have no escape route, leading to an uneven rise or explosions during baking.

Tools for Scoring

1.Lame: A traditional baker’s tool with a razor blade for precise cuts.
2.Sharp knife: In a pinch, a sharp knife will work, though it may not provide the same finesse.

Scoring Techniques

●Start with a single slash down the center for a simple loaf, or create intricate patterns for enhanced flair, such as a cross or swirl designs.
●Aim for a depth of about ¼ inch to ½ inch—too shallow won’t have much impact, while too deep may compromise the structure.

Baking Conditions

The right baking environment is crucial for achieving the perfect loaf:

●Preheat your oven: Preheat your oven to 450°F (232°C) and place a Dutch oven or baking stone inside.
●Steam method: Steam is essential in the initial phase of baking to get that crispy crust. You can add steam by placing a pan of water in the oven or using the Dutch oven method, which traps steam effectively.

Timing Your Bake

Most sourdough loaves take about 30-45 minutes to bake. Here’s how to identify when they are done:

●A golden-brown crust—listen for that alluring crackle when it cools!
●Internal temperature should be about 200°F to 210°F (93°C to 99°C) for proper doneness.

Conclusion

Mastering sourdough is not merely a cooking technique; it's a skill that fosters connection—with the ingredients, the baking process, and perhaps even with friends and family who gather around the table to share warm, freshly baked bread. As you venture deeper into the world of sourdough, remember that each loaf tells a story. Embrace the occasional mishaps and celebrate your successes; every bake contributes to your evolving artistry in the kitchen.

Sourdough requires understanding, love, and practice. As you follow these tips and techniques, you’ll find improvement in each batch, and the profound joy of sourdough baking will become an integral part of your home cooking. From crafting starters to pulling perfect loaves from the oven, relish the journey of sourdough mastery, knowing that perfection is found not just in the final product, but in every moment spent learning and growing as a baker. Happy baking!


🧰 Gear for this recipe
Tools our chefs reach for when cooking this
Lekue Sourdough Bread Maker Bake Kit
Baking
Lekue Sourdough Bread Maker Bake Kit
★★★★★4.4
$35-$50
View on Amazon
Round Banneton Proofing Basket 9-inch
Baking
Round Banneton Proofing Basket 9-inch
★★★★★4.7
$20-$30
View on Amazon
Dexas Stainless Steel Bench Scraper
Baking
Dexas Stainless Steel Bench Scraper
★★★★★4.7
$10-$15
View on Amazon
KitchenAid Stand Mixer 5qt
Small Appliances
KitchenAid Stand Mixer 5qt
★★★★★4.8
$300-$400
View on Amazon

As an Amazon Associate we earn from qualifying purchases.

🍳

Get the Next Recipe

Weekly recipes, techniques, and gear picks — straight to your inbox.

No spam, ever. Unsubscribe anytime.

YesChef - Learn from the world's best chefs
© 2026 Blame The Chef
🍳

Never Miss a Recipe

Weekly recipes, kitchen tips, and gadget picks — straight to your inbox.

No spam, ever. Unsubscribe anytime.
