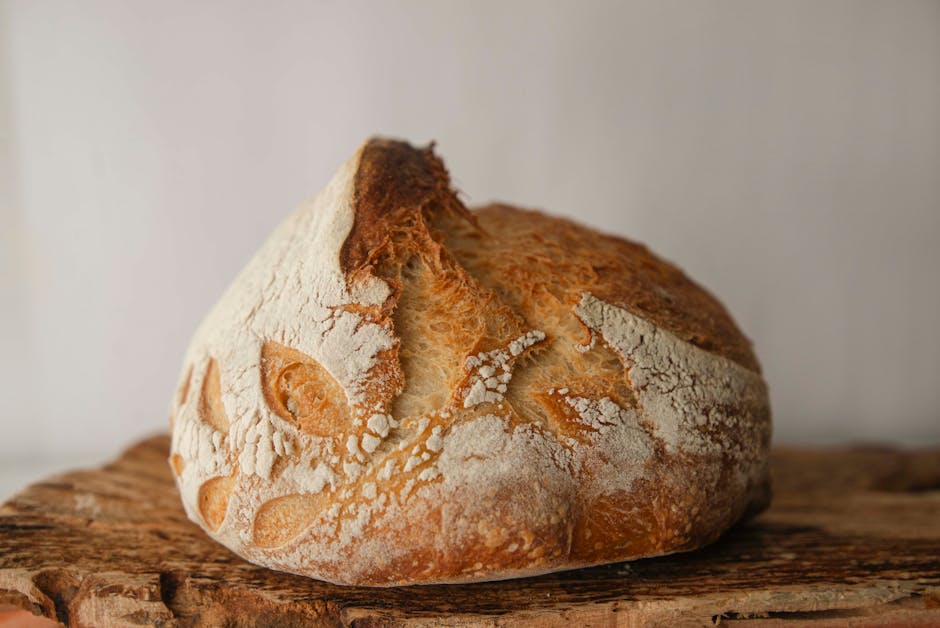
Sourdough Starter Secrets: From Neglect to Perfection
Sourdough starter is one of the most magical and elusive elements in the world of baking. Harboring a lively culture of wild yeasts and bacteria, a healthy starter is the key to achieving that crusty, tangy loaf that artisan bakers have developed a remarkable reputation for. Yet, for many home bakers, nurturing a sourdough starter can feel like an overwhelming challenge. The fear of neglecting a living organism often leads to an anxious swirl of thoughts about feeding schedules, ideal conditions, and potential disasters. However, with the right knowledge and a bit of patience, anyone can transform their sourdough starter from a neglected clump to a bubbling, bubbly powerhouse that's ready to elevate their baking to new heights.
Beneath the surface of your sourdough starter lies a fascinating world of microorganisms. These unseen players work tirelessly to create the complex flavors and textures we’ve come to love in sourdough bread. The beauty of sourdough lies not just in its delicious taste but also in its ease of adaptation; you can play with structures, add additional flavors, and even distribute your starter to friends. However, if you're starting from scratch—or mistakenly think that your current culture is a lost cause—don’t despair. In this post, we’ll explore the secrets of sourdough starter care, including perfect feeding ratios, ideal fermentation conditions, and tips and tricks for achieving a thriving culture that will make your bread baking endeavors an enjoyable success.
If you’ve found yourself falling out of love with your sourdough starter or perhaps letting it languish in the refrigerator for weeks, it’s time to rekindle that relationship. Whether you’re aiming to restart an old starter, troubleshoot problems with your current one, or create a new one from scratch, we’ll guide you every step of the way. Let's embark on this journey through the world of sourdough, uncovering secrets that will help you cultivate a robust starter and produce amazing breads that will impress family and friends alike.
Understanding the Basics of Sourdough Starter
Before diving into the methods for cultivating a healthy starter, it's essential to understand what a sourdough starter is and how it functions in the world of baking. At its core, a sourdough starter is a mixture of flour and water that has fermented over time due to wild yeasts and lactic acid bacteria present in the environment. Unlike commercial yeast, which is a single organism (Saccharomyces cerevisiae), sourdough fermentation relies on this symbiotic relationship of numerous microorganisms.
What is Fermentation?
Fermentation is a crucial process in baking, particularly in sourdough. As the wild yeasts consume the sugars in the flour, they produce carbon dioxide and alcohol, leading to the characteristic rise and flavor of sourdough bread. Concurrently, lactic acid bacteria thrive in the same environment, producing lactic acid, which contributes to the tangy flavor we associate with sourdough.
The Role of Temperature and Environment
Temperature plays a crucial role in the activity level of both yeast and bacteria. Yeasts generally thrive at warmer temperatures (between 75°F to 85°F or 24°C to 29°C), while lactic acid bacteria prefer slightly cooler environments. This delicate balance is key to cultivating a robust starter.
It's also important to consider humidity. High humidity can facilitate yeast activity, while low humidity may slow it down. Adjust your starter's feeding schedule based on the changes in your environment for optimal results.
Creating Your Own Sourdough Starter
If you’re starting fresh and want to create your own starter from scratch, you’re in for a rewarding adventure! While it does take time and patience, the process is simple and satisfying.
Choosing Your Ingredients
To create a sourdough starter, you only need two ingredients: unbleached all-purpose flour and water.
When selecting flour, here are the options to consider:
The Initial Steps
To begin, follow these steps to create your starter:
"Patience is key when cultivating your starter; each day brings you a step closer to a bubbling masterpiece."
Nurturing Your Starter
Once your starter is established, it’s all about nurturing and feeding it properly to keep it healthy and vigorous.
Feeding Schedule
The feeding regimen depends on how often you plan to use your starter and the conditions in which it lives.
How to Know Your Starter is Ready
A healthy sourdough starter exhibits several key characteristics:
Troubleshooting Common Issues
Sometimes, despite your best efforts, your starter may not perform as expected. Here are common issues and ways to troubleshoot:
Baking with Sourdough Starter
Now that you have a flourishing sourdough starter, it’s time to put it to use in your baking. The beauty of sourdough is its ability to enhance not only bread but also pancakes, waffles, and even pizza dough.
Recipes Using Sourdough Starter
Let's dive into some delicious recipes where your starter can shine.
#### Classic Sourdough Bread
Ingredients:
Instructions:
"The joy of baking sourdough bread is not just in the result but in the process itself—an art form that takes time to perfect."
#### Sourdough Pancakes
These fluffy sourdough pancakes are a fantastic way to use leftover starter instead of discarding it.
Ingredients:
Instructions:
Flavor Variations and Add-Ins
Feel free to experiment and enhance your sourdough dishes with various flavors:
The Lifespan of Your Sourdough Starter
One of the beauties of sourdough starter is its longevity when cared for properly. Here’s how to maintain it for the long term.
Long-Term Storage
When you go on vacation or want to pause your baking, it’s essential to know how to properly store your starter:
Reviving a Neglected Starter
If your starter has been neglected for weeks, it’s possible to bring it back to life:
Conclusion
With a little bit of love and attention, your sourdough starter can become the culinary cornerstone of your home baking. From its humble beginnings in a jar to its transformation into a bubbling, vibrant culture, it serves not only as a yeast source but also as a bridge connecting you to rich baking traditions. Remember that every baker’s journey with sourdough is unique, filled with trials, errors, and, most importantly, joys.
Embrace the process, be patient, and don’t hesitate to infuse your personality into your bread-making adventures. From loaf to pancakes and everything in-between, the world of sourdough is vast and inviting. As you become more familiar with your starter, consider keeping detailed notes of what works best in your kitchen environment, adapting as you grow and learn.
So whether you’re new to sourdough or looking to refine your skills, these sourdough starter secrets will guide you toward baking perfection. Trust in your starter’s potential, enjoy the process, and get ready to serve up breads that will delight friends and family. Here's to your baking success!




Get the Next Recipe
Weekly recipes, techniques, and gear picks — straight to your inbox.
