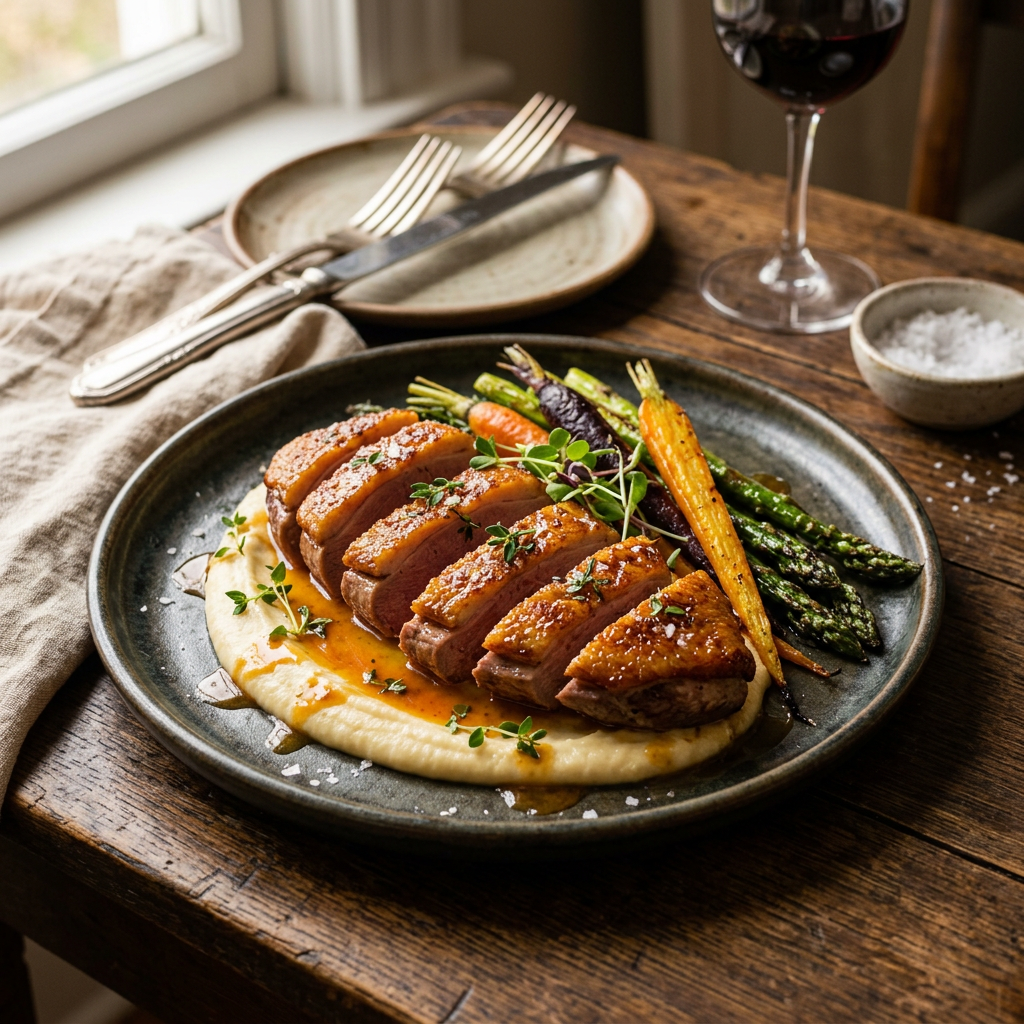
Test Post
Every great cook has a moment when something clicks — when the gap between following a recipe and truly understanding food suddenly narrows into something thrilling and manageable. That moment rarely comes from buying a new pan or tracking down an exotic ingredient. More often than not, it arrives quietly, in the middle of an ordinary Tuesday night dinner, when you finally grasp why you're doing what you're doing rather than simply doing it. Technique is the language of cooking, and once you begin to speak it fluently, every recipe you encounter becomes less of a rigid instruction manual and more of a friendly suggestion.
This post exists as a starting point — a foundation for exploring the kind of culinary knowledge that transforms nervous home cooks into confident, adaptable ones. Whether you've been cooking for two years or twenty, there's always a layer of technique sitting just beneath the surface of your current skill level, waiting to be uncovered. The difference between a dish that tastes "pretty good" and one that makes your dinner guests go suspiciously quiet with pleasure is almost always rooted in method, not magic. And that's genuinely great news, because method can be learned, practiced, and refined by absolutely anyone willing to pay attention.
Think of this as your invitation to stop blaming the chef — or more precisely, to finally, proudly, become one.
---
Why Technique Matters More Than Any Recipe
There's a reason culinary schools spend the first several months of professional training on foundational techniques before students ever attempt a composed dish. Knife skills, heat management, seasoning, emulsification — these aren't glamorous topics, but they are the invisible architecture beneath every stunning plate you've ever admired. A recipe, at its core, is simply a series of techniques strung together with specific ingredients attached. Once you understand the techniques independently, you stop being a prisoner of the recipe and start being its collaborator.
Consider something as seemingly simple as sautéing vegetables. Done correctly, it produces tender-yet-crisp vegetables with beautiful caramelized edges and deep, complex flavor. Done incorrectly — with a cold pan, overcrowded with too many vegetables, stirred too frequently — you end up with a steamed, waterlogged, color-drained disappointment. The ingredients are identical. The technique is the variable. This is why professional kitchens invest so heavily in repetition and muscle memory; not to create robotic cooks, but to build the kind of intuitive understanding that frees a cook to focus on creativity rather than logistics.
"Give me a cook who understands heat and I'll give you a thousand great recipes. Give me a thousand recipes without understanding and I'll give you confusion." — attributed to various culinary instructors, repeated in kitchens worldwide
The practical takeaway here is simple but profound: before you go searching for a new recipe to solve a cooking problem, ask yourself whether a technique upgrade might be the real answer. Bland soup? It might be a seasoning-at-every-stage technique issue. Tough roasted chicken? Likely a temperature and resting technique problem. Flat, greasy pancakes? Classic batter-handling and pan-heat technique territory. Every cooking failure leaves a clue, and that clue almost always points back to method.
---
The Foundation: Heat Control and Why It Changes Everything
If there is one single skill that separates consistently good cooks from occasionally lucky ones, it is the ability to manage heat with precision and intention. Home kitchens present a unique challenge here: unlike professional ranges with enormous BTU output and instant responsiveness, residential stoves vary wildly in their behavior. Learning to work with your specific stove — its hot spots, its lag time, its particular quirks — is as important as any cookbook you'll ever read.
Understanding the Heat Zones
Professional cooks think of heat not as a single setting but as a spectrum of distinct zones, each appropriate for different tasks:
Preheating: The Step Most Home Cooks Skip
One of the most common technique errors in home cooking is adding food to a pan that hasn't been properly preheated. When you place proteins into a cold or insufficiently hot pan, they stick, they steam, and they fail to develop that essential crust. The test is simple: add a small drop of water to your pan. If it evaporates immediately with a sharp sizzle, you're approaching the right temperature for sautéing. If it beads up and dances across the surface (the Leidenfrost effect), your pan is actually too hot for fat — add oil, let it heat for 15 seconds, then add your food. This small ritual of checking heat before committing ingredients is one of the fastest ways to improve your results.
---
Knife Skills: The Craft Beneath the Craft
It would be difficult to overstate the importance of proper knife technique in everyday cooking. Beyond the obvious safety benefits of working with a sharp knife and correct grip, consistent knife skills directly impact the quality of your final dish. When vegetables are cut to uniform size, they cook at the same rate. When aromatics like onion and garlic are chopped consistently, they release their flavors evenly. Uneven cuts don't just look unprofessional — they produce dishes where some pieces are overcooked and others are undercooked simultaneously.
The Fundamental Grip
Start with the pinch grip, which is the grip used in professional kitchens universally. Rather than wrapping your entire hand around the handle, pinch the blade itself between your thumb and the side of your index finger, just forward of the bolster. Your remaining fingers wrap the handle naturally. This grip gives you control, reduces fatigue, and allows for the rocking motion that makes efficient mincing possible. It feels awkward for the first week and then becomes completely natural — this is the definition of a skill worth building.
Keeping Your Knife Sharp
A dull knife is genuinely more dangerous than a sharp one, because it requires excess force and is far more likely to slip. Incorporate these habits immediately:
---
Seasoning: The Technique That Lives in Every Step
Seasoning is almost universally misunderstood by home cooks, who tend to think of it as something that happens at the table with a salt shaker after the food is served. In professional kitchens, seasoning is an ongoing process that occurs at every stage of cooking, building layers of flavor that become inseparable from the dish itself rather than sitting on top of it as an afterthought.
The fundamental principle is this: salt doesn't just make food salty — when used correctly and progressively, it suppresses bitterness, enhances sweetness, and amplifies the natural flavors already present in ingredients. When you salt pasta water aggressively (it should taste like mild seawater — roughly 1 tablespoon of kosher salt per gallon), you're seasoning the pasta from the inside out during cooking, which no amount of salting afterward can replicate. When you season your onions lightly as they start to cook, you're drawing out moisture and accelerating the sweating process while beginning to build flavor at the cellular level.
Building Flavor in Layers
Here's a practical sequence for seasoning a simple pan sauce that illustrates the layering principle beautifully:
Notice that salt appears six times in a process that produces perhaps four tablespoons of sauce. This isn't excess — this is craftsmanship.
---
The Art of Building Flavor: Browning, Deglazing, and the Magic of Fond
One of the most transformative techniques any home cook can master is understanding how to build, preserve, and leverage fond — the French term for those browned, caramelized bits that stick to the bottom of your pan after searing meat or deeply cooking vegetables. Many home cooks scrub these off in a panic or abandon the pan entirely. This is, culinarily speaking, a tragedy.
Fond is concentrated flavor. It is the Maillard reaction made physical — a collection of complex flavor compounds formed when proteins and sugars are exposed to high heat. These compounds are extraordinarily flavorful, carrying notes of nuttiness, savoriness, and depth that would take hours of simmering to develop in a broth. When you deglaze a pan — adding liquid (wine, stock, beer, even water) to a hot pan containing fond and using a wooden spoon to scrape and dissolve it into the liquid — you are performing a flavor act of almost absurd efficiency.
The technique itself is beautifully simple:
This process takes under five minutes and produces something that tastes as though it required considerably more effort and expertise. That is the very definition of good technique.
---
Resting, Finishing, and the Final 10%
There's a persistent myth in home cooking that when the food is cooked, it's done. Professional cooks know that the final 10% of a dish — the resting, the finishing, the plating — is responsible for an enormous proportion of the final result. Skipping these steps is like painting a beautiful canvas and then leaving it unframed, unlit, and leaning against the garage wall.
Resting meat is perhaps the most well-known finishing technique that home cooks most consistently fail to actually implement. When protein is cooked over high heat, muscle fibers contract and push moisture toward the center of the cut. If you slice immediately, that moisture floods out onto your cutting board and is lost. When you rest the meat — loosely tented with foil, on a warm plate, in a turned-off oven — those fibers relax and reabsorb moisture throughout the cut. A steak rested for 5–10 minutes will retain significantly more juice than one carved the moment it comes off the grill. For a large roast or bird, that resting window extends to 20–30 minutes without any meaningful heat loss.
Finishing touches that home cooks should adopt immediately include:
"The last thing you do to a dish is as important as the first. The finish is what the diner tastes. Don't coast home."
---
Putting It All Together: Your Path Forward
Mastery in cooking is not a destination — it is a practice, and like any practice worth pursuing, it rewards those who show up consistently and pay attention with genuine curiosity. The techniques covered in this post — heat management, knife skills, layered seasoning, building fond, and thoughtful finishing — are not advanced concepts reserved for culinary professionals. They are the foundational tools of anyone who cooks with intention, and they are available to you right now, in your kitchen, with whatever equipment and ingredients you already have on hand.
The most practical advice this post can leave you with is this: choose one technique per week and practice it deliberately. Not in a new recipe, necessarily, but in something you already make regularly. Make your usual roast chicken, but this time focus entirely on heat management and resting. Cook your standard pasta sauce, but apply layered seasoning at every stage and notice how the flavor develops differently. Sear a steak with full attention on building proper fond and turning it into a pan sauce. This kind of focused, iterative practice is how professional cooks develop their instincts — not through marathon cooking sessions, but through consistent, mindful repetition.
The kitchen is not a place for perfection — it is a place for learning, for adjusting, for tasting and correcting and tasting again. Every dish you cook is data. Every failure is information. The cooks who improve fastest are not the most talented; they are the most attentive. They ask why when something goes wrong, and they remember the answer when they cook again. They read, they watch, they taste with purpose, and they bring genuine enthusiasm to even the most ordinary weeknight dinner.
You already have everything you need to start. The heat is ready. The knife is in your hand. Now cook like you mean it.

Get the Next Recipe
Weekly recipes, techniques, and gear picks — straight to your inbox.
