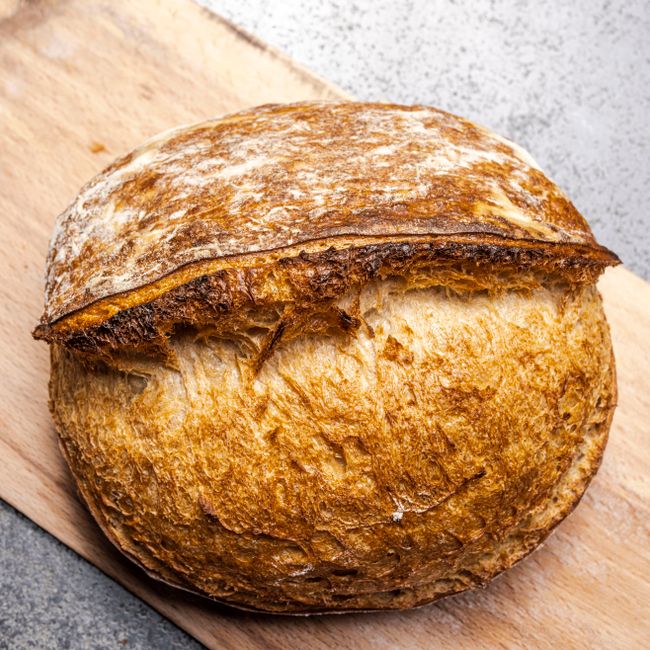
There’s something undeniably magical about the aroma of fresh bread wafting through your home, capturing the essence of warmth and comfort. In recent years, sourdough has emerged as a beloved staple in home baking, luring enthusiasts with its unique tanginess and rustic appeal. Whether it’s the crusty exterior or the chewy crumb, the allure of sourdough bread transcends mere sustenance, offering bakers a chance to engage in a centuries-old craft. As we delve into the world of sourdough, we'll explore everything from starter management to perfecting baking techniques, ensuring that every loaf you create is a testament to your dedication and artistry.
Baking sourdough is an intricate dance of art and science, where precise measurements meet intuitive adjustments. Understanding the dynamics of fermentation, gluten development, and hydration levels can feel overwhelming at first, but the beauty lies in the learning curve. Each loaf tells a story, emerging not just from flour and water but from the unique microflora of your environment that contributes to the flavor and texture profile of your bread. The journey can be long, filled with trial and error, but with a little patience and practice, anyone can master the process.
As we proceed through this guide, think of sourdough as both a recipe and a journey. With each step, you’re not just following instructions; you’re partaking in a tradition that spans generations. Equipped with the right knowledge and tools, you’ll soon be able to bake bread that will leave friends and family clamoring for more. Let’s embark on this flavorful adventure, where a simple mixture of flour, water, and salt can transform into a work of art.
The Basics of Sourdough Bread
Understanding Sourdough
At its core, sourdough bread relies on wild yeast and lactic acid bacteria for fermentation. What differentiates sourdough from other bread types is its use of a natural starter, which is a mixture of flour and water that has been allowed to ferment over time. This starter captures wild yeast present in the environment, creating a living culture that leavens the bread and imparts its signature sour flavor.
The fermentation process is a balancing act. Too little fermentation can lead to dense, underdeveloped loaves, while over-fermentation can result in undesirable flavors or a sticky, hard-to-handle dough. This is where temperature plays a critical role; the warmer the environment, the faster the fermentation process. Ideal fermentation temperatures range between 75°F and 85°F (24°C to 29°C). Knowing how to control your environment will help you find that perfect balance.
The flavor profile of sourdough varies significantly based on the ingredients you use, the hydration level of your dough, and how long you allow it to ferment. Taking the time to experiment with different flour types and hydration levels can lead to exciting discoveries about your personal preferences and ultimately refine your baking skills.
The Essential Ingredients
To make outstanding sourdough bread, you will need a handful of basic ingredients:
●Flour: Use a high-quality wheat flour, preferably organic. Bread flour provides more gluten, resulting in better structure, while all-purpose flour can also be suitable. You can experiment with whole wheat or rye flour for additional flavor and nutrients.
●Water: Filtered or bottled water is generally recommended, as chlorine and other chemicals in tap water can inhibit yeast activity. Aim for water at a temperature of around 75°F (24°C) for optimal fermentation.
●Salt: Use fine sea salt or kosher salt to enhance flavor and strengthen gluten. Be cautious with the amount; typically, you want about 2% of the flour weight in salt. This means, for instance, if you’re using 500 grams of flour, you need about 10 grams of salt.
●Starter: Your active sourdough starter is the heart of the bread-making process. It should be bubbly and well-fed. If you’re just starting out, you can create your own starter, which takes about 5–7 days to develop, or obtain a mature one from a fellow baker.
Understanding these ingredients will provide you with a solid foundation from which to explore more complex flavors and techniques.
The Sourdough Starter
Crafting your own sourdough starter is an enriching experience that connects you with a long baking tradition. Here’s a simple guide to getting started:
1.Day 1: In a clean glass jar, combine 100 grams of all-purpose flour and 100 grams of water. Stir until you achieve a thick, pasty consistency. Loosely cover the jar with a lid or cheesecloth and let it sit at room temperature (around 75°F) for 24 hours.
2.Day 2: You may see some bubbles begin to form. Discard half of the mixture, then add another 100 grams of flour and 100 grams of water, mixing well. Cover loosely and wait another 24 hours.
3.Days 3 to 7: Continue the feeding process daily, discarding half and adding fresh flour and water. You’ll start to notice more bubbles and a distinct sour smell. By the end of the week, your starter should have doubled in size within a few hours of feeding and be ready to use.
When your starter is bubbly, smells pleasantly sour, and has a consistent rise, it’s time to incorporate it into your bread recipes. Remember to reserve a small amount to keep your starter alive and continue the feeding cycle.
"The sourdough starter is not just a mixture of flour and water; it's a living organism, a testament to the environment in which it's cultivated."
The Fermentation Process
Bulk Fermentation
The fermentation process is crucial to developing the structure and flavor of sourdough. After mixing your levain—which is a portion of the starter mixed with flour and water—into your final dough, you enter the bulk fermentation phase. Here’s how to manage this critical step effectively:
●Timing: The duration of bulk fermentation varies based on the temperature and the amount of starter used. It typically lasts anywhere from 3 to 5 hours at room temperature. Adjust the time based on your observations; warmer kitchens speed up fermentation, while cooler temperatures slow it down.
●Mixing Techniques: Use the stretch and fold method rather than traditional kneading to develop gluten. Every 30 minutes during the first 2 hours, gently stretch one side of the dough and fold it over itself. This action helps strengthen the dough without overly deflating it.
●Texture and Volume: The dough is ready for shaping when it has increased in volume and exhibits a slightly domed top with small bubbles visible through the surface. It should be elastic yet relaxed, making it easy to shape without tearing.
Learning to recognize the signs of proper fermentation is vital. Take note of your dough's texture and volume during this stage, as they allow you to gauge when to proceed to shaping.
Shaping
Shaping is where the magic truly begins. Properly shaped dough will retain gas from fermentation and develop an appealing structure. Here’s how to shape your sourdough:
1.Pre-shape: Gently turn the dough out onto a floured surface. Use a bench scraper to divide it if making multiple loaves. With minimal manipulation, form a loose ball by pulling the edges towards the center.
2.Bench Rest: Let the pre-shaped dough rest for about 20 to 30 minutes. Cover it with a damp cloth to prevent drying out. This resting period allows the dough to relax, making it easier to shape one last time.
3.Final Shape: For a round loaf, flip the pre-shaped dough seam side up, and using your hands, form it into a tighter ball by pulling the edges toward the center again. For a batard (oval), follow a similar method but taper the ends.
4.Proofing: Transfer the shaped dough into a well-floured proofing basket, seam side up for rounds or seam side down for batards. Cover with a cloth or plastic wrap, and let it proof for 1 to 3 hours at room temperature or in the fridge for an overnight cold proof. The latter develops flavor and makes scoring easier.
When you shape your dough, remember that tension is your friend. Creating a taut surface on your loaf will help it hold its shape during baking.
The Baking Process
Prepping for Baking
The final phase of the sourdough process is baking—the moment when all your hard work pays off. To prepare for baking, follow these essential steps:
●Oven Setup: Preheat your oven to a scorching 450°F (230°C). If using a Dutch oven, place it inside the oven during preheating for at least 30 minutes. A hot baking environment ensures a beautifully caramelized crust.
●Scoring: Before baking, use a lame or sharp knife to make cuts approximately ¼ inch deep on the surface of your dough. This allows the bread to expand during baking without tearing. Experiment with different patterns to enhance the aesthetic appeal of your loaf.
●Steam: For an ideal crust, create steam in your oven. If baking in a Dutch oven, simply cover it during the first portion of baking, trapping steam inside. If using a baking stone, place a shallow pan filled with water at the bottom of the oven.
Baking Techniques
After prepping, you’re ready to bake. Here’s how to execute the baking phase effectively:
1.Initial Bake: If using a Dutch oven, carefully remove it from the oven (it’s extremely hot!). Gently place the dough inside, covering it with the lid. Bake for 30 minutes. For other methods, place your dough directly on the heated surface and bake for 20 minutes covered with steam.
2.Final Bake: Remove the lid (or steam source) and reduce the temperature to 425°F (220°C). Bake for an additional 15 to 30 minutes or until the loaf achieves a deep golden-brown color and sounds hollow when tapped on the bottom.
3.Cooling: Once finished, allow the bread to cool completely on a wire rack before slicing. This cooling period is essential as it lets the crumb structure set, preventing a gummy texture once cut.
"Bread baking is an act of meditation; each fold, each score, and each rise is an invitation to be present in the moment."
Troubleshooting Common Issues
Baking sourdough may come with its challenges, so here are some common issues you might encounter and how to resolve them:
●Flat Bread: If your loaf spreads out rather than rising, it could be due to over-proofing, weak gluten development, or inadequate shaping. Focus on proper timing and tension during shaping.
●Dense Crumb: A dense loaf often indicates under fermentation. Ensure that your bulk fermentation is sufficient, and consider adjusting the feeding schedule of your starter for more vigor.
●Gummy Texture: If your bread has a gummy interior, it could be due to insufficient baking time or not allowing enough cooling. Use a thermometer; the internal temperature of your bread should be about 200°F to 210°F (93°C to 99°C).
Familiarizing yourself with these troubleshooting methods helps demystify the baking process. Adjusting your techniques based on the observations you make will lead to continuous improvement.
Flavor Enhancements and Variations
Add-ins and Techniques
For a simple sourdough loaf, the base recipe is divine on its own. However, adding flavors or textures can turn a classic into something extraordinary. Here are some ideas to consider:
●Herbs and Spices: Incorporate finely chopped herbs (like rosemary or thyme) or spices (like black pepper or garlic) into your dough during the bulk fermentation phase for a savory twist.
●Fruits and Nuts: Dried fruits (such as cranberries or apricots) and nuts (like walnuts or pecans) can be added during the shaping phase for added flavor and texture. Aim for a maximum of 20% of the total flour weight in add-ins to maintain dough structure.
●Cheese: Fold in cubes of cheese (such as cheddar or feta) during shaping for a delightful surprise in every slice.
Experimenting with Flour Types
Don’t be afraid to explore different grains and types of flour in your sourdough. Variations can yield different textures and flavors:
●Whole Wheat Flour: Replacing part of the bread flour with whole wheat flour adds depth and nutrition. Start with a 30-50% substitution to maintain good hydration and texture.
●Rye Flour: Rye offers a distinctive flavor and can enhance the fermentation process. Incorporate small percentages (up to 30%) of rye flour for an interesting profile.
●Spelt Flour: Spelt flour has nutty flavors and creates a softer crumb. It can replace a portion of the bread flour, typically used at about 50%.
Experimenting with these ingredients encourages your creativity and allows you to develop your unique signature loaf.
Maintenance of Your Sourdough Starter
Feeding and Care
Maintaining your sourdough starter is essential for long-term success. Here’s what you need to know about feeding and caring for your starter:
1.Regular Feeding: If you use your starter frequently (multiple times a week), keep it at room temperature and feed it daily. If you bake less often, consider refrigerating it. This approach requires feeding it about once a week.
2.Hydration Levels: Choosing between a 100% hydration starter (equal parts flour and water) and a stiffer starter (more flour than water) affects the flavor and fermentation speed. A 100% hydration starter has a milder flavor, while a stiffer starter develops a tangier profile.
3.Reviving a Dormant Starter: If your starter has been neglected, it may sink to the bottom or develop a liquid "hooch." Simply pour off the hooch, discard half of the starter, and begin regular feedings, and it should revive within a few days.
Make it a routine to nurture your starter; the more you engage with it, the more in tune you’ll become with its condition and needs.
Storing Your Bread
After all your effort in perfecting sourdough baking, preserving your bread is just as important. Here’s how to store your completed loaves:
●Room Temperature: For short-term storage (up to 3 days), keep your bread in a brown paper bag or wrapped in a clean kitchen towel to maintain a crisp crust. Avoid plastic, as it encourages moisture that can lead to a soggy loaf.
●Long-Term Storage: For longer preservation (up to 3 months), wrap the bread in plastic wrap, followed by foil, or store it in a bread bag. Consider slicing it before freezing for ease of use. Make sure to let the slices cool before wrapping to prevent moisture build-up.
●Reviving Stale Bread: If your bread begins to stale, rejuvenate it by lightly spritzing with water and warming it in a preheated oven for about 5 to 10 minutes at 350°F (175°C).
By taking the proper steps to care for both your starter and your finished loaves, you’ll ensure that your sourdough journey continues with delicious outcomes.
Conclusion
Mastering the art and science of sourdough baking is a rewarding experience that enhances both your skills and your palate. Each loaf embodies not just the ingredients, but your passion and artistry as a baker. As you experiment with fermentation processes, flavors, and baking techniques, you’ll discover the unique heartbeat of your sourdough—a reflection of your own culinary identity.
Embrace the journey, celebrate your successes, and learn from your challenges. Sourdough baking is a continuous evolution, a delicate interplay of technique and intuition. The next time you pull a loaf from the oven, revel in the knowledge that the delightful aroma and satisfying crunch of the crust are a testament to your dedication to mastering this timeless craft. Happy baking!