The Art of Ethiopian Injera: Mastering Teff Fermentation for the Perfect Spongy Flatbread
There is something deeply grounding about the process of making Injera, the iconic, sour, and porous flatbread that serves as the foundation of Ethiopian dining. It is not merely a bread; it is a utensil, a plate, and a symbol of hospitality that brings people together around a shared circular tray known as the mitad. When you tear off a piece of the soft, spongy bread to scoop up a mound of spicy doro wat or earthy misir wot, you are participating in a tradition that spans thousands of years. For the uninitiated, the complexity of the fermentation process might seem intimidating, but once you understand the science of wild yeast and the unique properties of teff flour, you will find that it is an incredibly rewarding culinary endeavor that transforms your kitchen into a sanctuary of authentic global flavors.
To master this dish, one must be prepared to embrace the element of time, as this is a living, breathing project that demands patience and observation. Unlike western breads that rely on commercial yeast, Injera thrives on a slow, natural fermentation that develops a signature tang, a characteristic sharpness that perfectly balances the rich, piquant spices used in Ethiopian stews. You are essentially cultivating a starter culture, much like a sourdough, but with the added nuance of ancient, gluten-free grains. Bringing this to your home table requires a shift in mindset: move away from the frantic pace of modern baking and lean into the rhythmic, meditative cycle of bubbling batters and carefully monitored heat. As we delve into the chemistry of the grain and the technique of the griddle, remember that the most important ingredient is your willingness to experiment.
"Blame The Chef" is built on the philosophy that great food is an extension of our curiosity, and today we are venturing into the heart of East Africa to demystify one of the world’s most misunderstood staples. Many home cooks approach Injera and walk away feeling defeated by flat, flavorless pancakes that lack the essential "eyes"—the tiny, intricate bubbles that define a high-quality loaf. We are going to change that today by examining the teff grain, the hydration ratios, and the precise temperature control needed to achieve that professional-grade lift and lace. Put on your apron, clear your counters, and prepare to turn your fermentation game into a refined craft that will impress even the most discerning dinner guests.
The Science of Teff: Why Ancient Grains Matter
The cornerstone of authentic Injera is teff, a tiny, iron-rich, gluten-free ancient grain native to the highlands of Ethiopia and Eritrea. Despite its size—a single grain is about the size of a poppy seed—it packs a nutritional powerhouse of fiber, protein, and essential minerals. Unlike wheat, which relies on gluten networks to hold air bubbles, teff relies on its unique starch structure and its affinity for wild bacteria to create the sponge-like texture we desire. When you grind this grain into flour, you are working with a medium that behaves quite differently in the bowl, necessitating a change in how we think about hydration and structure.
Sourcing Quality Flour
When shopping for teff, you will typically encounter two primary varieties: ivory teff and dark (brown) teff. While ivory is often preferred for a lighter, more mild flavor, the dark variety provides that deep, earthy, almost nutty profile that many purists associate with the traditional dish. Always look for stone-ground, whole-grain teff flour to ensure you are capturing the germ and bran, which are crucial for attracting the wild yeast and beneficial bacteria required for a robust fermentation. If you can find a local mill or a high-end specialty grocer, opt for flour that hasn’t been sitting on a shelf for months; the fresher the grain, the more vigorous your initial fermentation cycle will be.
The Role of Fermentation
Fermentation is where the magic happens. By mixing teff flour with water, you are setting the stage for lacto-fermentation, a process where naturally occurring bacteria transform carbohydrates into lactic acid. This is why Injera possesses that delightful sour punch that cuts through heavy, fatty meats and spicy legumes. This process takes anywhere from three to five days, depending on the ambient temperature of your kitchen. During this time, the batter will rise, bubble, and mellow, developing a complex flavor profile that simply cannot be replicated by adding vinegar or citrus to a standard pancake batter.
"True fermentation is a dialogue between the chef and the microbes; you must learn to listen to the bubbling, smell the sharpness, and trust the timeline above all else."
Building the Starter Culture
Creating your initial batter, often referred to as the ersho (starter), is the most critical stage of the entire process. This is the foundation upon which your bread will stand, and it requires nothing more than patience and a clean environment. You want to avoid contaminants, so ensure your mixing bowl is sanitized and your water is filtered or dechlorinated, as chlorine can inhibit the growth of the wild yeast strains we want to cultivate.
Step-by-Step Starter Instructions
Managing Temperature and Consistency
Temperature is the invisible hand that guides your fermentation. If your home is particularly chilly, the process will naturally slow down, perhaps requiring an extra day or two. If it is hot, the yeast will become over-active, potentially turning the batter unpleasantly acidic or "funky" before you have a chance to cook it. Watch for the signs: if a thin layer of liquid (hooch) forms on top, simply stir it back in. This liquid is actually an indicator of high activity and adds character to the finished flatbread.
The Final Batter: Hydration and Aeration
Once your starter has reached peak activity, it is time to prepare the final batter for cooking. This stage is about balance; you are looking for a consistency that is thin enough to pour gracefully across a hot griddle but thick enough to retain its integrity once the bubbles set. Many chefs employ a technique of removing a portion of the batter, boiling it with water to create a thick porridge (often called a biscuit or absit), and then folding it back into the raw batter. This gelatinizes the starches, which creates a more stable, elastic, and perfectly porous Injera.
The Absit Method
The absit is the "secret weapon" of the Ethiopian grandmother's kitchen. By taking a cup of your fermented batter and cooking it with water until it thickens into a glossy, gelatinous paste, you are creating a structural base that ensures your bread doesn't crack or tear. After the absit has cooled slightly, whisk it back into the main fermented batter. This creates a chain of starches that act like a net, catching the carbon dioxide produced by the fermentation and holding it in place as the bread cooks.
Achieving the Perfect Pour
Your final batter should have the consistency of thin crepe batter. If you lift a ladle and let it fall, it should leave a distinct, clean trail in the batter before disappearing. If it is too thick, your Injera will come out dense and rubbery. If it is too thin, it will struggle to form those signature "eyes." Always check your consistency just before you start cooking, adding a teaspoon of water at a time if necessary. Remember, the hydration of your flour can change daily based on the humidity in your kitchen, so rely on your eyes and the tactile feel of the batter rather than strictly following a rigid cup measurement.
The Art of the Mitad: Cooking Techniques
Now we arrive at the fire. Traditionally, Injera is cooked on a mitad, a large, circular, concave electric griddle that maintains a constant, even temperature. If you don't have a mitad, a high-quality, large-diameter nonstick crepe pan or a well-seasoned cast iron skillet will serve as an adequate substitute. The goal is to provide a surface that allows for a rapid, even rise. You should never use oil or fat in the pan—the Injera must be able to grip the surface to form its structure.
Pouring the Spiral
The pouring technique is an art form unto itself. Start from the outer edge of the pan, pouring the batter in a steady, thin stream as you move in a continuous spiral toward the center. Don't worry if the first few are not perfect; this is a rhythmic movement that requires practice. Once you reach the center, fill in any gaps with a little extra batter, but do so quickly. The objective is to have a uniform layer that is thin and smooth.
The Steam and Set
Once the batter is poured, cover the pan immediately with a tight-fitting lid. This is non-negotiable. The trapped steam is what forces the surface to cook and create those beautiful, thousands of little eyes that act as perfect scoops for your stews. Cook for about 2 to 3 minutes; you will know it is done when the edges begin to lift away from the pan and the center is set, opaque, and dry to the touch. Do not flip the bread! Injera is cooked exclusively on one side, ensuring the bottom remains smooth and the top remains airy.
"The eyes of the Injera are the mark of a master; they are the result of steam trapped within the gelatinized starch, a tiny architectural feat that defines the dish's soul."
Troubleshooting Common Issues
Even for the seasoned chef, Injera can be a fickle companion. If your bread is turning out too bitter, you may have fermented it for too long or in a location that was too warm. If it is bland, the fermentation may have been cut short. These are subtle shifts, and like any fermentation project, it takes a few rounds to calibrate your specific environment. Do not get discouraged; every batch provides data that will make the next one better.
When the Bread is Gummy
If the texture is gummy or heavy, you likely didn't cook it long enough or your absit ratio was off. Ensure the heat is medium-high; if the pan is too cold, the bread will steam slowly and lose its rise. If you find the bread is sticking, your pan surface might need a better nonstick coating or, in the case of cast iron, a more thorough seasoning. Remember that the first pancake is almost always a "tester" to gauge the heat—don't judge your entire production based on the first pour.
The Color and Aroma
Don't be alarmed if your Injera smells intensely sour while cooking; this is a sign of a healthy, active culture. As it cools, this sharp aroma will mellow into a pleasant, tangy scent. If you find the color is inconsistent, make sure you are whisking your batter thoroughly before each ladle to ensure the settled starch at the bottom of the bowl is evenly incorporated. A uniform batter ensures a uniform rise and an even color across the entire flatbread.
Serving and Storage Traditions
In Ethiopia, Injera is not just eaten; it is a shared experience. Laying a fresh piece of Injera on a large, round tray, one spreads various stews across the surface. The bread absorbs the juices of the wat, creating a final layer that is often the most flavorful part of the meal. To store your finished Injera, stack them on a plate and cover them with a clean, slightly damp kitchen towel. They can stay at room temperature for a day or two, but for longer storage, they should be wrapped in plastic and refrigerated.
Reheating for Maximum Sponginess
To reheat, place a single layer of Injera in a steamer basket for about 30 seconds. This rehydrates the bread and restores its signature pillowy texture. Avoid the microwave if possible, as it tends to make the bread rubbery and tough. When serving, roll them up into tight, individual cigars or fold them into quarters to make them easier for guests to pull apart and use as utensils.
The Cultural Context of Hospitality
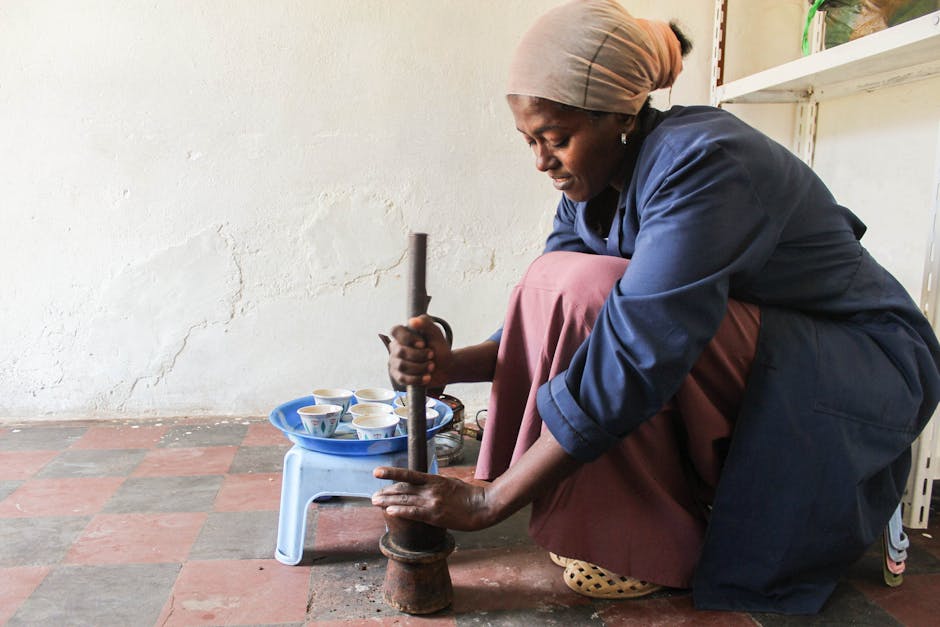
Sharing food in Ethiopia is a gesture of love. Feeding someone by hand, a practice called gursha, involves wrapping a morsel of food in a piece of Injera and placing it directly into a guest's mouth. It is an honor to give and a sign of trust to receive. When you master the art of making this bread, you are not just learning a recipe; you are stepping into a profound cultural landscape that values community, patience, and the joy of breaking bread with those you hold dear.
The Alchemy of Your Kitchen
After the process is complete, look at the results. The intricate, web-like pattern on the surface is a testament to the biological work that occurred inside your bowl. You have successfully harnessed the power of wild yeast and starch gelatinization to create something that is both ancient and entirely your own. This is the beauty of culinary mastery—the ability to take basic, humble ingredients and, through process and knowledge, elevate them into something extraordinary.
As you continue to refine your technique, consider experimenting with different ratios of teff to other grains, such as barley or sorghum, which are sometimes used in traditional Ethiopian blends to add texture or adjust the sourness. However, always return to the pure, 100% teff version to remind yourself of the standard. Every time you make this, you are building a muscle memory that will eventually make the process second nature. You will soon find that you no longer need the timer or the measuring spoon; you will know by the scent and the look of the batter when it is time to pour.
"Blame The Chef" isn't about blaming anyone for failure; it's about taking ownership of the craft. When you master a dish as complex and temperamental as Injera, you move past the "chef" label and enter the realm of the artisan. You’ve learned to manage variables that most people don't even know exist. So, keep that starter active, keep that griddle hot, and keep sharing the results with friends and family. There is no better way to celebrate the vastness of world cuisine than by filling your home with the distinct, sour, and comforting aroma of freshly baked Ethiopian flatbread.
Conclusion
Mastering Injera is a journey that requires the three pillars of great cooking: patience, observation, and respect for tradition. You have walked through the science of teff fermentation, learned the importance of the absit, and refined your pouring technique on the mitad. While the first attempt may not have perfect "eyes," remember that the flavor and the craft are the true rewards. This bread is a staple of one of the world's most vibrant culinary traditions, and by bringing it into your home, you are expanding your culinary repertoire in the most meaningful way possible.
Never forget that every culture’s staple food is a response to its environment and its history. The Ethiopian highlands gave us a grain that thrives where others fail, and a method of preparation that ensures nourishment and community. By honoring these methods, you are doing more than cooking; you are keeping a piece of living history alive in your own kitchen. Keep practicing the spiral pour, keep tending to your starter, and above all, enjoy the process of watching a simple batter transform into a beautiful, spongy piece of art.
As you move forward in your culinary path, let this be the dish that reminds you that simple ingredients—flour, water, and time—are the most powerful tools in any kitchen. Stay curious, keep pushing your boundaries, and continue to find joy in the complex, sour, and wonderful world of fermentation. Whether you serve this with a spicy chicken stew or a simple lentil salad, the result will always be a meal that is grounded in soul and substance. Thank you for joining me on this deep dive into the art of Ethiopian baking; until next time, keep cooking with heart, intent, and, of course, a little bit of magic.


Get the Next Recipe
Weekly recipes, techniques, and gear picks — straight to your inbox.
