The Art of Homemade Gnocchi: Mastering Potato-to-Flour Ratios for Pillowy, Light Dumplings
There is a distinct, almost ethereal quality to a perfectly executed potato gnocchi that simply cannot be replicated by the hardened, dense, vacuum-sealed pouches found on supermarket shelves. When done correctly, a gnocchi should feel like a whisper on the palate, a cloud of starch that dissolves effortlessly into a silky sauce rather than settling like a leaden weight in the stomach. Achieving this lightness is the holy grail for the home cook, yet it is often shrouded in unnecessary mystery and intimidating myths. Many beginners approach the process with fear, worried about the texture turning into rubber or the dough disintegrating in the pot, but the reality is that gnocchi is a forgiving medium if you understand the fundamental science behind the potato. By mastering the delicate dance between hydration and starch, you are not just making pasta; you are refining a culinary technique that transforms humble ingredients into high art.
The secret to this transformation lies almost entirely in the potato-to-flour ratio, a variable that shifts based on the seasonal water content of your produce and the humidity in your kitchen. We have all heard the advice to add flour "until it feels right," but for the home cook seeking consistency, that is a frustratingly vague directive. Instead, we must treat the potato as the primary architect of the structure, using flour only as a necessary scaffold to hold the shape. When you over-rely on flour, you inadvertently create a gluten network that is far too strong for such a delicate dumpling, turning your meal into something chewy and unappealing. Today, we are going to strip away the guesswork and focus on the physical properties of the potato, the equipment you absolutely need, and the precise, gentle handling techniques that distinguish a master chef from a novice.
As you embark on this culinary endeavor, remember that patience is as much an ingredient as the potatoes themselves. This is not a project to be rushed on a Tuesday night when your family is clamoring for dinner; it is an act of mindfulness that rewards careful preparation and intentional movement. You will need to think about the surface temperature of your workspace, the heat levels of your oven, and the way your hands interact with the dough. By the end of this guide, you will have moved past the "trial and error" phase and into a space of intuitive confidence. We will break down the chemistry of starch, the mechanics of potato prep, and the finishing techniques that turn these little pillows into a restaurant-quality centerpiece. Prepare your apron, clear your counters, and let us begin the pursuit of the perfect gnocchi.
The Science of the Potato: Why Variety Matters
The journey toward the perfect gnocchi begins long before you touch a rolling pin, starting entirely within the skin of the potato. Not all potatoes are created equal, and in the world of gnocchi, the starchy potato—specifically the Russet or Idaho variety—is your best friend. These tubers are characterized by their high starch content and low moisture, which is the exact opposite of waxy varieties like Red Bliss or New Potatoes. When you boil a waxy potato, it retains its shape and keeps its internal moisture locked inside; however, when you use a starchy Russet, the cellular structure collapses more easily, allowing for a light, airy mash that acts as the perfect canvas for your flour.
Understanding Starch vs. Moisture
If you attempt to make gnocchi with a waxy potato, you will inevitably end up adding too much flour to compensate for the excess water. This leads to a gummy, dense dumpling that requires a significant amount of boiling time. By contrast, a high-starch potato requires less binding agent, which keeps the interior of the dumpling soft and pillowy. You are essentially looking for a potato that, once riced, feels dry, fluffy, and almost powdery to the touch. If your potato mash feels sticky or wet, you are already fighting a losing battle against gravity and density.
The Role of Dehydration
Beyond selecting the right potato, the method of cooking is crucial. Many home cooks boil their potatoes, which is the most common mistake one can make. Boiling introduces excess water into the tuber, which then must be cooked out or absorbed by flour. Instead, professional chefs prefer baking the potatoes in a salt-crusted bed. By baking the potatoes whole with their skins on, you allow the moisture to evaporate as steam rather than trapping it inside. This creates an incredibly dry, concentrated potato base that holds together with a minimal amount of flour, ensuring the final product is light and airy.
"The difference between a leaden dumpling and a cloud-like gnocchi is rarely about the recipe; it is about the moisture content of your mash. Start dry, and you shall finish light."
Equipment: The Tools of Precision
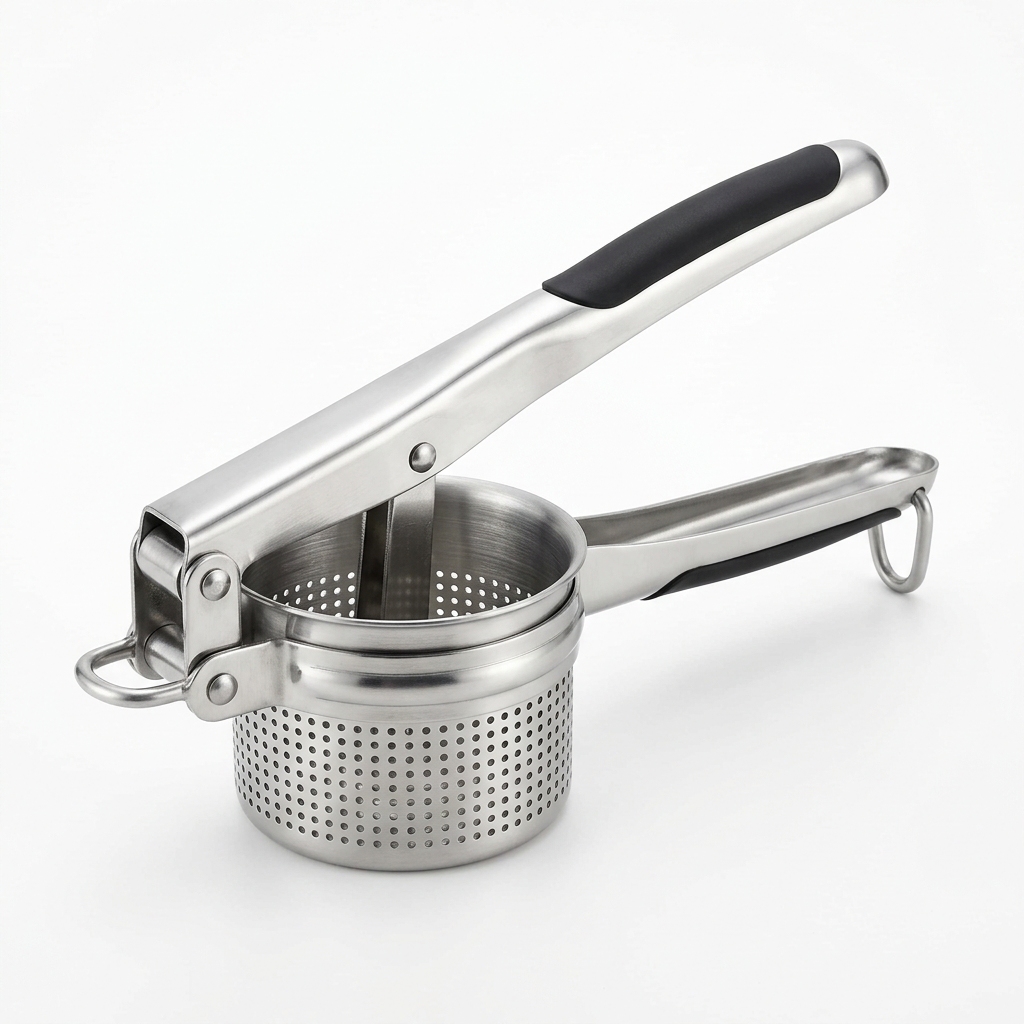
While you can technically make gnocchi with nothing more than a fork and a bowl, your results will be far more consistent if you utilize the proper tools. The texture of gnocchi is entirely dependent on the fineness of the potato mash. If you have lumps in your potato, you will have hard bits in your final dumpling, which is a jarring and unpleasant experience for the diner. A potato ricer is an essential piece of equipment that every serious home cook should own. It pushes the cooked potato through tiny holes, aerating the flesh as it goes and ensuring a uniform, light consistency that is impossible to achieve with a standard hand masher.
The Importance of the Bench Scraper
Next to the ricer, the bench scraper is your most valuable ally. When working with gnocchi dough, you want to minimize the amount of heat transfer from your hands to the dough. Because gnocchi dough relies on delicate starch networks, the warmth of your palms can cause the potatoes to release moisture and the gluten in the flour to tighten, making the dough tacky and heavy. By using a bench scraper to fold, cut, and gather the dough, you keep your hands clean and the dough cool. It also allows you to work quickly, which is critical for maintaining the texture you have worked so hard to create.
Surface Considerations
Finally, consider the surface you are working on. A wooden board is traditionally preferred over marble or stainless steel for a very specific reason: wood is porous and slightly warmer, which helps prevent the dough from sticking while allowing it to "breathe." Marble, while beautiful, is a heat sink that can make the dough cold and stiff, while stainless steel can be overly slick, making it difficult to control the flour distribution. If you do not have a large wooden board, a well-floured clean countertop will suffice, but do not underestimate the tactile benefits of a high-quality wooden workspace.
The Perfect Ratio: Balancing Starch and Flour
Achieving the correct ratio is where the artistry meets the mathematics of cooking. A standard, reliable starting point is approximately 250 grams of all-purpose flour for every 1 kilogram of riced potatoes. However, this is a starting point, not a rigid law. Depending on the humidity of your environment and the specific starch content of your potatoes, you may find that you need slightly more or slightly less. The goal is to reach a dough that is soft, slightly tacky, but not sticking to your fingers in a way that requires aggressive amounts of dusting flour.
Incorporating the Egg
There is a long-standing debate in the culinary world regarding the inclusion of egg. Some traditionalists argue that a "true" gnocchi should be just potato and flour, while others insist on the addition of an egg or egg yolk to provide structure. For the home cook, I highly recommend using one egg yolk per 500 grams of potato. The fat in the yolk adds a rich, velvety mouthfeel and provides just enough structural integrity to ensure the gnocchi doesn't disintegrate the moment it hits the boiling water. It acts as a bridge between the starch and the flour, creating a more cohesive dough that is easier to roll and shape.
Avoiding Over-working
The most dangerous thing you can do to gnocchi dough is to knead it like bread. With bread, you want to develop a long, strong gluten network to trap gas and create a chewy structure. With gnocchi, you want the exact opposite. You want the starch to stay loose and separate. When you mix your flour and potato, use a light hand. Use the bench scraper to bring the ingredients together, folding them over themselves until a shaggy, soft mass forms. As soon as you see no more streaks of flour, stop. If you continue to knead, you will activate the proteins in the flour, and you will find yourself eating chewy little rubber balls instead of delicate, pillow-like dumplings.
"Treat the dough with the lightness of a secret. The harder you press, the more you compromise the delicate aeration you have achieved through the ricing process."
Shaping and Scoring: The Aesthetics of Texture
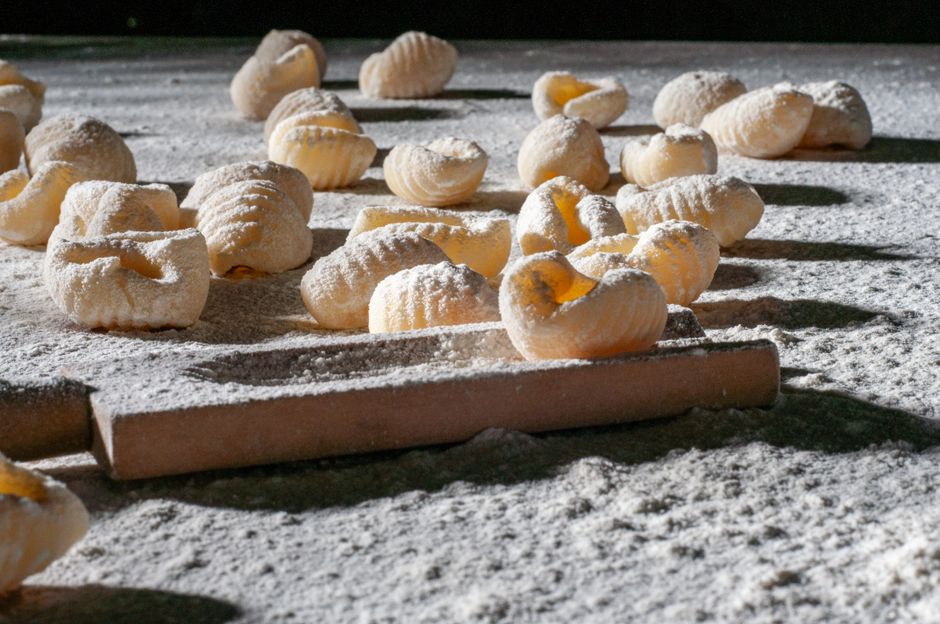
Shaping is not just about making the gnocchi look professional; it is about creating surface area. That iconic ridge pattern you see on restaurant gnocchi is there for a reason: it creates a groove that catches your sauce, ensuring that every bite is perfectly coated. Whether you use a gnocchi board or the back of a fork, taking the time to ridge each piece is an essential step in the final enjoyment of the dish. You can start by rolling your dough into long ropes about 3/4 of an inch in diameter, then cutting those ropes into individual, equal-sized pieces using your bench scraper.
Using the Fork Method
If you do not have a dedicated wooden gnocchi board, a fork is a perfectly adequate tool. Place a piece of the cut dough on the tines of the fork, press down gently with your thumb to create a divot, and then roll it downward off the tines. This motion creates the signature ridges on one side and a gentle hollow on the other. This hollow is particularly useful because it allows the gnocchi to cup the sauce, increasing the flavor density of every bite. It takes a little practice to get the flick of the wrist correct, but once you master the motion, you can churn through a batch in minutes.
Size Consistency
Consistency is key to even cooking. If you have some gnocchi the size of a marble and others the size of a walnut, you will inevitably end up with some that are raw in the center and others that have completely dissolved. Aim for uniformity. A piece about the size of a grape is generally considered the culinary standard. Remember that gnocchi will swell slightly as they cook due to the starch granules absorbing moisture, so keep your initial pieces on the smaller side. A uniform shape ensures that when you drop them into the water, they all rise to the surface at approximately the same time.
The Final Boil: Execution and Finishing
The final step—cooking the gnocchi—is often where home cooks panic, but it is actually the most straightforward part of the process. You want a large pot of heavily salted, boiling water. Treat it like the sea. The salt is essential because it flavors the dumpling from the inside out; without it, the gnocchi will taste flat and earthy regardless of how much sauce you use. Once the water is at a rolling boil, drop in your gnocchi in small batches. Do not overcrowd the pot, as this will drop the water temperature too quickly and cause the gnocchi to stick together.
The Float Test
The "doneness" of a gnocchi is determined by a simple visual cue: they will float. As the starch granules cook and the proteins solidify, the air pockets within the dumpling expand, making the gnocchi buoyant. Once they hit the surface, let them cook for exactly another 30 seconds to ensure the center is fully set, then remove them immediately with a slotted spoon or a spider strainer. If you let them sit in the boiling water for even a minute too long, they will begin to break down and become waterlogged.
Finishing in the Pan
The final touch is to transfer your cooked gnocchi directly into your sauce. Whether you are using a light brown butter and sage sauce, a rustic tomato ragu, or a rich gorgonzola cream, do not simply dump the sauce on top. Instead, toss the gnocchi in the pan with the sauce over low heat for about a minute. This allows the sauce to emulsify with the starchy water clinging to the dumplings, creating a glossy, cohesive finish that clings to the ridges you worked so hard to create. Finish with a grating of fresh Parmigiano-Reggiano and perhaps a crack of black pepper, and serve immediately.
Troubleshooting Common Gnocchi Failures
Even with the best intentions, things can go wrong. If you find your gnocchi are falling apart in the pot, your dough might have been too moist or you might have used too little flour. In this case, simply add a tablespoon or two of flour to the remaining dough, but do so with the lightest touch possible. If your gnocchi are coming out chewy, you have likely over-worked the dough. Remember that the gluten is your enemy here; be as gentle as a parent tucking a child into bed. The dough should always feel soft and supple, like a slightly damp pillow.
The "Test Batch" Technique
One of the most professional habits you can adopt is the test batch. Before you go through the trouble of shaping your entire mass of dough, take three or four small pieces, shape them, and drop them into the boiling water. This gives you a clear indication of how the dough will behave. If they hold their shape and have the right texture, you are good to go. If they dissolve, you know you need to add a bit more flour to the remaining mixture. This five-minute investment can save an entire afternoon of work.
Storage and Freezing
If you have made a large batch, you do not have to cook them all at once. Gnocchi freezes beautifully. Arrange your shaped, uncooked gnocchi in a single layer on a parchment-lined baking sheet and place them in the freezer until firm. Once they are frozen solid, you can transfer them to a freezer-safe bag for up to two months. When you are ready to eat, there is no need to thaw them; just drop them frozen directly into the boiling salted water. They will take about a minute longer to rise, but the texture will be virtually identical to fresh ones.
Conclusion
Mastering the art of homemade gnocchi is a rite of passage for any home cook who values the intersection of technique and tradition. It is a dish that demands your full attention, your respect for the ingredients, and a gentle hand, but the payout is extraordinary. When you break through the crust of a perfectly seared, hand-ridged potato dumpling and find that pillowy, tender center, you will understand why this humble dish has endured for centuries. You have transitioned from simply following a list of instructions to understanding the underlying mechanics of starch and moisture.
As you continue to practice, do not be discouraged by initial imperfections. Each batch is a learning opportunity. Pay attention to how the dough feels on a humid day versus a dry one, and learn to trust your intuition over a measuring cup. The more you make, the more you will develop a "gnocchi sense," a tactile understanding of when the ratio of flour to potato is perfectly aligned. This is not about achieving perfection on the first try; it is about the ongoing refinement of a craft that brings immense joy to the table.
Finally, remember that food is meant to be shared. Gnocchi is the perfect communal meal—it invites you to slow down, to prepare, and to savor. Whether you serve it with a sophisticated brown butter and toasted hazelnut sauce or a vibrant, fresh pesto, the star of the show remains those little handmade pillows of potato. Take pride in your work, embrace the process, and above all, enjoy the experience of creating something truly handmade in an increasingly automated world. Your kitchen is now an extension of your own culinary identity; go forth and create something beautiful.
Final Thoughts on Elevating Your Skills
As we wrap up this exploration of gnocchi, consider how this skill translates to other areas of your cooking. The principles of moisture management and gentle handling apply to so many other dishes, from pasta dough to delicate pastries. By learning to "read" the dough rather than just following a rigid script, you become a more adaptable and creative cook. Do not be afraid to experiment with additions to your gnocchi base, such as finely grated ricotta for a creamier texture or a hint of nutmeg to highlight the earthiness of the potatoes.
The world of Italian cuisine is deep and varied, but the foundation always rests on simple ingredients treated with immense care. Gnocchi is the perfect embodiment of this philosophy. You have learned that the potato is the heart of the dish, the flour is the support, and your hands are the final instrument of balance. Keep this guide in your kitchen, revisit these techniques, and keep reaching for that ethereal, cloud-like texture that defines the perfect dumpling.
Thank you for joining me in this deep dive into the art of potato gnocchi. Whether you are a seasoned veteran in the kitchen or a novice looking to find your way, remember that the only difference between a good chef and a great one is the willingness to refine, to practice, and to appreciate the small details that make a meal truly memorable. Happy cooking, and may your next batch of gnocchi be the lightest you have ever created. There is no greater satisfaction than serving a plate of food that you have crafted with your own hands, from raw ingredient to finished masterpiece, and there is no better dish than gnocchi to showcase that journey. Keep pushing your boundaries, stay curious, and continue to find the art in every bowl.
Get the Next Recipe
Weekly recipes, techniques, and gear picks — straight to your inbox.
