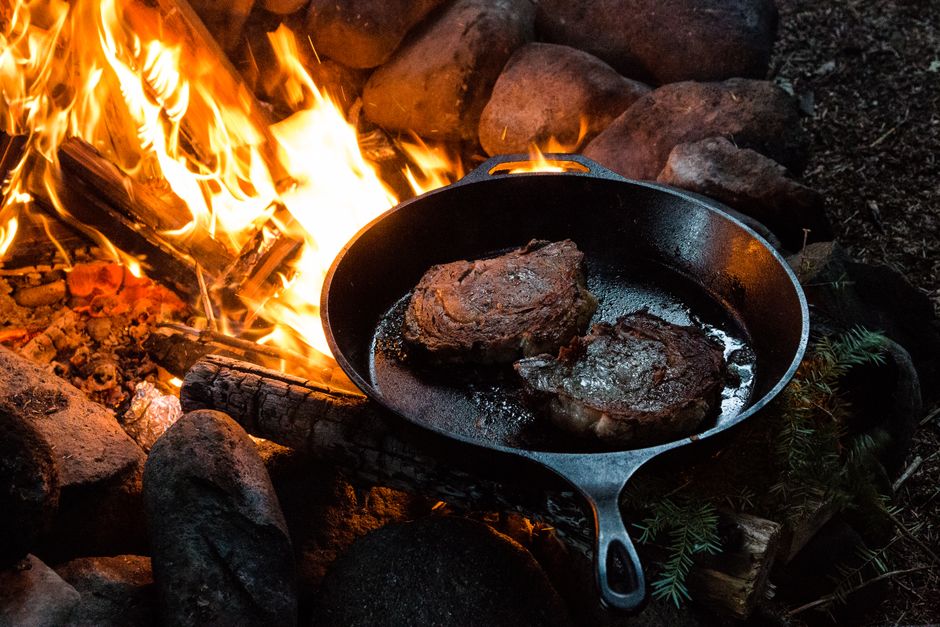
The Art of Perfect Pan-Searing: Techniques for Restaurant-Quality Crust
Cooking is an art form that requires both technique and passion, especially when it comes to creating that coveted, restaurant-quality crust on meats and vegetables. The perfect pan-sear can turn an ordinary piece of protein into an extraordinary culinary experience, transforming flavors while maintaining juiciness within. For many home cooks, achieving that hallmark of maillard reaction—the golden-brown crust that signifies perfectly cooked food—can feel elusive. However, mastering this technique isn't just about high heat; it fundamentally hinges on understanding the science of cooking, the right equipment, and precise execution.
In restaurant kitchens, chefs often make the art of pan-searing look deceptively easy. They wield their skillets like an artist with a brush, stirring a mix of precision, timing, and intuition to create the optimal crust. If you’ve ever wondered how they manage such a flawless sear, it largely boils down to their knowledge of temperature control, ingredient selection, and quality cookware. Each stage of the cooking process, from preparation to plating, plays an integral role in achieving that stunning outcome we associate with fine dining.
Whether you're looking to elevate a weeknight dinner or impress guests at your next gathering, understanding the nuances of pan-searing can revolutionize your cooking. This post will reveal the secrets behind perfect pan-searing techniques, guiding you through everything from selecting the right pans to mastering timing and presentation. With patience and practice, you, too, can cultivate that restaurant-quality experience right in your own kitchen.
Understanding the Basics of Searing
To begin, it’s essential to have a foundational understanding of what searing actually entails. At its core, searing is the process of cooking the surface of food at high temperatures until a *brown crust forms*. This not only enhances the flavor but also adds an appealing visual component to your dish. The Maillard reaction occurs at temperatures above 300°F (150°C), causing proteins and sugars in the food to react together and create complex flavors and aromas.
The Science Behind Browning
The science of browning involves several factors, including:
Understanding these principles will help you to not only sear effectively but also gain deeper knowledge of how heat impacts various foods.
"Cooking is not just about following a recipe; it’s about understanding the food you’re working with."
The Ideal Cuts for Searing
Not all cuts are created equal when it comes to pan-searing. Some are more forgiving and will yield better results:
These cuts typically have enough fat and connective tissue to survive high-temperature cooking without drying out, making them ideal candidates for achieving that perfect sear.
Selecting the Right Equipment
Your choice of equipment plays a pivotal role in the success of your searing technique. Opting for the right pan is one of the most critical decisions a cook can make.
The Best Pans for Searing
When it comes to selecting a pan, here are a few top choices:
When using these materials, ensure they are well-preheated before adding any fat. A properly preheated surface is essential for that initial burst of heat needed to initiate the Maillard reaction.
Other Tools of the Trade
In addition to your pan, make sure you have the following tools handy:
Preparing Your Ingredients
Before you get started with cooking, meticulous preparation can have a huge impact on your outcome. Properly preparing your ingredients is the cornerstone of successful pan-searing.
Choosing the Right Oil
The selection of oil is paramount. Some oils handle high temperatures better than others due to their smoke points. Here’s a breakdown:
#### Step-by-Step Prepping
"You can never go wrong with a simple seasoning of salt and pepper; it's the foundation for every great dish."
Mastering The Searing Technique
Once you've selected your ingredients and prepared them properly, it's time to dive into the searing technique itself. This is where the magic happens.
Preheating Your Pan
The first step in searing is preheating your pan. Here’s how to do it effectively:
Once the pan is hot, introduce your oil. A couple of tablespoons should suffice, but it will depend on the size of your pan and the amount of protein you’re cooking. Swirl it around until it shimmers.
Searing the Protein
Now that everything is prepped and your pan is hot, it’s time to put the protein in the pan:
Finishing in the Oven
For thicker cuts of meat, finishing in the oven is often necessary. Here’s how to do it:
- Medium-rare: 130°F (54°C)
- Medium: 140°F (60°C)
- Well-done: 160°F (71°C)
Using this technique ensures your meat is tender and juicy while still having that perfect crust.
Complementing Sear with Flavor
While the heart of the dish is the sear, adding flavors can elevate it even further. This section will cover flavor-enhancing techniques to complement your perfectly seared proteins.
Aromatics under the Protein
When cooking proteins like chicken or fish, consider adding aromatics directly into the pan just before finishing. Here’s how:
Saucing Your Sear
Creating a quick pan sauce post-searing provides a rich accent to enhance your dish:
"The secret to a great sauce is to take advantage of what’s left in the pan. Those browned bits hold essential flavor."
Plating and Presentation
Making your dish visually appealing can significantly enhance the dining experience. After all, we eat with our eyes first!
The Art of Plating
Here are some tips to consider for plating your perfectly pan-seared dish:
Final Touches
Improve your presentation even further with these finishing techniques:
Troubleshooting Common Searing Problems
While searing is generally straightforward, several common issues may arise. Here’s how to address them effectively:
Searing Issues
Creating a Better Crust
Conclusion
In summary, mastering the art of pan-searing is a vital skill for any home cook wishing to elevate their culinary repertoire. It involves understanding the balance between heat, moisture, and the type of ingredients used. By selecting the right equipment, preparing your protein properly, and practicing the searing technique thoughtfully, you can achieve that restaurant-quality crust that turns a simple dish into something extraordinary.
As you embark on your pan-searing journey, remember that practice makes perfect. The more you cook, the more you'll develop your intuition and understanding of how various proteins behave under heat. So fire up that skillet, embrace the sizzle, and enjoy the rewards of creating beautifully seared dishes that are bursting with flavor. Happy cooking!


Get the Next Recipe
Weekly recipes, techniques, and gear picks — straight to your inbox.
