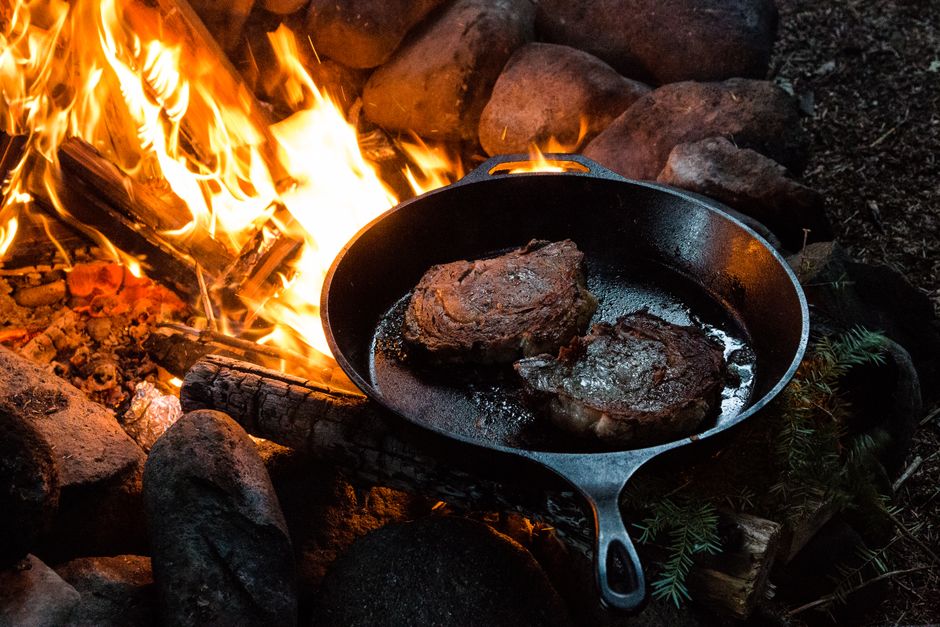
The Art of Perfect Pan-Searing: Temperature Control and Technique
Perfect pan-searing is often regarded as one of the most basic yet fundamental techniques in the culinary world. It transforms what could have been an ordinary meal into something extraordinary. With the right temperature control, technique, and a deep understanding of the ingredients, anyone can achieve that coveted golden-brown crust while ensuring that the inside remains juicy and flavorful. Embarking on this journey not only enhances your cooking repertoire but also instills confidence in your culinary abilities, whether you're a novice in your kitchen or a seasoned home chef.
At its essence, pan-searing utilizes a hot surface to create a flavorful crust on proteins, vegetables, and even some fruits. This method is revered because of its ability to concentrate flavors through the Maillard reaction—a complex chemical reaction that occurs when certain amino acids and sugars are heated. This reaction is responsible for those irresistible flavors and aromas that greet you as you walk into a well-seasoned kitchen. However, mastering the art of pan-searing is not just about flipping something in a hot pan; it's about understanding temperature control, quality of ingredients, and the science behind searing.
Throughout this journey into pan-searing, we will delve into the essential components that contribute to a successful sear. From selecting the right pan and the ideal fat to use, to measuring exact temperatures and timings for various proteins, this guide is designed to elevate your cooking skills to a professional level. By the end, you will not only know how to achieve the perfect sear but also recognize how this technique can enhance your overall culinary creations.
Understanding the Perfect Sear
Before you can master the technique of pan-searing, it is crucial to understand what a perfect sear looks like and feels like. The hallmark of a beautifully seared protein is a stunning brown crust that has developed an enticing aroma without being burnt. Achieving this requires careful attention to a few key factors: heat, oil, and timing.
The Importance of Heat
To achieve a perfect sear, you need to conquer the concept of heat management. When you start to heat your pan, you want it to reach a temperature of about 400-450°F (204-232°C) which is ideal for most meats, such as steak or chicken. However, understanding how to get your pan to this temperature and how to maintain it during cooking is essential.
Selecting the Best Fat
The type of fat you choose to utilize when pan-searing plays a significant role in not only flavor but also in the cooking process. Generally, you want to go for fats with a high smoke point. Some excellent choices include:
Using a fat with a high smoke point allows you to achieve that ideal sear at the required temperatures without the oil burning. That being said, don’t shy away from adding flavor enhancer fats like butter or olive oil towards the end of cooking, as their lower smoke points can add a rich flavor to your dish when combined with a higher smoke-point oil.
Timing is Everything
When aiming for a perfect sear, timing your cooking is crucial. Depending on the protein type and thickness, timing can vary dramatically. It is vital to educate yourself on how long to sear each side of different protein types:
Utilizing an instant-read thermometer can take the guesswork out of cooking. For example, chicken should reach 165°F (74°C) internally, while beef can be medium-rare at 130-135°F (54-57°C), and fish should be cooked to about 145°F (63°C).
Choosing the Right Proteins for Searing
The choice of protein can significantly affect the experience and outcome of your pan-searing adventure. Different meats, fish, and even vegetables respond uniquely to this technique, so let’s explore a variety.
Red Meat
When it comes to red meat, cuts like ribeye, sirloin, or tenderloin are best suited for pan-searing due to their fat content, which helps in achieving a flavorful crust. Here’s what you should consider:
Before searing, let your beef come to room temperature for about 30 minutes, ensuring even cooking.
Poultry
Chicken breasts and thighs also benefit greatly from pan-searing. Chicken thighs are preferable due to their higher fat content, making them juicier.
Seafood
Searing seafood, such as salmon, scallops, or shrimp, requires attention to timing as they cook a lot quicker than meat.
The Step-by-Step Guide to Pan-Searing
Now that you have a foundational understanding of temperatures, fats, and protein choices, it's time to dive deeper into the actual process of pan-searing. Below is a step-by-step guide to ensure your success!
Step 1: Preparation
Step 2: Preheat Your Pan
Step 3: Add the Fat
Step 4: Searing the Protein
Step 5: Resting and Finishing
“The mastery of pan-searing comes not just from technique, but from understanding your ingredients and their properties.”
Variations on the Classic Sear
Pan-searing can be transformed and adapted in numerous ways to explore the culinary landscape. Let's discuss some variations that can elevate your dishes even further.
Searing with Sauces
Incorporating a sauce directly into the pan while searing is an excellent technique to bring out layers of flavor. After searing your protein, consider creating a pan sauce. Here’s how:
Infusing Flavors
Experimenting with additional flavors by infusing your oil can change the game. Consider using olive oil blended with herbs like rosemary or thyme for an aromatic infusion to complement your proteins.
Cooking Vegetables
Don't limit pan-searing to proteins; many vegetables also respond well to this method:
The Oven Finish
For thicker cuts of meat, consider starting them on the stovetop and finishing in the oven:
Troubleshooting Common Issues
As with any culinary skill, complications may arise during the pan-searing process. Here are some common issues and their solutions.
Sticky Protein
Uneven Cooking
Burning Oil or Food
“Cooking is about rhythm; once you find yours, the kitchen becomes your dance floor.”
Pairing Sear-Cooked Foods
Finally, no culinary exploration is complete without discussing complementary flavors. Here are some ideas for sides and accompaniments that go hand-in-hand with perfectly pan-seared dishes.
Starches
Pair your seared proteins with simple starches such as:
Greens
Bringing a bit of brightness with greens can cut through the richness:
Sauces and Dressings
Common sauces to elevate your dish may include:
Conclusion
Mastering the art of pan-searing is a journey that opens the door to a world of culinary possibilities. By focusing on the right heat, selecting quality ingredients, and honing your technique, you are equipped to create satisfying and impressive dishes right in your kitchen. Like any art form, practice is essential—so don't hesitate to experiment, adjust, and refine your approach with each new attempt.
As you dive into this delightful technique, remember that the goal is not only about achieving a perfect sear but creating unforgettable flavors and experiences. So, take a moment to prepare, engage your senses, and enjoy the rewarding endeavor of cooking. Ultimately, it is an art that is not just about food but about crafting memories and sharing joy with those you love. Happy cooking! (2059 words)




Get the Next Recipe
Weekly recipes, techniques, and gear picks — straight to your inbox.
