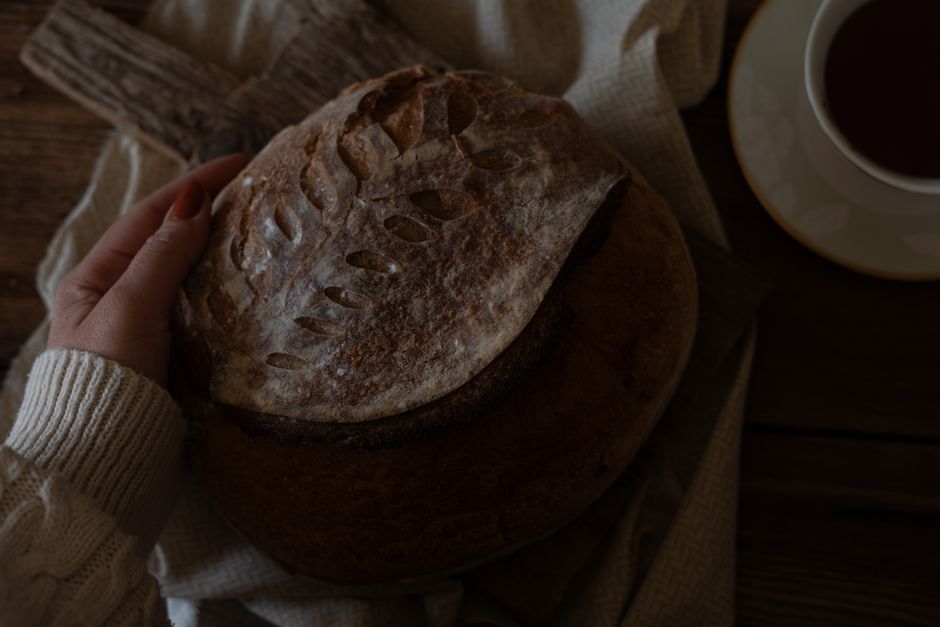
The Art of Sourdough: Mastering Wild Fermentation
The resurgence of sourdough bread is not just a trend; it’s a culinary movement that invites bakers of all levels to reconnect with the ancient craft of bread-making. Unlike conventional bread, which relies on commercial yeast for leavening, sourdough celebrates the power of wild fermentation, harnessing the natural yeasts and bacteria present in the environment. This process not only creates wonderful flavors and textures but also offers a deeper understanding of the fermentation process. Sourdough baking invites experimentation and patience, allowing bakers to develop their unique flavors and techniques.
One of the most appealing aspects of sourdough is its ingredient simplicity. All you need are flour, water, and salt. However, the magic lies in your starter, a mixture of flour and water that’s been fermented over time, cultivating the wild yeast and bacteria essential for leavening the dough. This starter, often affectionately named, becomes a beloved kitchen companion, providing a continuous cycle of life and creativity in baking. With every loaf, you’re not just baking; you’re engaging in a ritual that has been practiced for thousands of years.
Sourdough baking is as much about science as it is about art. Understanding how different variables – temperature, hydration, and fermentation time – affect the final product can elevate your baking proficiency from novice to extraordinary. Mastering these principles can empower you to adjust and adapt recipes, turning each loaf into a personal masterpiece. By embarking on this journey of wild fermentation, you're not just baking bread; you're joining a tradition that links baker to baker across generations.
Understanding the Basics of Sourdough
Before diving into the intricacies of sourdough baking, it's crucial to understand the fundamental components that contribute to its unique characteristics. These include wild yeast, lactic acid bacteria, and the fermentation process, each playing a critical role.
The Science of Wild Yeast
Wild yeast is a microorganism that lives in the environment, readily available on the surface of grains, in the air, and even on the bakers’ hands. When you create a sourdough starter, you cultivate these wild yeasts, which become the primary leavening agent in your bread. Unlike commercial yeasts, which are fast-acting and predictable, wild yeasts ferment at a slower pace, often resulting in more complex flavors due to the extended fermentation times involved.
The two most common strains of yeast found in sourdough are Saccharomyces cerevisiae and Candida milleri. The latter is particularly notable for its ability to thrive in the acidic environment created during fermentation. Understanding how these live cultures work can enhance your ability to manipulate flavors and rise times. Also, be aware that wild yeast is influenced by the environment, so starters kept in different locations might yield uniquely flavored bread.
The Role of Lactic Acid Bacteria
Alongside wild yeast, sourdough relies on lactic acid bacteria (LAB) to develop flavors and contribute to the bread’s structure. LAB thrive at the same temperatures as yeast and are responsible for the tangy taste associated with sourdough bread. They produce lactic and acetic acids through fermentation, giving the bread its distinctive flavor profile.
It’s worth noting that the balance between wild yeast and LAB varies depending on several factors, including the starter’s hydration level, temperature, and feeding schedule. A “wetter” starter can favor yeast production, while a “drier” starter can enhance LAB activity. Adjusting these variables allows bakers to fine-tune both flavor and acidity in their sourdough.
Flour: The Foundation of Sourdough
The type of flour used in sourdough has a significant impact on flavor and texture. Bread flour, which has a higher protein content than all-purpose flour, is typically recommended for sourdough baking because it develops more gluten structure, leading to a chewier crumb and better rise. Whole grain flours, like rye or whole wheat, are also excellent options as they contain more nutrients, feed the wild yeast, and lend unique flavors.
Here’s a quick guide to the types of flour suitable for sourdough:
Selecting the right flour is critical. Experiment with blends to discover what works best for your palate and baking style.
Creating and Maintaining Your Sourdough Starter
Your sourdough starter is the heart of your sourdough baking, acting as the source of all leavening in your bread. Starting one may take a bit of time and patience, but the rewards are well worth the effort.
How to Create a Sourdough Starter
Creating a sourdough starter from scratch requires just flour and water, but it involves a few days and regular feeding. Here’s a simple method to start your journey:
Feeding Your Sourdough Starter
To keep your starter healthy, regular feedings are essential. Most bakers opt to feed their starters once a day if kept at room temperature or once a week if stored in the fridge.
Feeding method:
It’s a simple process but critical to maintaining a vibrant starter. If you need to take a break from baking, feed the starter, store it in the fridge, and revive it by bringing it to room temperature and resuming daily feedings before use.
“Your starter is a living organism and thrives on your care. The more you bake, the healthier your starter becomes.”
Troubleshooting Common Starter Issues
Maintaining a strong starter can sometimes present challenges. Here are some common issues and their solutions:
The Fermentation Process: Shaping Sourdough
Once you have a strong starter, the next step is to ferment your dough. Fermentation is where the magic happens, as it not only builds flavor but also contributes to the final texture of your loaf.
The Autolyse Technique
The autolyse technique is a critical step that involves mixing flour and water and allowing it to rest before adding the starter and salt. This process allows the flour to fully absorb the water and begin the gluten development process.
This step aids in kneading and results in a more extensible dough, allowing for better shaping and rise.
Incorporating the Starter and Salt
Once the autolyse is complete, it’s time to add the starter and salt:
Bulk Fermentation: The First Rise
Following mixing, the dough undergoes bulk fermentation, which allows the yeast and bacteria to flourish. During this time, it's important to develop the gluten structure through stretch and folds rather than traditional kneading.
This technique builds strength in the dough without working it aggressively, encouraging a light, airy structure.
Shaping and Proofing Your Dough
Shaping your dough correctly and allowing it to proof adequately are crucial for achieving the perfect sourdough loaf.
Shaping Your Dough
After the bulk fermentation, it's time to shape the dough:
Proofing: The Final Rise
Proofing allows the dough to expand fully before baking. There are two main proofing methods:
Scoring and Baking
Scoring the dough before baking is essential for controlling the bread's expansion and aesthetics. Using a lame or sharp razor, make a shallow cut on the surface of the loaf just before placing it into the oven. This technique allows the trapped steam to escape, helping the bread maintain its structure.
#### Baking Temperature and Steam
To achieve the perfect crust, you need high temperatures and steam during the first phase of baking:
“Patience and temperature control are vital to getting that perfect crust and crumb structure in sourdough.”
Flavor Development Through Techniques
Flavor in sourdough comes from various factors, including the type of flour, fermentation times, and manipulation of hydration levels. Adjusting these elements can lead to incredible varieties of bread.
Experimenting with Hydration Levels
The hydration level of your dough refers to the ratio of water to flour and can dramatically influence the final texture and flavor.
Experimenting with different hydration levels helps uncover unique flavors and textures, allowing you to tailor each loaf to your preference.
Utilizing Different Flours
Mixing various flours in your sourdough can create distinct flavor profiles. For instance, substituting 20% of your main flour with rye can introduce unique, earthy notes, while whole wheat adds a nutty flavor.
Here are some popular flour combinations to try:
Incorporating Add-ins
For those looking to enhance their sourdough experience, consider adding ingredients like herbs, nuts, seeds, or fruits to your dough during the mixing stage.
Troubleshooting Common Sourdough Issues
Even seasoned bakers occasionally encounter issues during their sourdough journey. Here’s a guide to troubleshooting common problems.
Dense Loaf
If your sourdough turns out overly dense, consider the following:
Uneven Crumb Structure
Uneven holes in your bread can be a result of improper shaping or fermentation:
Overly Tangy Flavor
A strong sour taste can result from over-fermentation or a particularly sour starter:
Conclusion
In the art of sourdough, patience, understanding, and a willingness to experiment are your best allies. From crafting your starter to shaping and baking the perfect loaf, the journey is rich with learning opportunities. Each phase of sourdough baking allows you to engage with the ingredients, harnessing the beauty of wild fermentation.
By adopting various techniques, including autolyse, proper shaping, and the art of scoring, you can enhance both flavor and texture in your baking. Understanding the science behind wild yeast and lactic acid bacteria opens doors to infinite possibilities. Explore different flour combinations, hydration levels, and add-ins to personalize your bread.
Every loaf tells a story – one of patience, tradition, and love of craftsmanship. By embracing the nuances of sourdough baking, you’re not only creating delicious bread but also becoming part of a time-honored lineage of bakers.
Don’t be afraid to learn from failures, adjust your methods, and share your passion with others. The beauty of sourdough lies within its complexity and the joy of crafting something truly unique to you. So, roll up your sleeves, nourish your starter, and let the wild fermentation begin! Each bake is a new chapter; savor it.




Get the Next Recipe
Weekly recipes, techniques, and gear picks — straight to your inbox.
