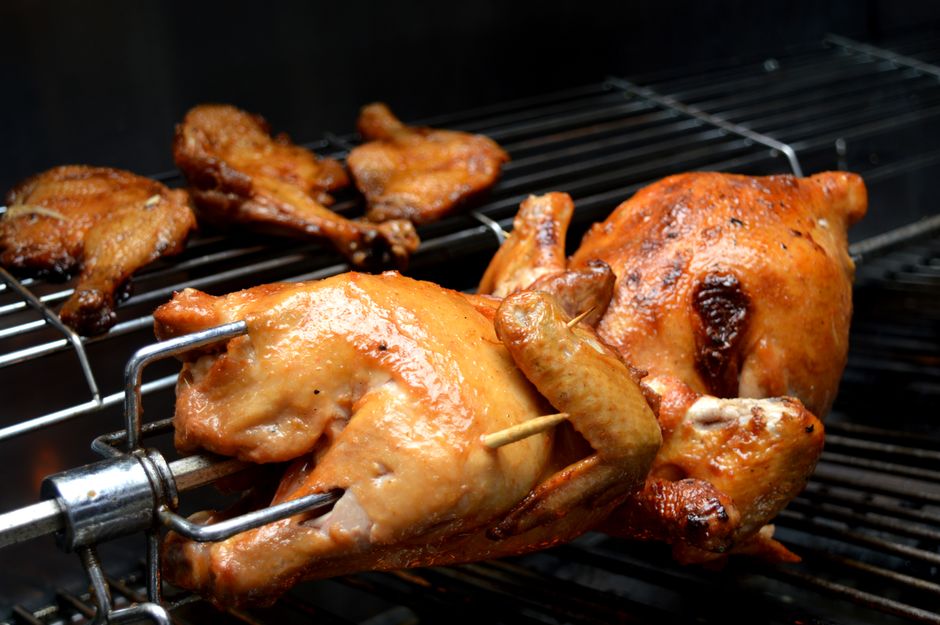
The Art of Spatchcocking: The Poultry Technique That Halves Roasting Time and Doubles Flavor
The traditional Sunday roast is an institution, a culinary ritual that anchors the weekend in warmth and comfort. Yet, for many home cooks, the prospect of roasting a whole bird is often shrouded in anxiety, plagued by the twin fears of a charred, dry exterior and an undercooked, salmonella-ridden interior. We have all been there, hovering over the oven, wondering if the legs are done while the breast meat turns into sawdust. The classic approach—tucking the wings, trussing the bird into a tight, aerodynamic package—is fundamentally flawed by its own geometry. By keeping the bird in a compact, spherical state, you are forcing the heat to fight its way through layers of insulating flesh, ensuring uneven results that necessitate constant basting and desperate temperature checks.
There is a better way, a technique born in professional kitchens that transforms the very physics of roasting: spatchcocking, or butterflying. By removing the backbone and flattening the bird, you effectively alter the surface-area-to-volume ratio, allowing the entire carcass to cook in a single, even plane. This is not merely a shortcut; it is a masterclass in heat management and moisture retention. When you flatten a chicken, you expose the dark meat to the same direct heat as the breasts, which usually require higher temperatures to render their connective tissues without drying out. This technique bridges the gap between the disparate muscles, turning a stressful production into a predictable, high-performance endeavor.
At "Blame The Chef," we believe that your kitchen should be a laboratory of success rather than a theater of uncertainty. Once you master the blade and the leverage required to spatchcock a bird, you will find yourself questioning why you ever bothered with trussing strings or specialized roasting racks. This technique is the cornerstone of professional-level poultry preparation, offering a crisp, golden skin that covers every inch of the bird and an interior that remains succulent, juicy, and perfectly seasoned. It is time to leave the dry, lackluster roasts of the past behind and embrace the structural transformation that will elevate your weekend meals from ordinary to extraordinary.
The Anatomy of the Bird and the Physics of Flatness
Why Conventional Roasting Fails
The primary failure of the conventional roast chicken is rooted in geometry. When a chicken is trussed, it is a rounded object with a high center of mass and a significant thickness. As the oven air circulates, the thin, delicate breast meat at the top of the bird reaches the target temperature of 165°F (74°C) long before the deep-seated thigh joints have finished rendering their fat. This creates a thermodynamic dilemma: you must choose between dry, overcooked breast meat or undercooked, unappealingly rubbery dark meat near the bone. Most home cooks compensate by roasting longer, which inevitably leads to the dessication of the breast, stripping the bird of its natural juices.
How Spatchcocking Changes the Game
By removing the backbone and flattening the bird, you eliminate the thermal disparity between the breast and the thigh. In a flattened configuration, the entire bird lies on the baking sheet at roughly the same distance from the heat source. The legs, now splayed outwards, are no longer shielded by the body cavity, allowing the heat to penetrate the thickest part of the joint effectively. This reduction in thickness means the bird reaches its target internal temperature in nearly half the time. Faster roasting time equals less moisture loss, which is the secret behind the incredibly juicy results you get at high-end rotisseries.
"When you flatten a bird, you stop cooking against the limitations of the oven’s architecture and start working with the laws of physics. The result is a uniformly cooked masterpiece every single time."
Structural Integrity and Heat Exposure
Furthermore, a spatchcocked bird offers a much higher surface area for the application of seasoning and heat. When a bird is whole, the skin trapped underneath the wings or against the roasting rack remains pale and flabby. When flat, every square inch of the skin is exposed to the convection of the oven. This encourages the Maillard reaction, the chemical process that creates the complex, savory brown crust we all crave. You are essentially turning your home oven into a high-powered rotisserie, achieving that elusive "glass-like" crispiness that defines professional poultry.
Essential Tools for the Procedure
Choosing the Right Shears
You cannot perform a proper spatchcock without the right hardware. Forget about using a standard chef's knife or a pair of kitchen scissors that you use for opening packages. You need heavy-duty, poultry shears with a spring-loaded mechanism and a serrated blade. These are designed to navigate the dense, calcified structure of the spinal column without slipping. A good pair of shears will give you the mechanical advantage needed to slice through the ribs with minimal effort, ensuring that your hands stay safe and your cuts remain precise.
Safety First in the Kitchen
Before you begin, ensure your workspace is sanitized and your bird is dry. Moisture is the enemy of grip, and trying to handle a slippery, cold bird with dull shears is a recipe for an accident. Always work on a stable, non-slip cutting board—a heavy wooden or thick polyethylene board is preferred. Because you are dealing with raw poultry, make sure that your "contamination zone" is clearly defined, and keep a clean towel and sanitizer spray nearby. Professionalism in the kitchen starts with safety; if you feel like you are struggling to cut through the bone, stop, readjust your grip, and evaluate your angle.
The Prep Surface
Stability is paramount. If your cutting board slides around, you are risking a slip. Place a damp paper towel underneath your board to lock it into place. Ensure you have plenty of room to maneuver the bird. You aren't just cutting; you are performing an operation. Have your spice rubs, olive oil, and high-heat roasting pan ready before you start the cutting process. Once your hands are coated in poultry juices, you do not want to be fumbling for salt shakers or opening cabinet doors.
The Step-by-Step Spatchcock Process
Step 1: Preparing the Bird
Start by removing the giblets from the cavity if they are present. Pat the chicken completely dry with paper towels; moisture on the surface will create steam, which prevents the skin from crisping, so getting the bird bone-dry is the first step toward a perfect result. Place the chicken breast-side down on your board. You should see the line of the backbone running straight down the center. This is your target line.
Step 2: Removing the Backbone
Using your poultry shears, start at the tail end and cut along one side of the backbone. Apply steady, firm pressure, listening for the satisfying crunch as the blades sever the ribs. Repeat this on the other side of the spine. Once the backbone is removed, keep it! It’s the perfect base for a rich, homemade stock later on. Opening the bird like a book will reveal the keel bone at the center of the breast.
Step 3: Flattening the Bird
Place the bird breast-side up on the board. You will see a small, sharp ridge of bone in the center of the chest—this is the keel bone. Place the palm of one hand over the center of the breast and press down firmly, leaning your body weight into it until you hear a sharp crack. This is the sternum breaking, which allows the bird to lie perfectly flat. If it doesn't lay flat immediately, feel free to give it another firm press. The bird should now look symmetrical and wide, resembling an open book.
Step 4: Final Trimming and Tuck
Trim away any excess hanging skin or fatty deposits around the neck area. Ensure the wing tips are tucked underneath the breast meat; this prevents them from burning during the extended high-heat roast. Now, the bird is ready to be seasoned. Because the bird is flat, you have a large, uniform surface for your aromatics, spice rubs, or herb-infused butters to cling to, ensuring a deep flavor penetration that permeates the meat.
Mastering the Seasoning and Aromatics
The Importance of Dry Brining
The secret to the best-tasting chicken isn't just the cooking method; it's the timing of the seasoning. Dry brining is the practice of salting your bird hours, or even a day, before roasting. When you apply kosher salt to the surface of the skin, it draws out moisture, dissolves into a brine, and is then reabsorbed into the meat through osmosis. This process denatures the proteins just enough to allow them to hold onto more moisture during the high heat of the oven, resulting in a succulent texture that is virtually impossible to achieve with last-minute seasoning.
Herb-Infused Compound Butters
Once the bird is dry and brined, applying a layer of compound butter is a pro-level move. Take softened unsalted butter and mix it with finely chopped fresh thyme, rosemary, garlic, and a hint of lemon zest. Gently loosen the skin over the breast meat using your fingers and massage the butter underneath. This provides a constant basting mechanism from the inside out as the butter melts, infusing the white meat with a deep, earthy fragrance while simultaneously helping the skin crisp up against the oven heat.
"A well-seasoned bird is a conversation between the chef and the ingredient. Don't be afraid of salt; it is the fundamental conductor that makes the melody of your herbs and aromatics truly sing."
Selecting Your Aromatics
While the bird is the star, the bed you roast it on is the supporting act. Placing the spatchcocked chicken on a bed of hardy aromatics—thick-sliced onions, carrots, fennel, and unpeeled cloves of garlic—does two things. First, it acts as a natural roasting rack, lifting the bird slightly to promote air circulation underneath. Second, the chicken fat renders down onto these vegetables, roasting them in an intense, poultry-infused nectar that is far superior to any simple vegetable side dish.
Roasting Profiles and Temperature Management
High-Heat vs. Low-Slow
For a spatchcocked bird, you generally want to roast at a temperature between 425°F and 450°F (220°C - 230°C). This is significantly higher than the standard 350°F roast, and it is vital for achieving the crispy skin we mentioned earlier. At these temperatures, the enzymes in the skin react quickly to the heat, creating a golden-brown, shattering-crisp exterior while the interior meat cooks through in roughly 45 to 55 minutes, depending on the weight of the bird.
Monitoring Internal Temperatures
Do not rely on the "poke test" or, heaven forbid, the color of the juices. Use a digital probe thermometer. You are looking for an internal temperature of 160°F (71°C) in the thickest part of the breast and 175°F (80°C) in the thigh. Because of carry-over cooking, the temperature will continue to rise by about 5 degrees after you take it out of the oven. If you wait until it hits 165°F inside the oven, you will likely end up with dry meat by the time it reaches the table. Pull it early and let it rest.
The Essential Resting Period
The most common mistake home cooks make is carving the bird the second it comes out of the oven. You must let the bird rest for at least 15 to 20 minutes on a cutting board, ideally tented loosely with foil. During this time, the internal juices, which have been agitated and pushed toward the center by the heat, redistribute back into the muscle fibers. If you cut into the bird immediately, those juices will run onto the board instead of staying in the meat, resulting in a dry, lackluster dining experience.
Achieving Professional Presentation
The Carving Technique
Because the bird has already been partially dismantled by the spatchcocking process, carving is remarkably intuitive. Since the backbone is already gone, you simply need to cut through the joints. Start by separating the legs and thighs from the body—they will practically fall away. Then, remove the wings. Finally, slice the breast meat off the rib cage in one clean piece, or slice it into thick, diagonal segments. The flattened structure makes identifying the joints a visual task rather than a guessing game.
Plating for Impact
Presentation is the final step in the culinary process. Arrange your carved pieces on a warm platter, skin-side up. If you roasted the bird on a bed of vegetables, place those in the center of the platter and arrange the chicken pieces around them, creating a rustic, family-style display. Drizzle the rendered pan juices—which are now concentrated with the flavor of the herbs and garlic—over the top of the meat just before serving. This adds a glistening sheen that is as beautiful as it is delicious.
Pairing and Serving Suggestions
A perfect roast chicken demands classic accompaniments. Because the bird is roasted at high heat, it pairs beautifully with sides that balance that richness: a sharp, acidic arugula salad with a lemon-dijon vinaigrette, or roasted root vegetables that have been tossed in a bit of balsamic vinegar. A light, crisp white wine like a dry Riesling or an unoaked Chardonnay cuts through the rendered fat of the chicken perfectly, cleansing the palate and making every bite taste as fresh as the first.
Troubleshooting Common Issues
What if the Skin Isn't Crispy?
If your skin is still rubbery, it usually comes down to one of two things: excess moisture or insufficient heat. Before roasting next time, try leaving the bird uncovered in the refrigerator for four to six hours after salting it. This is called air-drying, and it draws moisture out of the outer layers of the skin, allowing it to dehydrate slightly. When that dehydrated skin hits the hot oven, it crisps up instantly. Additionally, ensure your oven is truly preheated; if you put the bird in before the oven reaches the target temperature, the skin will steam rather than sear.
Managing Smoke in the Kitchen
High-heat roasting can sometimes cause your pan to smoke, especially if you have a lot of rendered fat hitting a hot bottom. To mitigate this, add a splash of chicken stock or dry white wine to the bottom of the pan along with your vegetables. This creates a moist environment in the bottom of the pan, which prevents the drippings from burning, and also provides the base for a quick, delicious pan sauce that you can whip up while the bird rests.
Uneven Doneness
If you find that your thighs are still raw while your breasts are done, your bird might be too thick, or your heat might be too concentrated in one area. Check that you have removed the entire backbone and broken the sternum completely. If your oven has a "hot spot," rotate the pan 180 degrees halfway through the cooking process. Mastering your oven’s unique temperament is part of the chef's journey, and small adjustments to your technique will pay off in the long run.
Conclusion
The art of spatchcocking is more than just a technique; it is a philosophy of efficiency and excellence. By choosing to dismantle the bird before it ever touches the heat, you are taking control of the cooking process rather than letting the oven dictate the results. You are prioritizing the structural integrity of the meat, ensuring that the breast stays juicy and the dark meat reaches its full, savory potential. It is a method that rewards the curious and the bold, proving that sometimes the best way to move forward is to flatten the obstacles in your path.
As you step into your kitchen this weekend, I encourage you to look at your next whole bird not as a formidable challenge, but as a blank canvas ready for transformation. Take your shears, commit to the process, and trust in the physics of the flat roast. You will find that the time saved in the oven is more than made up for in the depth of flavor and the appreciative silence of your guests as they take their first bite. At "Blame The Chef," our goal is to turn every home cook into a master of their domain, and spatchcocking is the quickest route to that mastery.
Do not be discouraged if your first attempt isn't perfect. Culinary skill is a muscle, and like any other, it requires repetition to strengthen. Each bird you prepare is a lesson in heat, timing, and seasoning. Keep a journal of your results, note the temperatures that worked best for your specific oven, and experiment with different spice profiles. The journey from a standard Sunday roast to a restaurant-quality meal is paved with small, deliberate choices. Spatchcocking is one of the most impactful choices you can make.
So, gather your tools, sharpen your shears, and prepare to elevate your poultry game to a new standard. The beauty of this technique lies in its simplicity—once you learn it, you will never go back. You are now armed with the knowledge of how to manage heat, preserve moisture, and maximize flavor. Go forth, command your oven, and enjoy the confidence that comes with knowing exactly how to execute a professional-level dish. Your kitchen is your domain, and with the spatchcock technique, you are undoubtedly the chef.

Get the Next Recipe
Weekly recipes, techniques, and gear picks — straight to your inbox.
