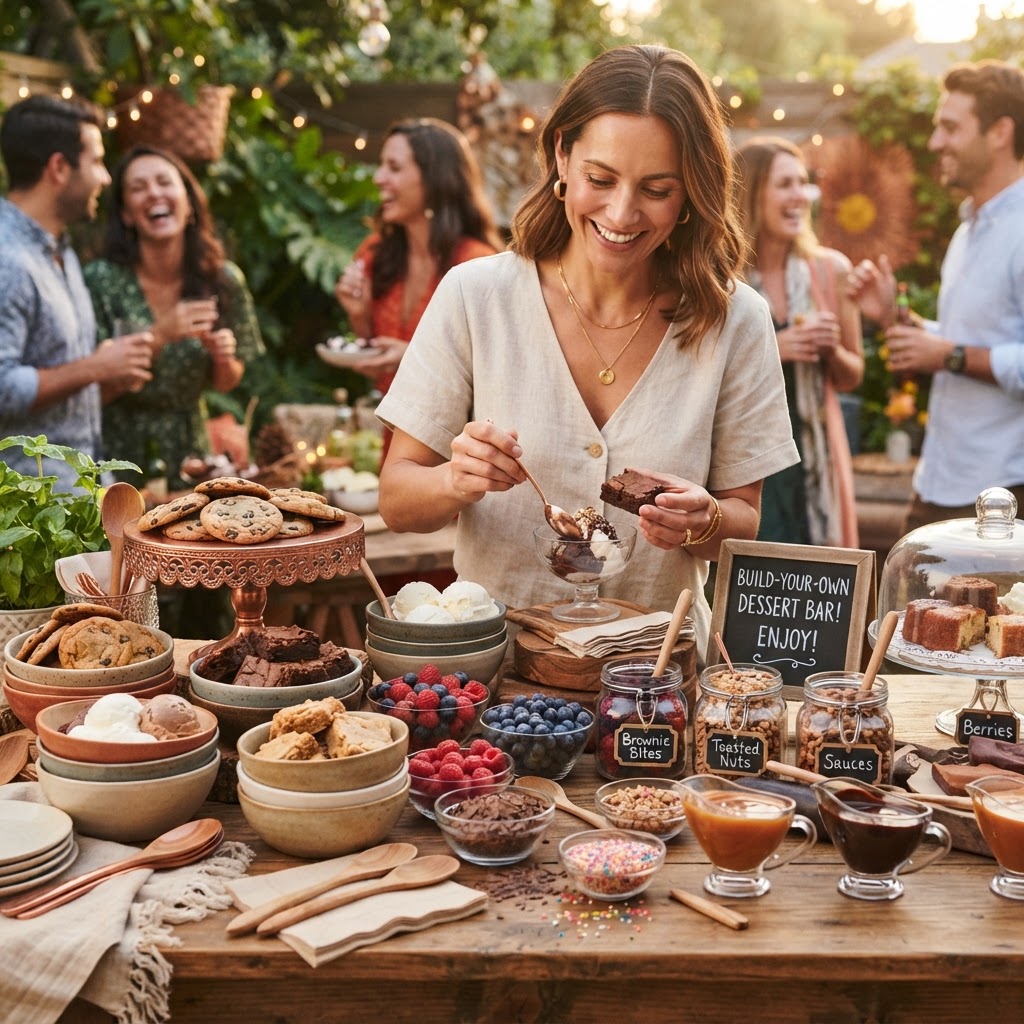
The Art of the "Build-Your-Own" Dessert Bar: Scaling Interactive Sweets for Effortless and Memorable Hosting
There is something inherently magical about the intersection of culinary craftsmanship and communal joy. As a chef, I have spent decades in professional kitchens where the focus is almost exclusively on precision, speed, and the delivery of a singular, flawless vision. Yet, when I retreat to my home kitchen, the philosophy shifts dramatically toward inclusivity and the joy of spontaneous interaction. The most successful gatherings I have hosted are not those where I sweat over a complex, plated dessert that sits wilting under a pass, but rather those where I invite my guests to become the architects of their own sugar-dusted masterpieces. By shifting the burden of assembly from the chef to the guest, you create a dynamic, tactile experience that transforms dessert from a static finale into the main event of the evening.
Scaling an interactive dessert bar requires a delicate balance between curation and freedom. It is not enough to simply throw an assortment of sweets onto a table and hope for the best; the secret lies in the intentional architecture of flavors and textures. You want to offer enough variety to satisfy every palate—from the chocoholic to the fruit-forward minimalist—while maintaining a cohesive theme that prevents the table from becoming a chaotic mess of sugary debris. When done correctly, this approach acts as a social lubricant, encouraging guests to mingle, trade toppings, and discuss their creations, thereby fostering a warm, relaxed atmosphere that is nearly impossible to replicate with a pre-plated dish.
As we dive into the logistics of this culinary endeavor, remember that your role as the host is akin to that of a curator. You are providing the canvas and the premium-quality materials, while your guests provide the creative spark. Do not fear the perceived lack of control; in fact, embrace it as an opportunity to showcase your knowledge of ingredient pairings and professional techniques. Whether you are hosting an intimate dinner party for six or a sprawling summer garden party for forty, the principles of a successful dessert bar remain rooted in mise-en-place, strategic temperature management, and the elevation of humble ingredients. Let us explore how you can elevate your next event into an unforgettable, interactive culinary experience.
The Foundation: Building a Cohesive Base
Every great dessert bar starts with a rock-solid foundation. You cannot build a skyscraper on a swamp, and you certainly cannot build a memorable dessert experience without a base that provides both structural integrity and a flavor profile that plays well with others. When selecting your base components, aim for a mix of textures—soft, crisp, and chewy—to ensure that each bite remains interesting. I recommend a combination of a high-quality genoise sponge, a batch of chewy fudge brownies, and perhaps a platter of shortbread cookies that hold up well under the weight of heavier toppings.
The Role of Temperature and Texture
The temperature of your base items is critical. Your brownies should be served at room temperature to maintain their fudgy density, while your sponge cake should be slightly chilled to prevent it from becoming overly fragile when adorned with syrups or compotes. Avoid the mistake of serving warm components alongside ice cream, as this will lead to a rapid melt, resulting in a pool of sugar soup before your guests have even returned to their seats. Keep your hot elements, such as warm fruit compotes or molten chocolate, in dedicated chafing dishes or slow cookers set to a low, consistent heat to ensure they remain at that perfect, pourable viscosity throughout the evening.
Scaling for the Crowd
When calculating quantities, a professional rule of thumb is to account for 1.5 servings per guest for each base element. If you have twenty guests, prepare at least thirty portions of your brownie squares and twenty-five slices of your cake. This ensures that you aren't constantly refilling platters or worrying about a guest being left with nothing but a bowl of whipped cream. Variety is excellent, but keep the number of base types to three or four; adding too many options often leads to indecision and creates an overwhelming sensory experience that detracts from the quality of the individual components.
"A dessert bar is not merely a collection of sweets; it is a curated journey where the host guides the guest through a landscape of contrasting textures, temperatures, and profiles, ensuring that every choice leads to a perfect bite."
Elevating the Elements: Professional Topping Strategies
Once your base is set, the toppings become the primary vehicle for individualization. This is where you can truly show off your culinary chops. Rather than settling for supermarket-grade bottled syrups or standard sprinkles, take the time to craft bespoke components that offer depth of flavor. A homemade salted caramel sauce, cooked to precisely 245°F (the soft-ball stage), will always outperform a store-bought version. Similarly, a macerated berry compote with a hint of balsamic vinegar or cracked black pepper adds a sophisticated, savory edge that elevates the entire spread.
Managing Moisture and Crunch
A common failure in dessert bars is the loss of texture over time. To prevent your crunchy toppings—such as toasted hazelnuts, candied pecans, or shattered honeycomb—from turning soft, serve them in individual glass jars with small serving spoons. This keeps them dry and separate from the more moisture-prone items like fresh berries or whipped creams. If you are serving fresh fruit, wash and pat it dry hours before the event; excess moisture is the enemy of a crisp assembly. Consider offering a "crunch station" where guests can finish their dessert with a final sprinkle of texture just moments before they take that first, decisive bite.
Flavor Bridges and Pairings
Help your guests make informed decisions by creating small, descriptive tags that suggest flavor pairings. For example, place a small card next to the dark chocolate shards that reads: "Pairs beautifully with sea salt and the espresso bean crumble." This subtle guidance prevents the "everything-plus-the-kitchen-sink" syndrome and encourages guests to think about how different components interact. You are essentially acting as a culinary mentor, teaching your guests about the importance of balancing sweetness with acidity, bitterness, or a touch of saline to round out the palate.
The Art of the Cream: Emulsions and Stability
No dessert bar is complete without a decadent, creamy element. However, standard whipped cream can often lose its volume and stability within an hour. As a professional, I rely on stabilized whipped cream—often using a touch of mascarpone or a tiny bit of bloomed gelatin—to ensure that your cream remains glossy, voluminous, and structurally sound for the duration of your party. This is a simple trick that separates amateur hosting from professional-level execution.
Exploring Dairy and Non-Dairy Options
In our modern culinary landscape, it is imperative to accommodate various dietary needs without sacrificing flavor. I often include a coconut-based whipped cream or a cashew-based vanilla bean mousse alongside the traditional dairy version. Ensure that your dairy-free options are kept just as cold as your dairy ones; heat is the enemy of all fats, and a warm, melting mousse is far less appealing than a firm, cool one. If you are serving ice cream, invest in a high-quality insulated cooler or a professional-grade serving tub kept on ice to prevent the dreaded thaw.
The Pourable Factor
If your dessert bar features components like molten chocolate sauce or salted caramel, pay close attention to the viscosity. Your sauce should be warm enough to pour easily but thick enough to coat the back of a spoon. If the sauce is too thin, it will soak into the cake bases and make them soggy; if it is too thick, it will solidify into a hard shell upon contact with the cooler elements. Practice your ratios beforehand—a 3:1 ratio of cream to chocolate for a ganache-style sauce usually provides that perfect, pourable consistency that is elegant and easy to manage.
Mise-en-Place: The Strategy of Spatial Organization
The flow of your dessert bar is just as important as the quality of the food. You want to create a logical progression that guides the guest through the assembly process. Start with the plates or bowls, move to the bases, proceed to the warm sauces, and end with the dry toppings and garnishes. This linear assembly line prevents congestion and ensures that guests are not bottlenecked at the beginning of the table, leaving them to wander aimlessly while holding their half-assembled desserts.
Designing the "Work Station"
Your dessert bar should not be a static display; it should be a functional workspace. Ensure there is enough counter space or table surface for guests to set down their plates while they assemble their toppings. If you are hosting a large crowd, try to build the bar in a "U" shape or on an island where guests can access the food from multiple sides. This spreads out the traffic and prevents the social awkwardness of a single-file line that feels more like a cafeteria than a party.
Signage and Instructions
Never underestimate the power of clear communication. Small, elegant cards printed on cardstock are far more effective than trying to explain the contents of every bowl to fifty different people. Include allergens, especially regarding nuts and gluten, so guests can navigate your spread with confidence and safety. I personally love to use chalkboard signage for a more relaxed, rustic aesthetic, or clean, minimalist font on white cardstock for a more modern, refined look. Whatever your style, make sure the text is large enough to be read from a few feet away.
"True hospitality is anticipating the needs of your guests before they even realize them. By curating a flow that is both logical and visually stunning, you allow your guests to focus entirely on the pleasure of the experience."
The Secret to Scaling: Batch Prep and Storage
The biggest mistake a home cook makes when hosting is trying to do everything on the day of the event. Scaling a dessert bar requires a rigorous production schedule. My personal workflow begins three days out:
Managing the Final Countdown
By breaking your prep into manageable chunks, you avoid the kitchen-induced stress that often plagues hosts. The goal is to spend the final two hours before your guests arrive putting on the finishing touches rather than frantically whisking batter. If you are working with chocolate, keep in mind that tempering is an art that requires patience; do not attempt to temper chocolate for the first time while your guests are at the door. If you aren't comfortable tempering, stick to a high-quality ganache or a simple melted chocolate dip that doesn't rely on the precise crystallization of cocoa butter.
The Cooling and Heating Station
Designate specific zones for temperature-sensitive items. Use chilled stone or marble platters for creams and mousses to keep them cold for longer periods. Conversely, use small, portable induction burners or tea-light warmers for your chocolate and caramel sauces. Keeping these items at their optimal service temperature not only ensures food safety but also drastically improves the taste and texture of the components, making them feel like a premium offering.
Aesthetic Considerations: Making it Instagrammable
While flavor is paramount, we eat with our eyes first. A dessert bar should be a visual feast that draws guests in from across the room. Use varying heights to create a dynamic landscape; utilize cake stands, wooden crates, and upside-down bowls to elevate some bowls while leaving others at the table level. This visual rhythm prevents the table from looking flat and uninspired. Incorporate fresh flowers, greenery, or even vintage serving pieces to add character and warmth to the setup.
The Power of Color and Contrast
When selecting your toppings, think about the color palette. A spread of all-brown components (brownies, chocolate sauce, nuts) will lack visual excitement. Introduce pops of color with vibrant fruit compotes, bright green pistachios, or edible flowers like violas or pansies. The contrast between deep, dark chocolate and bright, acidic raspberry coulis is not just a flavor win; it’s a stunning visual juxtaposition that makes the bar look professional and inviting.
Lighting and Ambiance
The lighting around your dessert bar should be soft and warm. Avoid harsh overhead lighting if possible; instead, use small, battery-operated fairy lights or votive candles to create a glow around the dishes. The goal is to make the dessert feel like a warm, inviting destination. If your event is outdoors, ensure your bar is shielded from direct sunlight, which will compromise the structural integrity of your creams and chocolate-based items within minutes.
The Cleanup and Post-Dessert Grace
A successful host knows that the cleanup is part of the experience. Don't let your dessert bar turn into a graveyard of dirty spoons and empty jars. Have a designated, out-of-the-way spot for used plates and silverware. If you are using disposable elements, ensure they are high-quality and, ideally, compostable. There is a certain art to keeping the table tidy throughout the evening; don't be afraid to discreetly wipe down the table or refresh the bowls when they start to look depleted. This active maintenance keeps the bar looking fresh and appealing until the very last guest has had their fill.
Embracing the Leftovers
One of the best parts of a build-your-own dessert bar is the abundance that remains at the end of the night. Do not let this go to waste! Prepare high-quality, eco-friendly boxes or small jars so your guests can pack up a few treats to take home. This is a delightful parting gift that extends the joy of your gathering into the next day. It also saves you from being buried under a mountain of leftover sweets, which is a common and dangerous trap for the home chef.
Final Thoughts
Hosting is an act of generosity, and an interactive dessert bar is perhaps the ultimate expression of that spirit. You are inviting your guests to step into your world, play with your ingredients, and leave their own mark on the menu. By focusing on quality, structure, and thoughtful preparation, you take the stress out of the equation and replace it with genuine connection. Do not let the prospect of a massive, multi-component dessert bar intimidate you. Start small, focus on the fundamentals of flavor and texture, and lean into the collaborative nature of the experience.
Remember that the goal is not perfection—it is connection. Your guests will remember the laughter, the joy of building something delicious with their own hands, and the warmth of the evening, far more than they will remember if the whipped cream was perfectly peaky or the chocolate was tempered to a mirror shine. Use these techniques as a framework to build your own confidence, then trust your instincts. The "Blame The Chef" approach to entertaining is all about embracing the beautiful, messy, and delicious reality of culinary creation. Now, go forth, gather your ingredients, and create a dessert bar that your guests will be talking about for months to come. You have the tools, the knowledge, and the passion; all that is left is to light the candles and open your doors.


Get the Next Recipe
Weekly recipes, techniques, and gear picks — straight to your inbox.
