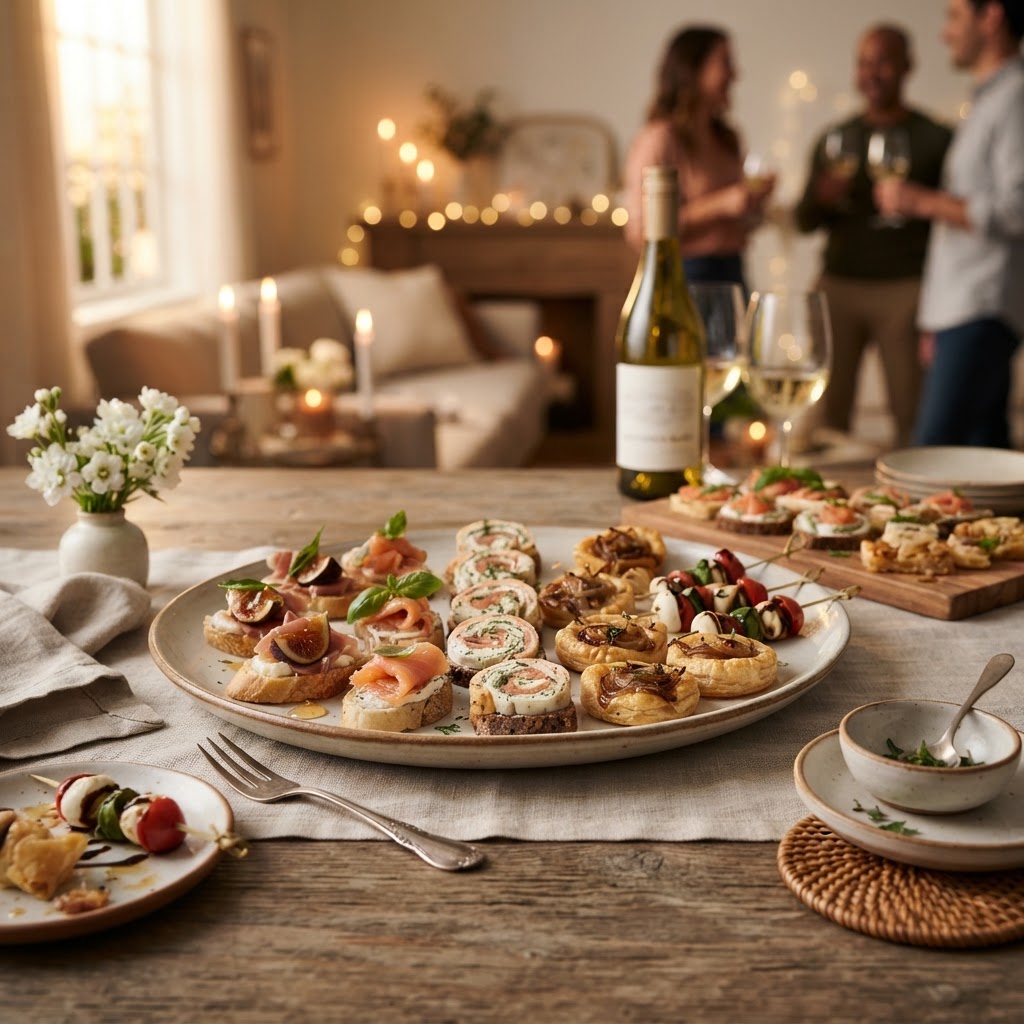
The Art of the "Make-Ahead" Hors d'Oeuvre: How to Assemble and Store Finger Foods for Stress-Free Hosting
There is a particular kind of panic that sets in exactly thirty minutes before guests arrive, a frantic crescendo of chopping, whisking, and cursing that every home cook knows all too well. You are likely covered in a light sheen of flour, the oven is smoking because of a rogue drop of cheese, and your doorbell has just rung for the first time. The ambition of hosting a beautiful dinner party often crashes headlong into the reality of executing a multi-course menu under pressure. This is where the make-ahead hors d'oeuvre becomes not just a helpful tip, but an absolute necessity for anyone who wants to actually enjoy their own party. When you master the rhythm of prep, you move from being a stressed line cook in your own kitchen to a relaxed, present host who holds a glass of wine instead of a paring knife.
The secret to professional-level entertaining is not hidden in secret ingredients or expensive equipment, but rather in the deliberate management of time and logistics. By breaking down complex recipes into manageable components—elements that can be toasted, folded, or chilled long before the party starts—you remove the frantic chaos of the "last-minute scramble." Cooking for others should be an act of joy rather than a test of endurance, and the strategy of advance preparation allows you to focus on the sensory experience of the meal. When your finger foods are already assembled and waiting in the wings, you can transition from the kitchen to the living room with confidence. This shift in mindset transforms your hosting style from reactive to proactive, ensuring that the atmosphere of your home remains calm, inviting, and sophisticated from the first guest to the very last.
Adopting this methodical approach requires a shift in how you view recipes. You must learn to distinguish between what needs to be served hot and crisp versus what benefits from an overnight rest in the refrigerator to allow flavors to marry. It is about understanding the structural integrity of ingredients—knowing which crackers will stay crunchy and which delicate pastry shells will succumb to humidity. Once you learn to balance the timing of your prep, you gain the ability to offer a menu that is far more impressive than the sum of its parts. Let us embark on a journey through the mechanics of strategic hosting, where we will refine your pantry, organize your refrigeration, and ultimately liberate you from the tyranny of the clock.
The Foundation of Timing and Logistics
Successful hosting begins with a production schedule that mimics the flow of a professional kitchen. Before you even select your ingredients, you must look at your guest list and your calendar with the cold, calculating eye of a chef. Start by categorizing your hors d'oeuvres into three specific groups: those that must be assembled at the last second, those that can be fully prepped ahead, and those that can be par-baked or partially assembled. This hierarchy is the backbone of stress-free entertaining. If your menu consists entirely of tasks that require immediate attention, you have failed before you even begun. Aim for a ratio where eighty percent of the work is completed at least four hours before the doorbell rings.
The Power of the Mise-en-Place
Mise-en-place is a French term that literally means "everything in its place." For the home cook, it means having your onions diced, your herbs chopped, your spices measured into small bowls, and your proteins trimmed and ready to hit the pan. When you are assembling delicate appetizers, the last thing you want to do is hunt for a spice jar while your dough is drying out. Dedicate the morning of your event to this mise-en-place. Use high-quality glass or stainless steel prep bowls to organize your station. By eliminating the mental load of searching for supplies, you free up cognitive space for the actual assembly and, more importantly, for socializing with your guests.
The professional chef’s greatest weapon isn't a sharp knife or a high-end range; it is the foresight to finish the work before the pressure begins.
When storing these prepped ingredients, use airtight containers and label them clearly with the time they were prepared. Consider the temperature danger zone—if your ingredients include proteins or dairy, they must remain at or below 40 degrees Fahrenheit. Keeping your workspace clean as you go is non-negotiable. A cluttered counter leads to a cluttered mind, and a cluttered mind leads to appetizers that lack the finesse and visual appeal that make them stand out. Treat your home kitchen with the same respect you would afford a professional one, and you will find that the cooking process becomes meditative rather than taxing.
Mastering Temperature Control and Texture
One of the greatest mistakes home cooks make is serving hors d'oeuvres that have lost their textural integrity. We have all suffered through a soggy tartlet or a limp, greasy fried spring roll. Texture is just as important as taste in the world of finger foods. To achieve that perfect crunch, you must understand the science of moisture migration. Moisture is the enemy of the appetizer. When you place a wet filling—like a caprese salad or a creamy dip—directly onto a pastry or bread base too early, the bread acts as a sponge, resulting in a disappointing, soft mess. The solution lies in a technique called "sealing" or "barrier-layering."
Barrier Techniques for Crisp Bases
To maintain the crispness of a cracker or pastry, create a barrier between the base and the topping. This could be a light brushing of melted butter, a thin layer of compound butter, or even a sprinkle of finely grated parmesan or toasted breadcrumbs. These elements prevent the moisture from the topping from seeping into the structure of your vessel. For example, if you are making goat cheese and fig crostini, toast the bread slices thoroughly and then brush them with a light coating of infused olive oil before adding the cheese mixture. This creates a hydrophobic surface that holds up for hours, rather than minutes.
The Reheat Protocol
For items that need to be served warm, you must master the flash-reheat technique. Never try to cook an appetizer from raw to finish while guests are waiting. Instead, bake your items until they are 80-90% cooked. Let them cool completely on a wire rack—never on a flat surface, as steam trapped underneath will cause sogginess—and then store them in the refrigerator. When you are ready to serve, pop them into a preheated 400-degree Fahrenheit oven for just 5-7 minutes. This short burst is enough to crisp the exterior and warm the center without overcooking the dish. This "par-baking" method is the secret to serving restaurant-quality food at home.
The Art of the Cold Assembly
Not every appetizer requires an oven. Some of the most sophisticated bites are served at room temperature, which gives you even more flexibility. Cold assembly items are your best friends during the peak of party chaos. Think of skewers, chilled shrimp, cured meats, or vegetable crudités with herb-infused dips. These items can often be fully assembled hours in advance and stored in the refrigerator, covered loosely with plastic wrap or a slightly damp paper towel to prevent them from drying out. The key is in the presentation and the flavor profiles you choose to highlight.
Balancing Flavors and Textures
When assembling a platter of cold hors d'oeuvres, aim for a balance of salt, acid, fat, and heat. A plate of prosciutto-wrapped melon is a classic for a reason; the saltiness of the cured meat cuts through the sweetness and watery texture of the melon. To make this "make-ahead," wrap your melon balls in prosciutto in the morning, arrange them on a platter, cover them, and refrigerate. Take them out of the fridge at least 20 minutes before serving to let the flavors bloom. Room temperature is crucial for flavor development; cold food often tastes bland because the cold masks the nuances of herbs and spices.
A great hors d'oeuvre should be a balanced microcosm of a full meal, delivering a complete flavor profile in a single, elegant bite that never feels greasy or heavy on the palate.
Another pro tip for cold assembly is the use of fresh herbs and acidity. A squeeze of lemon juice or a shower of fresh microgreens added right before service can revitalize an appetizer that has been sitting in the fridge. Herbs like parsley, chives, and dill provide a brightness that makes the food look and taste freshly made. Keep your herb garnish separate until the final minute. This simple step ensures that your appetizers look vibrant and enticing, rather than tired and oxidized. Invest in a good microplane for grating fresh citrus zest over your cold platters—the aromatic oils released at the last second add a sensory layer that guests will instinctively recognize as high-quality cooking.
Proper Storage and Preservation Techniques
The refrigerator is your staging ground, but it must be organized with precision. If you are preparing a large volume of finger foods, consider investing in half-sheet pans that fit perfectly on your refrigerator shelves. These allow you to store rows of canapés without them touching, which protects their shape and presentation. Never stack delicate items, as they will collapse under their own weight. Use parchment paper between layers if you must store items in containers, but avoid plastic wrap directly touching delicate pastries, as it can cause condensation and softening.
Managing Humidity and Condensation
Condensation is the hidden killer of the "make-ahead" hors d'oeuvre. When you remove a cold container from the fridge, the sudden temperature change causes moisture to bead on the surface of your food. To prevent this, allow your refrigerated items to come to room temperature gradually. Take them out of the fridge about 15-30 minutes before serving. If you are serving a hot appetizer, the oven's heat will evaporate any surface condensation, but for cold items, careful handling is key. Always use non-porous surfaces for storage, such as glass or ceramic, as plastic containers can sometimes impart flavors to delicate ingredients like cream cheese or butter.
The Labeling System
Never rely on your memory when you have a dozen things going on. Use masking tape and a permanent marker to label every single container in your fridge. Note the name of the item, the date it was prepared, and most importantly, the final assembly steps. For example, a note that says "Bake at 400F for 6 mins, garnish with chives" takes the guesswork out of the final moments. This reduces the cognitive load on your brain, which is already working overtime to manage drinks, music, and conversation. When you have a clear, written map, you are much less likely to forget an important ingredient or burn your food.
Elevating Your Presentation
The way you serve your food is just as vital as how you prepare it. Even a simple cracker with cheese can look like a five-star appetizer if it is presented with intention. Use varying heights and textures on your serving platters. A flat tray is functional, but a tiered stand or the use of wooden boards mixed with slate creates visual interest. When arranging finger foods, think about the guest's perspective. Are the items easy to pick up? Do they require a napkin? Are they bite-sized, or do they risk falling apart when someone tries to eat them?
The Ergonomics of Eating
A well-designed hors d'oeuvre is an exercise in culinary ergonomics. The best finger foods can be consumed in one or two bites without creating a mess. If you are serving something that is traditionally messy, provide a small vessel or a cocktail pick. The "one-bite rule" is a gold standard for a reason; it allows guests to continue holding a drink and engaging in conversation without the awkwardness of trying to navigate a large or crumbly piece of food. Always test your recipes for "hand-held feasibility" before the party. If it crumbles, adjust the binding agents—like egg, breadcrumbs, or a reduction—to ensure the structural integrity of the bite.
Themed Platter Arrangements
Group your appetizers logically on your platters. Do not crowd the plate; give each piece of food "breathing room." This not only looks more elegant but also prevents the flavors from mingling prematurely. If you have a strong, pungent cheese, keep it away from delicate seafood bites. Use garnish strategically to fill gaps and add color. Fresh pomegranate seeds, toasted nuts, or sprigs of fresh herbs act as natural "spacers" that make a platter look abundant and well-styled. Remember, guests "eat with their eyes" first, so investing an extra two minutes in the final arrangement pays off in the overall success of the evening.
The Equipment Every Host Needs
You do not need a commercial kitchen to pull off a seamless evening, but a few key pieces of equipment will make your life exponentially easier. First and foremost, you need a collection of rimmed half-sheet pans. These are the workhorses of the kitchen, perfect for baking, storing, and even serving. Pair these with high-quality parchment paper or reusable silicone baking mats. Silicone mats are a game-changer for delicate items like meringues or thin pastry crusts, as they provide a non-stick surface that ensures everything comes off in one piece.
Essential Tools for Success
Beyond the sheet pans, consider these essentials:
Microplane Zester:* For adding that final, bright citrus punch.
Offset Spatula:* For precision when spreading dips or toppings on canapés.
Disposable Piping Bags:* For creating professional, uniform dollops of mousse, cream cheese, or purees.
Heavy-Duty Serving Platters:* Choose materials that can be chilled or warmed depending on the dish.
Temperature-Controlled Storage:* A small beverage fridge can be a lifesaver for freeing up space in your main refrigerator.
Having the right tools allows you to work faster and with more precision. For instance, piping a filling into a pastry shell is not only faster than using a spoon, but it also creates a consistent, high-end look that is impossible to achieve by hand. When you treat your tools as extensions of your own hands, the speed of your assembly will increase, allowing you to focus on the finer details of the plating. A professional chef is only as good as their toolkit, and your home kitchen should be no different. Invest in pieces that are durable, multi-purpose, and easy to clean, as efficiency is the ultimate goal.
Troubleshooting the "Last Minute" Hiccup
Even with the best planning, things will occasionally go wrong. The oven may run hot, a guest might arrive early, or a component might fail. This is where your chef’s instinct—or as we like to call it, "The Blame The Chef" attitude—comes into play. Stay calm. If a batch of pastries burns, have a backup plan. Keep a few "emergency" appetizers in your pantry at all times: a jar of high-quality olives, a box of artisanal crackers, or a tub of good-quality hummus. These staples can be plated in thirty seconds if a primary appetizer fails, and no guest will ever be the wiser.
How to Pivot Gracefully
If you find yourself behind schedule, focus on the most important appetizers and let the less critical ones go. Your guests are there for your company, not to judge the breadth of your menu. If you are stressed, they will feel it. The most successful host is the one who laughs off a burnt tray of hors d'oeuvres and keeps the wine flowing. If you have followed the steps of prep, mise-en-place, and storage, these disasters will be few and far between. Remember that the goal is community and connection, and food is merely the bridge that helps facilitate those things.
True mastery in the kitchen is not just about the ability to cook, but the resilience to adapt when things don't go according to plan, ensuring that the host's peace of mind is never compromised.
When you do encounter a problem, pause, take a deep breath, and prioritize. Is the food still safe? Can it be salvaged? If the answer is no, discard it immediately and move on. Do not waste energy on regret. The hallmark of a seasoned host is their ability to roll with the punches. Your guests will remember the warmth of your hospitality and the quality of the conversation long after they have forgotten the specific appetizer that was supposed to be served. Trust in your preparation, trust in your skills, and most importantly, enjoy the process of sharing your work with the people you love.
Final Thoughts
The art of the "make-ahead" hors d'oeuvre is about much more than just saving time; it is about reclaiming the joy of hosting. By breaking down the complex labor of the kitchen into manageable, efficient steps, you transform the act of entertaining from a source of stress into a rewarding, creative outlet. You have the tools, the techniques, and the strategy to ensure that your next dinner party is not defined by the time you spent hovering over a stovetop, but by the memories you shared around the table.
Remember that every great chef started exactly where you are—striving to master the balance between ambition and reality. The make-ahead methodology is a gift you give to yourself, allowing you to participate in your own life and your own celebrations. As you continue to experiment with different recipes and techniques, keep your standards high but your expectations flexible. The true secret to "Blame The Chef" cooking is that while the planning is rigorous and technical, the final result should always feel effortless, approachable, and full of life.
Now that you have the framework, it is time to put it into practice. Look at your next event not as a list of chores, but as a project in logistics and creativity. Prepare your mise-en-place, respect the science of temperature and texture, and lean into the tools that make your work easier. Your guests will be impressed, your kitchen will remain calm, and most importantly, you will be the host who is actually present for the party. So, fire up your oven, sharpen your knives, and go forth to host the stress-free gathering you deserve. After all, the best parties are the ones where the host is smiling, the wine is chilled, and the hors d'oeuvres—perfectly crisp and flavorful—are already waiting to be enjoyed. Happy hosting, and may your kitchen always be a place of joy and effortless connection.


Get the Next Recipe
Weekly recipes, techniques, and gear picks — straight to your inbox.
