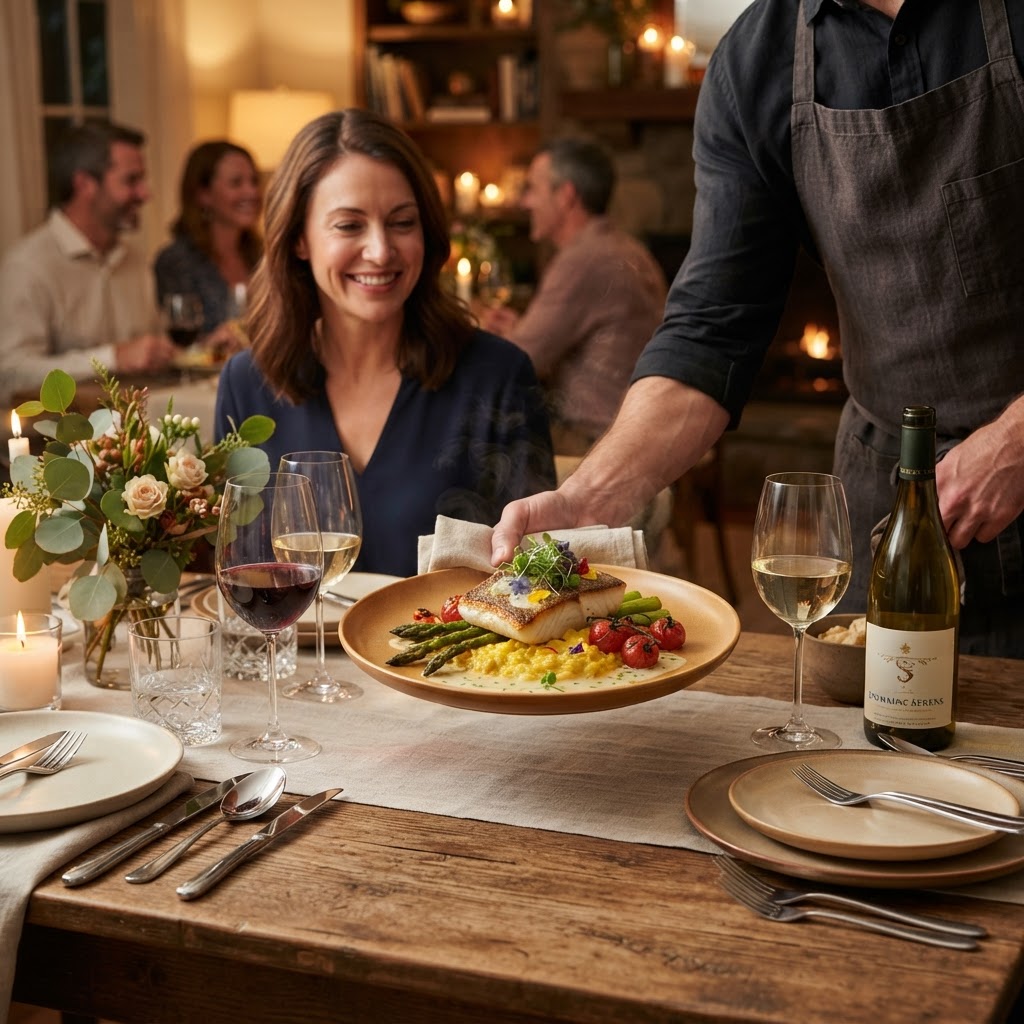
The Art of the "Plated-to-Table" Arrival: Mastering Warming Ratios and Finishing Touches for Restaurant-Style Dinner Party Service
There is a distinct, almost electric moment in a professional kitchen when the final garnish is placed, the tickets are cleared, and the plate is passed over the pass for service. For many home cooks, the dinner party experience is often the inverse: a frantic, sweat-drenched scramble to plate food that has been sitting under the heat of a stove light that isn't quite powerful enough, or worse, cooling rapidly on a cold marble countertop. We often blame the recipe, the timing of our ovens, or the unpredictable nature of our guests for the drop in quality between the sauté pan and the dining chair. However, the secret to restaurant-quality service at home isn’t just in the cooking; it is in the mastery of the Plated-to-Table Arrival. When you understand the physics of heat retention and the logistics of choreography, you stop being a frantic host and start being a culinary conductor.
To achieve this, we must first abandon the idea that a dinner party is a singular event of cooking and eating. Instead, think of it as a series of staged service intervals that require preparation long before the first guest rings your doorbell. The transition from a chaotic kitchen to a serene dining room is a skill set involving thermodynamics, vessel management, and the tactical application of thermal mass. By focusing on the temperature of your plates, the viscosity of your sauces, and the sequence of your finishing touches, you can replicate the professional standard of a high-end bistro in your own kitchen. This post is designed to take you from a home cook who serves lukewarm dinners to a host who delivers perfection with grace, ensuring that every bite remains at its intended temperature profile from the moment it leaves the stove to the moment it hits the table.
True mastery of the table arrival requires a shift in mindset regarding your workflow. Most home cooks try to execute every component of a meal simultaneously, leading to the dreaded "kitchen paralysis" where the sauce breaks while the protein overcooks and the vegetables lose their vibrant snap. Instead, we need to focus on mis-en-place efficiency and the strategic use of passive heat. When you treat your dinner party like a commercial service, you break down the cook into discrete tasks: prep, sear, rest, plate, and finish. By understanding how to manage your warming ratios—the relationship between the mass of your food and the capacity of your serving vessels to hold heat—you can effectively extend your "window of peak flavor" by several crucial minutes. Let us dive into the mechanics of how you can transform your next gathering into a seamless, restaurant-grade affair.
The Science of Vessel Temperature and Thermal Mass
The biggest culprit in a disappointing home-cooked meal is the cold plate. When you place a piping hot piece of seared protein onto a room-temperature ceramic plate, the plate acts as a thermal heat sink, instantly drawing the energy out of your food. This is the primary reason why restaurant food stays warm for longer—it is served on plates that have been held in a warming drawer or a heated cabinet. To replicate this, you must treat your dinnerware as an extension of your cooking equipment rather than just a serving vessel. A plate that is heated to roughly 120-130 degrees Fahrenheit creates a buffer zone that maintains the integrity of your hard work.
Mastering the Warming Drawer
If you have a built-in warming drawer, you are ahead of the curve, but most of us rely on the oven. The key is to avoid "cooking" the plates, which will make them impossible to handle. Set your oven to its lowest possible setting—usually between 150°F and 170°F—and stack your plates neatly. If you do not have space for this, a quick steam-warming method is an excellent alternative. Simply place your plates in a large steam-capable container or a dishwasher rack and run a hot cycle just before you start cooking. This keeps the ceramic saturated with heat, providing a steady baseline for the food to rest upon.
The Thermal Equilibrium Factor
When you calculate your warming ratios, consider the density of the food. A delicate piece of white fish has much less thermal mass than a thick-cut ribeye or a hearty ragu. The more dense the food, the more heat it retains, but the more heat it also strips from an unheated surface. For dense proteins, a warm plate is non-negotiable. For salads or cold appetizers, the opposite is true; your plates should be chilled in the refrigerator for at least thirty minutes prior to service to ensure the greens stay crisp and the vinaigrette maintains its emulsion.
"The difference between a home-cooked meal and a restaurant dish often comes down to the temperature of the vessel. A cold plate is the enemy of professional standards; warm your dinnerware to 120 degrees, and you will immediately notice the improvement in every bite."
Choreography of the Final Plating Sequence
Once the food is cooked and the plates are warm, the final plating sequence is a race against time. The goal is to minimize the "dead air" between the stove and the table. Professional chefs use a technique called staged plating, where all the components are laid out in a logical order—from the base starch to the protein, then the vegetables, and finally the sauce. By prepping your plating zone, you eliminate the need to hunt for spoons, squeeze bottles, or tweezers while the food is losing its structural integrity.
The "Sizzle to Service" Workflow
Start by arranging your warm plates in a line on a clean, dry surface. Place your proteins on a resting rack rather than a cutting board; this prevents the bottom of the meat from becoming soggy with juices while it rests. If you are serving a sauce, keep it in a small, heavy-bottomed saucepan on the lowest possible heat setting. The key here is viscosity control. If your sauce is too thin, it will look unappealing and cool down faster; if it is too thick, it won't coat the ingredients evenly. A proper emulsion should cling to the back of a spoon—this is what we call "nappe" consistency.
The Anatomy of the Plate
The Foundation:* Use a starch (purée, risotto, or grain) to create a level, stable base for the protein.
The Anchor:* Place your protein slightly off-center to create visual dynamism.
The Support:* Layer vegetables or garnishes around the protein to provide height and color contrast.
The Finishing Touch:* Drizzle your sauce last, focusing on the negative space around the protein rather than burying the sear.
Sauce Management and Emulsion Stability
A sauce is the soul of the dish, but it is also the most fragile component. Nothing kills the vibe of a dinner party faster than a sauce that has separated or developed a "skin" from sitting too long. To maintain professional quality, you must understand the chemistry of your sauces. If you are making a butter-based pan sauce or a beurre blanc, you must keep the temperature stable. If it gets too hot, the butter will oil out; if it gets too cold, it will solidify into a greasy mess.
The Hold and Whisk Technique
When holding a butter-based sauce, keep it in a warm—not hot—water bath or a very low-temperature spot on the back of the stove. If the sauce begins to look slightly broken, a splash of cold heavy cream or a single cube of cold butter whisked in vigorously can often re-emulsify the sauce back into a glossy, velvety state. Always keep a finishing emulsion ready—a small amount of high-quality olive oil or fresh herbs can brighten a sauce that has been sitting for ten or fifteen minutes.
The Role of Viscosity
You should aim for a sauce that acts as a bridge between the different textures of your plate. If your protein is dry-seared, your sauce provides the necessary moisture. If your starch is creamy, your sauce provides the acidic contrast. When plating, use a squeeze bottle for precision. This allows you to place the sauce exactly where you want it without flooding the plate, which helps in maintaining the aesthetic integrity of the dish for the brief moment it travels from the kitchen to the dining table.
"A sauce is not just a liquid accompaniment; it is the binding agent that pulls a dish together. Mastering the nappe consistency and learning how to hold your emulsions is the single most important skill for any home cook looking to elevate their service."
Controlling the Ambient Environment
We rarely think about the impact of our dining room environment on the food itself, but the physics of heat loss is dictated by the temperature of the room. A drafty room or an air-conditioned space will cause food to cool at an accelerated rate. When hosting, try to adjust your ambient climate to favor the food. This doesn't mean turning your house into a sauna, but it does mean ensuring that your dining area is free from direct vents or open windows that could rapidly sap the heat from your dinner plates.
The Impact of Plating Speed
Your plating speed is directly proportional to your confidence. The more you have to rethink the arrangement, the longer the food sits exposed to the air. By practicing your plating arrangement on a scrap plate before the guests arrive, you can develop a "muscle memory" for the flow of the dish. A professional line cook can plate a dish in under 30 seconds; your goal should be to replicate this by having all your garnishes—microgreens, sea salt, citrus zest, or toasted nuts—within an arm's reach of your plating station.
The "Guest Seating" Factor
Consider the time it takes for guests to sit down once the food is ready. If you are serving a formal multi-course meal, ensure that your guests are already seated before you begin the final assembly of the plates. This eliminates the "Wait, let me just grab my wine glass" delay that causes your carefully rested ribeye to drop ten degrees in temperature. In a professional restaurant, the service staff works in lockstep with the kitchen; at home, you must be both the head chef and the maître d'.
Finishing Touches: The Architecture of Aesthetics
Professional plating is an exercise in architectural balance. We eat with our eyes first, and the way a plate is finished is the final signal of care and intention. A beautiful dish is not just about the quality of the ingredients; it is about the negative space, the height, and the texture of the final garnish. Avoid the "dump and serve" method; instead, consider every component as a structural element that builds the visual narrative of your meal.
The Rule of Odd Numbers
When placing garnishes, always aim for odd numbers. Three or five sprigs of herbs, or three distinct drops of a reduction, look more natural and aesthetically pleasing than even numbers. This is a classic design principle that creates a sense of organic movement on the plate. It breaks the visual monotony and draws the eye across the surface of the food rather than focusing on a single, static point.
Texture and Crunch
Never underestimate the importance of texture contrast. If your meal consists of a soft purée and a tender protein, you must add a crunchy element to finish the plate. This could be toasted seeds, crispy shallots, or a dusting of crushed nuts. This crunch is not just a garnish; it is a sensory input that keeps the palate engaged. Ensure that this final crunch is added at the very last second, as humidity is the enemy of crispiness. If you add your crunch too early, it will lose its texture before it ever reaches the table.
Logistics of Large-Scale Home Service
When you move beyond a dinner for two to a larger gathering of six or eight, the logistics of the Plated-to-Table Arrival change significantly. You are no longer plating one dish at a time; you are running a production line. The key here is to simplify your menu to accommodate your kitchen capacity. Do not attempt a dish that requires individual pan-searing for eight people if your stove only has space for two pans. Choose dishes that allow for high-volume preparation, such as slow-braised meats, roasted root vegetables, or gratins that can be finished in the oven.
The "Staging Area" Method
Create a staging area on a clean sideboard or a portion of your counter that is dedicated solely to the finished plates. Use a towel-lined tray to move your plates from the kitchen to the dining room. A damp towel placed underneath the plates on the tray acts as an anti-slip mechanism and adds an extra layer of insulation to keep the bottom of the ceramic warm. This is a classic restaurant trick that ensures you don't drop a plate of food while navigating through your home.
The Sequence of Service
"Service is not just about putting food on a plate; it is about the orchestration of timing and movement. When you treat your home kitchen like a professional line, the stress dissipates, and the quality of your hospitality rises to meet the quality of your cooking."
Maintaining Consistency in Multi-Course Menus
A multi-course dinner party requires even more discipline than a single-course meal. You are managing multiple "pick-up" times throughout the evening. The secret to success is the reset strategy. After every course, your kitchen should be cleared of the previous equipment and reset for the next. This prevents the "clutter-creep" that leads to accidents and poor plating. By cleaning your workspace between courses, you give yourself a moment of mental clarity, which is essential for maintaining your focus as the night progresses.
The Cooling Down Period
Between courses, allow yourself a buffer of 10 to 15 minutes. This gives your guests time to digest, finish their drinks, and engage in conversation, while it gives you the necessary time to clean your pans, re-plate, and check your warming ratios for the next course. Never rush the process; the pacing of a meal is just as important as the taste. Use this time to check your fridge temperatures, verify your oven settings, and ensure that your next course is ready for the final pass.
The Final "Sweep"
As the meal concludes, the final course—usually dessert—is often an afterthought. However, it should be treated with the same level of care as the entrée. If you are serving a warm dessert, ensure your plates are heated. If you are serving cold, make sure your spoons are chilled. These small, deliberate touches signal to your guests that you have mastered the entire experience, from the first bite to the final farewell.
Final Thoughts
The transition from a home cook to a master of the Plated-to-Table Arrival is a journey of refinement. It is about acknowledging that while the recipe is the blueprint, the execution is the architecture. By focusing on the temperature of your plates, the precision of your saucing, and the choreography of your movements, you elevate the humble act of cooking into a true art form. Do not be discouraged by the learning curve; even the best professional chefs spent years in the "weeds" before they achieved the level of mastery that looks effortless.
Remember that the ultimate goal of all this technique is not to show off, but to provide a comfortable, memorable experience for your guests. When you are confident in your workflow, you are not trapped behind a counter; you are present, calm, and able to enjoy the company of those you’ve invited. The "Blame The Chef" philosophy has always been about taking control of your kitchen, and by mastering these service techniques, you are taking the most important step toward becoming a truly confident, professional-grade host. Start small, focus on the details, and don't forget: keep those plates warm.
Consistency is your greatest tool. The more often you practice these techniques—whether it’s a Tuesday night dinner for your family or a Saturday night gala for your friends—the more natural it will become. You will find that you are no longer "cooking" in the traditional sense; you are "managing service." This shift in perspective is what separates the average home cook from the exceptional one. Keep pushing the boundaries of your craft, keep refining your plating aesthetic, and most importantly, keep enjoying the process of bringing people together over a meal that is served exactly as it was intended.
As you look forward to your next event, reflect on the specific hurdles you have faced in the past. Was it the timing of the sides? The cooling of the sauce? The lack of space? By isolating these issues and applying the principles of thermal mass, staged plating, and ambient control, you can solve them one by one. There is no greater satisfaction in the culinary arts than the moment a guest takes that first bite and you know, with absolute certainty, that you have hit the target. Keep refining, keep practicing, and your table will become the most sought-after seat in town.
The art of the plated-to-table arrival is a testament to the fact that you don't need a commercial kitchen to achieve professional results. You need a plan, a bit of physics, and a commitment to the details. Whether you are serving a simple roasted chicken or an intricate multi-course tasting menu, the rules remain the same. The heat stays with the food, the plate stays warm, and the host stays in control. Take these lessons, apply them to your own kitchen, and watch as your dinner parties are transformed into events that linger in the memory long after the last plate has been cleared. The chef is no longer to be blamed for a cold meal; the chef is now the master of the service, and the service is nothing short of extraordinary.
Final tip for the road: always, always double-check your salt and acidity levels right before you plate. A dish that tastes perfect in the pan can lose its vibrancy during the transition to the table. A quick hit of sea salt or a drop of fresh lemon juice just as you are putting the finishing touches on your plate can revive the flavors, ensuring that the food tastes as bright and bold as you intended it to be. You are now ready to execute the perfect service. Go forth and cook with the confidence of a professional.
Get the Next Recipe
Weekly recipes, techniques, and gear picks — straight to your inbox.
