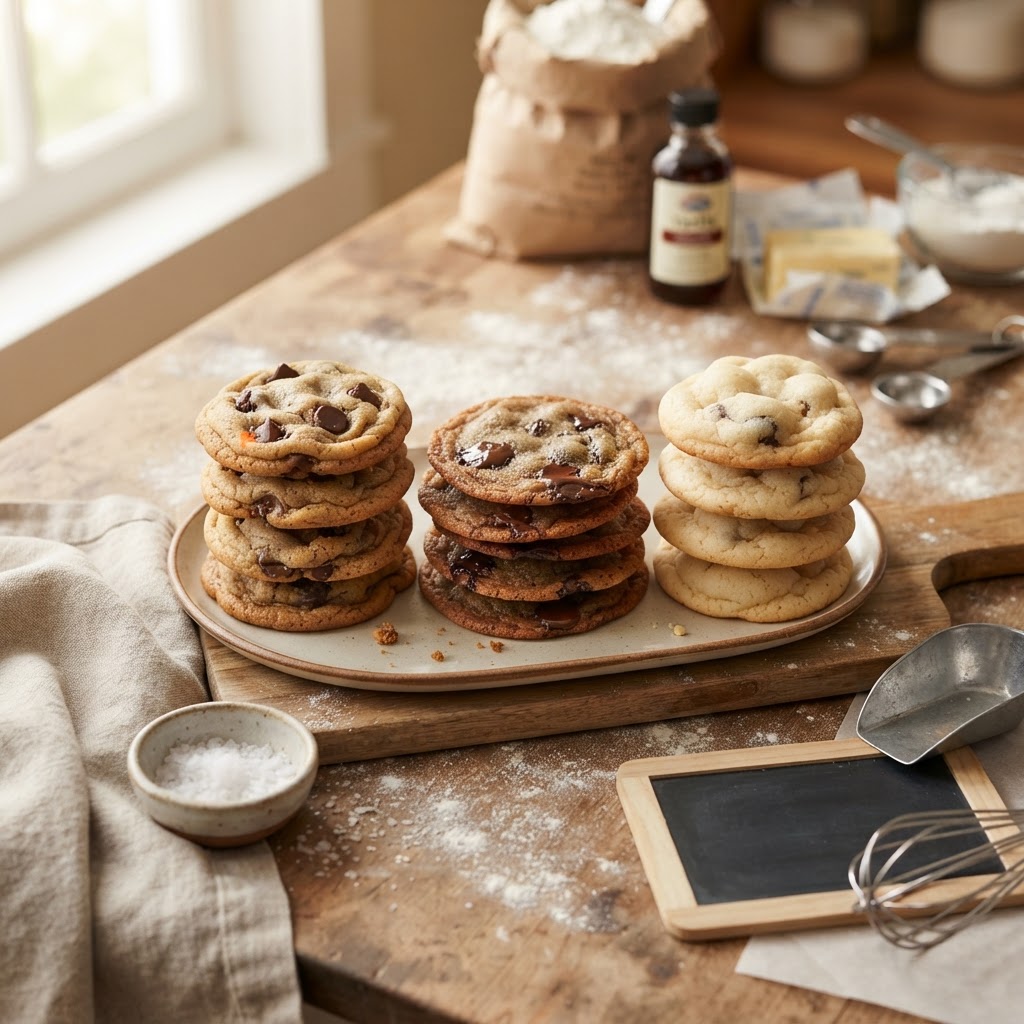
The Baker’s Cheat Sheet: How Fats, Temperatures, and Ratios Change Your Cookie Texture
Baking is frequently described as a science, yet it remains the most poetic form of culinary alchemy we have in the modern kitchen. Unlike roasting a chicken or sautéing vegetables, where you can rely on intuition and the occasional taste test, baking demands a profound respect for the chemistry occurring within the oven. When you set out to create the perfect cookie, you are essentially balancing the volatile relationships between sugars, proteins, and fats. If you have ever wondered why your cookies spread into thin, caramelized puddles while your friend’s cookies remain puffy and cakey despite using the same recipe, you are witnessing the direct consequences of ingredient manipulation.
The journey to the perfect cookie begins long before you preheat your oven. Every ingredient, from the precise protein content of your flour to the temperature of your butter, acts as a variable in a complex equation. Professional pastry chefs do not simply follow instructions; they understand the structural integrity of their dough and how thermal energy dictates the final outcome. Whether you crave a chewy center, a crisp edge, or a soft, pillowy bite, the path to that specific texture is paved with deliberate choices. By mastering the fundamental ratios and techniques, you stop being a prisoner to your recipes and become a master of your own pantry.
In this guide, we are going to dissect the anatomy of the cookie. We will pull back the curtain on the role of fats, the physics of sugar, and the critical influence of temperature control. Baking is a repeatable craft, but it is also one that rewards those who pay attention to the smallest details. Put away your guesses and prepare to elevate your baking game with the precision that separates home hobbyists from those who understand the true science of the sweet. Let us dive deep into the foundations of the perfect bake, ensuring that every batch you pull from the oven is exactly what you intended it to be.
The Foundation of Fat: Butter vs. Shortening
The fat you choose to incorporate into your dough is the primary architect of your cookie’s texture. Whether you are working with cold cubes of butter or shelf-stable shortening, you are determining the structural foundation of the final product. Butter is approximately 80 to 82 percent fat, with the remainder composed of water and milk solids. This water content is crucial because it turns to steam during the baking process, helping the cookie rise and creating a complex flavor profile through the caramelization of milk solids.
Shortening, on the other hand, is 100 percent fat and contains no water. Because it lacks water, it does not produce steam, which results in a cookie that is significantly more stable and less likely to spread during the baking process. If you want a tall, puffy cookie that holds its shape, shortening is a powerful tool in your arsenal. However, because shortening lacks the distinct, rich flavor of dairy, many chefs choose to utilize a 50/50 blend of butter and shortening to achieve the structural stability of the latter with the luxurious mouthfeel and taste of the former.
The secret to a bakery-style cookie isn’t just the recipe; it is the deliberate choice of fat, which serves as the canvas upon which all other flavors are painted.
Temperature is Everything
The state of your butter—whether it is cold, room temperature, or melted—dramatically alters the consistency of your dough. Creaming butter and sugar at room temperature (about 65°F to 67°F) creates air pockets that expand in the oven, leading to a light, aerated crumb. Conversely, using melted butter creates a denser, chewier cookie because the fat is already in a liquid state, which promotes a quicker spread and a fudgier center. If you are aiming for a cookie with a crispy edge and a soft, molten middle, starting with melted butter is your best path forward.
The Sugar Spectrum: More Than Just Sweetness
Sugar does much more than provide sweetness; it is a vital structural component that influences both the spread and the browning of your cookies. During the baking process, sugar undergoes a chemical reaction known as the Maillard reaction, which is responsible for the deep golden color and the rich, toasted flavor profiles we love in a classic chocolate chip cookie. The type of sugar you use acts as a hygroscopic agent, meaning it attracts and holds onto water, which is key to maintaining a chewy texture over several days.
Granulated white sugar promotes crisp edges because it creates a faster spread, allowing the edges of the dough to set quickly in the heat of the oven. Brown sugar, conversely, contains molasses, which adds acidity and moisture. This acidity helps activate the baking soda, while the moisture ensures the cookie remains soft and tender. By adjusting the ratio of white to brown sugar, you can exert total control over your cookie's final personality.
The Ratio Rule
If you want a cookie that leans toward the crispy side, increase your ratio of white sugar to brown sugar. If you prefer a dense, chewy, or "soft-baked" style, lean heavily into the brown sugar. A standard starting ratio is often 1:1, but many professional recipes shift toward 2:1 in favor of brown sugar to maximize that sought-after chewiness. Experimenting with dark brown sugar versus light brown sugar will also introduce deeper notes of toffee and caramel into your cookies, further complicating the flavor profile in the best possible way.
Flour, Protein, and the Role of Gluten
Flour is the structural backbone of your cookie. The protein content in your flour—specifically the development of gluten—is what determines how much chew your cookie has. When flour is mixed with liquid, the proteins gliadin and glutenin bind together to form gluten. In bread baking, we want this, but in cookie baking, we generally want to keep it to a minimum to ensure the cookie remains tender rather than tough or bread-like.
For the most delicate, melt-in-your-mouth cookies, many bakers opt for cake flour or a blend of all-purpose and cake flour. Cake flour has a lower protein content, which limits gluten development, resulting in a softer crumb. If you are aiming for a classic, chewy cookie, standard all-purpose flour is the gold standard. It provides just enough structure to hold the cookie together without making it overly resilient or dry.
Understanding the protein content in your flour is like understanding the foundation of a house; if you use the wrong strength, the structural integrity of your bake will eventually collapse under its own weight.
Avoiding Over-Mixing
Once you add your dry ingredients to your wet ingredients, the clock starts ticking. The longer you mix the dough, the more gluten you develop. To ensure a soft and tender cookie, always mix your dough until the flour is just barely combined. You should see a few streaks of flour remaining before you fold in your mix-ins. This technique minimizes gluten development and prevents the "tough cookie" phenomenon that often haunts beginner bakers.
The Impact of Thermal Energy and Timing
Temperature is the invisible hand of the oven. A common mistake is assuming that a "standard" oven temperature is always 350°F. While 350°F is a great starting point for a balanced cookie, minor adjustments can yield major results. Baking at a higher temperature, such as 375°F, will cause the edges of the cookie to set almost instantly, resulting in a crispy exterior and a raw, gooey center. Baking at a lower temperature, such as 325°F, allows the cookie to bake more evenly, resulting in a uniform texture throughout.
The Importance of the Cooling Rack
The baking process does not end when you pull the tray from the oven. Carryover cooking is a real phenomenon. Cookies continue to firm up as they sit on the hot baking sheet. If you transfer your cookies to a wire rack too early, they may fall apart. If you leave them on the sheet too long, they may become overbaked and crunchy. A good rule of thumb is to let the cookies set on the baking sheet for exactly three to five minutes before transferring them to a cooling rack to stop the cooking process entirely.
The Art of the Chill: Why Patience Pays Off
Perhaps the most overlooked step in the cookie-making process is the chilling period. After you have mixed your dough, resist the urge to bake it immediately. Chilling the dough in the refrigerator for at least 24 to 48 hours allows for a few critical chemical changes to take place. First, the flour has time to fully hydrate, which leads to a more uniform texture and better flavor. Second, the fats solidify, which prevents the cookies from spreading too rapidly once they hit the heat of the oven.
The result of this patience is a cookie with a deeper, more complex flavor profile and a much more desirable texture. The chilled dough develops a richness that mimics toffee, and the final bake will be significantly more professional in appearance. If you are struggling with cookies that turn into thin, greasy disks, the answer is almost always to get them colder before they go into the oven. Treat your dough like a fine wine—it needs time to breathe and evolve.
Troubleshooting Spread
If your cookies are still spreading too much, consider these adjustments:
Increase the Flour:* Add an extra tablespoon or two to the mix.
Reduce the Sugar:* Too much sugar liquefies in the oven, encouraging spread.
Check Your Leavening:* Ensure your baking soda is fresh; expired leaveners won't provide the lift you need.
Liners:* Use parchment paper rather than a greased baking sheet to prevent excessive slippage.
Enhancing Flavors with Salt and Add-ins
Salt is the secret weapon of the professional baker. It does not just make a cookie taste "salty"; it enhances the sweetness of the chocolate, the nuttiness of the butter, and the depth of the brown sugar. Many recipes call for a small amount of table salt in the dough, but for a gourmet touch, finish your cookies with a sprinkle of flaky sea salt immediately after they come out of the oven. The contrast between the sweet cookie and the sharp, crunchy salt is a hallmark of high-end pastry.
When it comes to add-ins like chocolate chips, nuts, or dried fruit, quality is paramount. If you are using chocolate, use high-quality chocolate chunks rather than standard morsels. Chunks create pools of molten chocolate throughout the cookie, whereas chips are engineered to retain their shape and provide a more uniform, albeit less exciting, bite. Always toast your nuts before adding them to the dough; this releases their natural oils and adds an incredible crunch that raw nuts simply cannot provide.
When you incorporate add-ins, you are building layers of flavor. Think of your dough as the floor and your chocolate, nuts, and salt as the furniture and decorations; the room is only as good as the items you choose to place inside it.
The Science of Leavening: Baking Soda vs. Baking Powder
The difference between baking soda and baking powder is a common point of confusion for home cooks. Baking soda (sodium bicarbonate) is a base, and it requires an acidic ingredient—like brown sugar, molasses, or buttermilk—to activate. Once activated, it releases carbon dioxide, which gives the cookie lift. Baking powder already contains an acid, making it a "complete" leavening agent that only requires moisture and heat to activate.
Most classic cookies rely on baking soda. Because brown sugar is acidic, it works in perfect harmony with baking soda. However, if your recipe calls for too much baking soda, the cookies may develop a metallic, soapy aftertaste. If you find your cookies are tasting slightly "off," you may be over-leavening. Stick to the precise measurements in your recipe, and always remember to whisk your leavening agent thoroughly into your dry ingredients to ensure it is distributed evenly, preventing "flat spots" or oddly shaped bubbles in your final bake.
Final Thoughts
Baking the perfect cookie is a lifelong pursuit, but it is one that becomes significantly more rewarding once you understand the variables at play. By controlling the temperature of your ingredients, manipulating your sugar ratios, and respecting the need for chilling, you can craft a cookie that rivals any artisanal bakery. Remember that the "Blame the Chef" philosophy is built on the idea that failure is simply data; if a batch does not come out quite right, analyze the texture, taste the profile, and adjust your variables for the next round.
Do not be afraid to experiment. Take the foundation we have discussed here and customize it. Swap out fats, tweak your sugars, or play with your flour protein levels until you find the exact texture that makes you happy. Cooking is about nourishment, but baking is about precision and joy. When you take the time to measure properly and understand the chemistry, you move from being a follower of instructions to being a culinary expert in your own right.
Lastly, never underestimate the power of environment. Your kitchen’s humidity, the calibration of your oven, and even the type of baking sheet you use—whether it is light-colored aluminum or dark, non-stick steel—will affect your results. Keep a notebook, track your adjustments, and celebrate the process as much as the result. There is truly nothing more satisfying than pulling a tray of warm, fragrant, perfectly textured cookies from the oven, knowing that you achieved that consistency through knowledge, patience, and a little bit of science. Happy baking!
As you continue to refine your technique, consider how other factors might influence your final bake. For instance, the elevation of your kitchen plays a significant role in how cookies rise and set. At higher altitudes, the air pressure is lower, which causes cookies to rise more quickly and potentially collapse before the structure has set. If you are baking at a high altitude, you may need to slightly increase your flour, decrease your leavening agents, and potentially increase your oven temperature to help the cookie set before it expands too much. These nuances are what separate the good bakers from the great ones.
Consider also the importance of proper measurement. We highly recommend using a digital kitchen scale for all your baking projects. While cups and spoons are convenient, they are notoriously inconsistent. One baker's "cup of flour" can weigh anywhere from 120 grams to 160 grams depending on how packed the flour is in the measuring cup. By switching to grams, you eliminate the single largest variable in the baking process, ensuring that every batch of dough has the exact same hydration and protein-to-fat ratio. This level of consistency is the hallmark of a professional-grade kitchen.
Furthermore, do not ignore the quality of your butter. While many home cooks use whatever is on sale, the difference between a high-fat European-style butter and a standard commodity butter is palpable. European butter often has a higher fat content—sometimes up to 84 percent—and a lower water content, which means less steam, more richness, and a more delicate crumb. While it might seem like a small detail, these micro-decisions add up to a macro-experience. If you want to impress your guests or simply treat yourself to the absolute best result, start sourcing high-quality ingredients as your baseline.
We often talk about the "perfect" cookie, but perfection is subjective. Some prefer the thin, lacy edges that shatter upon impact, while others want a cookie so thick and chewy it feels like a treat from a high-end confectionary. The beauty of this craft is that you get to decide what the standard is. Once you understand how these variables—fat, sugar, flour, and heat—interact, you have the power to engineer your own dream cookie. Use these guidelines as your starting point, but let your palate be your ultimate guide. Every time you step into the kitchen, you are adding to your repertoire of skills and developing a more intuitive understanding of how the world of baking works.
Finally, share your results. Baking is a communal act. Whether you are gifting a batch of your latest experiments to a neighbor or bringing a box into the office, the joy of a homemade cookie is meant to be shared. When you explain the science behind why a cookie is chewy or why a certain butter brand made a difference, you are sharing that knowledge and lifting the bar for everyone around you. Thank you for being a part of the "Blame The Chef" community, and here’s to many more batches of delicious, scientifically sound, and perfectly baked cookies in your future. Remember, the next time something doesn't turn out quite right, don't blame the ingredients—look at the chemistry and find your path to success.
To recap the most critical elements for your next session: keep your butter cool if you want height, use melted fat for a fudgy center, balance your sugars based on your desired texture, and always—always—chill your dough. These three pillars will serve you well regardless of the specific recipe you are following. If you can master these, you are ahead of 90 percent of the home bakers out there. Keep your workspace clean, your tools organized, and your oven calibrated. The science is on your side, and your oven is waiting to transform those basic pantry staples into something truly extraordinary. Every tray of cookies is a fresh opportunity to refine your craft, so don't be afraid to keep testing, tasting, and adjusting. Your perfect cookie is closer than you think.
When you look back on your early batches compared to the ones you are producing now, you will likely notice a significant shift in quality. That is the result of applying these principles. It is not magic; it is the deliberate application of culinary physics. You have mastered the basics of fats, sugars, and thermal energy, and that foundation will serve you for every other baked good you attempt, from delicate pastry shells to hearty loaves of sourdough bread. Keep pushing boundaries, keep learning, and most importantly, keep enjoying the process of creating something sweet. The journey of the home baker is never truly finished, and that is exactly why we love it.
As you wrap up your baking session, take a moment to clean your station. A organized kitchen leads to an organized mind, and that translates directly into better results. Wipe down your counters, wash your mixing bowls by hand to preserve their longevity, and store your dry ingredients in airtight containers to keep them fresh for your next bake. When you care for your tools and your workspace, you are signaling to yourself that your baking is a serious pursuit worthy of your time and effort. It is these small habits that collectively define the quality of your output.
Lastly, reflect on the flavor profile of the cookies you just made. Was the balance of salt correct? Did the chocolate chunks provide enough of a bite? Was the chewiness at the level you desired? If not, make a note in your digital log or recipe card. Maybe next time you increase the brown sugar by ten percent, or perhaps you toast your walnuts for an extra minute to get that deeper, nuttier flavor. This iterative feedback loop is how chefs develop signature recipes. Your "Blame The Chef" toolkit is now well-stocked with the theory required to make these calls confidently. We look forward to seeing what you create next.
In the final assessment, the cookie is a test of character. It demands patience during the chilling phase, precision during the measuring phase, and bravery during the baking phase. It rewards those who are willing to learn and punishes those who rush. If you have followed these steps, you are already well on your way to consistent, high-quality results. Every cookie is a lesson, and every oven pull is a victory. So, keep the apron on, keep the oven preheated, and never stop questioning the "why" behind the "how." You are now equipped to bake with the best of them.
Final check on your process: Are your dry ingredients sifted? If you’re making a delicate cookie, sifting is a non-negotiable step to ensure no clumps of flour ruin the texture. Have you checked the expiration date on your baking powder? It’s a common culprit for lack of rise. Is your parchment paper high quality? Cheap paper can burn at high temperatures. All of these minute details matter. You’ve got the knowledge now, and you’ve got the tools. Go forth and create something beautiful.
The world of baking is vast and full of wonder. From the chemistry of the Maillard reaction to the structural integrity of a perfect macaron, there is always something new to learn. But for now, you have the definitive cheat sheet for cookies. You have the understanding of fats, the strategy for sugars, and the patience for chilling. You have the blueprint to turn flour, butter, and sugar into something that brings people together. That, in its own right, is a beautiful thing. Keep baking, keep sharing, and keep refining. We’ll be right here to support your next culinary endeavor.
One final note on storage: once your cookies are fully cooled, store them in an airtight container with a piece of white bread. The cookies will absorb the moisture from the bread, keeping them soft for days longer than they would be otherwise. This is the kind of professional trick that keeps your hard work tasting fresh. It’s a simple, effective way to ensure that your effort is preserved. You’ve done the hard work, now make sure you can enjoy the fruits of your labor for as long as possible. See you in the next blog post!




Get the Next Recipe
Weekly recipes, techniques, and gear picks — straight to your inbox.
