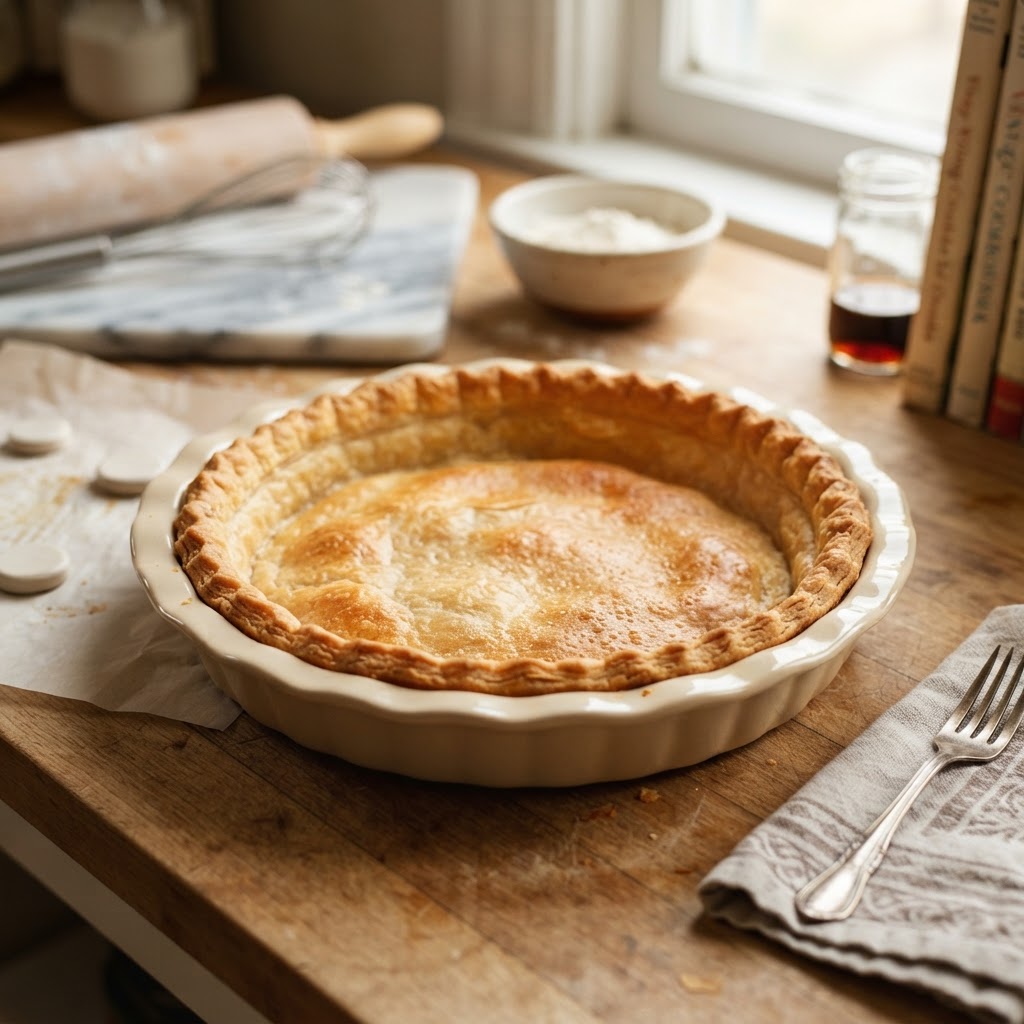
The Baker’s Guide to Blind Baking: How to Achieve Perfectly Crisp Crusts Without a Soggy Bottom
There is arguably no greater disappointment in the world of pastry than pulling a beautifully constructed tart from the oven, only to discover a tragic, gummy, and pale underbelly. We have all been there, standing in the kitchen with a gorgeous filling—perhaps a vibrant lemon curd or a rich, glossy chocolate ganache—only to realize the pastry shell has failed us entirely. The phenomenon known as the "soggy bottom" is the arch-nemesis of every home baker, yet it is entirely preventable with one essential technique: blind baking. Mastering this process is the singular bridge between being a novice who struggles with store-bought crusts and a confident home baker who produces professional-grade, shatteringly crisp pastry shells every single time.
Blind baking, or par-baking, is the practice of baking a pie or tart crust without its filling, often weighed down to prevent the pastry from puffing up or sliding down the sides of the tin. While it might feel like an unnecessary extra step when you are already tired from rolling out dough, I promise you that it is the secret weapon of the culinary world. This process ensures the starch in your flour is properly gelatinized and the butter has rendered out, creating those beautiful, flaky layers that define a perfect crust. When you bypass this step, the moisture from your filling seeps into the raw dough before the heat can crisp it, resulting in an unappealing, dense texture that no amount of fancy decoration can hide.
In this guide, we are going to demystify the art of the blind bake, stripping away the intimidation factor and providing you with the technical knowledge to achieve bakery-perfect results. Whether you are working with a classic pâte brisée, a sweet pâte sucrée, or a rustic savory crust, the principles remain the same. We will dive deep into the chemistry of fat and flour, the necessity of temperature control, and the exact timing required to achieve that elusive, golden-brown finish. Prepare to banish the soggy bottom from your kitchen forever, because once you understand the "why" and "how" of blind baking, your pies will never be the same again.
The Science of the Perfect Crust
To truly understand blind baking, you must first respect the chemistry of your ingredients. A great crust is a delicate balance of fat, flour, and water. The fat—typically cold, unsalted butter—creates distinct layers as it melts, releasing steam that pushes the layers of flour apart, which gives us that characteristic flakiness. However, if that fat melts too quickly before the dough hits the heat, or if the dough is not chilled, you lose those layers. Blind baking acts as a thermal barrier, locking those layers into place before you introduce a wet, heavy filling that would otherwise sabotage the integrity of your hard work.
Temperature is Your Greatest Asset
The single most important rule in pastry is keeping everything cold. I cannot stress this enough: work with chilled butter, use ice-cold water, and chill your dough at every possible stage. When we talk about blind baking, that final chill before the crust hits the oven is non-negotiable. If you try to bake a warm, soft dough, the butter will leak out immediately, causing the crust to shrink and lose its shape. By letting the dough rest and firm up in the refrigerator or freezer for at least thirty minutes before baking, you ensure that the fats stay solid just long enough for the oven heat to turn the water in the butter to steam, creating that iconic lift.
Flour and Gluten Management
The type of flour you choose for your crust also dictates the texture. For a tender, crumbly result, all-purpose flour is generally your best bet because it has a moderate protein content. If you use a high-protein bread flour, your crust will end up tough and chewy, which is the exact opposite of what we want. Furthermore, avoid overworking your dough. When you add liquid to flour, you begin to develop gluten, which gives structure to bread but creates a tough, board-like texture in pastry. Handle your dough gently, use a light touch, and always incorporate your liquids sparingly.
"The secret to a perfect pastry shell isn't found in a complex recipe, but in the patience to keep your butter cold and your process disciplined."
Mastering the Foundation: Rolling and Fitting
Before you can even think about the oven, you have to master the mechanics of fitting the dough into your tin. Many home bakers struggle with the dreaded "slump," where the sides of the crust slide down the tin during the bake, leaving you with a shallow, uneven shell. This usually happens because the dough was stretched too thinly during the rolling process or, more commonly, because it wasn’t pressed firmly enough into the corners of the tin. You want to lift your dough and gently drape it into the tin, rather than pulling at the edges to make it fit.
The Importance of the "Corner" Fit
Using a small ball of leftover dough, gently nudge the pastry into the corner of the tart pan or pie plate. You want a 90-degree angle at the base. If the dough doesn't reach the corner properly, it will create a pocket of air or a weak spot that will inevitably slump once the heat hits it. I recommend leaving a generous overhang of dough around the edges of the pan. Don't trim it until the dough has been fully chilled and partially baked; the extra weight of the overhang actually helps anchor the sides in place, preventing that unsightly shrinkage.
Pricking the Base
While some bakers are divided on this, I firmly believe in docking—the process of pricking the bottom of your crust with a fork. By creating small holes across the base, you provide a pathway for steam to escape, which prevents the base from puffing up like a balloon in the center. If you are using a very heavy pie weight, this is less critical, but for tarts, it is standard practice. Just be careful not to pierce all the way through if you are worried about filling leakage, though in a par-baked shell, a little docking is a safety net you’ll be happy you used.
The Art of Weighted Baking
Weight is the engine of the blind bake. Without it, your crust will inevitably lose its shape, puffing up in the middle or slouching down the sides. While professional bakers have ceramic pie weights, you don't necessarily need fancy equipment. Dried beans or raw rice are excellent, cost-effective alternatives that work just as well. The key is to ensure that the material is distributed evenly across the entire surface of the bottom and pushed slightly up against the walls of the crust to act as a supportive scaffold.
Parchment Paper vs. Foil
Always line your crust with a piece of parchment paper before adding your weights. I prefer parchment over aluminum foil because it is easier to shape into the corners and doesn't run the risk of tearing the delicate, cold dough. Make sure the paper extends a few inches above the edges of the tin so you can easily lift the weights out once the par-baking phase is complete. This makes the removal process clean and prevents you from accidentally crumbling the edges of your perfectly sculpted crust.
The Two-Stage Bake
This is a professional secret: you should never blind bake in one single go. Instead, use a two-stage process. First, bake the crust with the weights inside at a relatively high temperature—usually around 375°F (190°C)—for about 15 to 20 minutes. This sets the structure. Then, remove the weights and the parchment paper, and return the empty shell to the oven for another 5 to 10 minutes. This second, weightless phase allows the bottom to brown and dry out, ensuring that the base is just as crisp and golden as the fluted edges.
"A soggy bottom is not a failure of character; it is a failure of heat management. Treat your crust with the respect of a slow, controlled bake."
Choosing Your Weights: A Quick Guide
Ceramic/Metal Pie Weights:* Reusable, durable, and conduct heat well.
Dried Beans:* The ultimate budget-friendly choice. Keep them in a dedicated jar labeled "pie beans"—they will never be cooked for dinner, but they will serve you for years.
Raw Rice:* Excellent for filling deep corners and hard-to-reach areas, though it is a one-time use option.
Achieving the Perfect Golden Finish
Once you have removed your pie weights, your crust will likely look pale and somewhat "clammy." Do not be discouraged; this is exactly how it should look at this stage. The color development happens in that crucial final phase without the weights. If you want a truly professional finish, you can use an egg wash during the final few minutes of baking. A mixture of one egg yolk and a tablespoon of heavy cream brushed lightly over the bottom of the shell will create a moisture-proof seal and a beautiful, glistening golden color that adds an extra layer of protection against sogginess.
The Sealant Method
For fruit pies or tarts that are particularly juicy, many pastry chefs use an "edible sealant" inside the shell before adding the filling. This is especially helpful if you are concerned about moisture leaching into the crust. You can brush the interior of your warm, blind-baked shell with a thin layer of melted apricot jam, a beaten egg white, or even a bit of melted chocolate. Each of these creates a barrier that keeps the crust crisp even if the filling sits for several hours. It’s a simple trick, but it makes a massive difference in the texture.
Troubleshooting Color
If your edges are browning too quickly while the bottom remains pale, use a pie crust shield or a simple ring of aluminum foil to cover the fluted edges. This allows the center of the pie to continue baking without the outer edges burning. If you don't have a shield, you can easily fashion one by cutting a circle of foil, folding it into quarters, and cutting the center out to create a donut shape that covers just the edges of the crust.
When to Stop: Identifying Doneness
How do you know when to pull that shell out of the oven? It is easy to be timid, but you need to bake the shell until it is a deep, honey-gold color. If it looks pale, it is not finished. The color you see at the end of the blind bake is the color your crust will have for the remainder of its life; it won't magically brown further once the filling is added, especially if the filling is cold or requires a shorter bake time.
The Smell Test
Your nose is often more reliable than your timer. As the crust reaches the final stages of the blind bake, the smell of toasted butter and nutty, cooked flour will fill the room. That aroma is a sign that the Maillard reaction is taking place, which is exactly what we want for depth of flavor and structural crunch. If you don't smell it, it’s not ready. Trust your senses, and don't be afraid to add those extra three minutes to the timer.
Cooling and Storage
Once the crust is perfectly baked, let it cool completely on a wire rack. Never add your filling to a hot or even warm crust, as the heat will melt the fat in the pastry, turning it from crisp to greasy in a matter of minutes. If you are preparing your crust in advance, store it in an airtight container at room temperature for up to two days. If you live in a humid climate, be aware that pastry is a sponge—it will absorb ambient moisture, so a quick "refresh" in a 350°F (175°C) oven for five minutes is a smart move before you add your filling.
Advanced Tips for the Home Baker
If you are looking to take your blind baking to the next level, consider experimenting with the temperature of your oven. Some chefs swear by starting the crust at 400°F (200°C) for the first five minutes to give it a quick "blast" that helps hold its shape, before dropping the temperature down to 350°F (175°C) to finish the bake. This burst of heat helps the moisture evaporate quickly, keeping the bottom thin and crispy rather than thick and doughy.
Working with Different Crusts
Not all crusts behave the same way. A chocolate crust (using cocoa powder) is much darker than a standard crust, making it very difficult to judge color by eye. With chocolate pastry, you must rely entirely on the timer and the texture. It should feel firm to the touch. Similarly, gluten-free crusts tend to be more fragile. When blind baking gluten-free pastry, be extra generous with the chilling time, as these flours often lack the elasticity to hold their shape during the initial heat phase.
The "No-Chill" Myth
There is a lot of advice floating around about skipping the chilling phase to save time. I am here to tell you: don't do it. The gluten network needs time to relax, and the fat needs time to solidify. If you roll your dough and put it immediately into the oven, the dough will shrink back, pull away from the edges of the pan, and lose its intricate fluted design. Chilling is the ultimate insurance policy. If you are short on time, put the shaped crust in the freezer for 15 minutes. It is a non-negotiable step for anyone who wants a beautiful, professional result.
"A well-executed crust is the stage upon which your filling performs. If the stage collapses, the performance is lost, regardless of how good the filling tastes."
Essential Gear for Success
Heavy-Gauge Metal Tart Tin:* I prefer metal over ceramic because it conducts heat much more efficiently, helping you achieve a crispy bottom.
Removable Bottom Pan:* This is non-negotiable for tarts; it makes the transition from pan to serving plate effortless.
Digital Thermometer:* While not strictly for baking, knowing your oven’s true temperature is a game-changer. Often, home ovens run 25 degrees lower or higher than the dial suggests.
Pastry Weights:* If you bake frequently, invest in these. They are worth their weight in gold for the consistency they provide.
Final Thoughts
Blind baking is not just a technical chore; it is an act of care. It is the moment you decide that your creation deserves to be the best version of itself. When you take that extra time to weigh down the dough, to watch the color, and to ensure the fat is perfectly tempered, you are elevating your baking from a hobby to an art form. The soggy bottom is no longer a looming threat, but a distant memory, replaced by the satisfying, audible "snap" of a fork breaking through a perfectly crisp, golden-brown crust.
Remember that baking is iterative. Your first blind-baked crust might not be perfect, and that is perfectly fine. You might find that your oven runs hotter than mine, or that you prefer a different ratio of fat to flour. That is the beauty of the process. Keep notes, observe your results, and adjust accordingly. Each time you step into the kitchen, you are building your intuition and becoming a more capable chef. You have the knowledge now; all that remains is the practice.
So, the next time you find yourself staring at a bag of flour and a block of butter, don't shy away from the prospect of a tart. Embrace the blind bake. Respect the cold, honor the temperature, and take your time. Your future pies, tarts, and quiches will thank you, and more importantly, your guests will be blown away by the texture you’ve achieved. Happy baking, and may your crusts always be golden, crisp, and never, ever soggy. Keep experimenting, keep measuring, and most importantly, keep enjoying the process of creating something truly delicious from scratch. The world of pastry is wide and wonderful—you have only just begun to scratch the surface of what you can accomplish with a rolling pin and a bit of patience. Stay tuned to Blame The Chef for more deep dives into the science of baking, and remember: if the crust is right, the rest of the dessert will follow suit with ease. Now, go preheat that oven and start crafting your masterpiece.




Get the Next Recipe
Weekly recipes, techniques, and gear picks — straight to your inbox.
