The Baker’s Guide to Blind Baking: Mastering Weights, Temperatures, and Crust Integrity for Perfect Pies and Tarts
There is perhaps no greater heartbreak in the world of pastry than pulling a beautifully decorated pie from the oven, only to discover a tragic, soggy abyss staring back at you from the bottom crust. We have all been there, hovering over the oven glass, hoping against hope that the structural integrity of our work will hold, only to be met with a pale, limp, and undercooked base that refuses to slice. This phenomenon, often referred to by professional pastry chefs as the "soggy bottom blues," is the primary reason many home bakers shy away from elaborate tarts and custard-filled pies. However, the solution is not to avoid these desserts, but to master the essential, albeit sometimes misunderstood, technique of blind baking. Once you learn to respect the science behind par-baking or fully baking your crust before adding the filling, the world of professional-grade pastry opens up to you in a way you never thought possible.
At its core, blind baking is the process of baking a pie crust or tart shell without its filling. This is a non-negotiable step for recipes where the filling is either added cold, requires very little time in the oven, or is so moisture-dense that the crust would remain raw and doughy if baked simultaneously. When executed with precision, this technique ensures a shatteringly crisp texture, a deep golden-brown hue, and a clean, buttery flavor profile that highlights, rather than distracts from, your chosen filling. Many beginners perceive this as an unnecessary extra step, but I assure you that in the high-stakes environment of a professional kitchen, this is the secret weapon that separates a mediocre pie from an award-winning one. It is about patience, temperature control, and understanding how fat reacts to heat during those crucial first twenty minutes of the bake.
In this comprehensive guide, we are going to strip away the intimidation factor and break down the anatomy of the perfect crust. We will explore the specific ratios of fat to flour, the importance of maintaining an ice-cold work surface, and the strategic use of weights to prevent the dreaded slump. You will learn why the temperature of your butter can make or break your puff and why chilling is not a suggestion—it is a chemical requirement. Whether you are aiming for the perfect lemon curd tart or a deep-dish savory quiche, this guide will serve as your roadmap to pastry success. By the time you reach the end of this deep dive, you will no longer blame the chef for your pastry failures; you will be the chef in your own kitchen, wielding your rolling pin with the confidence of a seasoned pro.
The Chemistry of a Perfect Crust
Fat, Flour, and the Physics of Flakiness
To understand blind baking, we must first understand the fundamental composition of a pie crust. A classic pâte brisée relies on the simple ratio of flour, fat (usually butter), salt, and liquid. The magic happens when the fat remains in small, distinct shards or pebbles throughout the dough. As these bits of butter hit the heat of the oven, they melt, creating pockets of steam that push the layers of flour apart. This separation is what we define as flakiness. If your butter is too warm during the mixing process, it incorporates into the flour, resulting in a sandy, crumbly mess that lacks structural integrity.
The Role of Gluten Development
While we want a tender crust, we also need enough gluten development to keep the dough from falling apart when moved. However, over-working the dough is the enemy of the home baker. By minimizing contact with your hands—which are natural heat sources—and using a light touch, you preserve the texture. When rolling, avoid adding excessive extra flour, which can toughen the final product. A gentle, consistent motion is key to maintaining that delicate balance between a crust that holds its shape and one that melts in your mouth.
Temperature Control: The Golden Rule
Everything in baking, especially when dealing with laminated or shortcrust doughs, comes down to temperature. I often advise my students to place their dry ingredients in the freezer for ten minutes before beginning. Use ice water when hydrating the dough, adding it one tablespoon at a time to ensure you reach the "shaggy mass" stage without adding excess moisture. A crust that has been properly chilled before it hits the oven is a crust that will retain its shape, shrinking significantly less than a warm, pliable piece of dough.
"A pie crust is not merely a vessel for fruit; it is a canvas for flavor and a showcase of mechanical skill. When you master the temperature of your ingredients, you master the geometry of the plate."
Essential Tools for the Blind Bake
Choosing Your Weights
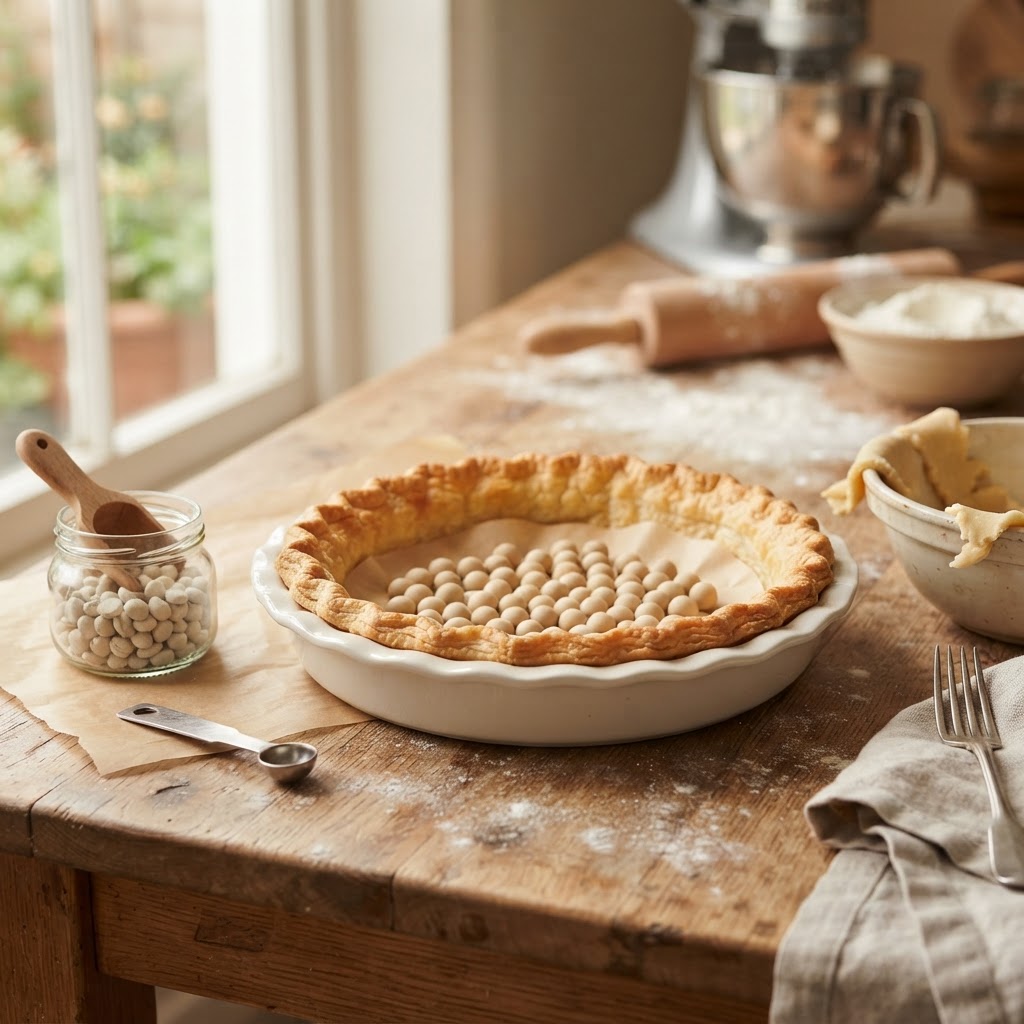
The most common question I receive is about what to use to weigh down the pastry. Ceramic pie weights are the gold standard because they distribute heat evenly and are reusable for a lifetime. If you do not have those, dried beans or rice work just as well, provided they are dedicated only to baking. The goal here is to create a downward pressure that prevents the bottom of the crust from puffing up while the sides set. If you don't use enough weight, the air trapped underneath will inevitably create an uneven, bubbly bottom that is difficult to fill and unsightly to serve.
The Importance of Parchment Liners
Many bakers make the mistake of placing weights directly onto the pastry. This is a recipe for disaster, as the weights can embed themselves into the dough or, in the case of rice or beans, get stuck in the butter. Always line your dough with a sheet of parchment paper or heavy-duty foil. Ensure the paper is large enough to cover the bottom and extend slightly up the sides, which makes the removal process much cleaner. This creates a protective barrier that keeps your crust pristine while it undergoes the initial high-heat bake.
Docking and Why It Matters
For some recipes, especially sturdy cookie-like crusts or shortbread bases, docking—the act of pricking the bottom of the dough with a fork—is an essential step. This creates small vents that allow steam to escape evenly, further preventing those large, unruly air bubbles. However, use caution with very thin or delicate crusts, as docking can sometimes lead to filling leakage later on. I recommend docking for thick, sturdy tart shells but being more conservative with standard pie crusts, relying instead on high-quality weights.
Mastering the Oven: Temperatures and Timing
The Initial High-Heat Blast
Blind baking is rarely a "set it and forget it" task. Most professionals use a two-stage baking process. Start your oven at a higher temperature, typically between 375°F (190°C) and 400°F (200°C). This initial blast of heat is designed to set the structure of the pastry immediately, firming up the edges and the base before the butter has a chance to fully melt and cause slumpage. This step usually lasts for about 15 to 20 minutes, or until the edges are set and beginning to color.
Removing the Weights
Once the crust is set, it is time to remove the weights and the parchment. At this point, the crust will likely look pale and somewhat damp on the bottom. Do not be alarmed; this is exactly where you want to be. Remove the weights carefully—they will be extremely hot—and set them aside to cool. If the edges of your crust are browning too quickly, you can use a pie shield or a ring of aluminum foil to cover the rim of the crust while the center finishes baking. This allows you to achieve a deep golden base without burning your decorative edges.
The Final Dry-Out
Return the crust to the oven at a slightly reduced temperature, roughly 350°F (175°C), for another 10 to 15 minutes. This stage is crucial for evaporating the last bits of moisture from the bottom of the shell. You want the crust to be a beautiful, uniform golden brown. If you are baking a tart that will require a long time in the oven with a filling, you might only "par-bake" it until it is matte and set, rather than fully browned. If you are adding a cold filling (like a cream or ganache), you must bake the crust until it is fully crisp.
Troubleshooting Common Pastry Pitfalls
The Dreaded Shrinkage
Shrinkage happens when the gluten in the flour tightens during baking. This is often caused by not allowing the dough to rest properly after rolling it out or by stretching the dough when placing it into the pie dish. Always make sure to gently press the dough into the corners of the pan rather than pulling on the edges. If your dough is still cold and relaxed when it hits the oven, it will shrink significantly less. Furthermore, letting your shaped crust chill in the refrigerator for at least 30 minutes before baking is a non-negotiable step for minimizing shrinkage.
The Color Test
How do you know when it’s truly done? Don't just rely on the timer; trust your eyes and your sense of smell. A finished, blind-baked crust should smell toasted, almost like browned butter. The color should be consistent across the entire surface. If you see pale patches, you have uneven heat or uneven moisture distribution. Never be afraid to leave it in for an extra three to five minutes; a slightly darker, more caramelized crust is almost always more flavorful than a pale, undercooked one.
Preventing Leaks
If you are planning on adding a liquid filling, you have one more secret weapon at your disposal: the egg wash or the sugar seal. Five minutes before your crust is finished baking, brush the bottom with a lightly beaten egg white. This creates a thin, protein-based barrier that seals the pores of the pastry, preventing the filling from soaking in. This is especially effective for fruit pies where the juices are notorious for turning the crust into a mushy, unappealing mess.
"A professional chef knows that the difference between a good dish and an exceptional one is often found in the techniques that go unseen. Your crust is the foundation of your architectural achievement."
Advanced Tips from the Professional Kitchen
The Lamination Hybrid
For those who want to take their crust to the next level, consider a laminated shortcrust. By folding your butter into the flour and performing a few simple turns, much like you would for a croissant, you create thousands of micro-layers. When this dough is blind-baked, it puffs into a crisp, airy delight that is miles ahead of a standard, worked-together crust. It requires more practice, but the result is a texture that is impossibly delicate and truly professional in every sense.
Flavor Infusions
Don't be afraid to experiment with your crust. Adding a tablespoon of granulated sugar or a pinch of finely chopped herbs (like thyme for a savory tart) can elevate the profile of the entire dish. When blind baking, these infusions become more concentrated as the water evaporates. A savory crust with a hint of toasted sage is the perfect partner for a woodland mushroom quiche, while a crust enriched with almond flour adds a subtle, nutty sweetness that pairs beautifully with seasonal stone fruits.
Storage and Re-heating
Did you know you can blind-bake your crusts days in advance? A fully blind-baked, airtight crust can stay fresh at room temperature for several days. If you find your crust has lost its crispness, a quick three-minute blast in a 350°F oven will restore it to its former glory. This is a life-saver for home cooks who are hosting dinners and want to minimize their workload on the day of the event. Always remember that the crust is a living component of your dish, and it reacts to humidity just as much as it reacts to heat.
The Art of the Decorative Edge
Fluting and Crimping
While the blind-baking process is primarily functional, the edge of your crust is where you can show off your personal style. Whether you prefer a simple fork-tined edge, a classic fluted scallop, or a sophisticated braid, the structural integrity of your design depends on the temperature of your dough. If the butter melts during the crimping process, your beautiful design will slump in the oven, turning into a sad, shapeless blob. Keep your hands cool and keep your dough chilled.
Egg Washes for Aesthetics
Beyond the structural seal mentioned earlier, an egg wash—a mix of an egg yolk and a splash of cream or water—provides that signature professional sheen. When applying this, be careful not to let the wash pool in the bottom of the pan, as it can cause the crust to stick to the parchment. Lightly brush the rim and the exposed edges of the crust halfway through the baking process to ensure a deep, glistening golden-brown finish that catches the light and makes your pie look like it stepped out of a magazine.
Dealing with Complex Shapes
If you are working with fluted tart pans, you have to be extra careful to press the dough into the ridges. If you leave air gaps between the dough and the pan, the pastry will lose its definition during the bake. Take a small scrap of your dough and use it as a "ball" to press the pastry into the crevices of the tin. This ensures that every ridge is preserved, giving you that iconic professional finish that defines the difference between a homemade tart and a boutique bakery creation.
Final Thoughts
Mastering blind baking is perhaps the most significant milestone a home baker can reach. It is the transition from simply following a recipe to understanding the mechanics of how food transforms under heat. When you accept that the crust is not just a container, but an active participant in the flavor and texture of your dessert, you begin to see every pie and tart as an opportunity for precision. The time spent chilling your dough, the care taken with your weights, and the vigilance required during those final minutes in the oven are not chores—they are the hallmarks of a craft being honed.
Do not be discouraged if your first attempt results in a slight slump or a patch that isn't quite golden enough. Baking is a science, and even the most seasoned executive chefs have had their fair share of pastry disasters. The key is to analyze what went wrong, adjust your temperature, check your ingredient ratios, and try again. The tactile memory you build from handling the dough, feeling the texture of the butter, and observing the color changes as the crust bakes is something that no cookbook can teach you. That knowledge belongs to you.
Finally, remember that the goal of this process is to create joy. Whether you are baking for a holiday gathering, a quiet Tuesday treat, or simply to challenge your own abilities, there is an immense sense of satisfaction that comes from lifting that piece of crust and finding a perfect, golden, shatteringly crisp base. You are no longer at the mercy of the oven, and you certainly no longer need to blame the chef. You have become the master of your own kitchen, one perfectly baked crust at a time. So, preheat that oven, prepare your weights, and start creating something extraordinary. Your future pies are counting on it.




Get the Next Recipe
Weekly recipes, techniques, and gear picks — straight to your inbox.
