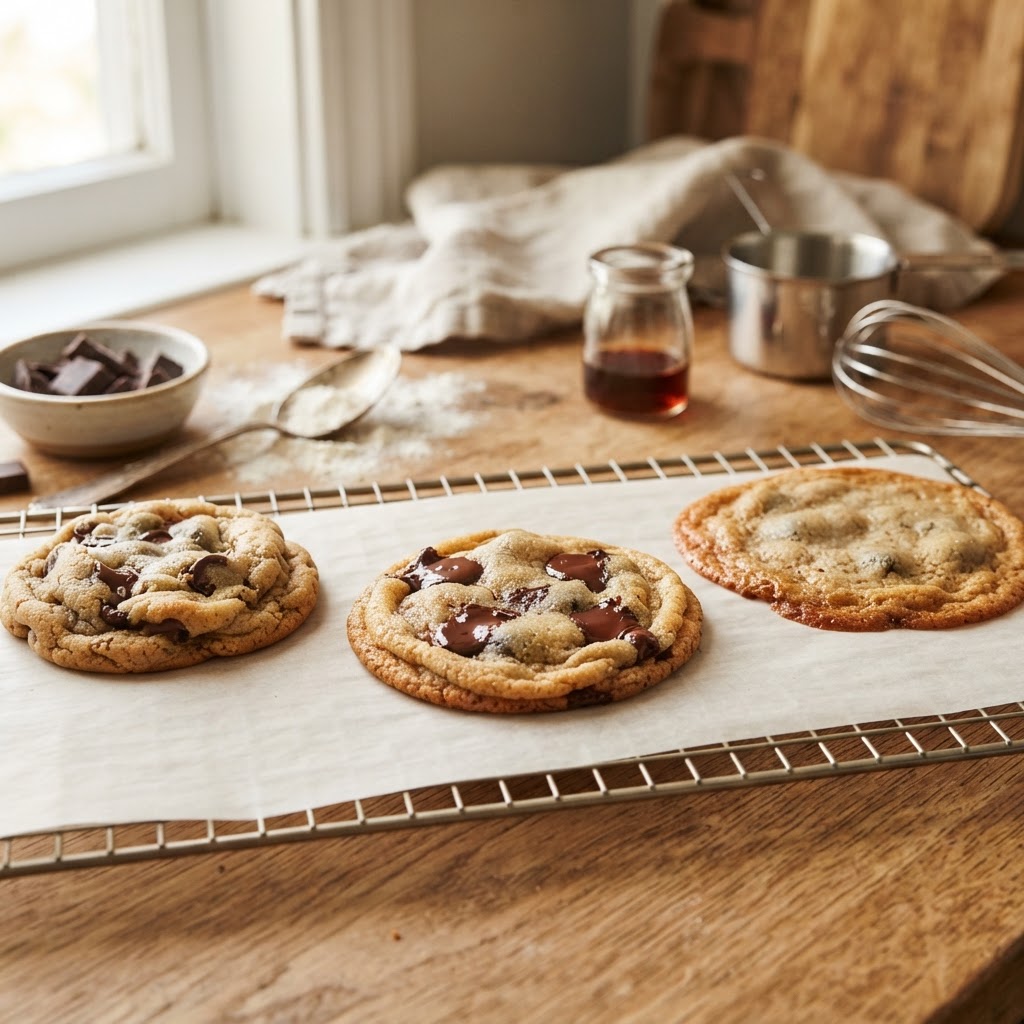
The Baker’s Guide to Cookie Spread: Mastering Ingredient Ratios and Chilling Times for Perfect Edge-to-Center Texture
There is perhaps no greater heartbreak in the domestic kitchen than pulling a tray of what you expected to be thick, chewy, bakery-style cookies out of the oven, only to find a singular, unified sheet of caramelized sugar spread across your baking pan. We have all been there, hovering over the oven light with baited breath, watching as a perfectly portioned scoop of dough slowly transforms into an unrecognizable, thin, and brittle lace cookie. It is a rite of passage for every home baker, yet it remains one of the most frustrating variables to master. The phenomenon of cookie spread is not a matter of luck or divine intervention; it is a precise intersection of chemistry, thermodynamics, and the structural integrity of your ingredients.
When we talk about "spread," we are essentially discussing the battle between gravity and the solidification of the dough structure. As the butter in your cookie dough melts, it creates a liquid environment that allows the other ingredients to flow, while the sugars liquefy and the proteins begin to denature. If the structural framework—provided by your flour and leavening agents—is not strong enough to hold that weight, the cookie collapses outward rather than rising upward. Understanding this mechanism is the difference between a sad, greasy puddle and a glorious, thick cookie with a crisp edge and a gooey, soft center. It requires us to move beyond simple recipes and begin thinking like a food scientist, treating our pantry staples as tools of structural engineering.
In the following guide, we are going to dismantle the science of the bake. We will look at how the temperature of your butter dictates the initial expansion of the cookie, why your oven calibration might be the secret enemy of your cookie texture, and how the ratio of white sugar to brown sugar fundamentally alters the moisture content of your final product. This is not just a collection of tips; it is a masterclass in controlling the physics of your oven. By the time we reach the end of this journey, you will no longer blame the chef when a batch goes wrong—you will be the one in control, adjusting variables with the precision of a professional pastry artist.
The Chemistry of Sugar and Its Role in Structural Integrity
The Hygroscopic Nature of Sugar
The type of sugar you choose is the primary driver of moisture and spread in any dough. Sucrose, or standard white granulated sugar, is essentially neutral in its acidity, but it provides excellent structure because it encourages a crisp edge. When it dissolves, it creates a syrup that holds the cookie together as the edges set. However, brown sugar contains molasses, which is acidic and highly hygroscopic, meaning it loves to attract and hold onto water. This added moisture is exactly what gives you that chewy center, but if your ratio leans too heavily toward brown sugar, your dough will simply be too wet to maintain its shape, leading to excessive spread.
Managing Sugar Ratios
To achieve the perfect balance, professional bakers often stick to a ratio of 1:1 or 2:1, depending on the desired outcome. If you are aiming for a thinner, crispier cookie, a higher percentage of white sugar is your best friend, as it promotes faster melting and a longer "flow" time before the edges set. Conversely, if you want a thick, puffy cookie, you should increase your white sugar percentage slightly to ensure the structure sets quickly before the butter has a chance to fully liquify and spread the cookie across the pan. Always remember that sugar is not just a sweetener; it is a structural component that dictates the "melt" rate of your cookie.
"Sugar is the architect of the cookie. It doesn't just provide sweetness; it dictates the speed at which your dough collapses in the heat of the oven, directly controlling the final diameter of your bake."
The Butter Debate: Temperature, Aeration, and Fat Content
Softened vs. Melted Butter
The state of your butter is perhaps the most important variable you can control. Many recipes call for "room temperature" butter, which is a bit of a misnomer. In professional baking, we prefer butter at roughly 65°F (18°C). At this temperature, the butter is malleable enough to be creamed with sugar but still cool enough to hold the air pockets you beat into it. If your butter is too soft or slightly melted, the aeration process is effectively ruined. Once those air pockets collapse, there is nothing to prevent the dough from turning into a greasy, spread-heavy mess the moment it hits the heat of the oven.
The Role of Fat Content
Not all butter is created equal. The butterfat percentage in your block of butter significantly impacts how much the cookie will spread. Standard American supermarket butter often contains more water than European-style high-fat butter. Because water turns to steam, high-water butter can cause your cookies to rise and then crater, resulting in a thin and uneven surface. High-fat butter (typically 82-84% butterfat) provides a more stable, rich foundation. If you are struggling with uncontrollable spread, check your butter label—using a higher fat content can lead to a more luxurious, tender crumb that holds its shape with much greater reliability.
Flour Ratios and the Importance of Protein
Understanding Gluten Development
Flour is the scaffolding of your cookie. The protein content in your flour is what allows the structure to form; as you mix your wet and dry ingredients, you begin the process of gluten development. Too little gluten, and your cookie will not hold its shape at all, spreading instantly into a flat pancake. Too much gluten, and you end up with a tough, bread-like texture that lacks the delightful snap of a great cookie. Most cookies thrive on all-purpose flour, which offers a moderate protein content perfect for a soft but sturdy bite.
Adjusting Flour for Altitude and Humidity
Environmental factors play a massive role in how your dough interacts with the oven. In high-humidity environments, flour acts like a sponge. If your kitchen is damp, your dough may need an extra tablespoon or two of flour to compensate for the moisture it has absorbed from the air. When you are measuring flour, always use a digital scale rather than volume measurements. The "dip and sweep" method is notoriously inconsistent and can lead to a 20% variance in your flour density, which is often the sole reason a recipe fails at home but works perfectly in a test kitchen.
* Measure flour in grams: 1 cup of AP flour is typically 120-125g.
* Sift your flour to ensure consistent aeration.
* If your cookies consistently spread too much, try adding 10-15g of extra flour to your recipe.
The Critical Importance of Chilling Time
Solidifying the Fat
Why must we chill our dough? It is not just about convenience; it is about chemistry. When you mix your dough, the butter softens and the sugar begins to dissolve into the wet ingredients. If you put that dough directly into the oven, the butter will hit its melting point almost immediately, causing the dough to flow before the starch in the flour has a chance to absorb the moisture and set. By chilling your dough for at least 24 hours, you allow the fats to re-solidify and the flour to fully hydrate, resulting in a much more complex flavor profile and a significant reduction in spread.
The Flavor Development Factor
Beyond the physics of spread, resting your dough is a culinary secret for depth of flavor. During the resting period, the enzymes in the flour break down complex carbohydrates into simple sugars, and the vanilla and butter flavors marry together, resulting in a richer, more toasted taste. Resting the dough is the hallmark of the "bakery-style" cookie. If you can manage the patience, a 24 to 48-hour chill in the refrigerator is the single most effective way to elevate your baking from "home-cooked" to "professional grade."
"Chilling is the quiet hero of the baker. It is not just a pause in the process; it is a transformative period where the chemistry of your dough balances, leading to deeper flavors and structural integrity that no warm-mixed dough can ever achieve."
Implementing a Chilling Strategy
Oven Calibration and Heat Management
The Accuracy of Your Thermostat
Your oven is a lying machine. Most home ovens are off by 10 to 25 degrees, and they fluctuate constantly as the heating element cycles on and off. If your oven is running hot, your cookies will set on the outside before they have a chance to rise, often resulting in a burnt, thin edge. If it is running cold, the butter will melt away before the edges can even begin to brown, leading to that dreaded "pancake" effect. A standalone oven thermometer is not an optional tool; it is mandatory for any serious baker who wants consistent results.
Rack Placement and Airflow
The position of your rack dictates how the heat reaches your cookie. For most cookies, the middle rack is the sweet spot. It allows for even circulation of heat, preventing the bottom of the cookie from browning too quickly while the top remains raw. If you are baking multiple trays at once, remember that this restricts airflow, which will increase your bake time and potentially lead to uneven spread. Always bake one tray at a time, or rotate your pans halfway through the baking cycle to ensure even heat distribution across the surface of the baking sheet.
Ingredient Ratios: The Secret Behind the Bake
Leavening Agents: Baking Soda vs. Baking Powder
Leavening agents are the gas release systems of your cookie. Baking soda is a base and requires an acid—like the molasses in brown sugar—to react and create the lift. Baking powder contains both the base and an acid, meaning it is "double acting" and provides a more consistent, predictable rise. If your recipe is spreading too much, you might have too much leavening, which causes the cookie to rise too fast and then collapse under its own weight. A simple fix is to slightly reduce the amount of leavening, which keeps the cookie dense and prevents excessive expansion.
The Importance of Salt
Salt is the unsung hero of baking. It doesn't just make things salty; it suppresses the intensity of the sugar and strengthens the gluten structure. A pinch of sea salt on top of the finished cookie provides a sensory contrast that makes the rich, buttery notes of the cookie stand out. If your cookies feel flat or one-note, you are almost certainly under-seasoning. Don't be afraid to use a high-quality kosher salt; it provides the structural support and flavor complexity that separates a great cookie from a sugary disaster.
* Check the expiration date of your baking soda; if it is stale, your cookies won't rise.
* Use sea salt for finishing to add texture.
* Balance your sugar profile by testing small batches with varying ratios.
Troubleshooting Your Batch: When Things Go Wrong
Correcting for "Pancake" Cookies
If you pull your tray out and find a flat sheet, don't throw it away. You can often salvage the flavor by using a round biscuit cutter to "re-form" the cookies while they are still warm out of the oven. Simply place the cutter over the warm cookie and swirl it gently in a circular motion to pull the edges back toward the center. This won't fix the internal texture, but it will certainly improve the presentation. For the next batch, increase your chilling time by 12 hours and add a tablespoon of flour to the remaining dough.
Fixing "Rock-Hard" Cookies
On the other side of the spectrum, if your cookies are too hard or dense, you are likely over-baking or using too much flour. Remember that cookies continue to cook for a minute or two after they leave the oven due to the residual heat on the baking sheet. Pull them out when the edges are set but the center still looks slightly underdone. This is the "golden moment" of baking. If you wait until the center looks fully baked, you have already over-baked the edges, and the cooling process will turn the entire cookie into a hard, brittle biscuit.
"Baking is an act of observation, not just following a recipe. Learning to identify the exact moment to pull the tray from the oven is a skill developed through practice and the bravery to trust your instincts over the timer."
The Final Tweak: Surface Texture
To ensure your cookies look like professional masterpieces, try the "pan-banging" technique. About halfway through the baking time, lift the pan and let it drop onto the oven rack. This will cause the cookie to collapse slightly, creating those beautiful, concentric ripples that give you that highly coveted edge-to-center texture. It creates a variety of textures in a single bite, from the crispy, caramelized edges to the soft, chewy ridges of the center. It is a visual and textural flourish that elevates the simple cookie into a gourmet experience.
Final Thoughts
Mastering the perfect cookie is a lifelong pursuit, but it is one that rewards the curious and the patient. By understanding the role of your butter’s temperature, the hygroscopic nature of your sugars, the protein content of your flour, and the non-negotiable necessity of chilling your dough, you move from being a follower of recipes to a master of your kitchen. Remember that every oven is unique and every environment brings its own variables, so give yourself grace when a batch doesn't turn out quite as expected. Instead of blaming the chef, look at the science; the dough is talking to you, telling you exactly what it needs to reach its potential.
As you move forward, keep a baking journal. Record the ambient temperature of your kitchen, the specific brand of flour you used, the exact length of your chilling time, and the adjustments you made to the sugar ratios. This data-driven approach will make you a more confident baker, capable of diagnosing issues before they even make it into the oven. Baking is fundamentally an exercise in precision, but it is also an act of love. When you take the time to perfect these small details, the result is more than just a sweet treat—it is a testament to the skill and care you have poured into your craft.
Finally, do not underestimate the power of high-quality ingredients. Because cookies have so few components, every single one matters. Use real vanilla extract, high-fat European butter, and high-quality chocolate that melts smoothly. Your guests and family will taste the difference immediately. Continue to experiment, continue to bake, and above all, continue to enjoy the process of turning raw ingredients into something that brings joy to those around you. The perfect cookie is not an accident—it is a deliberate creation, and now, you have the knowledge to create it every single time you preheat your oven. Happy baking, and may your edges always be crisp and your centers always be soft.




Get the Next Recipe
Weekly recipes, techniques, and gear picks — straight to your inbox.
