The Baker’s Guide to Cooling and Storage: How to Preserve Texture, Prevent Staling, and Protect Your Bakes
There is a profound, almost spiritual disappointment that settles in the pit of a baker’s stomach when a loaf pulled from the oven, golden and fragrant, suffers a tragic transformation overnight. We spend hours measuring hydration percentages, proofing dough until it feels like a lover’s earlobe, and hovering over the oven door with the anxiety of a parent. Yet, the final, most critical phase of baking is often treated as an afterthought. We assume that once the timer dings and the bake is complete, our job is finished. Nothing could be further from the truth; cooling and storage are not merely the tail end of the process—they are the final, essential steps in the chemistry of your bake.
The science of cooling is essentially a continuation of the baking process, where moisture distribution and crumb setting occur away from the direct heat of the oven. If you slice into a loaf of sourdough or a batch of muffins while they are still radiating heat, you are effectively interrupting the structural integrity of the starch molecules. Steam that has not had the chance to migrate or evaporate will turn your beautiful, airy crumb into a gummy, dense disappointment. By mastering the art of the rack, you can ensure that the textures you worked so hard to achieve remain stable, whether you are serving them an hour later or three days down the road.
Welcome to "Blame The Chef," where we believe that knowledge is the secret ingredient that turns good home cooks into exceptional bakers. In this guide, we are going to demystify the cooling and storage process, moving far beyond the simple instruction to "let cool completely." We will explore the thermodynamics of steam, the impact of ambient humidity on crust crispness, and the precise storage methods that prevent the dreaded staling process from sabotaging your hard work. Grab your wire rack, keep your serrated knife holstered for just a moment longer, and let’s dive into the technical preservation of your kitchen masterpieces.
The Critical Physics of Cooling
When your bread or pastry emerges from the oven, the internal temperature is typically between 190°F and 210°F for bread, or slightly lower for enriched doughs. Even after the heat source is removed, the interior of the product is still undergoing thermal migration. The moisture inside the crumb is in a volatile state, transitioning from a liquid to a vapor. If you trap this vapor by cooling your item inside a closed container or on a solid surface, it will condense back into water, resulting in a soggy, leathery bottom that no amount of toasting can truly save.
The Importance of Airflow
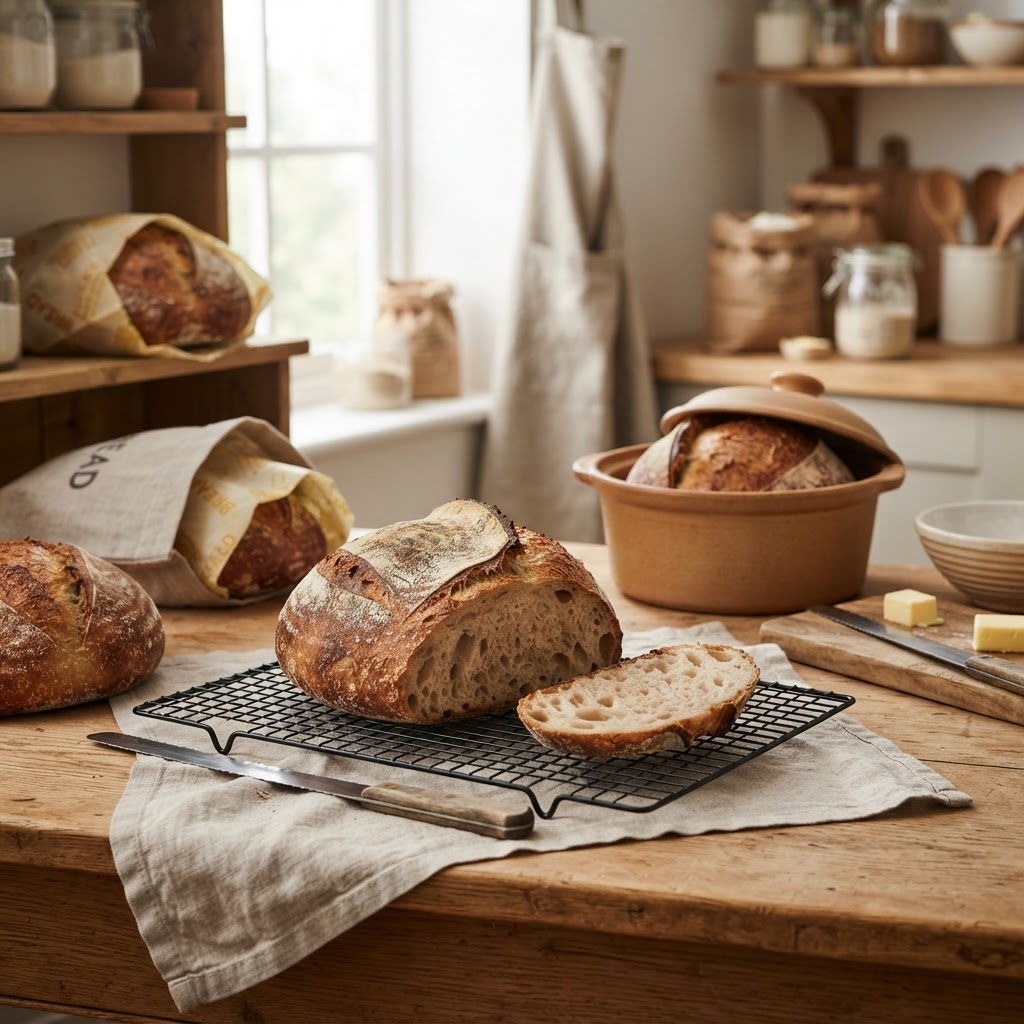
To achieve the perfect texture, you must prioritize convection cooling. This is why a sturdy, elevated wire rack is non-negotiable for every home baker. By raising the product off the counter, you allow air to circulate beneath the bottom crust, preventing the accumulation of steam and ensuring an even set. If you are baking high-hydration breads, a rack with a grid pattern that is too wide may cause the loaf to sag; always choose a fine-mesh wire rack to support the structural weight of the bread while allowing for maximum airflow.
Managing Internal Steam
Many bakers make the mistake of slicing into bread while it is "warm to the touch," thinking the flavor is best at that temperature. While the flavor may be enticing, the crumb is essentially still a gel. As the product cools, the starch molecules begin to retrograde, or firm up, which is what gives your bread its sliceable structure. Cutting too early releases the steam prematurely, drying out the loaf at an accelerated rate. For a standard boule, wait at least two to four hours; for smaller items like cupcakes or cookies, thirty minutes is usually sufficient.
The cooling process is not a passive activity; it is a structural necessity that dictates the final crumb texture and shelf life of your bake.
The Chemistry of Staling and Moisture Retention
Staling is often misunderstood as simply "drying out," but it is actually a chemical phenomenon known as starch retrogradation. When bread is baked, the starch granules absorb water and swell, creating the soft crumb we enjoy. As the product cools and sits, these amylose molecules begin to crystallize and reorganize themselves, pushing water out of the starch structure and into the air or the crust. This is what makes a crusty loaf turn chewy or a soft roll turn brittle and hard.
Temperature Zones and Retrograde Motion
Research has shown that the process of staling occurs most rapidly at temperatures between 32°F and 50°F. This is precisely why you should never store bread in the refrigerator. Storing your artisanal sourdough in the fridge will effectively triple the speed of the staling process, leaving you with a stale, unpalatable loaf in less than 24 hours. The refrigerator environment is a moisture-sucking machine that ruins the delicate balance of crumb hydration.
Managing Ambient Humidity
If you live in a high-humidity environment, your battle is against softness. A crusty baguette left on the counter in a humid kitchen will turn soft and rubbery within hours. Conversely, in a dry or arid climate, your challenge is preventing moisture loss. Understanding your local environment allows you to adjust your storage techniques—using paper bags for crusty items in humid climates or plastic-lined containers for moist cakes in dry climates.
Strategies for Optimal Storage
Once your bake has reached room temperature, the storage phase begins. The golden rule of thumb is: store according to the crust. If you want to maintain a crackling, crispy crust, you must avoid airtight containers at all costs. An airtight container creates a micro-climate of trapped steam that will dissolve the crispness of a crust in minutes. For crusty breads, a brown paper bag or a specialized linen bread bag is the gold standard, as these materials allow for a controlled exchange of moisture.
The Role of Plastic vs. Paper
For soft-crusted items—such as brioche, sandwich bread, or moist muffins—plastic is your friend. Plastic acts as a moisture barrier, trapping the crumb's internal hydration and preventing it from migrating into the air. If you want to keep a cake moist for 48 hours, wrapping it tightly in plastic wrap while it is just barely cool (but not hot) can actually help keep the crumb supple by locking in the residual warmth before it fully evaporates.
The Bread Box Renaissance
The old-fashioned bread box is making a comeback for good reason. It provides an environment that is neither too dry nor too humid, shielding your bread from direct airflow while still allowing for the "breathing" necessary to maintain a balance between a crisp exterior and a soft interior. If you don't have a dedicated bread box, a wooden cutting board with a cloth draped loosely over the top is a professional, effective substitute.
A crusty loaf is a living thing that needs to breathe; trap it in plastic too early, and you sacrifice the very texture you spent all day perfecting.
Freezing: The Baker’s Secret Weapon
If you cannot consume your baked goods within 48 hours, the freezer is your best friend. Contrary to popular belief, freezing is a time capsule that, when done correctly, halts the staling process almost entirely. The key to successful freezing is minimizing surface area exposure and preventing "freezer burn," which is caused by the sublimation of moisture.
Step-by-Step Freezing Technique
Reviving Frozen Bakes
A frozen loaf of bread can be brought back to life with a quick "refresher" bake. Once the loaf is completely thawed, lightly mist the crust with water and place it in a preheated oven at 350°F for 5 to 7 minutes. This will re-crisp the exterior and provide that "fresh from the oven" aroma and crunch that makes home baking so rewarding.
Advanced Tips for Specialty Items
Not all bakes follow the same rules. Pastries, specifically those with high fat content like laminated doughs (croissants, danish), have entirely different cooling requirements. Because butter has a low melting point, cooling these items too quickly in a drafty area can cause the butter to solidify unevenly, affecting the flakiness of the layers. A more gradual cool in a slightly sheltered part of the kitchen is often preferred for lamination.
The Cookie Conundrum
For cookies, the goal is often a crisp edge and a chewy center. If you cool cookies on the hot baking sheet, they will continue to bake due to the residual heat of the pan, which can lead to over-baking. Move cookies to a wire rack after 2 to 3 minutes of "setting" time on the pan. To keep them chewy, store them with a small slice of apple or a piece of soft bread in an airtight container; the cookies will absorb the moisture from the fruit or bread, maintaining that perfect texture.
Cupcakes and Delicate Cakes
For cupcakes and cakes, the biggest enemy is moisture condensation. If you frost a cake before it is completely cool, the heat will melt your buttercream, leading to a slippery, sliding disaster. Always ensure your cake is cool to the touch on the underside of the pan before inverting it. If you are in a rush, a blast chiller or a quick trip to the fridge for the cake layers (once they are mostly cool) is a professional trick to firm up the crumb before frosting.
Common Myths and Mistakes
There is a pervasive myth that if bread feels hard, it is "dead." In reality, bread goes through cycles of hardening and softening based on the environment. If you find your loaf has become hard, don't throw it out. You can often save it by brushing the crust with water and putting it in a 350°F oven for 5 minutes. This process, known as re-heating, can recover 80% of the loaf's original quality.
Don't Blame the Chef for Poor Storage
I often hear people say, "The bread I bought from the bakery only lasted a day." When I ask them how they stored it, they usually admit to leaving it on the counter, uncovered, in a dry house. The best artisan loaf in the world will turn into a rock if left unprotected in a dry environment. You have to be proactive about your storage conditions based on your home's humidity levels.
The "Sourdough" Exception
Sourdough bread, with its higher acidity, naturally resists mold and staling longer than yeasted bread. The lactic and acetic acids produced during the fermentation process act as natural preservatives. Even so, sourdough still benefits from proper storage in a linen bag. Do not be afraid to experiment with your storage environment; if your house is particularly dry, a slightly thicker linen bag can provide the extra insulation your loaf needs.
Master the art of the rack, learn the rhythm of your environment, and you will never have to settle for a stale, gummy, or disappointing bake again.
Final Thoughts
The journey of a loaf of bread doesn't end when it is pulled from the oven; it is a delicate transition from the fiery chaos of the bake to the stable, delicious reality of the table. By treating the cooling and storage phases with the same level of respect and attention as the mixing and kneading stages, you elevate your status from a casual baker to a true artisan. We have discussed the thermodynamics of moisture, the chemical inevitability of starch retrogradation, and the practical, daily habits that ensure your bakes remain as perfect as they were the moment the timer stopped.
Remember, the home kitchen is a living, breathing laboratory. Your environment—the humidity in your air, the draft near your windows, and the temperature of your pantry—plays a pivotal role in the success of your preservation efforts. Do not be discouraged if your first few attempts at storing artisan breads are met with varying results. Experiment with different bags, test the timing of your cooling process, and observe how your bakes react to the shifting seasons. Every mistake is just data in your quest to become a better baker.
Ultimately, "Blame The Chef" is about empowering you to take control of your kitchen. When you understand the 'why' behind these techniques, you are no longer just following a recipe; you are practicing the craft of culinary science. Take the time to let your loaves rest on the rack, double-wrap your freezer goods with care, and never let your hard work go to waste due to improper storage. May your crusts always be crackly, your crumbs always tender, and your kitchen always filled with the comforting, reliable scent of freshly preserved joy. Keep baking, keep learning, and as always, thank you for trusting us with your kitchen journey. The oven is yours—make the most of it.



Get the Next Recipe
Weekly recipes, techniques, and gear picks — straight to your inbox.
