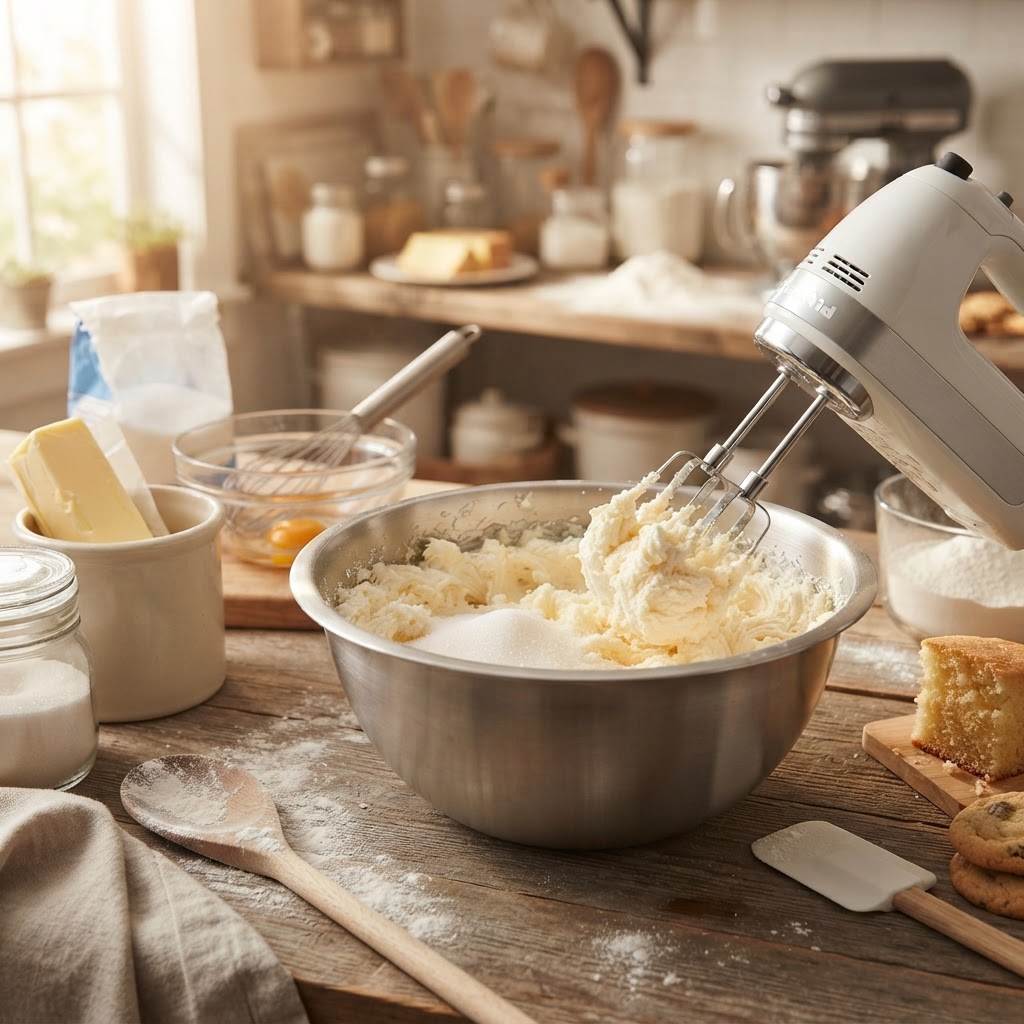
The Baker’s Guide to Creaming: Mastering Fat and Sugar Aeration for Light, Moist Cakes and Cookies
There is a particular kind of alchemy that occurs when you set a stand mixer to a medium-high speed and watch a bowl of seemingly disconnected ingredients transform into a pale, billowy cloud of potential. Many home bakers approach the process of creaming with a casual indifference, treating it as little more than a necessary chore before the real baking begins. Yet, in the professional kitchen, we know that the humble act of beating butter and sugar together is the single most critical bridge between a dense, leaden sponge and a cake that possesses a tender, ethereal crumb. If you have ever wondered why your cookies spread into greasy puddles or why your vanilla cake felt more like a muffin, the answer almost always lies in how you handled the creaming stage. It is here that we build the internal architecture of our baked goods, creating millions of tiny air pockets that will eventually expand in the oven to give our desserts their lift and structure.
Understanding the physics of aeration is what separates the enthusiastic novice from the confident baker. When you beat granulated sugar crystals into softened butter, those sharp, jagged edges of sucrose act like microscopic saws, cutting through the solid fat and creating pockets of air. These pockets are stabilized by the fat, which coats the air bubbles and prevents them from escaping back into the ether. When the baking powder or baking soda—our chemical leaveners—eventually releases carbon dioxide, those gases don’t have to work from scratch; they simply fill the pre-existing tunnels and bubbles we created during that initial vigorous mixing. Mastering this phase allows you to control the final texture of your bake, giving you the power to manipulate density, moisture, and rise with consistent precision every single time you step into the kitchen.
In this guide, we are going to strip away the guesswork and provide you with a rigorous, professional-grade approach to the creaming method. We will cover the vital importance of temperature, the specific chemical interplay between sweeteners and fats, and the common pitfalls that lead to broken emulsions and disappointing results. By the time you finish reading, you will no longer look at your butter and sugar as individual components to be combined, but as the essential scaffolding upon which every successful cake and cookie is built. Whether you are a professional pastry chef in the making or a dedicated home cook looking to sharpen their skills, this deep dive into the science of aeration will transform your relationship with your stand mixer. Let’s take the mystery out of the mixer and get down to the brass tacks of professional baking.
The Foundation: Why Fat and Sugar Need Each Other
The creaming process is fundamentally a physical process rather than a chemical one, although it sets the stage for the chemistry that follows. We start with butter, which is a complex emulsion of water droplets dispersed throughout a network of milk fat crystals. When we introduce sugar, we are looking to achieve a state of physical lightness. The sugar crystals provide the mechanical force necessary to cut into the fat, while the fat provides the viscous medium that holds that air in suspension. Without the sugar, the butter would simply become smoother but never aerated. Without the butter, the sugar would just sit in the bowl as an inert grit.
The ratio of fat to sugar is a topic of much debate, but generally, in the world of classic creaming, you want to maintain a balance that allows for maximum aeration without compromising the structural integrity of the final product. Too much sugar relative to the fat can lead to a syrup-like consistency that collapses under the weight of the flour, while too little sugar won't provide enough mechanical "teeth" to effectively trap air. Professional ratios often hover around a 1:1 or 1:1.5 ratio by weight, depending on whether you are aiming for a delicate pound cake or a chewy, structure-heavy cookie.
"The creaming method is not merely a step to combine ingredients; it is the act of inflating your batter with microscopic balloons that will sustain the rise of your cake long after it leaves the heat of the oven."
The Role of Ingredient Temperature
Temperature is the silent arbiter of your baking success. If your butter is too cold, the sugar crystals will simply bounce off the solid fat, failing to create those vital air pockets. If your butter is too warm—nearing the point of melting—it will lose its ability to hold onto air, turning into a greasy, fluid mess that cannot trap anything. You are looking for that elusive "cool room temperature," typically around 65°F to 68°F (18°C to 20°C). At this temperature, the fat is soft enough to be pliable but firm enough to maintain its crystalline structure, which is essential for holding the bubbles you are beating into it.
The Importance of Sugar Granulation
While many home bakers reach for the bag of standard granulated sugar, professional pastry chefs often consider the grain size. Standard superfine or caster sugar is often preferred for more delicate cakes because the smaller crystals dissolve more easily into the fat and butter, creating a finer, more uniform grain. However, for cookies where you want a bit more "bite" and structure, standard granulated sugar works beautifully. Avoid coarse sparkling sugars or raw, turbinado-style sugars for the creaming phase, as their large, irregular crystals can puncture the delicate emulsion and lead to a coarse, uneven texture in your final crumb.
The Technical Execution: Speed, Timing, and Texture
To achieve the perfect creamed base, you must utilize the right equipment and the right speed. While a wooden spoon and a whisk can get the job done if you have the arm strength of a medieval blacksmith, a stand mixer is your best tool for consistency. You should always use the paddle attachment—never the whisk attachment. While the whisk seems like it would incorporate more air, it is actually designed for aerating liquids like egg whites or cream. The paddle attachment is specifically engineered to cut through the heavy fat and sugar, forcing air into the mixture without over-working the emulsion.
Start your mixer on a low speed to incorporate the sugar and butter into a paste. This prevents the sugar from flying out of the bowl and allows the crystals to begin their work on the butter fat. Once the mixture is a cohesive, pale yellow paste, increase the speed to medium-high. You are looking for a visual transformation. The mixture should shift from a deep, saturated yellow to a pale, off-white or cream color. This change in color is the most reliable indicator that you have successfully incorporated air.
Monitoring Visual Cues
Consistency in the bowl is just as important as the duration of mixing. You are looking for a consistency that resembles fluffy buttercream frosting. It should be light, airy, and should hold a soft peak if you lift the paddle. If the mixture looks greasy or translucent, you have likely over-creamed or started with butter that was too soft. If the mixture remains dense and stubbornly yellow, you haven't whipped it long enough. Always scrape down the bowl periodically to ensure that the butter at the bottom of the bowl is incorporated into the aeration process, or you will end up with a mix of light and heavy batter.
The Timing Factor
There is no "one size fits all" time for creaming, as it depends on the temperature of your kitchen, the power of your mixer, and the volume of ingredients. However, as a general rule of thumb, you should be beating your butter and sugar for at least 3 to 5 minutes at medium-high speed. Do not rush this step. Many bakers stop after 60 seconds because they are anxious to move on to the eggs and flour. If you stop too early, you lose out on volume, which directly translates to a heavier, denser cake.
Integrating the Eggs: The Delicate Emulsion
Once you have achieved that beautiful, pale, aerated fat-sugar base, you are ready to add your eggs. This is where most bakers encounter their first major hurdle: the broken emulsion. Eggs are primarily water, and you are trying to force them into a fat-based mixture. If you add the eggs too quickly, the liquid will overwhelm the fat’s ability to hold it, and the mixture will curdle—that unsightly, separated look that makes a batter appear like scrambled eggs.
To prevent curdling, you must add your eggs one at a time, or even better, in small, steady streams if you are working with large quantities. Wait until each egg is fully incorporated into the batter before adding the next. If the mixture starts to look like it is beginning to break, stop the mixer and add a tablespoon or two of your measured flour. The starch in the flour will help stabilize the emulsion and hold the liquid in place, saving your batter from disaster.
"A broken batter is not necessarily a failed cake, but it is a sign that the delicate balance of your emulsion has been compromised. Treat your eggs with the same patience you gave your butter."
Why Temperature Matters for Eggs
Just as your butter needs to be at a specific temperature, your eggs should be at room temperature as well. If you crack cold, refrigerated eggs into room-temperature creamed butter, the cold temperature of the eggs will cause the butter to seize and harden instantly. This ruins the aeration you just spent five minutes building. Always pull your eggs from the refrigerator at least an hour before you plan to bake. If you are in a rush, place the eggs in a bowl of warm (not hot) water for ten minutes to take the chill off.
The Science of Leavening During Integration
Many recipes ask you to add the leavening agents—the baking powder or baking soda—at the dry stage. However, some professional methods suggest adding the leavener to the creamed mixture before the flour if you are looking for a particularly high rise. While this is less common, it ensures the leavener is perfectly distributed. For the home baker, however, sticking to the standard practice of mixing leaveners with flour remains the safest bet to avoid any localized "pockets" of chemical activity that could cause the cake to rise unevenly and then collapse.
Troubleshooting Common Creaming Failures
Even with the best intentions, things can go wrong in the bowl. If your cake turns out dense, the most likely culprit is an under-creamed base. Remember, if you don't build the air in at the start, no amount of baking powder will give you a light crumb. The chemical reaction of baking powder only acts on the existing structure; it cannot create structural integrity where none exists. If you find your cakes are constantly coming out heavy, increase your creaming time by two minutes next time.
Conversely, if your cakes are rising rapidly in the oven and then sinking in the middle, you might be over-creaming. It is possible to beat too much air into the mixture. When you incorporate excessive air, the structure becomes too fragile to hold the weight of the batter once it starts to cook. The air pockets expand, the protein in the flour hasn't had enough time to set the structure, and the whole thing collapses into a sad, sunken center. Aim for the "sweet spot" where the batter is light and fluffy but still feels substantial to the touch.
Identifying the "Greasy" Batter
A greasy, separated batter is usually a result of butter that was too warm or adding the liquid ingredients too quickly. If your batter looks like a curdled mess, don't throw it out. Often, the addition of the dry ingredients will bring everything back together. Fold in your dry components gently, and watch as the flour absorbs the moisture and pulls the emulsion back into a smooth, thick, luxurious batter. If it still looks grainy, it may simply be that the butter was too warm to properly hold the structure, but it will likely still bake into something quite edible, even if the crumb isn't perfectly consistent.
The "Slick Bowl" Test
Professional chefs often use the "slick bowl" test to determine if their emulsion is solid. After you have added your eggs, your bowl should look clean and the batter should cling tightly to the paddle. If there is a thin, translucent layer of oil coating the sides of the bowl, your emulsion is likely breaking. This is the moment to pause, take a breath, and assess. Do not immediately dump in all your remaining ingredients if you see this separation occurring. Slow down, add a bit of flour, and ensure your mixer speed is moderate—not aggressive.
Advanced Tips for the Home Baker
Once you have mastered the basics of creaming, you can start experimenting with flavor infusions during the creaming stage. Because fat is an excellent carrier of flavor, the creaming process is the ideal time to introduce aromatics. If you are using lemon or orange zest, beat it into the sugar before you add the butter. The essential oils in the zest will be released by the sharp sugar crystals, infusing the sugar with intense citrus notes that will permeate the entire cake. This is far more effective than adding the zest at the end of the mixing process.
Similarly, if you are using vanilla bean paste or high-quality vanilla extract, add it during the creaming phase rather than with the eggs. This allows the vanilla flavor to distribute evenly through the fat, which acts as a flavor-delivery system throughout the baking process. By layering your flavors into the fat-sugar base, you ensure a more profound depth of taste in every single bite of your final creation.
The Use of Specialized Sugars
While standard sugar is the default, don't be afraid to experiment with different types of sweeteners. Light brown sugar, for instance, contains molasses, which adds moisture and a slight acidity. If you replace 25% of your granulated sugar with brown sugar, you will notice a significant change in the tenderness of your crumb. The molasses reacts slightly with the baking soda and creates a more moist, chewy result. Just remember that brown sugar clumps more easily, so ensure you break up any large lumps before beginning the creaming process.
The "Softened Butter" Myth
Many recipes simply say "softened butter," but this is dangerously vague. For the best aeration, you want butter that yields to gentle pressure but does not lose its shape. If your finger leaves a deep, greasy indentation that remains, it is likely too soft. If it resists pressure, it is too cold. Aim for a texture that feels like room-temperature cream cheese. If you have forgotten to take your butter out, do not use the microwave. Instead, cut the butter into small cubes and let it sit for ten minutes, or place it in a stand mixer with the paddle and beat it for a minute before adding the sugar. This mechanical work will soften the fat without melting it.
The Science of the "Final Crumb"
Why does all of this work matter? It matters because of the crumb structure. A cake, at its core, is a network of proteins (from the flour), sugars (from the sweeteners), and fats (from the butter). During the creaming process, we create the skeleton for this network. When the cake goes into the oven, the air bubbles expand, the proteins coagulate around these bubbles, and the sugars caramelize to provide flavor and moisture retention. If your skeleton is poorly formed—due to lack of aeration—the final product will be dense, chewy, and lacking in that delicate, melt-in-the-mouth quality we all strive for.
Achieving a "professional" texture is all about the distribution of these elements. When you have successfully creamed your butter and sugar, you have created a consistent base that allows the flour and liquids to integrate without having to over-mix the batter. Over-mixing the batter after the flour is added is the second most common mistake, as it develops the gluten and turns a delicate cake into a tough, bread-like loaf. By doing the hard work in the creaming phase, you keep the flour mixing time to an absolute minimum, ensuring your cake stays tender and light.
"Baking is chemistry, but it is also physics. If you master the physical manipulation of your fats, the chemistry of the oven will reward you with perfection every time."
The Effect of Air on Cookie Spread
If you struggle with cookies that spread too thin, your creaming method might be the culprit. If you beat too much air into your cookie dough, the cookies will spread excessively because the air inside the dough expands rapidly before the structural proteins in the flour have a chance to set. For cookies that have a bit more height and chew, you don't necessarily need to aim for "maximum" aeration. A more modest creaming—just until smooth and combined—is often better for a cookie with a thicker, more satisfying chew.
The Final Step: The Flour Fold
Once you have finished your creaming and added your eggs, the way you add your flour is the final hurdle. Never dump all the flour in at once. Add it in three parts, mixing on the lowest possible speed. The moment the last streak of flour disappears, stop the mixer. I mean it—stop immediately. Even three extra rotations of the paddle can develop enough gluten to ruin the delicate work you did during the creaming phase. This is the moment to transition from the science of the mixer to the gentle touch of the spatula.
Final Thoughts
The art of creaming is the heartbeat of the professional kitchen. It is a fundamental skill that, once understood, unlocks the potential of virtually every butter-based dessert in your repertoire. It is not about speed, and it is not about brute force; it is about paying attention to the texture of your ingredients and respecting the science of aeration. Whether you are baking a classic yellow birthday cake, a batch of soft-baked chocolate chip cookies, or an elaborate layer cake for a special occasion, the time you spend at the beginning of the process will pay dividends in the quality of the final result.
As you head back to your kitchen, remember the variables: temperature, patience, and observation. Don't be afraid to stop the mixer and touch the batter. Don't be afraid to take a few extra minutes to ensure that your butter and sugar have reached that perfect, pale, airy state. Baking is a journey of constant learning, and mastering the creaming method is perhaps the most significant step you can take toward becoming a truly competent baker. You have the tools, you have the knowledge, and now you have the technique. Go forth, respect your ingredients, and let the results speak for themselves. After all, when the cake is light, moist, and perfectly crumbed, there is no one left to blame but the chef—and in this case, that is exactly what you want. Happy baking.



Get the Next Recipe
Weekly recipes, techniques, and gear picks — straight to your inbox.
