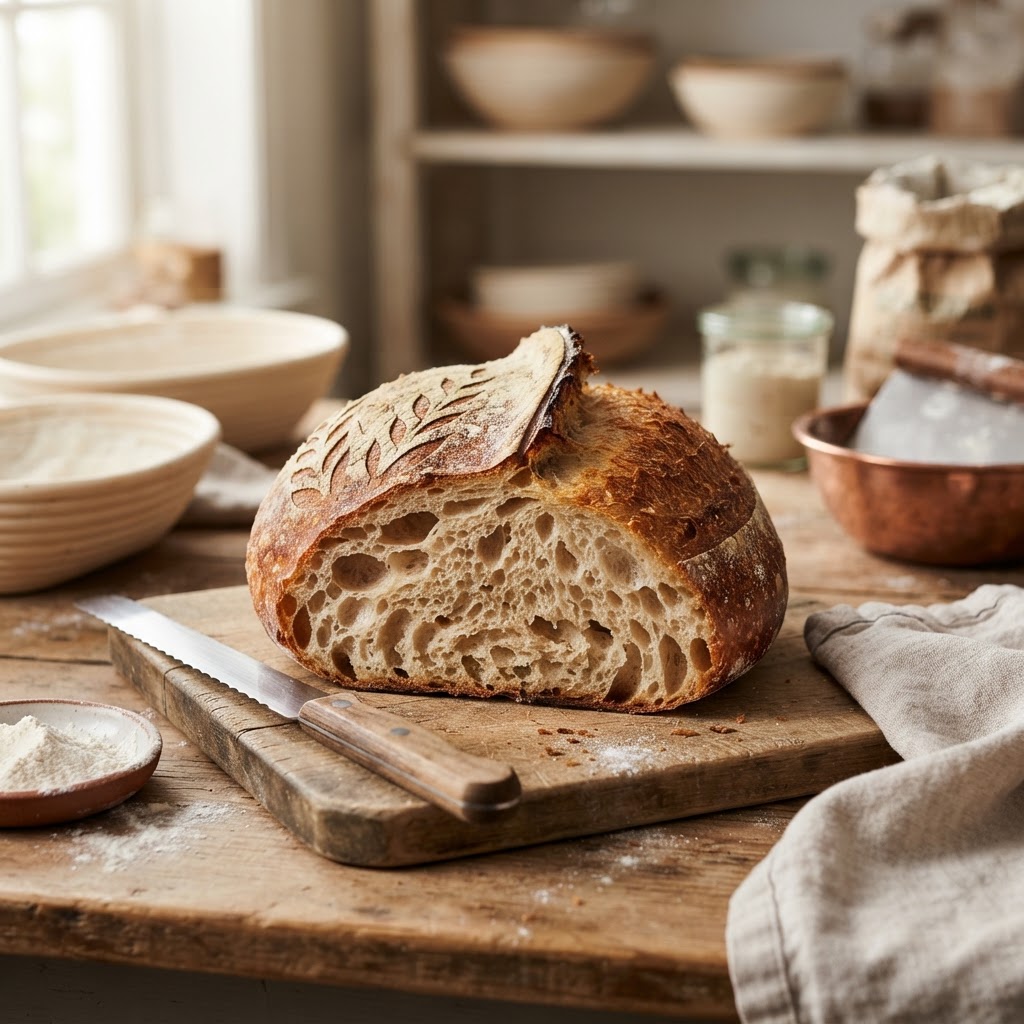
The Baker’s Guide to Dough Elasticity: Mastering Autolyse and Kneading Techniques for Perfectly Structured Loaves
Baking the perfect loaf of bread is often shrouded in mystery, leading many home bakers to believe that professional results are reserved for those with industrial ovens and decades of experience. The truth, however, lies in the fundamental science of flour, water, and time. When we talk about dough elasticity, we are really talking about the architecture of your bread—the invisible network that holds gas bubbles in place and gives your crumb that coveted, chewy texture. Understanding how to build this strength through the autolyse method and precise kneading techniques is the bridge between a dense, flat brick and a high-rising, artisanal masterpiece. By mastering these components, you stop guessing and start engineering the perfect bake in your own kitchen.
Many beginners find themselves frustrated by dough that feels like a sticky, unmanageable mess, or conversely, a stiff, lifeless clump that refuses to expand. This is almost always a result of poor gluten development or a lack of understanding regarding how dough behaves under different conditions. Whether you are aiming for a rustic sourdough boule with a shattered-glass crust or a pillowy, soft brioche, the physics of your dough remains consistent. We are looking for the sweet spot where the protein strands have aligned, providing enough tenacity to hold air and enough extensibility to expand in the heat of the oven. It is a dance of chemistry that rewards patience and deliberate action over brute force.
"Blame The Chef" is here to demystify these processes, moving beyond simple recipes to explain the "why" behind the "how." We will dissect the impact of water temperature, the influence of flour protein percentages, and the transformative power of allowing your dough to rest. By the end of this guide, you will approach your mixing bowl with confidence, knowing exactly how to manipulate the dough to get the specific texture you desire. It is time to stop blaming the yeast, the weather, or the oven; it is time to master the dough itself. Grab your bench scraper and a reliable kitchen scale, because we are going to get into the heart of bread baking—the science of the gluten network.
The Science of Gluten: Understanding the Elasticity Foundation
At the heart of every great loaf is the development of the gluten network. When flour and water meet, two proteins—gliadin and glutenin—begin to hydrate and bond. Gliadin provides the dough with its ability to stretch, or its extensibility, while glutenin provides the structural strength, or elasticity. If your dough lacks elasticity, it will not be able to hold onto the carbon dioxide produced by fermentation, resulting in a dense, heavy crumb. If it lacks extensibility, the dough will be too stiff to rise, leading to blowouts at the score lines or a bread that feels like a gummy, unrefined mass.
Achieving this balance is not just about aggressive kneading; it is about proper hydration and time. Think of gluten as a microscopic mesh. If you move too fast, you risk tearing these delicate strands before they have the chance to link up properly. This is why many bakers utilize the autolyse phase. By simply mixing your flour and water and letting it rest for thirty minutes to an hour, you allow the enzymes in the flour—specifically protease and amylase—to begin their work before the salt or yeast ever touches the mixture. This simplifies the kneading process, as the dough begins to organize itself before you even touch it.
The Role of Protein Content
It is critical to note that not all flours are created equal. For a standard crusty loaf, you are looking for a bread flour with a protein content between 11.5% and 13.5%. Lower protein flours, such as all-purpose or cake flours, simply do not have the structural integrity to support a high-hydration loaf. If you are baking something delicate, like a babka or a sweet roll, you might opt for a lower protein content to ensure tenderness.
"True bread mastery is not found in the speed of the mixing, but in the patience to let the proteins organize themselves into a resilient, living structure."
The Magic of Autolyse: Why Waiting is Your Greatest Tool
The autolyse technique, popularized by French bread scientist Raymond Calvel, is perhaps the single most effective way to improve the quality of your home-baked bread. By keeping your salt and leavening agent out of the initial mix, you prevent the salt from tightening the gluten structure prematurely, which allows for better enzymatic activity. During this rest period, the flour fully hydrates, making the dough significantly easier to handle and reducing the total amount of physical kneading required later in the process.
Implementing the Autolyse
To perform an effective autolyse, combine your bread flour and water until no dry bits remain. Do not worry about achieving a smooth surface at this stage; simply ensure all the flour is hydrated. Cover the bowl with a damp cloth or plastic wrap to prevent a skin from forming, and set it aside in a room-temperature environment—ideally between 70°F and 75°F.
This transition occurs because the gluten proteins have begun to align, and the starches have softened. When you return to add your salt and yeast, you will find that the dough incorporates these ingredients with much less effort. This reduction in labor also leads to a better finished product because you are not oxidizing the dough through excessive handling, which can strip away the natural, nuanced flavors of the grain.
Mastering Kneading Techniques: From Machine to Hand
Once the autolyse is complete and you have added your salt and yeast, it is time to build the final structure. Kneading is the process of physically stretching and folding the dough to force the protein strands into a unified, organized matrix. While a stand mixer is a fantastic tool for high-volume baking, I often encourage home bakers to hand-knead at least a few times to develop a "feel" for the dough. You need to understand when the gluten has reached the point of full development, a state where the dough is smooth, supple, and passes the windowpane test.
The Windowpane Test
The windowpane test is the industry-standard way to check for optimal gluten development. Take a small golf-ball-sized piece of dough and gently stretch it outward between your fingers. If the dough can be pulled thin enough to see light pass through it without tearing, you have achieved proper elasticity. If it snaps back immediately or tears, it needs more kneading. If it stretches but feels weak or sticky, you might be over-proofing or using insufficient flour.
Techniques for Hand Kneading
The Fold and Push:* Place the heel of your hand on the dough, push it away from you, fold it back over itself, and turn it 90 degrees. Repeat this rhythmically.
The Slap and Fold (Bertinet Method):* This is excellent for high-hydration doughs. Lift the dough with both hands, slap it onto the counter, and fold the top over the base. This method uses the dough’s own weight to stretch the gluten strands without adding extra flour.
"A loaf of bread is only as strong as its crumb. If you rush the kneading process, you are essentially building a house on a foundation of sand."
High Hydration and Folding: The Gentle Approach
If you are working with a high-hydration dough (anything above 75% water-to-flour ratio), traditional kneading on a countertop is often counterproductive. These doughs are sticky and will tempt you to add more flour, which will ruin your hydration percentage and produce a dense loaf. Instead of kneading, we use a series of stretch and folds performed directly in the bowl. This method builds elasticity while preserving the gas bubbles already being created by the yeast or sourdough culture.
Executing the Stretch and Fold
Set a timer for 30 minutes. Reach under one side of the dough, pull it upward, and fold it over the center. Rotate the bowl and repeat this on all four sides. This constitutes one "set." By performing three to four sets of these folds over the course of two hours, you effectively align the gluten strands without ever having to wrestle with a sticky, unmanageable mass on your tabletop.
Understanding Hydration Ratios
Low Hydration (55-65%):* Produces a tighter crumb, perfect for sandwich loaves.
Medium Hydration (65-75%):* Ideal for rustic boules and baguettes.
High Hydration (75-90%+):* Creates an open, "wild" crumb structure with a crackling, thin crust.
The beauty of the stretch-and-fold method is that it is self-regulating. As the fermentation progresses, the dough becomes stronger and more elastic on its own. You will notice that by the fourth set of folds, the dough resists your stretch more than it did during the first set—this is a sign that your gluten network is maturing perfectly.
Managing Fermentation and Temperature
Elasticity is not just affected by mechanical action; it is deeply influenced by the environment. The temperature of your kitchen and the water you use dictate the speed of fermentation. A cold kitchen will slow the yeast, giving you more time to develop strength, while a warm kitchen will accelerate the process, potentially weakening the gluten if you are not careful. Always aim for a bulk fermentation temperature of roughly 78°F for optimal enzymatic performance.
The Impact of Salt
Salt does more than provide flavor; it is a gluten strengthener. It tightens the protein strands and regulates the rate of yeast activity. If you omit the salt, your dough will be slack and ferment too rapidly, resulting in a loaf that spreads out rather than up. Always ensure your salt is fully incorporated into the dough after the autolyse phase to maximize its tightening effect.
Monitoring Fermentation Progress
You are looking for the dough to increase in volume by approximately 50-75% during the bulk fermentation stage. It should look bubbly, feel light to the touch, and hold its shape when jiggled. Do not rely solely on time; rely on the tactile signs. If the dough looks flat, give it more time. If it looks like it is about to overflow the bowl, move to the shaping phase immediately to lock in that structure.
Troubleshooting Common Elasticity Issues
Even with the best techniques, things can go wrong. If your dough is tearing as you shape it, you have likely over-kneaded or allowed the fermentation to go too long, breaking down the gluten structure. If your dough is stiff and hard to stretch, it is likely under-fermented or the flour had too high a protein content for your specific recipe. Don't panic; these issues are easily corrected in future bakes by adjusting your timings or flour selection.
What to do if the dough is too slack:
What to do if the dough is too tight:
"When the dough fights back, it is telling you it needs more time, not more muscle. Listen to what the flour is saying, and you will find yourself in perfect harmony with your baking."
Perfecting the Final Shape and Score
The final step in ensuring your loaf maintains its structure is shaping. Shaping is the process of creating "surface tension" on the exterior of the dough. This tension is what forces the bread to expand upward in the oven rather than outward. Whether you are shaping a round boule or an elongated batard, the goal is to create a taut skin that encapsulates the gases trapped inside.
The Shaping Sequence
Final Thoughts
Mastering the art of dough elasticity is a journey that changes the way you look at a bag of flour. It transforms the process from a recipe-following chore into a tactile, rewarding experience where you become an active participant in the transformation of simple ingredients into a complex, nourishing food. By prioritizing the autolyse phase, treating your dough with respect through gentle kneading, and understanding the importance of surface tension during shaping, you will achieve professional results time and time again.
Remember that every loaf is a lesson. If a loaf comes out a little flatter than expected, analyze your gluten development and fermentation times. If the crust is perfect but the interior is gummy, look at your hydration levels and baking temperatures. The kitchen is a lab, and "Blame The Chef" is your partner in this experimentation. Keep your bench clean, keep your flour stored properly, and never underestimate the power of a long, slow fermentation.
Baking is not about being perfect on your first try; it is about consistency and the willingness to learn from every bake. Take these techniques, practice them, and soon, the "mystery" of bread will become second nature. You are the architect of your own crumb, the master of your own hydration, and the creator of the perfect loaf. Now, preheat that oven, set your timer, and start building that gluten network with the confidence of a true artisan. Happy baking!



Get the Next Recipe
Weekly recipes, techniques, and gear picks — straight to your inbox.
