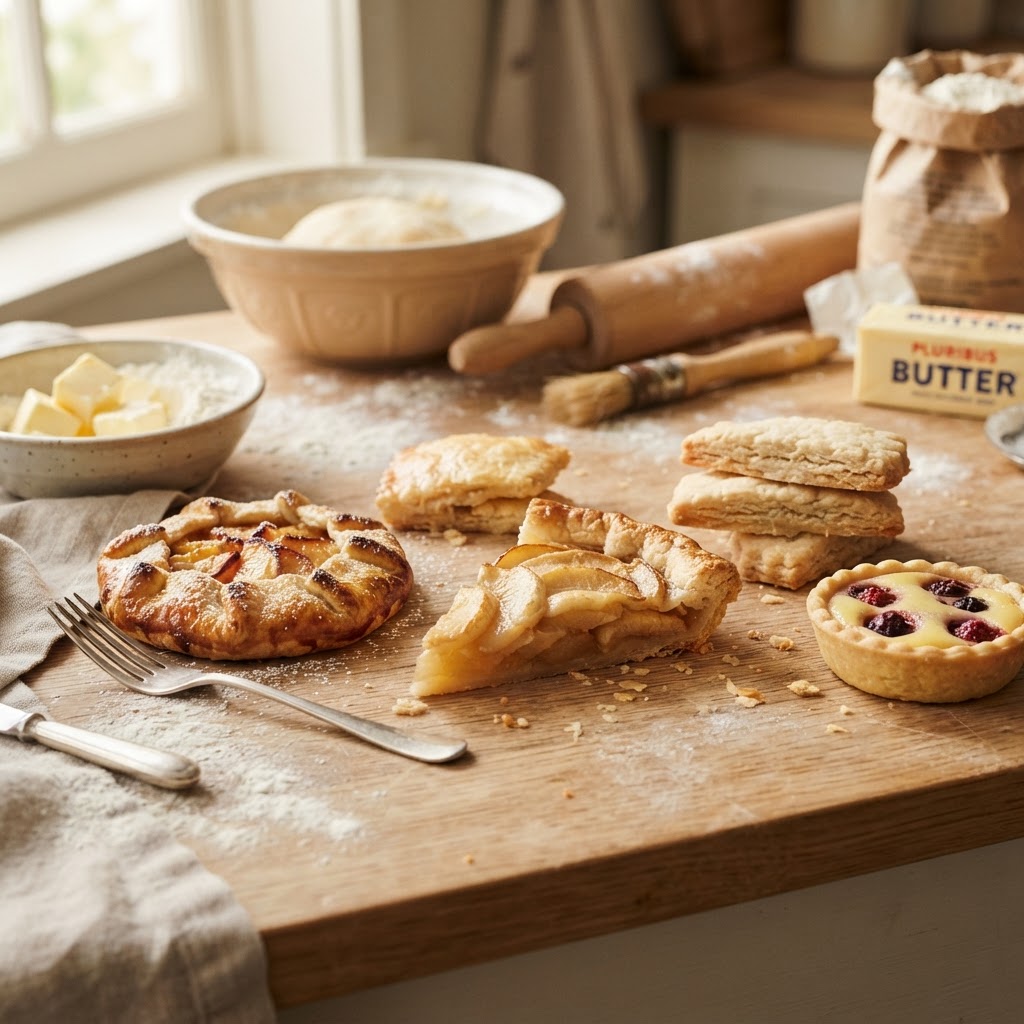
The Baker’s Guide to Fat Content: Mastering Butter-to-Flour Ratios for Optimal Shortcrust and Pastry Tenderness
Baking is a discipline governed by the rigid, almost mathematical laws of chemistry, yet it remains one of the most expressive art forms in the culinary world. Many home cooks approach the kitchen with a sense of trepidation, viewing a recipe as a labyrinthine set of obstacles designed to catch them in a moment of carelessness. At Blame The Chef, we believe that the kitchen should be a sanctuary of experimentation rather than a place of anxiety. By understanding the underlying structural integrity of your ingredients, you move from being a follower of instructions to a true master of your craft. Pastry, in particular, is the ultimate litmus test for a baker’s comprehension of temperature, touch, and, most crucially, the delicate dance of fats.
The secret to a transcendent shortcrust pastry—the kind that shatters upon the first bite and dissolves into a buttery cloud on the tongue—is not found in a secret ingredient, but in the ratio of fat to flour. We are dealing with the physics of hydration and the biology of gluten development. When flour meets water, the proteins glutenin and gliadin bond to form gluten, the elastic network that gives bread its chew. In pastry, however, our goal is the antithesis of chewiness. We want tenderness, which requires us to coat the flour particles in fat, effectively sabotaging the gluten network before it can fully form. This process, known as "shortening," is the foundational concept that separates a professional pâtissier from a novice.
To master this art, one must cultivate an almost intuitive relationship with the temperature of their environment and the state of their ingredients. Butter is a temperamental medium, shifting from a solid structural component to a liquefied fat that can easily ruin the texture of a crust if handled with too much warmth or friction. We are chasing the "mealy" or "flaky" architecture that defines world-class baking. Whether you are crafting a savory quiche or an delicate fruit tart, the principles remain identical. Let us strip away the mystery and dive deep into the science of fat-to-flour ratios, empowering you to command your oven with the confidence of a seasoned chef.
The Chemistry of the Fat-to-Flour Ratio
At its most elemental level, a classic shortcrust pastry relies on a ratio that balances structure with fragility. The standard baker’s percentage for a basic shortcrust usually sits at a 1:2 fat-to-flour ratio by weight. This means for every 100 grams of flour, you are employing 50 grams of fat. When you manipulate this ratio, you are fundamentally altering the physics of the dough. Increasing the fat content results in a more "short" or crumbly texture—the classic pâte sablée—while decreasing the fat increases the structural stability, making it ideal for tall, free-standing pies that must hold their shape under the weight of heavy fillings.
Understanding the Role of Fat
Fat serves two primary purposes in your pastry: it inhibits gluten development and provides flavor. When flour is coated in fat, it becomes hydrophobic, meaning it cannot easily absorb the water required to activate the gluten proteins. This is why we prioritize keeping our butter chilled; if the butter melts into the flour too early, the mixture becomes greasy and dense rather than flaky. We want discrete chunks of cold fat that will remain solid until they hit the hot oven, where they will melt and create pockets of steam, resulting in the distinct layers we crave.
The Impact of Flour Types
Not all flours are created equal, and the protein content of your chosen base significantly dictates how much fat you need. Bread flour, with its higher protein content, requires more fat to achieve tenderness than a soft cake flour or pastry flour. For most home bakers, a standard all-purpose flour with a protein content of around 10% to 11% is the perfect middle ground. However, if you find your pastry is consistently tougher than you prefer, do not blame your technique—try swapping 20% of your flour for cornstarch to dilute the protein content and instantly enhance the tenderness.
The secret to success in baking is not just following a recipe, but understanding the behavior of your ingredients under heat and pressure. Fat is the key that unlocks the door to perfect pastry; keep it cold, handle it sparingly, and let the science do the heavy lifting for you.
The Art of Cold-Chain Management
Temperature is the silent partner in every successful pastry project. From the moment you pull your butter from the refrigerator to the second the tray slides into the oven, temperature control is your primary objective. If the ambient temperature of your kitchen is high, your butter will begin to soften, and the emulsion of your dough will be compromised. A professional chef knows that a kitchen is a cold environment, and if you are working in a warm space, you must utilize tools like stone surfaces, chilled bowls, and frequent "rest periods" in the refrigerator to keep your dough at the ideal temperature.
The Critical Thresholds
The ideal working temperature for butter in pastry is between 40°F and 50°F (4°C to 10°C). Once the butter exceeds 65°F (18°C), it begins to integrate into the flour rather than remaining as distinct, pea-sized chunks. These chunks are the "engine" of your pastry; when the oven’s heat hits them, the water within the butter evaporates, pushing the flour layers apart and creating that desirable lift. If your butter is too warm, it absorbs into the flour, resulting in a heavy, biscuit-like crust that lacks the delicate shatter of a high-quality pastry.
Tools for Temperature Control
Invest in a high-quality bench scraper. This tool is non-negotiable for a home baker. It allows you to chop butter into flour without transferring the heat from your hands into the dough. Furthermore, always use a digital scale instead of volume measurements. A cup of flour can weigh anywhere from 120g to 160g depending on how it was packed, which can throw your fat-to-flour ratio into complete disarray. Precision is the antidote to failure. If you find your kitchen is too warm, try these professional tips:
* Chill your mixing bowl for at least 30 minutes before beginning.
* Use ice water when hydrating the dough, never tap temperature water.
* If the dough feels soft, stop immediately and place it in the fridge for 20 minutes before continuing the lamination or rolling process.
Achieving the Perfect Lamination: The Technique of Incorporation
The method by which you incorporate fat into flour determines the final texture of the pastry. There are three primary methods: the rubbing-in method, the creaming method, and the lamination method. The rubbing-in method is the most common for standard shortcrust. It involves using your fingertips or a pastry blender to cut the fat into the flour until the mixture resembles coarse breadcrumbs. This technique ensures that the fat coats the flour, creating that classic sandy texture. However, leave a few larger pieces of fat—about the size of small peas—to ensure the finished product is flaky.
The Lamination Technique
For puff pastry or rough puff, the goal is to create thin, alternating layers of dough and fat. This is where the fat-to-flour ratio becomes particularly important, as you need enough fat to maintain distinct layers. You aren't mixing the fat into the flour here; you are physically folding it between sheets of dough. This process creates a structural marvel that rises significantly in the oven. Each turn—where you fold the dough over itself—must be done gently, ensuring that the cold butter does not tear through the delicate dough sheets.
Avoiding Common Pitfalls
One of the most common errors is overworking the dough. Once you add your liquid, you must stop mixing as soon as the dough holds together. Overworking creates a long gluten chain, which leads to a tough, elastic pastry that shrinks in the oven. This shrinkage is a direct result of the gluten retracting as it is heated. Always handle the dough as little as possible. If you find it is difficult to roll out, it is likely that the gluten hasn't relaxed. The solution is not to force it, but to let it rest in the refrigerator for an additional 30 minutes.
Pastry is not meant to be a test of strength; it is a test of patience. The dough is a living, breathing entity that reacts to your touch, and the moment you force it, it will fight back by becoming tough and unyielding in the oven.
Hydration: The Invisible Variable
Water is the smallest ingredient in your recipe, yet it wields the most influence. Its purpose is twofold: to bind the flour and fat together into a workable mass and to create the steam necessary for the rise. However, too much water encourages gluten formation, which is the enemy of tenderness. You want to use just enough water to keep the dough from crumbling when you press it together with your fingers. This is why hydration is usually given as a range rather than a fixed number, as the humidity in your kitchen and the age of your flour can drastically change its needs.
The Ice-Water Rule
Always use ice-cold water. The temperature helps keep the fat in its solid state during the mixing process. Add the water one tablespoon at a time, incorporating it with a fork or a bench scraper. Do not dump the entire amount of water in at once. Observe the dough. If it looks dry and shaggy, it is likely perfect; if it looks smooth and uniform, you have likely added too much water and initiated too much gluten development. A "shaggy" dough is a good sign that your pastry will be tender.
Resting: The Hidden Step
After hydration, the dough must be wrapped and chilled. This serves two vital purposes. First, it allows the flour to fully hydrate, ensuring that the moisture is evenly distributed throughout the mass. Second, it allows the gluten to relax. Think of the gluten network as a series of stretched rubber bands; if you roll the dough immediately after mixing, those rubber bands are taut and will pull back. By letting the dough rest in the refrigerator, you allow those bands to slacken, making the dough much easier to roll out without it fighting against you or shrinking in the pan.
Troubleshooting the "Blame The Chef" Kitchen
Even with the best ratios, things can go wrong. If your pastry cracks while rolling, it is either too cold or too dry. If it is too cold, let it sit for a few minutes at room temperature; if it is too dry, a light mist of water can sometimes save it, though it is better to prevent this in the mixing stage. If your pastry leaks fat in the oven, your oven temperature is likely too low, or you did not chill the dough long enough before baking. A high-heat start is essential to set the structure of the pastry before the fat melts and runs out.
Common Issues and Solutions
The Importance of Blind Baking
For many fruit-based or custard-based tarts, blind baking is the secret weapon for a crisp, professional-grade crust. By lining the shell with parchment and filling it with pie weights or dried beans, you hold the crust in its shape while the bottom sets. Remove the weights halfway through the bake to allow the bottom to dry out and brown. This extra step ensures that your final product is structurally sound, crispy, and thoroughly baked, providing the perfect canvas for your culinary creations.
Advanced Flavor Profiles and Fat Selection
While butter is the gold standard for flavor, there are times when other fats can elevate your baking. Some traditional recipes use lard or shortening to achieve a flaky texture that butter simply cannot replicate. Lard has a higher melting point than butter, meaning it creates larger, more distinct layers, which is ideal for savory meat pies or very rustic crusts. A common professional trick is to use a 50/50 blend of butter and high-quality lard—the butter provides the rich, complex flavor, while the lard provides the superior, shatteringly crisp structure.
Exploring Alternative Fats
If you are aiming for a specific texture, don't be afraid to experiment with your fat choices:
European-style Butter*: These have a higher butterfat content (usually 82% or higher) and less water, leading to a richer flavor and a more tender result.
Cold-Pressed Coconut Oil*: Useful for vegan pastry, though it lacks the complex dairy notes of butter.
Chilled Ghee*: An interesting, nutty alternative, though its lack of water content means you may need to adjust your hydration ratio slightly.
Balancing the Flavor
Pastry is a neutral base, so don't be afraid to season your flour. A pinch of sea salt is mandatory to cut the richness of the fat. For sweet pastries, a small amount of sugar or a touch of vanilla bean paste can enhance the overall profile. For savory crusts, herbs like thyme or rosemary can be mixed directly into the flour. These small adjustments turn a standard dough into a component of a much more complex, balanced dish, showcasing your attention to detail as a chef.
Final Thoughts
Mastering the baker’s fat-to-flour ratio is a rite of passage for every home cook. It requires a departure from the "set it and forget it" mentality and demands an engagement with the physics of your ingredients. You now understand that tenderness is achieved through the careful coating of flour proteins, that temperature is the most critical variable in your production, and that patience during the resting phase is the difference between a mediocre crust and a masterpiece. Do not blame the chef when a recipe fails—look instead to the temperature of your butter, the precision of your measurements, and the temperament of your dough.
Every time you enter the kitchen, you are conducting a science experiment that results in something edible, beautiful, and deeply satisfying. Take notes on what works and what doesn't. Perhaps you prefer your crust a little more buttery, so you bump the fat ratio up to 60%. Perhaps you prefer a more robust crust that holds its shape, so you dial it back to 40%. The "rules" I have provided are the foundational structure upon which you will build your own unique culinary identity.
As you continue to refine your technique, remember that the most important tool you possess is your own hands. They will eventually learn the feel of the perfect, shaggy dough, the precise resistance of the butter, and the correct level of hydration. Don't be afraid of the flour, don't fear the cold, and above all, keep experimenting. Baking is a journey of discovery, and your next crust will surely be your best yet. Happy baking, and may your layers always be sharp, your butter always be cold, and your pastries always be perfectly, tenderly crisp.


Get the Next Recipe
Weekly recipes, techniques, and gear picks — straight to your inbox.
