The Baker’s Guide to Fat-to-Flour Ratios: How Butter, Oil, and Shortening Change Your Cookie and Cake Textures
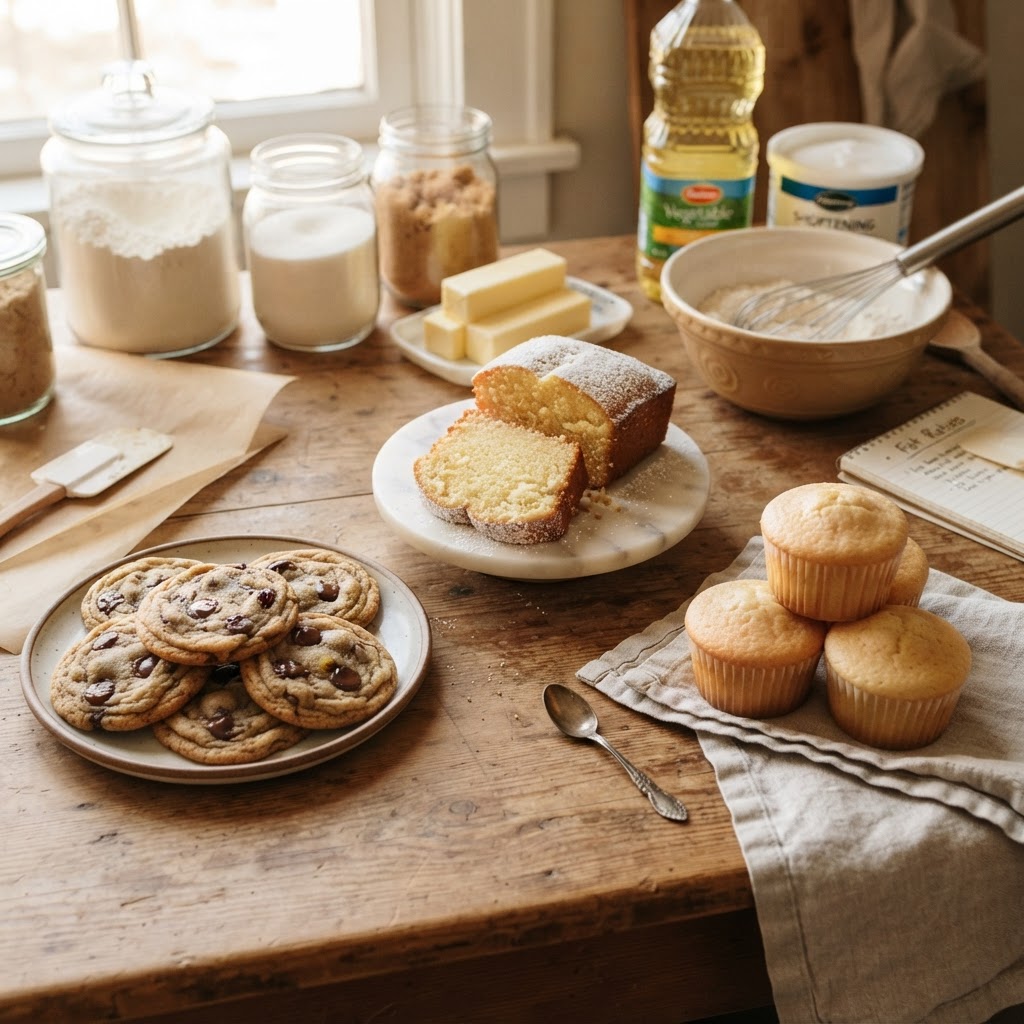
Baking is often described as a science, and nowhere is that more evident than in the delicate dance between fats and flours. When you step into the kitchen to whip up a batch of cookies or a tiered cake, the specific type of fat you choose—and the ratio at which you incorporate it—acts as the primary architect of your final texture. Whether you are aiming for a cookie that shatters upon the first bite or a cake that melts away with a velvety crumb, understanding how these ingredients interact on a molecular level is your greatest asset. It is the difference between a bake that earns a proud spot on the dessert table and one that ends up in the bin, leading many home bakers to utter the classic refrain: "Blame the chef."
The interplay between fat and flour is essentially a structural balancing act. Flour provides the foundation, offering the proteins—glutenin and gliadin—that develop into the structure of your baked good, while fat serves as a tenderizing agent that coats those protein strands. By physically preventing the flour from absorbing too much liquid and forming long, tough gluten chains, fat ensures your pastries remain tender rather than chewy. The magic happens when you adjust the fat-to-flour ratio or swap a solid fat like butter for a liquid one like oil; suddenly, the density, spread, and lift of your masterpiece shift entirely, rewarding the curious baker with endless possibilities for customization.
In this guide, we will break down the chemistry behind these ingredients to help you master the art of consistency. We will explore why butter provides flavor but can lead to uneven spreads, why shortening creates that elusive, perfectly sculpted cookie, and how oil contributes to an almost impossibly moist cake crumb. You will learn to identify the exact moment to pull your pans from the oven based on the fat content and how to adjust your recipes when you find yourself missing a staple ingredient. Grab your apron, preheat your oven to the exact degree, and let’s dive into the fascinating world of fat chemistry.
The Foundation of Fat: Butter, Oil, and Shortening
Understanding your primary fats is the first step toward becoming a master baker. Not all fats are created equal, and their compositions—water content, melting points, and smoke points—will dictate the outcome of your recipe. Butter, for instance, is approximately 80% to 82% fat, with the remainder being water and milk solids. This water content is crucial for steam generation, which helps lift cakes and puff up pastry layers, while the milk solids brown beautifully in the oven, providing that signature nutty flavor we all love.
Shortening, on the other hand, is 100% fat. Because it lacks water, it does not contribute to steam-based lift, nor does it provide the flavor profile of butter. However, its high melting point makes it an excellent choice for structural integrity. Cookies made with shortening tend to hold their shape better and spread significantly less than those made with butter. If you want a tall, thick cookie, replacing a portion of your butter with shortening is a pro-level technique that ensures your cookies don't turn into flat puddles on the baking sheet.
Oil is perhaps the most misunderstood fat in the pantry. Because it is liquid at room temperature, it provides a superior "mouthfeel" in cakes, keeping them moist for days longer than butter-based sponges. Oil coats flour proteins more effectively than solid fats, resulting in a tighter, more uniform crumb. However, because it lacks the ability to trap air when creamed with sugar, you will often need to rely on chemical leaveners like baking powder or baking soda to get the lift that air-pocket-rich butter-based recipes might provide naturally.
Comparing Melting Points
Butter:* Melts at approximately 90°F to 95°F. This lower melting point encourages spreading, which is why butter-based cookies flatten out quickly in a hot oven.
Shortening:* Melts at roughly 106°F to 115°F. This allows the dough to set in the oven before the fat fully liquefies.
Oil:* Liquid at room temperature. It never provides "structure" through solidification, making it best for dense, moist cakes or quick breads.
"The secret to a perfect cookie isn't just the quality of your chocolate chips; it is the physical state of your fat at the moment the oven door closes. Think of fat not as an accessory, but as the chassis upon which your entire bake is built."
The Art of Creaming: Aeration and Structure
The creaming method is the heartbeat of most cake and cookie recipes. By beating sugar into your softened butter, you are doing more than just mixing ingredients; you are forcing sharp sugar crystals to cut into the fat, creating millions of tiny air pockets. During the baking process, these pockets expand, acting as the primary leavening agent for your cakes. This is why "creaming until light and fluffy" is a non-negotiable step in professional kitchens.
If your butter is too warm, these air pockets will collapse, resulting in a dense, greasy final product. If your butter is too cold, the sugar won't integrate properly, and you'll fail to create the necessary aeration. Most professionals suggest that butter should be around 65°F (18°C)—a temperature often described as "cool room temperature"—before beginning the creaming process. At this temperature, the fat is soft enough to whip but firm enough to hold the air you are laboriously incorporating.
When transitioning from butter to oil, you lose the ability to cream. This is why oil-based cakes often use the "muffin method" (mixing dry and wet separately) or rely on whipped egg whites to provide the necessary loft. If you try to swap oil into a recipe that calls for the creaming method, you will find yourself with a flat, greasy mess. Always check your recipe’s leavening source; if it relies on creaming for air, keep your butter solid and your temperature consistent.
Troubleshooting the Spread: Fat Ratios in Cookies
Every baker has faced the tragedy of the "runaway cookie"—that moment when you open the oven to find a single, flat, crispy sheet of dough where twelve individual cookies used to be. This is almost always a failure in the fat-to-flour ratio. If your fat is too high, or your flour too low, the structure cannot support the weight of the cookie as the fat melts. Increasing your flour by just one or two tablespoons can often solve the issue, but understanding the ratio is a more reliable long-term solution.
The standard ratio for a classic American-style cookie is roughly 1 part fat to 2 parts flour by weight. If you shift this balance toward more fat, you get a thinner, crisper cookie with a delicate edge. If you shift toward more flour, you get a thicker, more cake-like texture. Furthermore, the type of sugar you use impacts the fat’s behavior. Brown sugar contains moisture (molasses), which interacts with the fat to create a chewier texture, while white sugar allows the fat to crisp up the edges more efficiently.
Pro Tips for Managing Spread
"When you measure flour by scooping directly from the bag, you often pack it down, leading to a much higher ratio of flour to fat than the recipe intended. Always spoon and level your flour to maintain the structural integrity of your bake."
The Science of Moisture: Oil-Based vs. Butter-Based Cakes
Why do professional bakeries often prefer oil for their cupcakes and muffins? The answer lies in fat saturation. Because oil is liquid at room temperature, it does not "harden" when a cake cools. A butter-based cake will firm up significantly when placed in the refrigerator, whereas an oil-based cake remains soft and tender. This makes oil the superior choice for desserts that are served cold or intended to be stored for several days.
However, the trade-off is flavor. Butter provides a rich, creamy mouthfeel and a depth of taste that oil simply cannot replicate. Many professional chefs use a "hybrid" approach, using a blend of butter for flavor and a splash of neutral oil (like grapeseed or canola) to ensure the moisture stays locked in. When experimenting with these ratios, keep your total fat volume constant and simply swap the percentages until you find the profile that matches your preferences.
Another factor to consider is the protein content of your flour. Cake flour has lower protein content, which limits gluten formation, while all-purpose flour has more, providing sturdier structure. When you pair high-protein flour with oil, you get a bouncy, springy cake. When you pair low-protein flour with butter, you get a fine, tender crumb that melts in your mouth. Knowing these combinations allows you to customize your recipes to achieve the exact texture you desire.
Shortening: The Secret Weapon for Sculpted Bakes
Shortening often gets a bad rap in the culinary world due to its processed nature, but from a technical standpoint, it is a miracle ingredient. Because it has no water, it is effectively a "dry" fat. This makes it perfect for recipes where you want zero steam-based expansion, such as intricately decorated sugar cookies or pie crusts that need to hold a specific crimped shape. If your goal is a high-definition design that stays crisp after baking, shortening is your best friend.
When using shortening, you don't have to worry about the "melting point" issues that plague butter. This means you can work with the dough for longer periods without it becoming too sticky or soft. For home bakers struggling with dough temperature, a 50/50 blend of butter (for flavor) and shortening (for stability) is an excellent way to achieve professional results without the frustration of melting dough.
Why Professionals Use Shortening
Stability:* It maintains structural integrity in high-heat environments.
Shelf Life:* It is more stable than butter and does not oxidize as quickly.
Neutrality:* It does not compete with flavorings like lemon, vanilla, or spices.
Temperature Control: The Invisible Ingredient
If there is one thing that separates a hobbyist from a seasoned pastry chef, it is the obsession with temperature. You might think that tossing ingredients together at room temperature is sufficient, but in the realm of high-end baking, thermal management is a primary variable. The temperature of your eggs, the temperature of your fat, and the temperature of your oven are the holy trinity of successful baking.
Cold ingredients like milk or eggs will cause your fat to solidify prematurely, leading to a curdled batter that won't bake into a uniform crumb. Conversely, if your kitchen is too warm, your fats will lose their aeration, and your baked goods will lack the necessary height. Always keep an infrared thermometer nearby; it is the most inexpensive way to instantly elevate your baking consistency.
Finally, consider the ambient temperature of your mixing bowl. If you are working in a professional kitchen or a hot home kitchen, chill your metal bowl in the freezer for ten minutes before beginning. This prevents the friction of the mixer from overheating your fat. Small, deliberate adjustments to the temperature of your workspace will drastically improve the outcome of your delicate cakes and cookies.
Achieving Perfect Layers: The Fat-Flour Interaction in Pastry
Pastry, particularly puff pastry or biscuits, is the ultimate test of fat-to-flour ratios. Here, you are not mixing the fat into the flour; you are laminating it. You want the fat to remain in distinct, thin layers throughout the flour. When the dough hits the high heat of the oven, the water in the fat turns to steam, pushing the layers of flour apart. This is how you achieve that coveted, airy, flakey lift.
The key to this process is keeping the fat solid. If the fat melts into the flour during the mixing stage, you lose the layers and end up with a dense, greasy mass rather than a light, crisp pastry. This is why professionals often use frozen butter and work with a bench scraper rather than their hands, which transfer heat to the dough. The goal is to keep the butter in "pea-sized" chunks throughout the mixture until the very moment of baking.
If you find your pastry is turning out tough, you are likely overworking the dough, which develops too much gluten. If it is too crumbly, you likely have too much fat or not enough moisture. Aim for a ratio where the flour is fully coated but still retains the structural integrity to be rolled out. Remember, the flour is the glass, and the fat is the sand; you need the right amount of sand to keep the glass from shattering, but too much sand will bury the structure entirely.
Final Thoughts
The journey to becoming a confident baker is paved with experiments, some successes, and—inevitably—a few flops that you’ll have to blame on the chef. However, by mastering the nuances of fat-to-flour ratios, you transition from blindly following a recipe to understanding the mechanics behind it. You no longer fear the humidity or the heat of your kitchen; instead, you view these as variables to be managed.
Remember that baking is not a rigid set of laws, but a flexible framework. When a recipe calls for butter, ask yourself if you want the flavor (butter) or the structure (shortening). When your cake is too dry, consider a higher oil-to-butter ratio. When your cookies spread too much, adjust your flour-to-fat balance. Each time you make a change, take a note. Keep a kitchen journal, record your temperatures, and document your results.
Ultimately, the goal of "Blame the Chef" is to empower you to take full ownership of your kitchen. By understanding the chemistry of your ingredients, you move from the role of a follower to the role of a creator. The next time a bake doesn't turn out quite right, don't just blame the ingredients or the oven—look to your ratios, adjust your temperature, and get back to the drawing board. After all, the best part of being the chef is that you get to eat the evidence, learn from the process, and try again until every bite is nothing short of perfection. Happy baking, and may your fats always be perfectly measured and your crumbs forever tender.
Advanced Techniques for the Home Kitchen
As you progress in your baking journey, you might want to look into emulsification. This is the process of binding your fat, water, and proteins together so they don't separate during the baking process. Using ingredients like egg yolks or store-bought emulsifiers can help create a smoother batter. If you find your cake has a "greasy" look or feel, your emulsion likely failed because your ingredients were at drastically different temperatures. Always use room temperature eggs and soft butter to help them bond.
Another advanced technique is the Reverse Creaming Method. Unlike the standard method where you cream butter and sugar, here you beat the softened butter into the dry ingredients until the mixture resembles sand. Then, you add the liquids. This method coats every single particle of flour in fat, which effectively prevents gluten from forming. The result is a cake with a velvety, tight crumb that is almost impossible to ruin. It is the gold standard for high-ratio cakes, like wedding cakes, which need to be dense enough to stack but soft enough to enjoy.
Finally, do not underestimate the power of the rest period. Even if you have the perfect fat-to-flour ratio, your dough needs time to hydrate. Allowing your cookie dough to rest in the refrigerator for 24 to 48 hours allows the flour to fully hydrate and the fats to crystallize. This simple act of patience does more for the depth of flavor and the texture of your cookies than any expensive ingredient ever could. It is the hidden hallmark of a professional baker.
Managing the Variables: Humidity and Elevation
If you live at high altitudes, the physics of your bake change significantly. Lower air pressure means that your chemical leaveners will work much faster, and your cake might rise and then collapse before it has a chance to set. In these cases, you need to decrease your baking powder and increase your flour-to-fat ratio to add structural strength to the crumb. If you find your bakes are consistently collapsing, look at your elevation and consider cutting back on the sugar, which can weaken the protein network.
Humidity is the other great silent variable. Since flour is a dry, absorbent material, it will pull moisture from the air, effectively changing the weight of your flour. If your kitchen feels sticky, your flour is likely heavier than it would be in a dry climate. You may need to use slightly less liquid or slightly more flour to compensate. Always keep your flour in an airtight container to mitigate this, and consider keeping a dehumidifier in your kitchen if you live in a notoriously wet climate.
By being mindful of these external factors, you prove that you are not just a baker, but a food scientist. When you account for the weather and the altitude, you take control of your bakes in a way that most home cooks never consider. Stay curious, stay precise, and always remember to check the texture before, during, and after the bake. Your kitchen is your laboratory, and every loaf or cookie is a discovery.
The Role of Fats in Flavor Profiles
While we have focused heavily on texture, we must touch upon the flavor contribution of fats. Cultured butter, which is fermented, adds a subtle tang that brings out the brightness in fruit-based cakes. Lard, while rarely used in modern sweet baking, offers an unparalleled flakiness in pie crusts that butter cannot achieve. Using a combination of fats can give your bakes a complex, multi-layered flavor profile that makes your desserts memorable.
Do not be afraid to experiment with infused fats. If you have a favorite oil-based cake recipe, try using an oil infused with orange zest or vanilla bean. If you are making a butter-heavy cookie, try browning the butter first. Browned butter adds a layer of toasted, nutty depth that pairs perfectly with chocolate and cinnamon. By heating the butter until the milk solids brown, you aren't just changing the flavor—you are fundamentally altering the water content and the fat profile, leading to a richer, deeper final product.
Ultimately, the choice of fat is a stylistic decision as much as a scientific one. The "Blame the Chef" philosophy isn't about pointing fingers when things go wrong; it’s about recognizing that every choice you make in the kitchen—from the brand of butter to the temperature of the oil—is a creative decision. The science provides the rules, but your taste buds provide the vision. Keep iterating, keep tasting, and above all, keep enjoying the process of creation. The perfect bake is waiting for you at the end of every experiment.


Get the Next Recipe
Weekly recipes, techniques, and gear picks — straight to your inbox.
