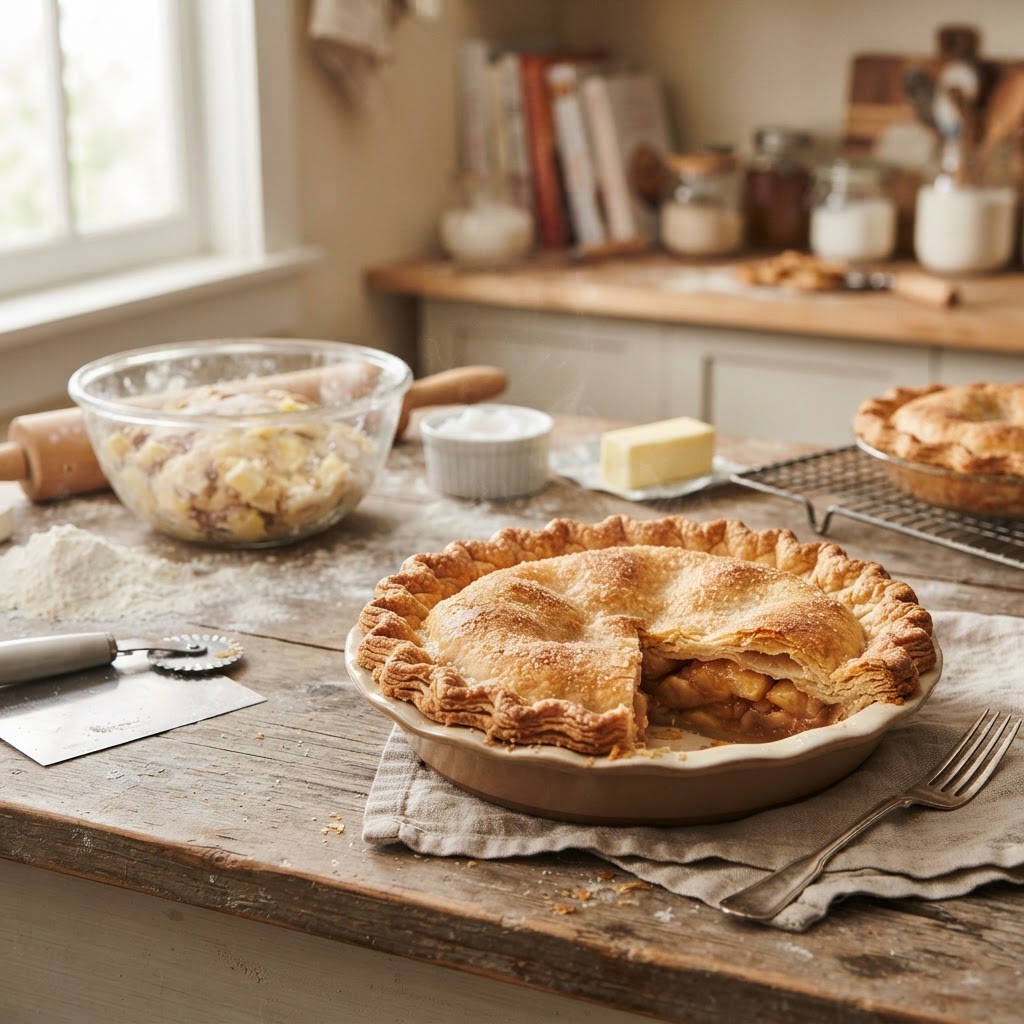
The Baker’s Guide to Fat-to-Flour Ratios: Mastering Shortening and Emulsification for Perfectly Tender, Flaky Pie Crusts
There is a singular, haunting moment that every home baker eventually faces: the first bite into a homemade pie crust that turns out tough, leathery, or flavorless. You followed the recipe to the letter, yet the result feels more like a cardboard box than a delicate, buttery vessel for your fruit filling. The truth is that pie crust is not merely a recipe; it is a delicate balancing act of chemistry, temperature control, and physical manipulation. When we talk about "Blame The Chef," we aren't just pointing fingers at a person; we are pointing toward the technical failures that occur between the bowl and the oven. To bake a truly spectacular crust, you must stop viewing flour and fat as mere ingredients and start viewing them as building blocks of structural integrity.
The secret to pastry success lies hidden within the fat-to-flour ratio, a mathematical framework that dictates the very architecture of your dough. If you have ever wondered why a commercial crust feels so different from your own, it is almost certainly because you haven’t yet mastered the science of emulsification and lamination. Most home recipes provide vague instructions like "cut in the butter until it resembles coarse crumbs," but that is not nearly descriptive enough for the artisan baker. We are looking for precision, texture, and a thermal discipline that ensures those glorious, flaky layers remain distinct through the heat of the oven. This guide is designed to strip away the myths and provide you with a bulletproof methodology for professional-grade results every single time.
By the time you finish reading this, you will understand the interplay between gluten development, butter moisture content, and ambient temperature. We are going to explore why cold is your greatest ally and why the specific type of flour you choose can change the physics of your bake. Whether you are aiming for a classic lattice-topped apple pie or a savory galette, the fundamentals remain the same. Prepare to abandon the guesswork and embrace a technical approach that treats baking like the precise science it truly is. Grab your bench scraper, chill your bowls, and let’s dive into the anatomy of a perfect pie crust, because if the pastry fails, the entire dessert is doomed—and we certainly don't want to blame the chef for that.
Understanding the Fat-to-Flour Ratio
The foundation of any flaky crust is the Baker’s Percentage, a concept usually reserved for professional bread bakers but equally vital for pastry. When you deviate from the standard ratios of fat to flour, you fundamentally change the hydration level and the structural support of the dough. A classic, tender crust typically sits at a ratio of 1:2, meaning one part fat for every two parts flour by weight. If you increase the fat, the crust becomes shorter and more crumbly; if you increase the flour, the crust becomes sturdier but risks becoming tough if over-handled.
Achieving this balance is only the first step; the application of this ratio depends entirely on the hydration technique. When you add liquid, you are providing the mechanism for gluten to form. Because gluten is the primary enemy of flakiness, your ratio must be calculated with the goal of "shortening" the protein strands. By coating the flour particles in fat—a process known as enrobing—you physically prevent the long chains of gluten from linking up, which is what creates the dreaded "tough" texture.
"The difference between a mediocre crust and a masterpiece is not in the ingredients themselves, but in the thermal management of the fat and the restrained hand of the baker during the hydration phase."
Calculating Your Ratios
To master your ratios, you must invest in a digital kitchen scale. Measuring flour by volume is the single most common cause of failure in home kitchens, as a single scoop of flour can vary by as much as 20% depending on how tightly it is packed. Start with a baseline of 300 grams of all-purpose flour and 200 grams of unsalted, high-fat butter. This ratio provides the ideal balance for most fruit-based pies that require a sturdy bottom.
The Role of High-Fat Butter
Not all fats are created equal. When shopping for butter, look for European-style varieties with a butterfat content of at least 82-84%. The lower water content in these brands means less steam is produced during the initial bake, which helps maintain the structural integrity of your laminations. If you use standard, supermarket-grade butter, you are working with higher water content, which can lead to a crust that is more prone to shrinkage and a "gummy" interior texture.
The Science of Cold: Temperature as a Tool
If you take only one lesson from this guide, let it be this: Temperature is the most important ingredient. If your kitchen is warm, your butter is warm. If your butter is warm, it melts into the flour before it ever touches the heat of the oven. This creates a homogeneous mess rather than the pockets of fat we need for those signature flakes. You must keep your fat, your flour, your liquid, and your equipment chilled throughout the entire process.
Consider the physics of the bake: when a cold chunk of fat is encased in a coating of flour and then hit with high, immediate heat, the water inside the butter turns into steam. This steam pushes the layers of dough apart, creating the delicate, paper-thin sheets that define a great crust. If the butter has already softened and bled into the flour during the mixing process, there is no steam expansion. The result is a dense, greasy, and ultimately unappealing crust that settles flat on the pie plate.
Professional Chilling Techniques
Managing Ambient Heat
If your kitchen temperature exceeds 72 degrees Fahrenheit, you are fighting a losing battle. If possible, perform your mixing in the morning when the air is cooler. If you find your dough starting to get sticky or the butter beginning to smear, stop immediately. Place the entire bowl—or even just your hands—back into the freezer for ten minutes to reset the thermal state of the fats.
Mastering Emulsification and Lamination
Many bakers believe that "cutting in" the butter is about getting the butter small. This is a common misconception. The goal is actually to maintain large, visible chunks of butter, some as large as peas or even almond slivers. These chunks are the "engine" of your crust. As you roll the dough out, you are flattening these chunks into broad, thin sheets. This is the lamination process, which occurs on a micro-scale within the dough.
Emulsification occurs when you add the liquid and the fat begins to interact with the flour. You want the fat to coat the flour but not dissolve into it. This is why we use a gentle "folding" motion rather than kneading. Kneading develops gluten, which makes the crust tough. Folding keeps the layers intact and allows the dough to retain its short, crumbly texture after baking.
"Lamination is the art of creating layers. Treat your dough like a delicate fabric; fold it, preserve it, and never overwork it, for the ghost of the butter is what provides the lift."
The Folding Technique
Once your butter is cut into the flour and you have added your ice water, use a bench scraper to fold the dough over itself. Press down, turn, and fold again. This creates those distinct, laminated layers. By the time you are ready to chill the dough disk, you should be able to see streaks of butter marbled throughout the pale yellow flour mixture.
The Resting Phase
After the dough is formed into a disc, it must rest. This is not optional. The resting period allows the flour to fully hydrate and, more importantly, it allows the gluten strands to relax. If you try to roll out dough that hasn't rested, it will snap back like a rubber band every time you try to extend it. Give it at least an hour in the refrigerator to ensure the fats have hardened again.
Flour Selection and Gluten Control
Not all flour is the same, and your choice of protein content will dictate the final chew of your pastry. All-purpose flour is the standard for a reason: it sits in the middle ground of protein content (usually 10-12%). This is enough to provide structure, but low enough to avoid the chewiness found in bread flour. However, if you are looking for an exceptionally tender crust, you might consider replacing 20% of your all-purpose flour with cake flour.
The protein content in cake flour is lower, which translates to less gluten formation. While this makes the dough more delicate and harder to handle, the result is a crust that practically dissolves on the tongue. If you choose this route, you must be extremely careful during the rolling process, as the dough will be more fragile and prone to tearing. Always keep your workspace lightly floured to prevent sticking, but avoid "over-flouring," which can make the crust dry.
Comparing Flour Types
The "Over-Mixing" Warning
There is a point of no return in pie making. When you are combining your liquid with the flour-fat mixture, do it until the dough just barely holds together. It should look shaggy, messy, and disorganized. If the dough looks like a smooth, uniform ball of bread dough, you have already overworked it. A shaggy, marbled dough is exactly what you want; the final unification happens during the rolling process, not inside the mixing bowl.
The Art of the Roll and the Dock
Rolling out your crust is where most home bakers lose their nerve. They apply too much pressure, causing the butter to smear into the flour rather than flatten into layers. Use a heavy rolling pin, and let the weight of the pin do the work for you. Start from the center and roll outward in short, controlled bursts. Rotate your dough disc 45 degrees after every two or three rolls to ensure an even thickness and to prevent it from sticking to the counter.
If you find that the dough is cracking at the edges, do not panic. This is actually a good sign—it means your fat-to-flour ratio is correct and you have large enough chunks of butter. Simply use your fingers to patch the cracks with a tiny bit of water or an extra scrap of dough. When you move the dough into the pie tin, do not stretch it. Stretching the dough is the primary reason for shrinkage in the oven. Instead, lift and ease it into the pan, ensuring it is fully supported by the sides and bottom.
Rolling Tips for Success
The Importance of Docking
For a blind-baked crust, docking—or poking the bottom with a fork—is essential. This allows air to escape and prevents the crust from bubbling up and losing its shape. For fruit pies, you generally do not need to dock unless your filling is particularly heavy, as the weight of the fruit will keep the bottom crust pressed against the pan.
The Final Bake: Mastering the Heat
The final step in our journey is the oven. When the crust hits the heat, the water content in the butter evaporates instantly, lifting the layers of flour. If your oven temperature is too low, the butter will melt and ooze out before the crust sets, leading to a greasy, dense disaster. You want high heat—usually 400°F (200°C)—to initiate that "oven spring."
Once the crust has held its shape, usually after about 15-20 minutes, you can reduce the temperature to 375°F (190°C) to finish browning the bottom and cooking the fruit filling. This dual-temperature approach is a pro tip that ensures the crust is perfectly golden on the outside and fully cooked through on the inside. Never rush the browning process; the Maillard reaction is what provides that nutty, complex flavor that separates a great pie from a sugary, bland one.
Oven Setup
Monitoring Doneness
Don't just look for color; look for the sound of the crust. A properly baked crust will have a slightly hollow, crisp sound when tapped. The edges should be deep golden brown, and the bottom should be firm to the touch. If you are baking a fruit pie, ensure the filling is bubbling thick bubbles in the center—this indicates that the starches in the fruit have activated, confirming the filling won't turn into soup when you slice it.
Final Thoughts
Mastering the pie crust is a journey of patience and observation. By understanding the chemical relationship between your ingredients, you stop being a recipe follower and start becoming a true baker. You’ve learned that the ratio of fat to flour is your structural foundation, that temperature is your primary tool for managing texture, and that the physical handling of the dough is what determines whether your pastry will be tough or tender.
Don't be discouraged by your first few attempts. Even professional chefs have days where the dough behaves inconsistently. The beauty of baking is that it is a practice of constant refinement. Next time you stand in your kitchen, focus on the coldness of your butter, the lightness of your touch, and the deliberate care you take in folding those layers. When you pull a perfectly browned, shattering-crisp crust from the oven, you’ll realize that the effort spent on these technical details was more than worth it.
"A great pie is a testament to the baker's discipline. When you respect the science of the dough, the dough rewards you with a texture that is nothing short of transcendent."
If you find your crust isn't perfect the first time, check your variables. Was the kitchen too warm? Was your butter too soft? Did you overwork the flour? The answers are almost always found in the physics of the bake. Keep your bench scraper close, your butter frozen, and your confidence high. You now have the knowledge to create something truly exceptional. Go forth, bake with intention, and enjoy the process of turning simple, humble ingredients into a culinary work of art. The perfect pie is well within your grasp, and I can't wait to see what you create next. Keep those ovens hot, keep your butter cold, and above all, enjoy every single flaky, buttery bite. You’ve earned it.



Get the Next Recipe
Weekly recipes, techniques, and gear picks — straight to your inbox.
