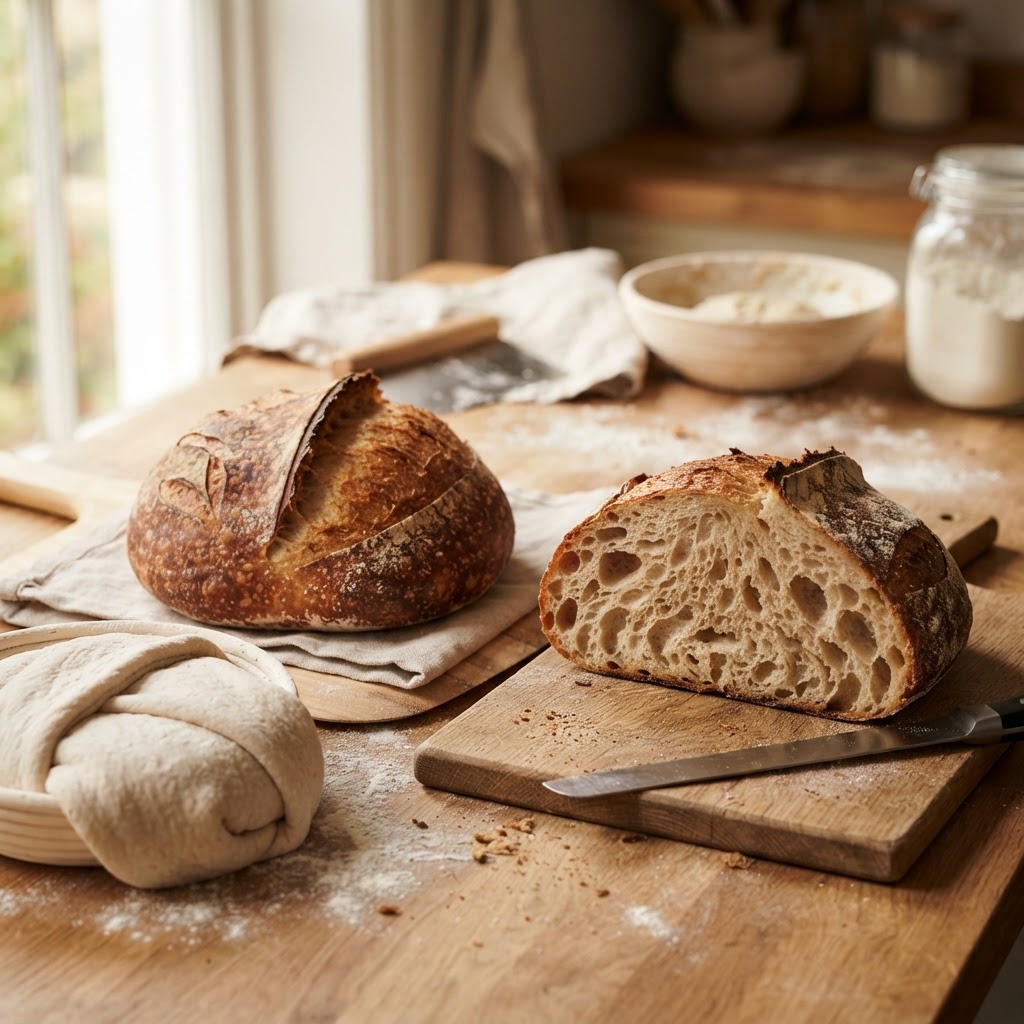
The Baker’s Guide to Gluten Development: Mastering Kneading, Folding, and Rest Times for Superior Structure and Crumb
Baking bread is a craft that sits squarely at the intersection of rigorous science and soulful intuition. Many home cooks approach their first loaf with a mix of excitement and trepidation, often finding that the difference between a dense, gummy brick and a light, airy loaf lies not in the quality of the flour alone, but in the structural integrity of the dough. Understanding gluten is the single most important skill you can acquire as a baker, as it serves as the invisible scaffolding for your creation. By mastering the physical properties of proteins within wheat, you transform simple flour and water into a complex matrix capable of trapping carbon dioxide and rising to incredible heights. Once you grasp the mechanics of this transformation, you no longer feel like you are guessing at hydration levels or guessing when to bake; instead, you become the architect of your own crumb.
The journey toward a perfect crumb starts the moment water touches flour, triggering an enzymatic reaction that begins the formation of gluten. Many beginners make the mistake of assuming that more kneading is always better, or conversely, that a "no-knead" recipe is a shortcut that avoids the work of structure. In reality, gluten development is about balance, patience, and recognizing the specific needs of different dough types. Whether you are aiming for a tight, uniform crumb for sandwich bread or an open, wild landscape of air pockets for a sourdough boule, the principles of development remain the same. We are managing the elasticity and extensibility of the dough to ensure it can expand without tearing under the pressure of fermenting gas.
At "Blame The Chef," we believe that baking should be a rewarding exploration rather than a source of stress in your kitchen. This guide is designed to demystify the technical side of dough manipulation, turning complex chemistry into actionable, hands-on habits. We will walk through the science of protein chains, the art of folding, and the critical role of rest periods in your baking schedule. By the time you finish this guide, you will be able to look at a piece of dough and understand exactly what it needs to reach its full potential. Let’s pull up our sleeves, flour our work surfaces, and dive deep into the fascinating, elastic world of gluten.
The Chemistry of Gluten: Proteins and Hydration
At the heart of every loaf are two proteins: gliadin and glutenin. When you introduce water to flour, these two proteins hydrate and bond together to form the long, stretchy chains we identify as gluten. Gliadin provides the dough with its extensibility, or the ability to stretch without snapping back, while glutenin provides elasticity, the force that helps the dough hold its shape and return to its original form. Without the interaction of these two, your bread would simply be a puddle of starch and water, unable to hold onto the gas produced by your yeast.
The ratio of these proteins varies depending on your flour, which is why professional bakers use bread flour (higher protein content) for chewy, structural loaves and pastry flour (lower protein content) for delicate cakes. When you mix your flour and water, you aren't just making a paste; you are initiating the structural foundation of the bread. It is crucial to ensure that the flour is fully hydrated, as dry flour pockets create "islands" that weaken the final structure and result in an inconsistent crumb texture.
Temperature plays a major role in how these proteins bond during the initial mix. A cooler water temperature, typically between 65°F and 70°F, is often preferred for long-fermentation doughs to prevent the yeast from becoming too active before the gluten structure has been properly established. Conversely, if you are in a rush, slightly warmer water (75°F to 80°F) can speed up the development process, though you must be careful not to exceed 85°F, or you risk killing the yeast and compromising the final flavor profile of the bread.
Understanding Hydration Ratios
The amount of water you add—referred to as hydration—dictates how easily the gluten develops. A lower hydration dough (55-65%) is easier to handle but develops gluten quickly through manual kneading. A higher hydration dough (75-90% and above) requires more finesse, often relying on stretch-and-fold techniques rather than aggressive kneading to prevent the dough from becoming an unmanageable mess.
"The dough is a living entity that responds to every touch; the goal is not to force it into submission, but to guide the gluten into an organized network that can capture the breath of the yeast."
Kneading: Developing Strength Through Friction
Traditional kneading is a form of mechanical manipulation that aligns the protein chains into a strong, unified structure. By pushing the dough away from you with the heel of your hand, folding it back over, and repeating the process, you are essentially "combing" the gluten strands so that they align in a parallel fashion. This creates the strength necessary to withstand the expansion of air bubbles during the proofing phase. When done correctly, the dough transforms from a shaggy, sticky mass into a smooth, satiny ball that is resistant to tearing.
However, over-kneading is a genuine risk for the home baker. If you push the gluten development too far, the structure becomes brittle, losing its ability to stretch during the bake, which results in a dense and tough loaf. You want your dough to reach the "Windowpane Test" stage—a point where you can stretch a small piece of the dough thin enough to see light pass through it without the film tearing. Once you hit this point, stop kneading immediately and allow the fermentation process to take over.
Professional tips for successful kneading include:
The Power of Rest: The Autolyse Technique
The autolyse is perhaps the most underrated tool in a baker's arsenal. Simply put, this is the act of mixing your flour and water and letting it sit, covered, for 30 to 60 minutes before adding salt or yeast. During this time, the flour hydrates and enzymes within the wheat begin to break down some of the proteins and starches. This process makes the gluten easier to develop, meaning you will spend significantly less time kneading your dough.
After the autolyse, you will notice that the dough is already more extensible and smooth than when you first mixed it. Adding the salt and leavening agent after this period ensures that you aren't fighting the dough during the initial mixing phase. Salt, in particular, tightens the gluten structure; by holding off on it, you allow the dough to relax and open up, making it much more pliable for the shaping process that follows later.
Many home cooks skip this step because they are impatient, but the time invested in an autolyse pays dividends in the final loaf. You will find that the crumb is more open, the crust is better colored, and the flavor is more nuanced. It is a fundamental technique that separates amateur bread making from professional-level baking. Always remember that with bread, time is your most valuable ingredient.
Why Salt Matters
Salt isn't just about flavor; it is a structural regulator. It controls the rate of yeast fermentation and helps to tighten the gluten, preventing the dough from becoming over-stretched and collapsing. Without salt, your bread will not only be bland, but it will lack the structural strength to maintain its shape in the oven.
Folding: An Alternative to Mechanical Kneading
If you are working with a high-hydration dough (like a classic sourdough), manual kneading is often ineffective because the dough is too slack. This is where folding comes into play. Instead of pounding the dough, you perform a series of gentle folds—usually in sets of four—every 30 minutes during the first two hours of bulk fermentation. This redistributes the yeast, creates a consistent internal temperature, and builds strength layer by layer.
The process is remarkably simple: grab one edge of the dough, stretch it upwards, and fold it over to the center. Rotate the bowl and repeat until all four sides have been folded. Over the course of the fermentation, you will feel the dough become noticeably more robust, holding its shape better each time you handle it. This method creates a complex, open crumb structure because you are preserving the air pockets that are forming naturally rather than crushing them with aggressive kneading.
Folding is also much gentler on your kitchen equipment and your hands, making it an ideal method for large batches or extended baking sessions. By utilizing gravity and the dough's own weight, you are encouraging the gluten network to organize itself in a three-dimensional way. This creates a "ladder" of protein that can expand upwards in the oven, leading to that coveted oven spring.
"The fold is a silent conversation between the baker and the dough; you are training the protein to be strong, yet supple enough to bloom beautifully under the heat of the hearth."
Shaping: The Final Structural Push
Once your bulk fermentation is complete and the dough is full of air, you must shape it carefully to ensure a tight surface tension. The goal of shaping is to create a "skin" on the outside of the loaf, which acts like an elastic balloon, holding the structure together as it rises in the oven. If your shaping is too loose, the loaf will spread horizontally rather than rising vertically, resulting in a flat and dense loaf.
To shape a round loaf (boule), gently pull the edges of the dough toward the center until you have a taut, rounded top. Then, flip the dough over so the seam is facing down and rotate it on the bench, using the friction of the surface to pull the outer skin even tighter. Be careful not to deflate the dough too much; you want to maintain the air bubbles you worked so hard to create during the fermentation process.
A tight shape also ensures that when you score the loaf with a blade, the expansion happens exactly where you want it. The score acts as a pressure release valve. Without a well-shaped, taut skin, the bread will crack randomly in the oven, leading to an uneven bake and a less-than-aesthetic loaf. Always handle the dough with purpose, but treat it with the respect due to a delicate, living thing.
Managing Temperatures and Proofing Times
The environment in which your dough rests determines the pace of gluten development and fermentation. Yeast is highly sensitive to heat; a warm kitchen (above 75°F) will cause the dough to ferment too quickly, which can weaken the gluten before it has reached its full strength. A cooler environment (65°F to 70°F) is generally ideal for a slow, steady rise, allowing the gluten network to fully develop and the flavors to deepen.
When checking if your dough is ready for the oven, rely on the poke test. Gently press your finger into the dough. If it springs back immediately, it is under-proofed and needs more time. If it stays indented permanently, it may be over-proofed and will struggle to rise in the oven. The sweet spot is a slow, gradual rebound. Learning to trust your touch is part of becoming a master baker, as no clock can ever be as accurate as the physical state of the dough itself.
Consider these factors when planning your bake:
The Flour Type:* High-protein bread flour requires more development time than low-protein cake or pastry flour.
The Leavening Agent:* Sourdough starters require significantly longer fermentation times than commercial yeast to build the necessary structure.
Humidity:* Higher humidity can make the dough stickier and harder to handle, so you may need to adjust your hydration levels downward.
Troubleshooting Common Gluten Failures
Even the most experienced bakers encounter issues with dough structure. If your loaf feels like a dense, heavy brick, it is likely that your gluten development was insufficient, or the dough was under-proofed. If your dough is completely flat and spreads upon hitting the heat, it is often a sign of over-proofing, where the gluten chains have become so stretched and exhausted that they can no longer hold the weight of the gases inside.
Another common issue is "tearing" during the shaping process. This happens when the outer skin is stretched beyond its capacity. If you see the surface of your dough tearing as you attempt to tighten it, stop immediately and let the dough rest for another 10 to 15 minutes. This allows the gluten to relax, which will make it much more extensible and easier to shape on your second attempt.
Finally, remember that patience is the ultimate ingredient. If your dough doesn't feel right, resist the urge to add more flour or bake it anyway. Give it another 30 minutes of rest or an extra set of folds. The bread will tell you what it needs if you are willing to listen. Every mistake is a lesson in the physics of dough, and every loaf that doesn't go to plan brings you one step closer to the perfect, golden-brown masterpiece you are aiming for.
Final Thoughts
Mastering the art of gluten development is not about memorizing complex formulas, but about cultivating a deep, intuitive understanding of your ingredients. From the initial hydration of the flour to the final, rhythmic folds and the gentle tension of shaping, every movement you make is a brick in the foundation of your loaf. As you move forward in your baking journey, focus on the feel of the dough. Notice how it changes under your hands, how it tightens after a rest, and how it blooms in the heat of the oven.
Do not be discouraged if your first few attempts do not yield the "perfect" crumb you see in magazines. Baking is a craft that rewards consistency and observation over raw speed. Take notes, adjust your temperatures, and never be afraid to experiment with different flour blends or hydration levels. When you finally pull that loaf from the oven—with its crackling, caramelized crust and that unmistakable, airy interior—you will know that it was your patience, your technique, and your careful stewardship of that gluten network that made it possible.
At "Blame The Chef," we want you to view your kitchen not as a laboratory of stress, but as a space for creative liberation. Bread is the world’s most humble, yet most transformative food. By taking the time to learn the science behind the structure, you are elevating the simple act of baking into an art form. So, preheat your oven, clear your counter, and get ready to bake something truly special. The perfect loaf is not just a result; it is the culmination of everything you have learned today. Happy baking, and may your crumbs always be light and your crusts always golden.




Get the Next Recipe
Weekly recipes, techniques, and gear picks — straight to your inbox.
