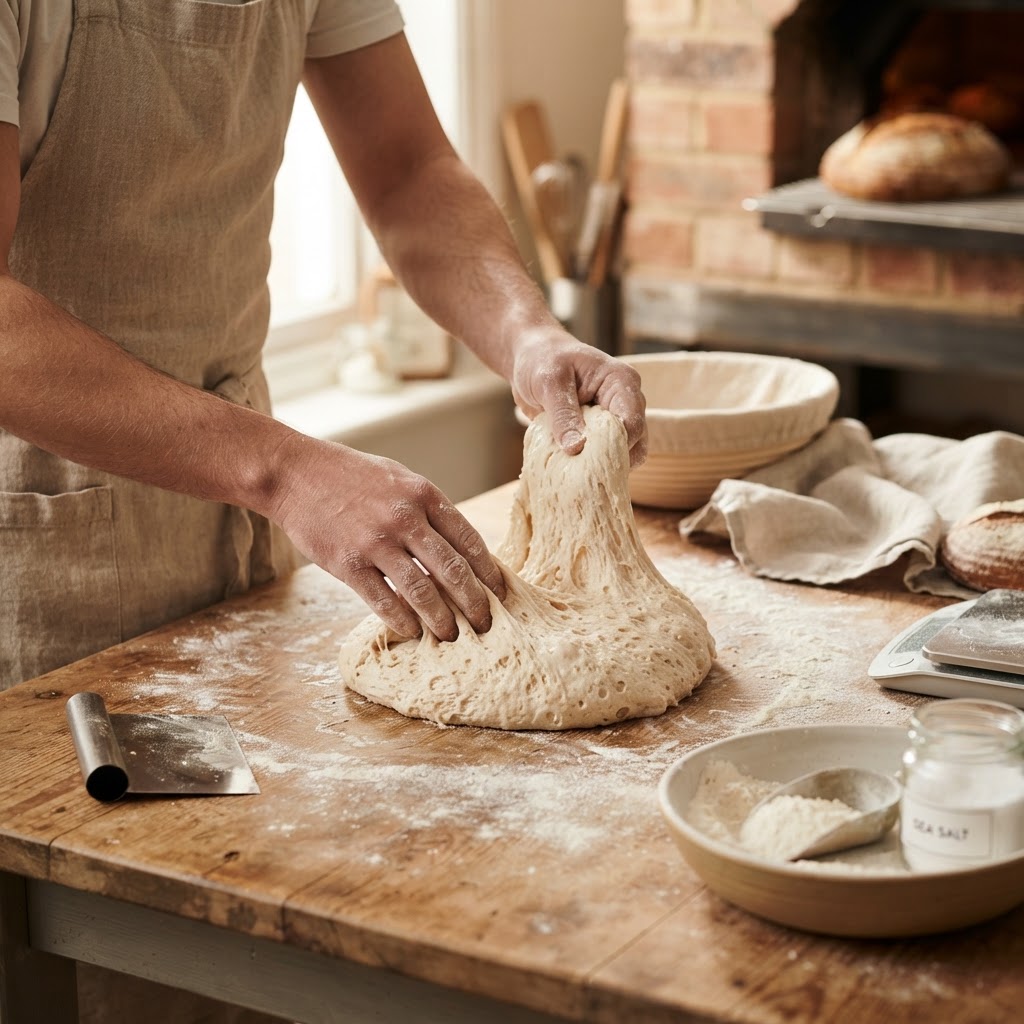
The Baker’s Guide to Hydration Adjustments: Mastering Flour Absorption and Humidity Control for Consistent Dough Results
Baking is often categorized as a science, and nowhere is that more evident than when you begin to grapple with the elusive variable of dough hydration. For the home baker, the sight of a recipe calling for 75% hydration can be both exciting and terrifying, representing the threshold between a dense, gummy crumb and the open, airy masterpiece you see on social media. Understanding how flour interacts with water is not merely about following a ratio written on a page, but rather about developing an intuitive grasp of how environmental factors change the physical properties of your dough. This guide serves as your roadmap to moving beyond rote recipe following and into the realm of true bread mastery, where you control the dough rather than letting the dough control you.
The journey toward consistent results begins with the realization that flour is a living, breathing ingredient that reacts dynamically to its surroundings. If your kitchen is particularly humid, your flour has likely already absorbed a degree of ambient moisture, meaning that pouring in the full amount of water dictated by a static recipe might result in a sticky, unmanageable mess. Conversely, in the dry heat of winter, your flour is parched and thirsty, often requiring a slightly higher volume of water to reach the same consistency as a summer bake. Recognizing these subtle shifts requires you to engage your senses, feeling the elasticity of the gluten network and watching the way the dough relaxes under your touch.
Mastering this art form requires patience and the willingness to treat your kitchen like a living laboratory. We are going to explore the mechanics of protein structures, the impact of mineral content in your water, and the critical role that temperature plays in fermentation rates. By the end of this deep dive, you will possess the confidence to look at a shaggy, hydrated dough and know exactly how to adjust your technique to ensure a perfect oven spring and a blistered, crackling crust. Let’s roll up our sleeves and demystify the science of hydration, turning those "baker’s blues" into consistent, bakery-quality results that will make you the envy of every dinner party.
The Chemistry of Flour and Absorption
At the heart of every loaf is the interaction between water and the proteins found in flour—specifically glutenin and gliadin. When these proteins are hydrated, they begin to bond and form gluten, the elastic matrix that traps the carbon dioxide produced by yeast. The capacity of your flour to absorb water is determined largely by its protein content and the way it was milled. A high-protein bread flour, typically ranging from 12% to 14% protein, will naturally be thirstier than a standard all-purpose flour, and failing to account for this will lead to a stiff, tough dough that refuses to expand properly in the oven.
Understanding your specific brand of flour is the first step toward consistency. Not all bags of "bread flour" are created equal; the ash content and the variety of wheat used can change the water-binding capacity significantly. Some flours are "damaged" during the milling process, which sounds negative but actually increases their ability to hold water, making them highly desirable for high-hydration loaves. If you are struggling with a recipe, the first variable you should investigate is whether your flour is under-hydrated relative to the needs of its specific protein structure.
The Role of Protein Content
Low Protein (10-11%):* Best for cakes and pastries where you want a tender crumb; these flours struggle to support the weight of high-hydration structures.
Medium Protein (11.5-12.5%):* The workhorse of the home kitchen; versatile enough for most sandwich breads and dinner rolls.
High Protein (13%+):* The gold standard for artisanal sourdough and crusty loaves; these flours require more water to become fully hydrated and elastic.
"The true measure of a baker isn't found in the precision of their scale, but in the sensitivity of their fingertips. If the dough tells you it is thirsty, you must have the courage to offer it a drink, regardless of what the original recipe suggests."
Understanding Ambient Humidity and Flour Equilibrium
Flour is hygroscopic, meaning it constantly seeks an equilibrium with the moisture levels of the surrounding air. In a humid coastal environment, flour can easily take on an extra 1-2% moisture content, which may seem negligible but makes a massive difference in a high-hydration dough (say, 80% or higher). If you don't adjust for this, you may find your dough turning into a slack, soupy consistency that refuses to hold its shape during bulk fermentation. Conversely, in the dead of winter, when central heating strips the moisture from the air, your flour will be bone-dry and require more water than the recipe calls for to achieve that supple, satiny finish.
To manage this, professional bakers often perform a test mix. Instead of adding 100% of the water at once, hold back about 5-10% of your total liquid. Mix your dough, let it rest for 20 minutes (the autolyse phase), and then evaluate the consistency. Only then should you drizzle in the remaining water if the dough feels firm or dry. This technique allows you to calibrate the hydration in real-time, effectively neutralizing the impact of your home’s specific environment on the final product.
Strategies for Humidity Control
The Autolyse Technique: Your Best Friend
The autolyse is perhaps the most misunderstood yet essential technique for anyone looking to master hydration. By mixing only your flour and water and letting it rest for 30 to 60 minutes before adding salt or yeast, you allow the flour to fully hydrate and the gluten network to begin forming on its own. This resting period does the heavy lifting for you, significantly reducing the amount of manual kneading required and making the dough much more extensible. When the gluten has had time to develop during the autolyse, it becomes much better at retaining the water you add, preventing that dreaded "puddle" effect.
During this rest, enzymes within the flour—specifically amylase and protease—begin to break down starches into simpler sugars and soften the gluten proteins. This leads to a dough that is much easier to shape and has a superior final crumb structure. If you are working with a high-hydration recipe (anything over 75%), skipping the autolyse is almost always a mistake, as the dough will lack the strength needed to support its own weight during the long fermentation process.
Benefits of Autolyse
Increased Extensibility:* The dough stretches further without tearing.
Improved Flavor:* Longer enzymatic activity results in deeper, more complex notes in the finished loaf.
Easier Handling:* The dough becomes less sticky and more "cohesive," making the shaping phase significantly less stressful.
"Treat the autolyse as a conversation between the flour and the water; by giving them a moment of silence in the mixing bowl, you allow the gluten bonds to form organically, rather than forcing them into submission through aggressive kneading."
Water Chemistry and Mineral Content
We often overlook the water itself, assuming that because it is safe to drink, it is perfect for baking. However, the mineral content of your tap water—known as water hardness—can have a surprising effect on your dough. Calcium and magnesium, which are common in "hard" water, actually act as yeast nutrients and help to tighten the gluten structure. If your water is extremely soft, you might find that your dough feels a bit floppy or lacks the desired "snap" in the oven.
For most home bakers, tap water is perfectly fine, but if you are experiencing consistent issues with dough slackness despite precise measurements, try switching to a bottled mineral water for a test bake. The goal is consistency, and if your local water supply fluctuates seasonally, your dough will feel the effects. Additionally, always pay attention to the water temperature. Temperature is the primary driver of fermentation speed; warmer water speeds up yeast activity, while cold water slows it down, allowing for longer, more flavor-intensive fermentation.
Temperature Control Basics
Desired Dough Temperature (DDT):* Professional bakers aim for a finished dough temperature between 75°F and 78°F (24°C–26°C).
Warmth:* Use water at 80°F-85°F (27°C-29°C) if your kitchen is cool.
Cold:* Use water at 60°F-65°F (15°C-18°C) if your kitchen is hot or you are doing a long, cold-proof in the refrigerator.
Strength Building and Bulk Fermentation
Once you have mastered the initial hydration, the next challenge is building the strength necessary to hold that moisture. High-hydration doughs require a gentle touch during bulk fermentation. Instead of traditional kneading, which can tear the developing gluten strands, use a series of stretch-and-folds. Every 30 minutes during the first two hours of bulk fermentation, reach under the dough, pull one side up, and fold it over the center. Rotate the bowl and repeat this on all four sides. This builds strength while respecting the airy bubbles you are trying to cultivate.
This process is critical because it organizes the gluten network into a strong, layered structure. As you fold the dough, you are effectively "sealing in" the moisture and trapping the gases. If you skip this, the dough will simply spread out into a flat pancake rather than rising upwards in the oven. A well-folded dough will look smooth and billowy, showing clear signs of gas bubbles throughout the mass. If the dough feels slack, perform an extra set of folds—this is your way of adding structural integrity to an otherwise loose composition.
Troubleshooting Your Bulk Fermentation
The Dough is Spreading:* You need more folds or a more vigorous shaping technique.
The Dough is Dense:* It is likely under-fermented; allow it more time in the bulk phase at a stable temperature.
The Dough is Tearing:* You are being too aggressive with your folds; take a gentler approach to maintain the integrity of the gluten network.
Shaping: The Final Step in Hydration Management
The final shaping is where the battle of hydration is won or lost. Because high-hydration dough is prone to sticking, it is vital to use the minimum amount of flour on your bench. Over-flouring during shaping creates "streaks" of raw flour inside your final loaf, which ruins the texture. Instead, rely on the tension you create during the shaping process. By dragging the dough against the counter, you create a thin "skin" on the surface, which holds the internal moisture in and prevents the loaf from collapsing into a puddle.
If your dough is particularly sticky, don’t reach for more flour right away. Instead, dampen your hands with a little water. This prevents the dough from sticking to your skin without introducing unwanted extra starch into the dough itself. Remember that the surface tension is what drives the vertical rise, or "oven spring." If you shape a high-hydration loaf with confidence and tension, it will stand tall and proud; if you are hesitant or gentle, it will inevitably flatten out during the bake.
Pro-Tips for Shaping Success
"The secret to a crust that shatters is the tension created during shaping. A slack dough is a sad dough, but a properly tensioned, hydrated dough will reward you with a crumb that sings when it comes out of the oven."
The Oven Spring and Heat Management
The ultimate test of your hydration control is the oven spring. As the dough hits the intense heat of your oven or Dutch oven, the trapped gases expand rapidly, and the water evaporates into steam. This steam is what causes the "spring." If you have under-hydrated your dough, it will be too rigid to expand, resulting in a dense, tight crumb. If you have over-hydrated, the gluten network might be too weak to contain the expansion, leading to a loaf that spreads wide and looks flat.
The use of a Dutch oven or a cast-iron combo cooker is non-negotiable for the home baker, as it traps the steam released by the dough itself. This steam keeps the crust soft for the first 15–20 minutes, allowing the bread to reach its maximum volume before the crust sets. Only after this initial burst should you remove the lid to allow the crust to caramelize and harden. This is where the magic of the Maillard reaction happens, turning the sugars and amino acids into a deep, mahogany brown crust that provides the structural integrity and flavor we all crave.
The Baking Timeline
Final Thoughts
Mastering the art of hydration is not a destination, but a lifelong process of observation and adjustment. By paying attention to the protein content of your flour, respecting the impact of your environment, and utilizing techniques like the autolyse and strategic folding, you can move away from the frustration of unpredictable loaves. Baking is the ultimate practice in mindfulness; it requires you to be present, to touch the dough, and to adapt to its needs in the moment. Remember that every loaf, even the ones that don't come out perfectly, is a lesson learned.
As you become more comfortable with these variables, you will find that you are no longer reading a recipe but rather guiding the dough through its transformation. The consistency you seek will come not from a rigid set of rules, but from the confidence to make small, calculated adjustments based on what you feel under your hands. Keep a notebook of your bakes, noting the hydration percentage, the ambient temperature, and the specific flour used. Over time, these notes will become your own personalized guide to the perfect loaf.
Take pride in the process. The sound of a cooling crust crackling on your kitchen counter is the reward for the patience and precision you have poured into your work. Whether you are aiming for the perfect sourdough boule or a delicate sandwich loaf, the principles of hydration remain the same. Go forth with your flour, water, and salt, and don't be afraid to blame the chef—you—for the delicious results that await. Happy baking, and may your crumb be as open as your curiosity.
The journey to the perfect loaf is never really over, as there is always a new flour to try, a different hydration percentage to explore, or a slight tweak to the bulk fermentation timing to discover. By understanding the core mechanics of how flour, water, and heat interact, you have equipped yourself with the tools of a professional. You are no longer just a recipe follower; you are a baker who understands the 'why' behind every movement in the kitchen.
Continue to push your boundaries. If you have mastered 70% hydration, try 75% or 80%. Experiment with adding whole grains, which are thirstier than white flour, and learn how they alter the dough's behavior. The more you experiment, the more your intuitive sense of "doughtiness" will develop, allowing you to sense when a dough needs one more fold, a few more minutes of rest, or just a little bit more warmth to reach its full potential.
Ultimately, remember that the goal of baking is to share, to create, and to enjoy the process of making something nourishing from humble, everyday ingredients. The science is the foundation, but the heart is what makes the bread truly special. Keep your starter healthy, keep your oven hot, and keep your enthusiasm high. Every loaf you bake is an expression of your dedication to the craft, and that, more than any technical statistic, is what makes a truly great baker. Happy baking, and enjoy the journey toward your personal version of the perfect crust.
Continue to explore the nuances of fermentation, as the longer, colder proofs often yield the most complex flavors. Understanding that hydration is merely one side of the coin, with fermentation timing being the other, will help you reach that next level of professional mastery. Do not fear the process; embrace the way the dough changes from a shaggy mass into a smooth, elastic masterpiece. Your hands are your best tools, and through them, you will develop the kind of knowledge that books simply cannot convey. Stay curious, stay diligent, and most of all, stay hungry for that perfect bake.
As you proceed with your future baking projects, consider the impact of your flour's freshness. Freshly milled flour, for instance, has different absorption qualities than store-bought flour that has been sitting on a shelf for months. The presence of the wheat germ and oil in fresh flour can affect the gluten development, often requiring a slightly different hydration strategy. These are the kinds of details that separate the hobbyist from the enthusiast. Stay observant, note the changes, and adapt. You have all the skills you need to achieve greatness in your kitchen, one loaf at a time.
Remember that high-hydration doughs are not the only way to achieve excellence; there is great beauty in a lower-hydration rustic loaf or a complex enriched dough. Each style requires its own balance of ingredients and techniques, and by learning the principles of hydration, you have essentially opened the door to mastering every other type of bread. The principles we have discussed here—protein structure, humidity, temperature control, and proper handling—are universal. Apply them with care, and you will find that consistency becomes the hallmark of your baking.
Final tip for the road: always trust your gut feeling after you have spent time getting to know your ingredients. If the recipe calls for a strict amount of water, but your intuition says the dough is already saturated, trust your hands. The recipe is a framework, but you are the architect. Build your loaves with confidence, adjust with grace, and relish in the incredible aroma of fresh bread filling your home. You have already taken the first, most important step by seeking the knowledge to improve, and that is where all true baking mastery begins.
Now, go clear your counter, flour your surface, and start your next project with the clarity and purpose that this guide has provided. Whether you are baking for your family, friends, or just for the joy of the craft, remember that every loaf has a story and you are the one writing it. May your ovens be hot, your crumb be airy, and your crust be perfect. The "Blame The Chef" promise is simple: stay curious, keep practicing, and never stop learning about the incredible, living process of turning simple ingredients into art.
The path to consistency is built on repetition and reflection. Don't be afraid to fail, for every failure is just a data point in your journey toward the perfect loaf. Treat your kitchen as your sanctuary and your dough as your medium. With the right focus on hydration, temperature, and technique, you will soon find that professional-grade results are not only possible but well within your grasp. It is time to bake with the confidence of a pro. Let’s get to it. You have all the knowledge, the skills, and the passion to make this happen.
Baking is a generous act, and there is nothing more rewarding than handing a warm, freshly baked loaf to someone you love. By mastering the science of hydration, you are ensuring that every loaf you share is of the highest quality possible. This is the greatest reward for any baker—the ability to provide joy, warmth, and sustenance. Carry this knowledge with you, let it inform your future bakes, and most importantly, keep enjoying the process of being a creator in your own home. The crust is calling, so let's get back to the oven.
Mastery takes time, but every single minute you spend working with your dough is an investment in your skills. Do not rush the process, do not force the results, and never lose sight of the magic that happens when flour and water meet. You are now equipped to tackle even the most challenging high-hydration recipes with confidence. Go ahead and start that sourdough, mix that ciabatta, or fold that focaccia—you are ready for whatever the dough throws at you. The kitchen is yours, the ingredients are waiting, and the results will be nothing short of spectacular.
Finally, never forget to clean your tools while the dough is proofing. It sounds simple, but a clean workspace is the mark of a baker who is in control. Organization, hygiene, and preparation are the unspoken partners of hydration and fermentation. When you respect the process in its entirety, the results will naturally follow. You are on your way to becoming a master of your own kitchen, and I cannot wait to see what you produce. Keep your oven calibrated, your scale accurate, and your heart focused on the craft. Happy baking.



Get the Next Recipe
Weekly recipes, techniques, and gear picks — straight to your inbox.
