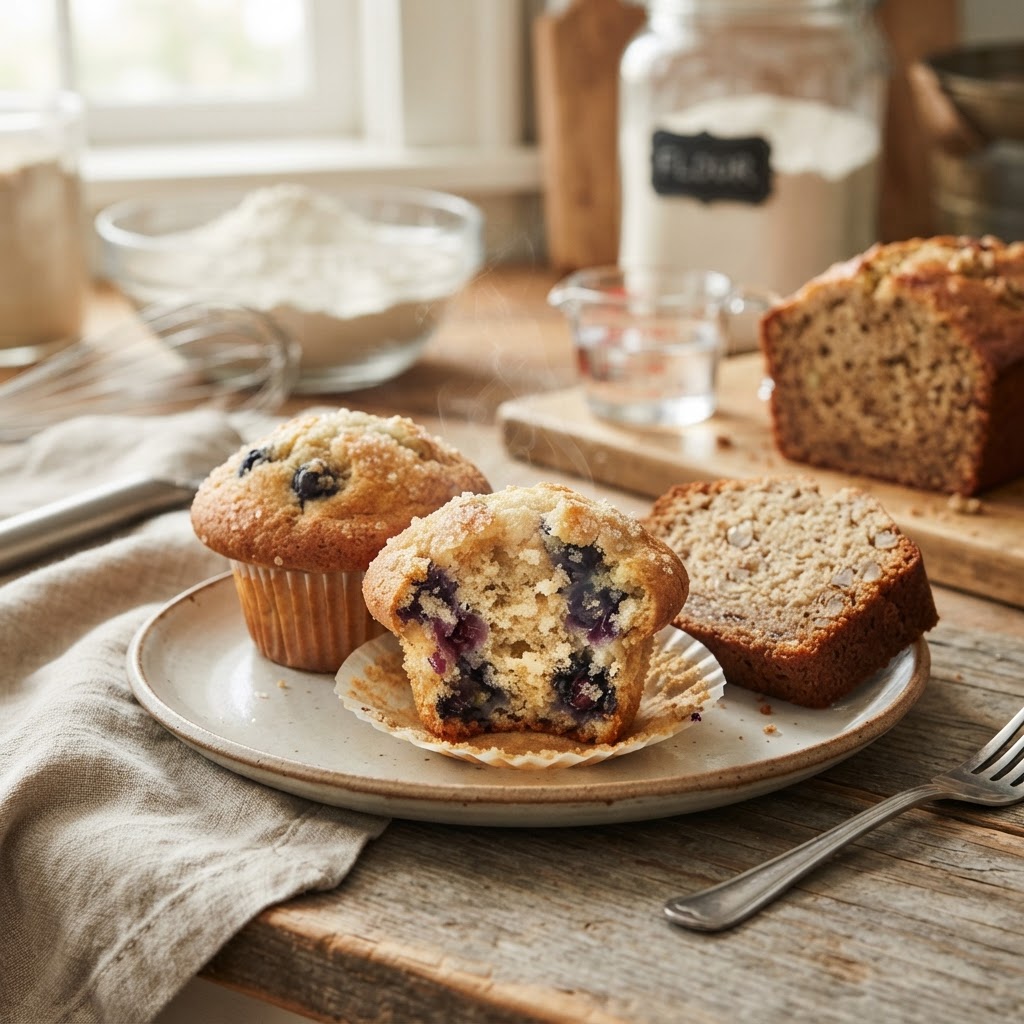
The Baker’s Guide to Hydration Adjustments: Mastering Flour Protein Content and Room Temperature for Consistent Muffin and Quick-Bread Crumb
Baking is often categorized as a science, yet for the home cook, it frequently feels more like an exercise in high-stakes improvisation. We have all stood in our kitchens, staring at a bowl of muffin batter that looks suspiciously like dry, craggy concrete or, conversely, a soup that promises nothing but a sunken center and a gummy core. The difference between a commercial-grade, domed, tender muffin and a tragic, leaden quick bread usually boils down to the invisible variables we rarely see on the back of a recipe card. Today, we are pulling back the curtain on the two most significant, yet most ignored, factors in the professional baker’s arsenal: flour protein percentages and the subtle, often ignored, impact of ambient room temperature.
Understanding the internal chemistry of your batter is the hallmark of transitioning from a casual baker to one who commands their kitchen with confidence. When we talk about hydration in the context of muffins and quick breads, we aren’t just talking about water; we are talking about the fluid interaction between fats, sugars, eggs, and the structural network created by flour. If you have ever wondered why your blueberry muffins worked perfectly in November but turned into chewy hockey pucks in the heat of July, you are already observing the complex interplay between environmental heat and hydration. Learning to manipulate these variables allows you to standardize your results regardless of the season or the specific brand of flour currently sitting in your pantry.
In this guide, we are going to break down the mechanics of crumb structure so that you can diagnose your own baking failures before they reach the oven. We will explore how to calculate the necessary adjustments to your liquid ratios based on the specific protein content of your flour and why your kitchen’s thermal environment is arguably as important as the quality of your butter. Whether you are aiming for a classic banana bread with an ethereal, melt-in-your-mouth texture or a rustic, fruit-laden muffin with a sturdy, crackly top, these adjustments will become your new standard operating procedure. Grab your digital scale and a notebook, because we are moving far beyond the "add flour until it looks right" school of baking.
The Chemistry of Protein and Hydration
When you select a bag of flour, you are essentially choosing the structural framework of your finished product. All-purpose flour is the Swiss Army knife of the baking world, but it is not a monolithic ingredient; its protein content can swing anywhere from 9% to 12% depending on the brand and the region of the harvest. This protein is primarily glutenin and gliadin, which, when hydrated, form the elastic network we know as gluten. In the context of muffins, we are not looking for the long, chewy strands found in a baguette; instead, we are aiming for a tender, short-crumb structure that relies on minimal development and maximum aeration.
Identifying Your Protein Percentage
The protein content listed on the nutritional label of your flour bag dictates how much liquid it can effectively absorb. A higher protein content flour requires more hydration to reach the same consistency as a lower protein flour because those protein chains are "thirstier." If you are working with a high-protein bread flour but using a recipe designed for pastry flour, your batter will naturally be stiffer, leading to a tighter, tougher crumb. To achieve consistency, you must become adept at reading these numbers and adjusting your milk, juice, or water ratios accordingly.
The Role of Hydration Balance
Hydration in quick breads is a balancing act between the solids (flour, sugar, leavening) and the liquids (eggs, oil, dairy). When protein content is high, your liquid-to-flour ratio must increase to maintain a relaxed crumb. Conversely, if you are using a delicate, low-protein cake flour, you must scale back on the liquids to prevent the structure from collapsing under its own weight before the leavening agents have a chance to do their job. This is not just a suggestion; it is a mathematical requirement for structural integrity.
"True consistency in baking isn't found in a perfect recipe, but in the baker's ability to adjust the variables of their ingredients to meet the reality of their kitchen environment."
Mastering the Room Temperature Variable
We often treat room temperature as an afterthought, but in the world of emulsified batters—which most muffins and quick breads are—it is a critical factor. When you cream butter and sugar, you are creating an emulsion that traps air bubbles. If your room temperature is too cold, the butter remains brittle and will not hold the air; if it is too hot, the butter melts and the emulsion breaks entirely, leading to a greasy, dense final product. The ambient temperature also dictates the fermentation rate of chemical leaveners like baking powder and baking soda, which start reacting the moment they encounter liquid.
The Thermal Impact on Batter
Your batter’s temperature dictates the viscosity of your fats. During the mixing phase, you want your ingredients—specifically eggs and dairy—to be at a uniform room temperature, typically around 68°F to 72°F. If your kitchen is hovering in the high 80s during a summer heatwave, your fats will lose their stability, causing your muffins to spread and lose their characteristic dome. Monitoring the ambient temperature allows you to make preemptive strikes, such as chilling your butter slightly or using colder milk, to ensure your batter enters the oven at the ideal thermal state.
Managing the Leavening Reaction
Chemical leavening agents are temperature-sensitive. In a warm kitchen, the "double-acting" aspect of baking powder can accelerate, causing your muffins to rise too quickly and then deflate because the internal structure has not yet set through protein coagulation. By maintaining a controlled environment or adjusting your mixing time to account for a warmer kitchen, you can ensure that the rise happens in the oven, right when you need it most.
The Structural Anatomy of a Perfect Crumb
A perfect quick-bread crumb is defined by a uniform distribution of small, delicate air pockets. When you cut into a muffin, you shouldn't see large, cavernous tunnels—those are a hallmark of over-mixing. The goal is a light, tender structure that supports the weight of inclusions like fruit, nuts, or chocolate chips. Achieving this requires a precise understanding of how the various components of your batter interact during the first five minutes of baking, which is the most critical phase for volume and texture.
Preventing the "Tunneling" Effect
Tunneling occurs when gluten is overworked. Because muffins are not kneaded like bread, the only mixing they experience occurs in the bowl. Once the dry ingredients meet the wet, the clock starts ticking. To minimize tunneling, ensure your dry ingredients are whisked thoroughly before adding the wet, and then use the "fold and incorporate" method. This involves using a large spatula to gently lift the batter from the bottom of the bowl and fold it over the top, stopping the moment no dry streaks remain.
The Role of Fats and Sugars
Fats contribute to tenderness by "shortening" the gluten strands, effectively preventing them from becoming too elastic. Sugar, while known for sweetness, is also a vital tenderizer; it holds onto water and delays the coagulation of proteins, which keeps the crumb moist for days. If you find your quick bread is dry or crumbly, it is often a sign that you have reduced the sugar or fat too aggressively, compromising the chemistry that keeps the crumb soft.
"A muffin is only as strong as the bond between its starch and its fat. Respect that ratio, and you will never experience a dry crumb again."
Advanced Hydration Strategies
If you have mastered the basics of protein and temperature, you are ready to look at hydration from a professional perspective: Baker’s Percentages. In professional pastry, everything is calculated as a percentage of the total flour weight. By converting your favorite recipes into this format, you can easily scale them up or down and make precise adjustments to the liquid content based on the moisture levels of your other ingredients, such as mashed bananas, pumpkin puree, or yogurt.
Converting to Baker’s Percentages
To calculate your recipe, express the weight of every ingredient as a percentage of the total flour weight. For example, if you have 500g of flour and 250g of milk, your hydration is 50%. If you swap to a high-protein bread flour, you might increase that milk to 275g (55% hydration) to compensate for the higher absorption. This takes the guesswork out of baking and allows you to recreate your successes with surgical precision regardless of the ingredients on hand.
Adjusting for Inclusions
Adding fruit or heavy inclusions changes the hydration needs of the batter. Fresh blueberries or diced apples release water as they bake, which can lead to a soggy bottom or an uneven crumb. When adding high-moisture fruits, it is wise to slightly decrease your total liquid hydration by 2-3% to account for the internal moisture release. Alternatively, if you are adding dry ingredients like nuts or oats, you may need to increase the hydration to ensure the batter remains supple and capable of rising.
Rule 1:* Always weigh ingredients in grams for maximum accuracy.
Rule 2:* Adjust liquid levels by 1-2% at a time.
Rule 3:* Document every change in your baking journal so you can identify patterns over time.
Equipment and Environment: The Unseen Baker
Your equipment is just as much a variable as your flour protein. A heavy-gauge aluminum muffin tin conducts heat differently than a non-stick, dark-coated pan. Dark pans absorb heat faster, which can cause the edges of your muffins to brown and set before the center has risen, leading to a distorted shape. If you use dark pans, it is standard practice to lower your oven temperature by 25°F to ensure an even bake, compensating for the pan’s high thermal conductivity.
The Power of the Convection Setting
Convection (fan-forced) ovens are a dream for pastries, but they can be tricky for quick breads. The constant airflow creates a crust very quickly, which can hinder the final "oven spring" if you aren't careful. For muffins, many professionals prefer to start at a higher temperature for the first 5 minutes to encourage a quick lift, then drop the temperature to finish the baking process gently. This "shock and slow" method ensures a stable structure that won't collapse once it leaves the oven.
Humidity and Your Kitchen
We rarely think about the humidity in our homes, but flour is hygroscopic, meaning it absorbs moisture from the air. On a rainy or humid day, your flour may already have a higher moisture content than on a dry, winter day. If you live in an area with extreme seasonal swings, you might need to adjust your liquid ratios based on the weather. A simple way to check is to feel the flour; if it feels clumpy or heavy, it is holding moisture. If it flows like sand, it is likely very dry and will require more liquid.
Troubleshooting the Common Muffin Failures
Even with the best planning, muffins can go rogue. Understanding why a failure happened is the most powerful tool you have to improve your skills. Most failures are not the result of bad luck, but a direct consequence of an imbalance in one of the variables we have discussed. By looking at the physical evidence, you can pinpoint the error and apply the necessary fix for the next batch.
The Sunken Center
A sunken center usually points to one of three things: excessive leavening, over-mixing, or an oven that was too cool. If your leavening is too high, the muffin rises faster than the structure can support, and then the air escapes. If you have over-mixed, the internal structure is too rigid, creating a rubbery center that sinks upon cooling. Check your leavening ratios and ensure your oven temperature is verified by an independent oven thermometer—built-in oven gauges are notoriously inaccurate.
The "Domeless" Muffin
If your muffins are coming out perfectly flat, they are likely suffering from a lack of heat or a weak emulsion. A flat top usually means the oven was not hot enough to trigger a rapid rise in the first few minutes, or that the emulsion broke during the mixing process. Remember to keep your fats at the right temperature and ensure your oven is fully preheated—usually for at least 30 minutes before you put anything inside—to ensure the ambient heat is stable.
"A failure in the kitchen is just a recipe for a better understanding of your ingredients. Don't hide the mistake; eat it, analyze it, and adjust the math."
Developing a Feedback Loop
To truly master these techniques, you must keep a log. For every batch of muffins or quick bread you make, record:
Final Thoughts
Mastering the nuances of flour protein content and room temperature is the final frontier for the home baker. It is the transition point where you stop following recipes blindly and start designing your own outcomes. When you understand that a muffin is a delicate chemical reaction held together by the precise interaction of heat, protein, and liquid, you gain the freedom to experiment without fear. The next time you find yourself staring at a bag of flour, remember that you are holding the foundation of your creation; by adjusting for the environment and the grain, you are taking control of the final result.
Consistency is not a gift bestowed upon a lucky few; it is a discipline. It is found in the weight of your scale, the precision of your thermometer, and your willingness to observe the subtle signals your ingredients are sending you. As you continue your baking journey, remember that your kitchen is a laboratory as much as it is a place of comfort. By applying these principles—adjusting for protein percentages, monitoring your thermal environment, and keeping meticulous records—you will elevate your quick breads from mere breakfast staples to professional-grade masterpieces.
So, head back into your kitchen with these new tools. Challenge your assumptions about your flour, watch the temperature of your butter, and don’t be afraid to tweak the hydration levels until the crumb is exactly the way you want it. There is nothing quite like the satisfaction of slicing into a loaf of bread or pulling a muffin from the tin and seeing that perfect, uniform crumb structure you worked so hard to achieve. Baking is a craft, and every batch is an opportunity to refine your touch, deepen your knowledge, and celebrate the beautiful, delicious results of a process well-understood. Happy baking, and may your muffins always rise to the occasion.
***
Continued Exploration of Ingredients
As you move forward, consider the impact of sugar types. Brown sugar adds not just moisture but acidity, which reacts with baking soda to provide extra lift. If you substitute white sugar for brown, you are not just changing the flavor profile; you are changing the pH of the batter and the way it interacts with your leavening agents. Every substitution has a ripple effect. This is why professional chefs are so cautious about deviating from a baseline recipe until they fully understand the underlying mechanics.
The Importance of Resting the Batter
One final pro tip for the home cook: resting your batter. Even for muffins using chemical leavening, letting your batter sit for 15 to 30 minutes before scooping it into the pans can allow the flour to fully hydrate and the fats to firm up slightly. This leads to a more uniform rise and a better-developed crumb. However, be mindful: if your kitchen is very warm, this resting period can cause the leavening agents to prematurely exhaust themselves. In warmer environments, skip the rest or place the bowl in the refrigerator for that duration.
Temperature and Ingredient Emulsification
The process of emulsification is the secret to a professional texture. If your eggs are cold and your butter is room temperature, the butter will re-harden when the eggs are added, resulting in a curdled look. This "broken" batter won't trap air properly, leading to a dense, heavy crumb. Always ensure your eggs and dairy are at the same temperature as your creamed butter. If you are in a rush, place your eggs in a bowl of warm water for 5 minutes—it’s a quick hack that makes a world of difference in your final texture.
The Role of Flour Sifting
While modern flour is generally well-processed, sifting still has a place, particularly if you are adding cocoa powder or other dry inclusions. Sifting isn't just about removing clumps; it’s about aerating the flour and ensuring an even distribution of leavening agents. When you skip this step, you risk having "pockets" of baking soda in your finished muffin, which can leave a bitter, metallic aftertaste. A quick pass through a wire mesh sieve ensures that your chemical leavening is perfectly dispersed throughout the batter.
The Final Baking Stretch
When your muffins are in the oven, resist the urge to open the door. Every time you peek, you lose significant heat, which can cause the delicate, rising structure of the muffin to collapse. Use your oven light and look through the glass. You are looking for a "spring back" when the top is gently pressed; if it feels firm and bounces back, it is ready. If it leaves an indentation, it needs another minute or two. Once you master the visual and tactile cues of the bake, you will find that you don't even need a timer to know when perfection has been achieved.
Final Technical Checklist for Success
To ensure your success every time, keep this checklist near your baking station:
By integrating these technical adjustments into your workflow, you are moving away from the guesswork of the past. You are becoming a master of your own culinary environment, capable of producing consistent, bakery-quality muffins and quick breads in any kitchen, in any season. The path to perfection is paved with details, and now that you know where those details lie, you are well on your way to becoming the baker you have always aspired to be. Keep experimenting, keep measuring, and most importantly, keep enjoying the process of creating something truly exceptional from the simplest of ingredients.




Get the Next Recipe
Weekly recipes, techniques, and gear picks — straight to your inbox.
