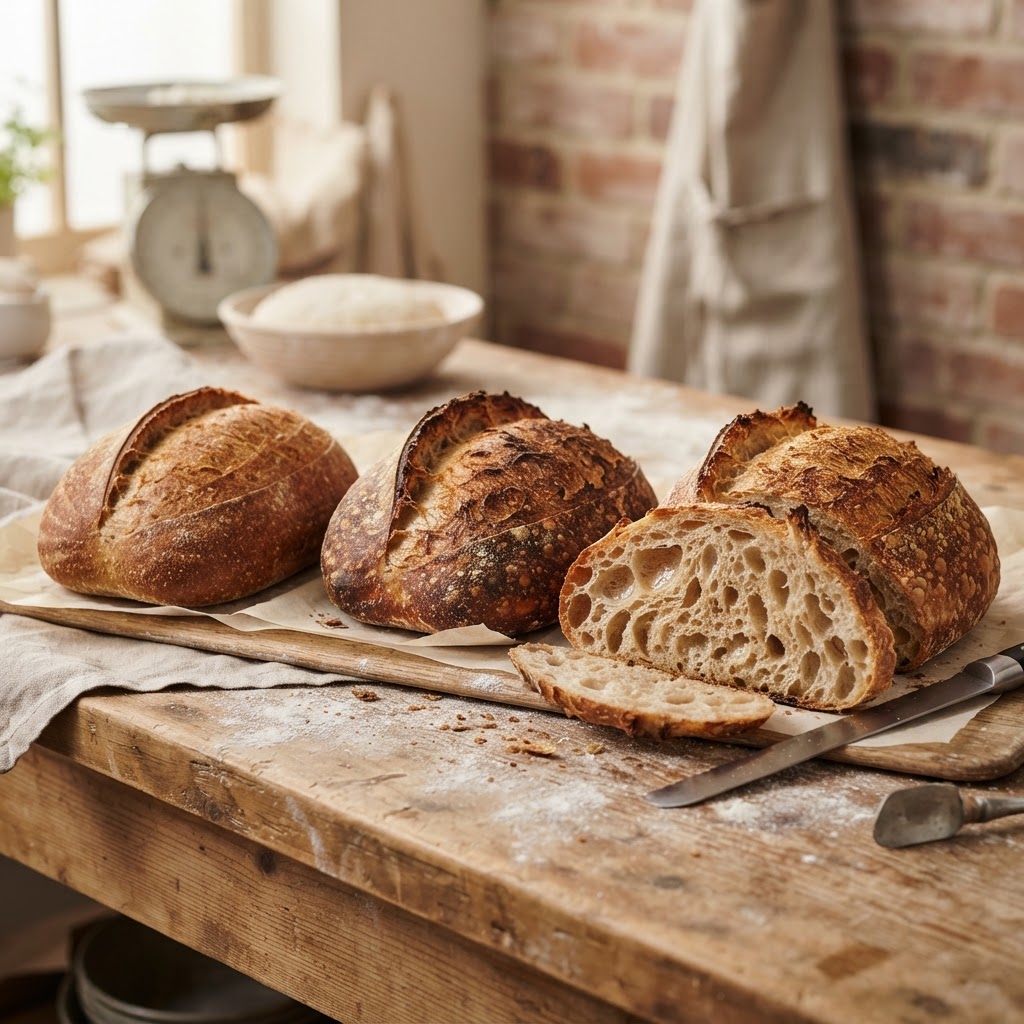
The Baker’s Guide to Hydration: How Water Percentages Dictate Crumb, Crust, and Shelf Life
The world of artisan bread baking often feels like a secret society where the language is spoken in decimals and percentages. To the uninitiated, the term hydration might sound like a simple instruction to drink more water, but in the professional bakery, it is the fundamental architecture of every loaf. It is the invisible force that dictates whether your sourdough will have a soaring, open crumb or a dense, cake-like interior. Understanding how water interacts with your flour is the difference between a frustrating afternoon spent scraping sticky dough off your counter and the rewarding creation of a bakery-quality masterpiece. Mastering this concept isn’t about luck; it’s about understanding the science of baker’s percentages and how to manipulate them to suit your desired outcome.
When I first started my journey in professional kitchens, I spent months wrestling with dough that felt like it had a mind of its own. I would follow recipes to the gram, only to find that my results changed depending on the humidity of the kitchen or the specific brand of flour I had purchased that week. It was only when I stopped focusing on the water as an "ingredient" and started seeing it as a structural component that everything clicked into place. Hydration is the engine that drives fermentation, enzyme activity, and the development of the gluten network. Once you grasp this, you move from being a follower of recipes to being a true bread artisan.
In this guide, we are going to strip away the mystery surrounding water ratios and dive deep into the mechanics of the dough. We will look at how specific percentages change the physical behavior of your bread, how to manage high-hydration sticky doughs without losing your sanity, and why temperature is the silent partner to your hydration levels. Whether you are aiming for a crusty, rustic boule or a tender, airy focaccia, the path to perfection starts with the water. Put on your apron, sharpen your bench knife, and let’s get into the nitty-gritty of why your flour-to-water ratio is the most important decision you will make all day.
The Foundation of Baker’s Percentages
To understand hydration, you must first master the language of baker’s math. Unlike standard cooking, where recipes are written in volumes or specific weights, bread formulas are calculated based on the total weight of the flour, which is always set to 100%. If you have 500 grams of flour and 350 grams of water, your hydration is 70%. This universal language allows professional chefs to scale recipes up or down infinitely while keeping the structural ratios perfectly balanced.
Why 100% Flour is the Benchmark
Every recipe starts with the flour. By assigning it the value of 100%, we create a baseline that allows us to compare different bread styles objectively. When you add salt, yeast, or hydration, you are calculating those ingredients as a percentage of that base weight. This consistency is vital, especially when dealing with additions like olive oil, honey, or seeds, which also affect the dough's final texture and structural integrity.
The Role of Absorption
Not all flours are created equal. Hard wheat flours with high protein content have a greater capacity to absorb water than softer, lower-protein flours. This is why a 70% hydration dough made with bread flour might feel stiff, while the same percentage made with pastry flour would feel like a batter. Always check the protein count on your bag of flour; if it is above 12%, you can generally push the hydration higher without the dough losing its integrity.
"Hydration is not just an amount of liquid; it is the catalyst for every chemical reaction that occurs within your dough. If you want to change your bread, start by changing your percentage."
Low Hydration: The Land of 60% to 65%
Low-hydration doughs are the workhorses of the baking world. They are reliable, easy to handle, and provide a consistent crumb that is ideal for sandwiches and toast. If you are a beginner, starting here is essential because it allows you to learn the mechanics of kneading and folding without the dough sticking aggressively to your hands or work surface.
Characteristics of Low-Hydration Doughs
Doughs in the 60% to 65% range are firm and pliable. They can be shaped with minimal effort, hold their form during the final proof, and rarely spread out on the baking stone. Because the dough is less sticky, you don't need a lot of bench flour, which keeps the crust from becoming tough or absorbing too much excess powder. These loaves typically have a more regular, closed crumb structure, making them perfect for uniform slicing.
When to Choose This Ratio
You should opt for lower hydration when you are working with heavier, enriched doughs, such as brioche, or when you are making a sandwich loaf that requires a very tight, soft crumb. Additionally, if you are learning the art of shaping, lower hydration gives you the tactile feedback you need to understand how to create surface tension. Mastering this level of dough ensures you build the muscle memory required for more advanced, high-hydration loaves later on.
The High-Hydration Sweet Spot: 75% to 85%
Once you cross the 75% threshold, you enter the realm of the "open crumb." This is where the magic of artisanal sourdough truly shines. At this level of hydration, the dough becomes much more fluid and elastic. It requires a different set of skills to manage, specifically the use of coil folds or stretch and folds rather than traditional aggressive kneading, which would damage the delicate structure.
Managing Stickiness and Structure
The primary challenge with high-hydration dough is "tackiness." Because the gluten network is stretched thin by the high water content, the dough will want to stick to everything it touches. The secret here is patience and temperature control. Using cooler water during the mixing phase keeps the dough from becoming too slack, and working with wet hands is far more effective than using extra flour, which can lead to a dense, dusty crust.
The Beauty of the Open Crumb
The reason we chase 80% hydration or higher is the aesthetic and textural result: large, irregular air pockets and a light, custardy crumb. This type of bread provides a beautiful contrast between the crisp, shattered-glass exterior and the soft, moist interior. These loaves require a very hot oven and often a Dutch oven to trap steam, which allows the loaf to expand before the crust sets, facilitating that coveted "oven spring."
"High hydration is a game of management. You aren't fighting the dough; you are managing its flow. If the dough starts to puddle, it is a sign that it has lost its structural tension, not that it is a failure."
The Impact of Hydration on Shelf Life
One of the most overlooked benefits of higher hydration is how it affects the longevity of your finished loaf. Water, when properly bound within the gluten matrix, helps maintain the freshness of the crumb. Bread that is very dry often stales quickly because the moisture migrates out of the starch granules rapidly. Conversely, a high-hydration loaf retains its moisture for days.
Starch Retrogradation
Staling is essentially the process of starch retrogradation—the recrystallization of starch molecules as they cool and sit. High-hydration doughs contain more water, which acts as a plasticizer for the starch, slowing down this crystalline formation. This is why a well-baked, 80% hydration sourdough loaf can stay soft and delicious for four or five days, whereas a low-hydration baguette might be rock-hard within twenty-four hours.
Storage Tips for Maximum Freshness
Regardless of your hydration, how you store your bread is critical. Never store bread in the refrigerator, as the cold temperatures accelerate starch retrogradation, making the loaf stale faster. Instead, store it at room temperature in a paper bag or a bread box. If you have a high-hydration loaf, you can keep it cut-side down on a wooden board to keep the crumb moist for longer, or wrap it in a clean cotton tea towel to balance humidity.
Temperature and Its Relation to Water
Temperature is the invisible hand that guides your hydration. If your kitchen is hot—say, 80°F—a 75% hydration dough will behave very differently than it would in a 65°F environment. High hydration speeds up fermentation because water is a fantastic conductor of heat and a necessary solvent for the yeast and bacteria in your starter to thrive.
Calculating Desired Dough Temperature (DDT)
Professional bakers use the Desired Dough Temperature (DDT) calculation to ensure consistency. By calculating the temperature of the flour, the ambient air, the water, and the friction generated by your mixer, you can dial in a consistent environment for your yeast. For most sourdough, a DDT of 78°F is the gold standard for healthy, controlled fermentation.
The Cooling Effect
If you are working with high-hydration doughs in a warm climate, use ice water. Dropping your water temperature to 50°F or 55°F will compensate for the heat gained during the mixing process. This extra control allows you to keep the dough structured and prevents it from over-proofing during the bulk fermentation phase, which is a common pitfall for home bakers trying to replicate professional results.
Troubleshooting the Hydration Mess
We have all been there: you add the water, the dough looks like a loose soup, and you start questioning your life choices. First, take a deep breath. Hydration levels can be adjusted mid-process, and nothing is truly ruined until it is baked. If you find your dough is unmanageable, there are specific techniques to save it without sacrificing the final quality of the loaf.
The "Slippage" Fix
If your dough is too wet, don't just dump more flour into it, as this will create dry streaks. Instead, use a series of strength-building folds. Every 30 minutes, perform a set of folds by grabbing the edge of the dough, pulling it up high, and folding it over the center. This creates internal layers of tension. You will be amazed at how a sticky, soupy mess can transform into a firm, smooth ball of dough after four sets of folds over two hours.
Ingredient Adjustments
If you are consistently struggling, consider the autolyse technique. By mixing only the flour and water together for 30 to 60 minutes before adding the salt and yeast, you allow the flour to fully hydrate and the gluten to begin forming on its own. This makes the dough significantly more extensible and easier to handle, even at higher hydration percentages. It is a professional chef’s secret for taming wild, high-water doughs.
Step 1:* Autolyse your flour and water for 45 minutes.
Step 2:* Add your starter/yeast and salt, and mix until incorporated.
Step 3:* Perform a series of gentle folds to build structural tension.
Step 4:* Observe the dough; if it still feels too weak, perform one extra set of folds.
Advanced Flour Additions: The Fiber Variable
The final piece of the hydration puzzle is the type of flour you are using. Whole grains, rye, and ancient grains are "thirsty" flours. They contain bran and germ, which act like tiny sponges that soak up water much faster than refined white bread flour. If you are baking a whole-wheat loaf at 75% hydration, it will feel much stiffer than a 75% hydration white loaf.
Adjusting for Whole Grains
When working with high percentages of whole-wheat or rye, you must increase your hydration significantly to achieve the same open crumb. Do not be afraid to push these loaves toward 85% or even 90% hydration. Because the bran acts as a structural inhibitor—actually cutting the gluten strands—the extra water is necessary to soften the bran and allow the gluten network to properly expand during the bake.
Using Pre-Soaks
For very hearty grains, use a soaker (or pâte fermentée). Soak your whole grains or seeds in warm water for several hours before adding them to your main dough. This ensures that the water is absorbed by the ingredients rather than pulling moisture away from your dough, which keeps your hydration ratios consistent and prevents the final loaf from feeling dry or gritty.
Final Thoughts
The journey to understanding hydration is a journey of understanding the very essence of bread. We started by looking at simple ratios, moved through the complexities of handling sticky, high-hydration doughs, and discussed the critical role of temperature and flour quality. Remember that bread baking is not a chore; it is a conversation between you and your ingredients. Every time you increase your hydration by a mere 2% or 3%, you are learning how that water interacts with the protein in your specific flour. You are learning the "feel" of the dough, and that intuition is something no recipe book can ever replace.
Don't let the stickiness of the dough intimidate you. Embrace the mess. When you find yourself with dough stuck to your hands, you are simply learning where the limits of that particular flour lie. Keep a journal, record your percentages, note the ambient temperature of your kitchen, and adjust as you go. You will find that within a few weeks, your loaves will become more consistent, your crust will get crispier, and your crumb will become the envy of your neighbors.
Bread is one of the oldest human inventions, and yet, it is a constantly evolving craft. Whether you are baking a standard 65% loaf for a simple grilled cheese or a 85% hydration sourdough boule for a dinner party, the core principle remains the same: treat the water as the foundation, respect the temperature, and always keep experimenting. Blame the chef if you have to, but I promise that once you master the water, you will never look at a bag of flour the same way again. Happy baking!




Get the Next Recipe
Weekly recipes, techniques, and gear picks — straight to your inbox.
