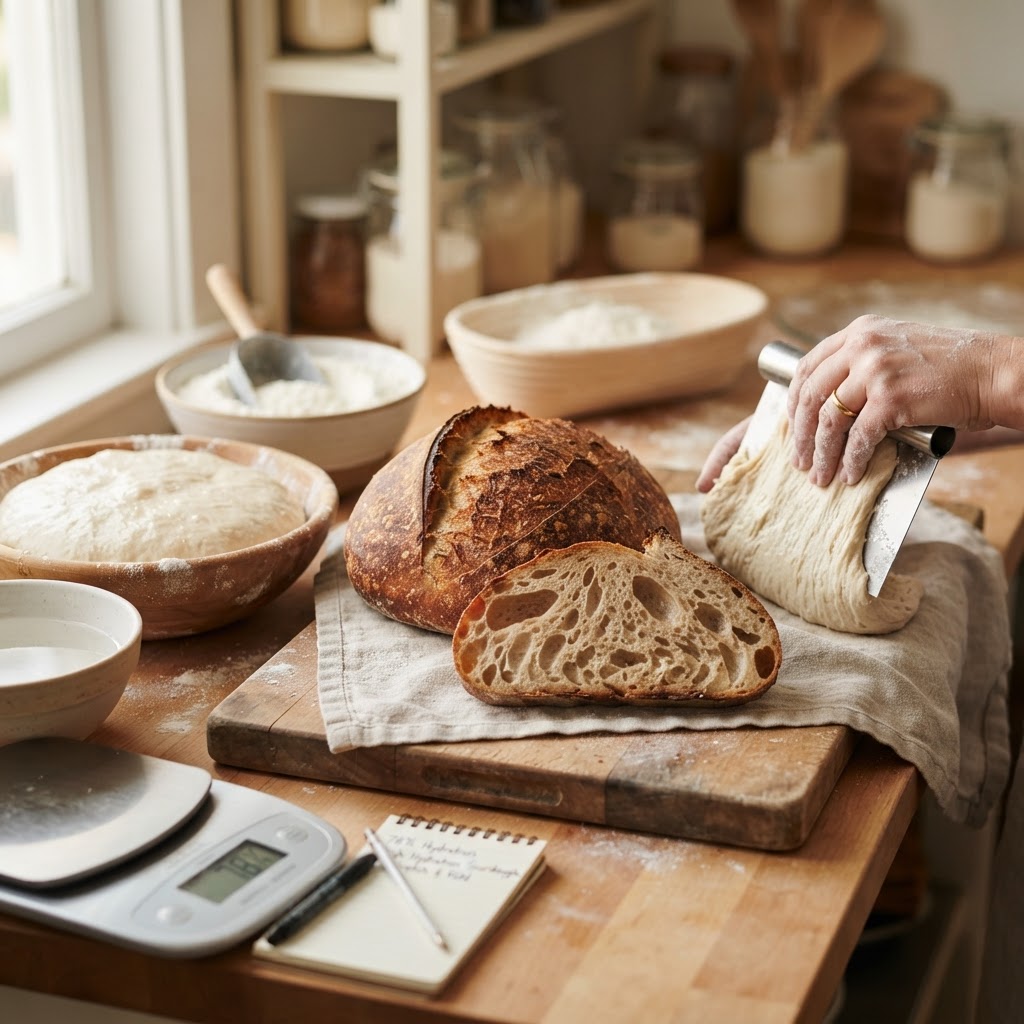
The Baker’s Guide to Hydration: Mastering Water-to-Flour Percentages for Consistent Dough Elasticity and Crumb Structure
The world of artisanal bread baking often feels like a secret society where the language is coded in percentages and the entry fee is a dusting of flour on your kitchen floor. Many home bakers begin their journey with recipes that measure strictly in cups and tablespoons, only to find that their results fluctuate wildly from one week to the next. The culprit is almost always the inconsistent measurement of dry ingredients versus liquid, a problem solved instantly by embracing the Baker’s Percentage. By shifting your perspective to a system where flour is always represented as 100%, you begin to understand the chemistry of your dough rather than just following instructions blindly. This guide aims to demystify the science of hydration, empowering you to adjust your recipes based on environmental factors like humidity, flour type, and personal preference for crumb structure.
When we talk about hydration in bread baking, we are simply discussing the ratio of water to flour by weight. A dough that is 60% hydrated means that for every 100 grams of flour, you are adding 60 grams of water. While this sounds mathematically simple, the practical application changes everything about the way your dough behaves during the mixing, folding, and shaping processes. A low-hydration dough feels sturdy and manageable, making it perfect for beginners or for loaves that require intricate scoring patterns. Conversely, high-hydration doughs—often exceeding 80%—are sticky, temperamental, and prone to spreading, yet they reward the baker with a translucent, airy, and jelly-like crumb that is the hallmark of professional-level sourdough.
Mastering these percentages is not merely about achieving a specific look; it is about consistent dough elasticity and building a structure that can support its own weight during the long fermentation process. Whether you are using a standard all-purpose flour from the supermarket or a high-protein bread flour from a local mill, knowing how to balance your water content will elevate your baking from casual hobbyist to confident artisan. Throughout this post, we will break down the variables that affect your dough, explain how to calculate your own formulas, and provide actionable tips for managing high-moisture doughs without losing your sanity. Prepare to look at your kitchen scale in a new light, as we dive deep into the hydration variables that separate a dense, brick-like loaf from a masterpiece of crust and crumb.
The Foundation of Baker’s Math
Before you can manipulate hydration, you must understand the language of the professional bakery. The Baker’s Percentage is a system where the weight of each ingredient is expressed as a percentage of the total flour weight in the recipe. Because flour is always the 100% constant, every other ingredient—water, salt, yeast, and fat—is adjusted relative to that baseline. This allows you to scale recipes up or down infinitely without losing the integrity of your dough’s character, provided you keep your ratios intact.
Why Weight Beats Volume
If you are still using measuring cups, you are likely failing before you even turn on the oven. A cup of flour can vary by as much as 20% depending on how it was scooped or settled in the vessel. When you weigh your ingredients, you ensure that your hydration percentage is mathematically accurate. Professional chefs rely on this precision because it removes the guesswork from the equation, allowing for repeatable results every time you bake. If you want a 75% hydration loaf, you need 750 grams of water for every 1,000 grams of flour. There is no room for interpretation when you are dealing with grams and digital scales.
Defining Your Baseline
For the average home baker, it is best to start by establishing a baseline. Most standard sandwich loaves sit comfortably between 60% and 65% hydration, making them easy to knead and shape. Lean hearth breads, like a classic baguette or a crusty boule, often jump into the 70% to 75% range. Once you have a base recipe that you know works, you can begin to incrementally increase your water by 2% to 3% each bake. By keeping a baking journal, you can document exactly how these small changes affect your dough’s tension, its ability to hold gas, and the final texture of the loaf after cooling.
"True mastery in the bakery does not come from following a recipe, but from understanding the relationship between water and the protein strands within your flour. When you treat hydration as a variable you control, you stop being a follower and start being a creator."
The Science of Gluten and Water Interaction
Hydration is essentially the catalyst for the magic that happens inside your mixing bowl. When flour comes into contact with water, two specific proteins—gliadin and glutenin—begin to hydrate and connect. As you manipulate the dough through kneading or folding, these proteins link together to form gluten strands, a stretchy, web-like network that traps carbon dioxide produced by your yeast. Without adequate water, this network remains rigid and brittle, leading to a heavy, dense loaf that refuses to rise.
Protein Content and Water Absorption
Not all flours are created equal. A high-protein bread flour has a greater capacity to absorb water than a lower-protein pastry or cake flour. If you try to force 80% hydration into a weak, low-protein flour, you will likely end up with a puddle of batter rather than a beautiful dough. Absorption rates are specific to the miller and the harvest, so it is vital to know your ingredients. Look for a flour with a protein content between 12% and 14% if you are interested in experimenting with high-hydration recipes, as these grains provide the structural integrity required to hold onto that extra water.
The Role of Autolyse
One of the most effective techniques for improving dough elasticity is the autolyse. This involves mixing only your flour and water together—skipping the salt and leaven—and letting it rest for 30 to 60 minutes before adding the rest of your ingredients. During this time, the flour fully hydrates, and the gluten network begins to organize itself without any manual labor. By the time you come back to add your salt and yeast, the dough will already have significantly more extensibility. This is a game-changer for high-hydration doughs, as it makes the initial mixing phase feel much less intimidating and sets the stage for a superior crumb.
Managing the Sticky Reality of High Hydration
As you push your hydration levels into the 80% and 90% range, the physical handling of the dough becomes the primary challenge. High-hydration dough is inherently sticky because the excess water sits between the gluten chains, causing them to slide against each other more easily. If you treat this dough like a traditional kneadable loaf, you will be tempted to add more flour, which ruins the very thing you were trying to achieve. Instead, you must change your handling techniques to work with the moisture, not against it.
The Coil Fold Technique
Traditional kneading on a countertop is often counterproductive for high-hydration doughs, as it can tear the delicate structure you are trying to build. Instead, use a series of coil folds or stretch and folds performed directly in the bowl. Every 30 minutes during the bulk fermentation, reach under the center of the dough, lift it up, and let it fold over itself. This strengthens the gluten without destroying the air pockets created by your wild yeast or commercial starter. Repeat this four times, and you will notice the dough transform from a sloppy, unorganized mass into a silky, cohesive ball.
Using Water as a Tool
The biggest mistake beginners make is using flour on their hands when shaping sticky dough. Every pinch of flour you dust onto your board is a pinch of flour that gets incorporated into the dough, slowly turning your 85% hydration loaf into a 70% one. Instead, keep a small bowl of room-temperature water next to your workstation. Dampen your hands and your bench scraper before touching the dough. The water acts as a non-stick barrier, allowing you to create tension on the surface of the loaf without the dough sticking to your skin.
"A sticky dough is not a failed dough; it is a lively, active environment. By embracing the wetness and learning to guide it through gentle folds rather than aggressive kneading, you unlock the potential for the legendary, open crumb that everyone craves."
Fermentation, Temperature, and Hydration
Hydration and temperature are inextricably linked in the life cycle of your dough. A wetter dough ferments much faster than a dry one because the water allows for easier movement of nutrients and sugars for the yeast. If your kitchen is hot—say, above 75 degrees Fahrenheit—a high-hydration dough can quickly go from "perfectly proofed" to "over-proofed mush." Understanding this relationship is crucial for maintaining the consistency of your crumb structure and preventing your loaves from losing their shape in the oven.
The Impact of Ambient Temperature
If you are working in a warm environment, you may want to decrease your hydration slightly or use chilled water in your mix to slow down the fermentation process. Yeast loves a warm, moist environment, so if you are pushing the limits of your hydration, you must pay closer attention to the bulk fermentation phase. I recommend using a clear, straight-sided container to monitor the growth of your dough. A 50% increase in volume is usually the sweet spot for a well-structured loaf.
Controlling the Proofing Time
If you find that your dough is too slack or losing structure, your fermentation might be moving too fast for the gluten to keep up. Consider utilizing a cold retard in the refrigerator overnight. The lower temperature slows down the activity of the yeast while allowing the enzymes to continue breaking down complex carbohydrates into simple sugars. This not only improves the flavor of your bread but also makes the dough much easier to score just before baking, as the cold dough will hold its shape better against a sharp lame or razor blade.
Troubleshooting Common Hydration Pitfalls
Even with a scale and a thermometer, things can go wrong. If you are struggling with a loaf that comes out looking like a pancake, the issue is often a lack of tension during the shaping process rather than the water content itself. High-hydration dough needs a tight "skin" on its surface to hold its structure during the steam-injected environment of the oven. If you skip the bench rest or the final shape, you are essentially asking your bread to collapse, regardless of how accurate your Baker’s Percentage was.
The "Shattered Crumb" Effect
Sometimes, your bread might look great on the outside but have a dense, gummy interior. This is a tell-tale sign that the hydration was too high for the flour’s specific strength, or that the dough was not baked long enough. To fix this, ensure you are baking your loaves to an internal temperature of at least 205-210 degrees Fahrenheit. A dark, caramelized crust is not just for flavor; it is an indicator that the structure of the bread has set properly, allowing for the moisture to evaporate correctly from the crumb.
Adjusting on the Fly
Don't be afraid to pull back. If a recipe calls for 80% hydration and you feel like the dough is completely unmanageable, lower it to 75% for your next attempt. The goal is to build your skills progressively. As your technique with bench scraping, folding, and shaping improves, your ability to handle higher-hydration doughs will increase naturally. Remember that baking is a journey of small refinements, and each loaf is a data point that helps you become a more intuitive baker.
Advanced Flour Blending for Texture
Once you have mastered the basics of hydration, you can start experimenting with flour blends. The addition of whole grains, such as rye, spelt, or whole wheat, dramatically changes how your dough absorbs water. These grains have a bran component that is like a little sponge; it will soak up a significant amount of water that would otherwise be available to the gluten network. If you swap out 20% of your bread flour for whole wheat, you might find that you need to add an extra 2% to 5% water to achieve the same consistency you had before.
Working with Rye and Ancient Grains
Rye, in particular, is a temperamental ingredient because it lacks the gluten-forming proteins of wheat. It absorbs water aggressively but creates a sticky, almost gummy texture if handled improperly. When working with high-rye formulas, hydration is even more critical. You are looking for a dough that feels tacky but not wet. Using a higher-hydration with rye often results in a better shelf life and a more complex, sour flavor, but it requires a very deft hand. Start by replacing just 10% of your white flour with a specialty grain and see how the hydration reacts.
The Importance of the "Soaker"
For larger inclusions like seeds, grains, or cracked wheat, use a soaker. This involves soaking your additions in an equal weight of water before adding them to your final dough. If you add dry seeds to a high-hydration dough, they will act like little thieves, stealing the moisture away from your gluten network as they hydrate during the fermentation process. By pre-soaking them, you ensure that the water you’ve meticulously calculated remains where it is needed—supporting the crumb structure and keeping the loaf moist for days after it leaves the oven.
"Your choice of flour is the clay, but your hydration is the water that brings it to life. Mixing different grains is like mixing colors on a palette; each grain brings its own unique absorption profile and flavor, waiting for the perfect ratio to sing."
Final Thoughts
Mastering hydration is the definitive turning point in a baker’s development. It is the moment you move past the "rules" of a single recipe and into the realm of understanding how ingredients actually interact. By adopting the Baker’s Percentage, you are no longer guessing; you are engineering. You are managing the physics of water, protein, and heat to create something that is not just food, but a technical achievement. Every loaf you bake is an opportunity to adjust that percentage by a fraction, to watch how the dough tensions under your hands, and to see how the crumb sets in the intense heat of your oven.
Do not be discouraged by the sticky messes or the flattened boules that inevitably happen when you first push your hydration higher. Even the most seasoned professional chefs have had to scrape a failed experiment off their granite countertops. The key is to keep your baking journal close, document your hydration percentages, and always note how the dough felt to the touch. Was it overly slack? Did it struggle to rise? Was it tacky or truly wet? These subjective observations, when paired with the objective precision of your scale, will eventually form an internal compass that tells you exactly how much water your dough needs before you even begin to mix.
Finally, remember that bread is meant to be enjoyed. While we obsess over crumb structure, air bubbles, and hydration percentages, the ultimate test is the taste. High hydration often yields a better-flavored loaf with a thinner, more shattered crust—the kind that sings as it cools—but a moderately hydrated loaf can be just as delicious and much easier to slice for your morning toast. Find the hydration level that fits your skill level and your lifestyle, and make it your own. Whether you are a fan of a tight, uniform crumb for sandwiches or an open, airy structure for dipping in olive oil, your path to consistency starts with the water. Keep your scales zeroed, your folds gentle, and your oven hot, and you will find that the "Blame The Chef" approach to baking is really about taking credit for the beautiful, crusty results that come from understanding your dough inside and out. Happy baking!



Get the Next Recipe
Weekly recipes, techniques, and gear picks — straight to your inbox.
