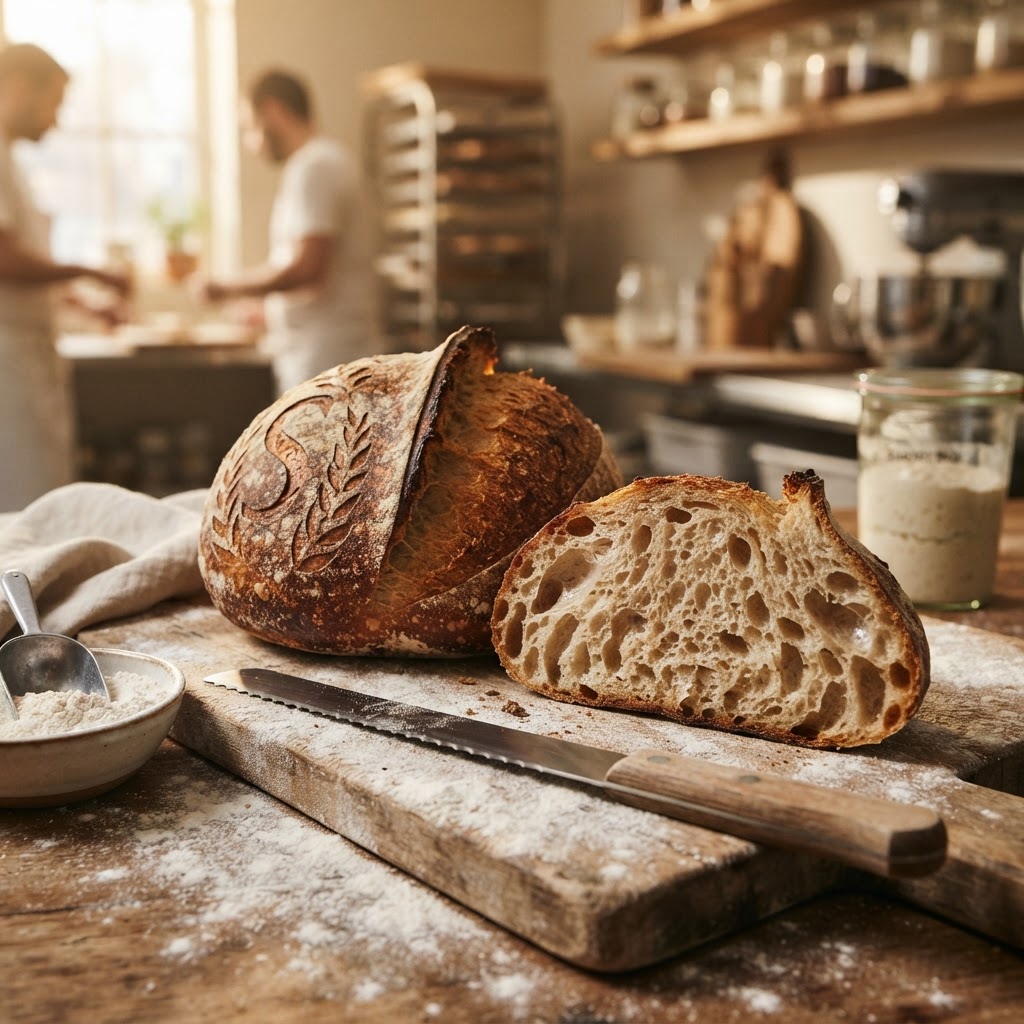
The Baker’s Guide to Hydration: Mastering Water-to-Flour Ratios for Superior Crumb and Crust Structure
If you have ever stared at a loaf of bread, feeling the frustration of a dense, gummy interior or a crust that shattered into jagged, unappealing shards, you are not alone. Many home bakers spend months—sometimes years—chasing the elusive "open crumb" that defines a bakery-quality sourdough or a perfect baguette. The secret rarely lies in the brand of your flour or the complexity of your scoring pattern, but rather in the quiet, foundational science of hydration. Water is the lifeblood of dough, acting as the bridge that connects proteins to form a cohesive network. When you understand how to manipulate the water-to-flour ratio, you stop being a recipe-follower and start becoming a true artisan who can troubleshoot any dough in any environment.
At its core, hydration is simply the ratio of water to flour by weight, expressed as a Baker’s Percentage. Whether you are working with a lean rustic loaf or a buttery enriched brioche, the hydration percentage determines the extensibility, elasticity, and eventual crumb structure of your finished product. A low-hydration dough, often referred to as "stiff," is easy to handle but results in a tight, crumbly texture. Conversely, a high-hydration dough—those "wet" slacks that challenge even experienced bakers—will yield that airy, gelatinized, and open crumb that we all crave. Mastering this delicate balance is the single most significant leap you can make in your baking journey.
Throughout this guide, we will peel back the layers of flour science, examining how different grains absorb moisture and how ambient conditions influence your dough's behavior. We will explore the critical threshold where flour meets water, the importance of autolyse in gluten development, and the sensory cues you must learn to recognize by touch rather than by clock. Baking is a sensory-driven discipline, and once you move beyond the rigid constraints of a single recipe, you will find that the dough becomes an extension of your own hands. Let’s prepare to ditch the fear of sticky hands and embrace the transformative power of water.
Understanding the Baker’s Percentage
The language of professional baking is defined by the Baker’s Percentage, a system where the total weight of the flour is always set at 100%. By calculating all other ingredients—water, salt, yeast, and inclusions—as a percentage of the total flour weight, you gain the ability to scale recipes up or down with perfect consistency. When a recipe calls for 500 grams of bread flour and 375 grams of water, you are looking at a 75% hydration dough. This mathematical framework removes the guesswork and allows you to adjust the structure of your loaf based on the specific flour you have in your pantry.
The Math Behind the Moisture
To calculate hydration, you divide the weight of the water by the weight of the flour, then multiply by 100. For example, if you are using 500g of flour and 400g of water, your calculation is (400 / 500) 100 = 80%. This 80% hydration* level is the "sweet spot" for many sourdough enthusiasts because it is high enough to create large, irregular holes but low enough to remain somewhat manageable for the home cook. Understanding these numbers allows you to look at a recipe and immediately predict how sticky the dough will feel during the initial mixing phase.
Flour Absorption Capacity
Not all flours are created equal, and this is where many bakers encounter unexpected struggles. A high-protein strong white bread flour requires more water to fully hydrate than a low-protein pastry flour or a rustic whole wheat flour. Whole grains, specifically, contain bran, which acts like a sponge, soaking up significantly more water than refined white flour. If you are substituting a portion of your white flour with whole wheat or rye, you must increase your hydration by 5-10% to ensure the dough does not become dry and stiff during the final proof.
The hydration level of your dough is the primary architect of your final loaf. It dictates the strength of your gluten, the texture of your crumb, and the speed at which the yeast ferments.
The Autolyse Technique
The autolyse is perhaps the most undervalued technique in the amateur baker's toolkit. By mixing only your flour and water—omitting the salt and leaven—and letting it rest for 30 to 60 minutes, you jumpstart the enzymatic processes within the flour. During this rest period, the flour fully absorbs the water, the gluten network begins to organize itself spontaneously, and the dough becomes noticeably more extensible. This rest period is a non-negotiable step for anyone looking to master high-hydration loaves without excessive, structure-damaging kneading.
Why Salt and Leaven Wait
Adding salt too early can tighten the gluten bonds prematurely, potentially restricting the dough's ability to stretch. Similarly, if you add the leaven during the autolyse, the yeast begins consuming sugars and producing acids before the gluten network has had a chance to properly hydrate. By reserving these ingredients for after the autolyse, you ensure the dough is primed, relaxed, and ready to be worked. This small shift in your workflow will result in a dough that is significantly more manageable, even at high hydration levels.
Sensory Cues for the Autolyse
You will know the autolyse has been successful when you touch the dough after the rest. It should feel like clay—supple, elastic, and slightly tacky, but not necessarily sticky. It will stretch much further than the shaggy, torn-looking mass you initially mixed. If the dough still feels like a dry, unyielding lump, your hydration is likely too low for the flour you have selected. Use this time to adjust your recipe; if the dough feels like a rock, add an extra 20-30g of water and fold it in until it disappears.
Managing High-Hydration Doughs
When you push your hydration above 80%, you are moving into the realm of "slack" doughs. These doughs are notoriously sticky, but they are also capable of producing the most incredible, translucent, and airy interiors. The secret to handling high-hydration dough is to shift your mindset from "kneading" to "folding." Traditional kneading—pushing the dough against the counter with the heel of your hand—is often impossible with wet dough because it will simply adhere to your skin and the surface, causing you to add more flour and ruining the delicate hydration balance you worked so hard to achieve.
Coil Folds vs. Stretch and Folds
Instead of kneading, use coil folds or stretch and folds. With a coil fold, you grab the dough from the middle, lift it until it releases from the bowl, and let it fold over onto itself as you lower it back down. This builds strength vertically, creating the structure needed to hold those large gas bubbles. Perform these folds at 30-minute intervals during the first 2 hours of bulk fermentation. This method is gentle, respects the developing gas, and creates a uniform gluten structure that is significantly stronger than traditional mechanical kneading.
The Role of Bench Rest
Never move directly from a bulk ferment to final shaping. Once the bulk fermentation is complete and the dough has grown by roughly 50-75% in volume, you must dump it onto a lightly floured surface and perform a pre-shape. This creates surface tension. After the pre-shape, let the dough rest for 20 to 30 minutes. This "bench rest" allows the gluten to relax again after the stress of handling. If you try to perform your final shape without this rest, the dough will snap back or tear, which is a common reason for poor crumb structure.
The Science of Crumb and Crust
The crumb—the interior of the bread—is effectively a record of your fermentation and hydration. An open, airy crumb is the result of gas expansion during the final bake, which is only possible if the gluten network is strong enough to trap carbon dioxide. If your hydration is too low, the dough will be stiff and the bubbles will be small and uniform, leading to a "cake-like" crumb. If your hydration is perfectly balanced for your flour, the dough will be flexible, allowing the steam generated in the oven to inflate the gas pockets to their maximum potential.
The Crust Conundrum
A great crust requires high heat and consistent steam. As the dough enters the oven, the exterior must stay moist long enough for the bread to expand fully—this is the oven spring. If the crust hardens too quickly, the loaf will be locked in its size and will not achieve its full volume. Water is the key here as well. Steam injected into the oven (either through a Dutch oven, a pan of hot water, or a commercial steam injection system) gelatinizes the starches on the surface, which eventually caramelizes into a deep, mahogany crust.
Controlling the Bake
For home bakers, a Dutch oven is the best tool for mimicking a professional steam-injected oven. By trapping the moisture released from the dough itself during the first 20 minutes of baking, you create a humid environment that keeps the crust soft, allowing for maximum expansion. After those first 20 minutes, remove the lid to allow the crust to dehydrate and develop that signature, crisp bite. If you skip this, your bread will be pale and lack the crunch that separates a good loaf from a great one.
Mastery in baking is not found in a recipe, but in the observation of how your dough reacts to your hands, your oven, and your climate.
Troubleshooting Common Issues
Even with the perfect hydration, things can go wrong. If you find that your dough is consistently spreading into a pancake on your baking stone, your issues likely stem from a lack of gluten strength or an over-fermentation. When a dough is over-fermented, the yeast has eaten too much of the sugar, and the acid has begun to break down the protein network. Even a perfectly hydrated dough will lose its shape if the fermentation time was too long for the ambient temperature of your kitchen.
Identifying Under-Proofing
Under-proofed dough often looks deceptively good, but when you cut into it, you will see a dense bottom layer with a few massive, irregular tunnels at the top. This is a sign that the yeast was not active enough, or the bulk fermentation was cut short. The gas wasn't distributed evenly, and the bread did not have the structural integrity to hold its shape during the bake. To fix this, increase your bulk fermentation time, especially if your kitchen temperature is below 70°F (21°C).
The Importance of Temperature
Temperature is the invisible hand of baking. Yeast activity roughly doubles for every 18°F (10°C) increase. If you are baking in a warm house, your dough will ferment much faster than the recipe suggests. Always aim for a Dough Temperature (DT) of 78°F (25°C) after mixing. You can control this by using warm or cold water in your initial mix. If your kitchen is cold, use 85°F (29°C) water to jumpstart the yeast; if your kitchen is sweltering, use 60°F (15°C) water to prevent the dough from getting away from you.
Advanced Techniques: Inclusion and Enrichment
Once you have mastered a basic 75-80% hydration loaf, you can begin to experiment with inclusions and enrichments. Inclusions—like seeds, olives, or sun-dried tomatoes—can absorb water, so you must factor this into your initial hydration math. If you are adding a cup of soaked seeds, reduce your water by roughly 50g to account for the moisture already held within the seeds. Adding ingredients without adjusting your water will lead to a dense, soggy loaf that never bakes through properly.
Adding Fat to the Mix
Enriching a dough with butter, oil, milk, or eggs changes the nature of the hydration entirely. Fat coats the flour proteins, which actually creates a barrier to gluten development. This is why brioche, which has a very high fat content, takes significantly longer to knead than a rustic sourdough. When working with enriched doughs, your hydration must be adjusted downward because the fat adds a liquid-like quality to the dough that can make it feel much wetter than it actually is.
The Power of Patience
The final secret to superior crumb structure is patience. In the world of high-hydration, slow-fermented bread, the time you spend waiting is the time the flavor develops. By using a small amount of leaven and a long, cool bulk fermentation—often called a cold retard in the refrigerator for 12 to 24 hours—you develop complex, acetic, and lactic acids that define the flavor profile of a world-class loaf. Do not rush the process; the dough will tell you when it is ready.
Final Thoughts
Mastering hydration is a lifelong pursuit, one that demands both technical precision and the courage to experiment. You will have days where the dough behaves perfectly, resulting in a towering loaf with a glassy, blistered crust and an interior full of light, airy tunnels. You will also have days where the dough seems to fight you, turning into a sticky mess that refuses to hold its shape. Both outcomes are part of the process, and both offer lessons that no textbook can provide.
As you continue to refine your technique, remember that bread is a living entity. It reacts to the humidity in the air, the mineral content of your water, and the specific biology of your local yeast. By focusing on the water-to-flour ratio, you are giving yourself the ultimate tool for success, but your intuition is the final ingredient. Keep your bench clean, your hydration logged, and your curiosity peaked. The journey to the perfect loaf is long, but the reward—a warm, crusty, and delicious slice of bread—is worth every minute of trial and error.
Never be afraid to Blame The Chef when things don’t go quite to plan; after all, even the best of us have tossed a flat, gummy loaf into the bin. But with each mistake, you are learning the subtle language of starch and water, and soon, you will be able to look at any bowl of dough and know exactly what it needs to become something truly magnificent. Keep baking, keep testing, and most importantly, keep enjoying the process of turning simple ingredients into something that sustains, comforts, and delights.
The beauty of baking lies in its simplicity. Flour, water, salt, and time. When you harmonize these four elements, you move from simply making food to creating art. The hydration ratio is the master key that unlocks this potential, providing you with the stability to innovate and the knowledge to adapt. Whether you are a weekend hobbyist or an aspiring professional, the lessons found in the water-to-flour balance will serve as the foundation for every loaf you ever bake. Embrace the stickiness, trust the math, and enjoy the delicious results of your hard work. Happy baking!




Get the Next Recipe
Weekly recipes, techniques, and gear picks — straight to your inbox.
