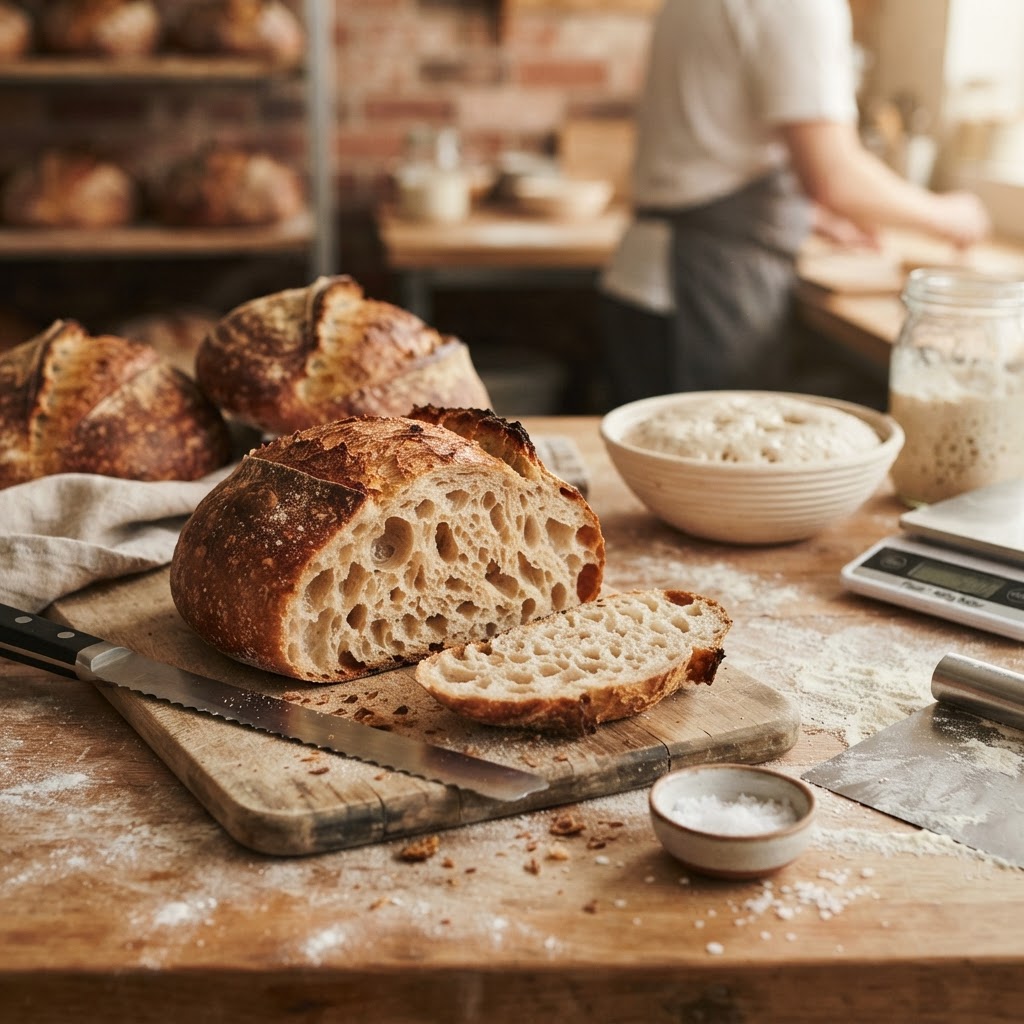
The Baker’s Guide to Hydration Percentages: Mastering Dough Consistency and Crumb Structure for Artisanal Loaves
Baking the perfect loaf of bread is often shrouded in mystery, leading many home cooks to believe that artisanal quality is reserved for those with professional ovens and decades of experience. In reality, the difference between a dense, gummy brick and a light, airy loaf with a glossy, open crumb comes down to a fundamental concept: Baker’s Percentages. When you begin to view your recipes not as static measurements in cups and tablespoons, but as mathematical ratios based on flour weight, the entire world of bread baking shifts from guesswork into a precise, repeatable science. This guide is designed to strip away the intimidation factor and empower you to manipulate your dough with the confidence of a seasoned boulanger.
Hydration is arguably the most critical variable in the artisan bread equation, acting as the primary driver for both dough handling and the final texture of your crust and crumb. By understanding how the ratio of water to flour affects the gluten network, you can learn to predict how a dough will behave long before it hits the bench. It is about moving beyond following a recipe blindly and starting to understand the "why" behind the hydration levels you see in world-class recipes. We are going to explore the nuances of high, medium, and low hydration, and how adjusting these percentages even by a small margin can transform your home kitchen output.
At "Blame The Chef," we believe that every mistake is simply a lesson waiting to be kneaded into the next batch of dough. Do not be discouraged if your first attempt at a high-hydration sourdough results in a sticky, unmanageable mess that refuses to hold its shape. Even professionals battle with overly slack doughs, and the key is learning how to read the physical feedback your dough provides. As we delve into the technical aspects of moisture content, keep in mind that patience and observation are your best tools, alongside a reliable digital scale. Let’s embark on the journey of mastering dough consistency so you can finally bake the loaf of your dreams.
Understanding the Baker’s Percentage System
The Baker’s Percentage is the universal language of professional baking, providing a way to scale recipes up or down while maintaining exact ratios. In this system, the total weight of the flour is always set to 100%, and every other ingredient—water, salt, yeast, or levain—is calculated as a percentage of that total flour weight. This removes the ambiguity of volume measurements, which are notoriously inaccurate, and ensures that your hydration level remains consistent regardless of whether you are making one loaf or ten.
Why Flour Weight is the Anchor
By grounding your formula in the weight of the flour, you gain the ability to troubleshoot and modify your hydration levels with ease. For instance, if you find that your dough feels too dry to work with during the shaping process, you can easily calculate how much additional water (as a percentage of flour) is needed to achieve your desired feel. This systematic approach is the secret to moving from "lucky" loaves to consistent, professional-grade results every single day.
Calculating Your Hydration
To calculate the hydration of a dough, divide the weight of the water by the weight of the flour, then multiply by 100. If you are using 500 grams of flour and 350 grams of water, you have a 70% hydration dough. This percentage is the blueprint for your loaf's personality. Low hydration (under 60%) produces a stiff, dense loaf like a baguette or bagel, while high hydration (above 80%) creates the wild, open structures associated with modern sourdough baking.
"True artisan baking is not about following a recipe to the letter; it is about mastering the mathematical relationship between water, flour, and time, then using your hands to listen to what the dough needs."
The Impact of Hydration on Crumb Structure
The crumb—the interior texture of your bread—is directly influenced by how much water is available for the starch to absorb and how effectively the gluten network can trap gas. In high-hydration doughs, the water creates larger air pockets because the dough is more fluid and capable of expanding rapidly under the pressure of fermentation gases. This results in the "open crumb" that so many bakers covet, where the holes are irregular, glossy, and light.
The Role of Water in Gluten Development
Water is the medium that activates the proteins in flour—gliadin and glutenin—allowing them to link together and form the elastic matrix we know as gluten. Without sufficient water, this matrix is too tight, resulting in a dense, tight crumb that feels heavy in the mouth. Conversely, if you add too much water for the strength of your flour, the structure can collapse under its own weight, leading to a flat, dense "pancake" effect instead of an airy loaf.
Managing Dough Strength
As you increase hydration, the dough naturally becomes stickier and harder to handle. To combat this, you must rely on techniques like autolyse—the process of letting flour and water rest before adding salt or yeast—which gives the gluten a head start in development. Using strong, high-protein bread flour is also essential when working with high hydration levels, as it provides the structural backbone necessary to hold onto all that moisture during the bake.
Choosing the Right Hydration for Your Goals
Not every loaf should be 85% hydration. In fact, attempting a very wet dough before you have developed the necessary handling skills is a recipe for frustration. For beginners, we recommend starting in the 65% to 70% range. This hydration level is the "sweet spot" where the dough is supple and extensible enough to be easy to shape, but not so sticky that it turns into a liquid mess on your counter.
Low Hydration (55-65%)
Lower hydration is perfect for breads that require a tight, uniform crumb and a structure that holds its shape beautifully during the proof. Think of classic hearth loaves, sandwich breads, or pretzels. These doughs are easy to knead by hand, simple to shape, and are far more forgiving if you accidentally over-proof them. They result in a very consistent, reliable crumb that is ideal for daily consumption.
Medium-High Hydration (70-80%)
This is the range where you begin to see the "artisanal" character emerge. You will notice the crust becomes thinner and crisper, while the interior becomes more tender. At this level, you should start incorporating stretch and fold techniques rather than traditional aggressive kneading. This gently organizes the gluten strands without tearing them, allowing you to build strength while maintaining the gas bubbles trapped within the dough.
Extreme Hydration (85%+)
Entering the 85% and above range requires a professional touch and, often, a very high-quality bread flour with a protein content of 13% or higher. These doughs are often handled in the bowl using coil folds and require a cold fermentation to firm up the dough before shaping. The result is a spectacular, wide-open crumb that looks like a honeycomb, but these loaves are prone to spreading if they lack proper structural tension.
"The difference between a mediocre loaf and a masterpiece is rarely the recipe itself; it is the baker’s ability to adjust their technique based on the unique personality of the flour and the ambient temperature of their kitchen."
Professional Techniques for Handling Wet Dough
If you want to bake at higher hydration levels, you must abandon the idea of using excess flour on your workbench. Every bit of extra flour you knead in during shaping alters your final hydration ratio, usually leading to a stiffer, drier loaf than you intended. Instead, focus on using wet hands to handle the dough, as the moisture prevents the dough from sticking to your skin, whereas dry hands will cause the dough to cling to you.
The Power of Coil Folds
When working with high-hydration sourdough, traditional kneading is not only ineffective but can actually damage the delicate gluten network. A coil fold is a technique where you lift the dough from the middle, allowing it to fold under itself, and then letting it stretch and settle back into the container. Perform these folds every 30 to 45 minutes during the bulk fermentation to build strength, layering the gluten and trapping air in a structured way.
Shaping and Tension
Shaping a high-hydration loaf is all about creating surface tension. You are essentially trying to build a "skin" on the outside of the dough ball that holds the gas inside. By pulling the dough gently across your bench—using the friction of the counter rather than added flour—you can create a tight outer membrane. This tension is what prevents the loaf from spreading flat in the oven and forces the loaf to rise upward during the "oven spring."
Tip 1: Use a bench scraper* as an extension of your hand. It is the best tool for moving, dividing, and tensioning sticky, high-hydration dough.
Tip 2:* Perform your final shape on a slightly cool surface if possible, as it helps the dough hold its structure better than on a warm wooden board.
Tip 3:* If the dough feels "loose" or "slack," add one extra set of folds to tighten the gluten network before the final proof.
Temperature and Its Role in Hydration
Water behaves differently at different temperatures, and this directly impacts how your flour absorbs liquid. In a warmer kitchen, your dough will ferment much faster, which can make a high-hydration dough feel even more chaotic and sticky. Conversely, in a cold environment, the gluten may tighten up, requiring a longer fermentation to reach the desired level of extensibility. Always use an instant-read thermometer to monitor your water temperature and your dough temperature (the "Desired Dough Temperature" or DDT).
The Ideal Dough Temperature
For most artisan sourdough, keeping your dough between 75°F and 78°F (24°C–26°C) throughout the bulk fermentation is standard. If your water is too cold, the yeast will be sluggish, and the flour won't hydrate properly, leading to a stiff and unmanageable dough. If the water is too hot, you risk killing the yeast or, at the very least, creating a "blown" dough that loses its structural integrity before it even reaches the oven.
Cooling for Better Handling
If you find that you are struggling with a very high-hydration dough (80%+), try moving your bulk fermentation into a cooler area or using water that is a few degrees colder than usual. Slowing down the fermentation allows you more time to perform your folds and build strength. Additionally, chilling your dough (a process known as retarding) for 12 to 24 hours in the refrigerator before baking will firm up the butter and gluten, making it significantly easier to score and shape.
Mastering the Oven Spring
The "oven spring" is the final, dramatic rise the loaf experiences in the first 10 minutes of baking. At this stage, the water in the dough turns to steam, causing the gas bubbles to expand rapidly. If your hydration is correct and your tension is good, your loaf will rise significantly, creating the characteristic "ear" or crust opening that every baker strives for. If the hydration is too low, the loaf will be too stiff to expand; if it is too high and lacks strength, it will just spread.
Creating Steam in the Oven
Steam is the baker’s best friend during the first stage of baking. It keeps the crust soft, allowing the loaf to expand fully before the crust sets. In a professional bakery, ovens inject steam directly. At home, you can achieve this by baking inside a Dutch oven or a cast-iron combo cooker. The lid traps the moisture evaporating from the dough, essentially creating a mini steam-injection oven that ensures a beautiful rise and a blistered, professional-looking crust.
Scoring for Success
Scoring—the act of cutting the top of the dough before it goes into the oven—is not just decorative. It creates a weak point where the gases can escape in a controlled manner. For a high-hydration loaf, your score should be deep and made at a 45-degree angle. This allows the loaf to "bloom" during the bake. If your dough is at the correct hydration, you will see a distinct separation between the crust and the inner crumb after you pull it out of the oven.
Troubleshooting Common Hydration Issues
Every baker encounters the "puddle of dough" at some point. Perhaps you accidentally added 50 grams of water too much, or your flour was lower in protein than you expected. Do not panic; there are ways to save a dough that seems too wet. If you realize early enough, you can add a small amount of flour, though you must remember to adjust your salt and yeast proportions to keep the flavor profile balanced.
What if it's too sticky?
If your dough is sticking to everything, it might not be a hydration issue; it might be a strength issue. Instead of adding more flour, continue to perform your folding sets. As you strengthen the gluten, the dough will naturally become less sticky and more manageable. The proteins will begin to hold onto the water more effectively, and the dough will transform from a fluid state into a cohesive, elastic ball.
The "Sourdough Slump"
If your bread comes out with a gummy, dense center, it is almost always a sign that it was under-baked or cut while still hot. Never cut into your artisanal loaf for at least two hours after it comes out of the oven. The inside continues to cook as it cools, and cutting it too early lets the internal steam escape prematurely, which ruins the texture. If you have been struggling with a gummy crumb, drop your hydration by 5% in your next batch and ensure you are baking it to a deep, dark golden-brown color.
"A loaf of bread is a conversation between the baker, the flour, and the environment. Never be afraid to adjust your hydration based on the humidity in your kitchen; that is the mark of a true master."
Final Thoughts
Mastering hydration percentages is not a journey that ends with a single perfect loaf. It is a continuous process of calibration, observation, and refinement. By moving your focus from "following a recipe" to "managing a formula," you gain the agency to create bread that suits your specific tastes—whether you prefer a crusty, airy loaf with a holey crumb or a denser, more substantial slice for your morning toast.
Remember that baking is both art and science. The science dictates the ratios, but the art lies in how you feel the dough between your fingers, how you respond to the changing seasons, and how you learn to interpret the signs of fermentation. Do not be afraid of the high-hydration doughs that seem intimidating; lean into the mess, embrace the process of building strength through folds, and keep that scale front and center.
At "Blame The Chef," our goal is to help you feel confident enough to experiment. Once you master the fundamentals of hydration, you can start incorporating inclusions like seeds, nuts, or roasted garlic, knowing that you have the structural integrity to support them. Every time you pull a steaming, golden-brown loaf out of your oven, you are participating in a tradition that spans millennia, refined by the modern precision of the baker’s percentage. Happy baking, and may your crusts always crackle under the touch of a knife.
If you find yourself plateauing, try recording your notes in a baker’s journal. Track the hydration percentage, the ambient temperature, the type of flour used, and the length of fermentation for every bake. Over the course of a month, you will begin to see patterns emerge that no cookbook could ever explain for your specific environment. It is these small, personal observations that bridge the gap between a home enthusiast and a true artisan. You have the tools, the technique, and the knowledge—now it is time to go to your kitchen and start building that perfect gluten network. The crumb you are chasing is closer than you think. Keep kneading, keep folding, and above all, keep baking.



Get the Next Recipe
Weekly recipes, techniques, and gear picks — straight to your inbox.
