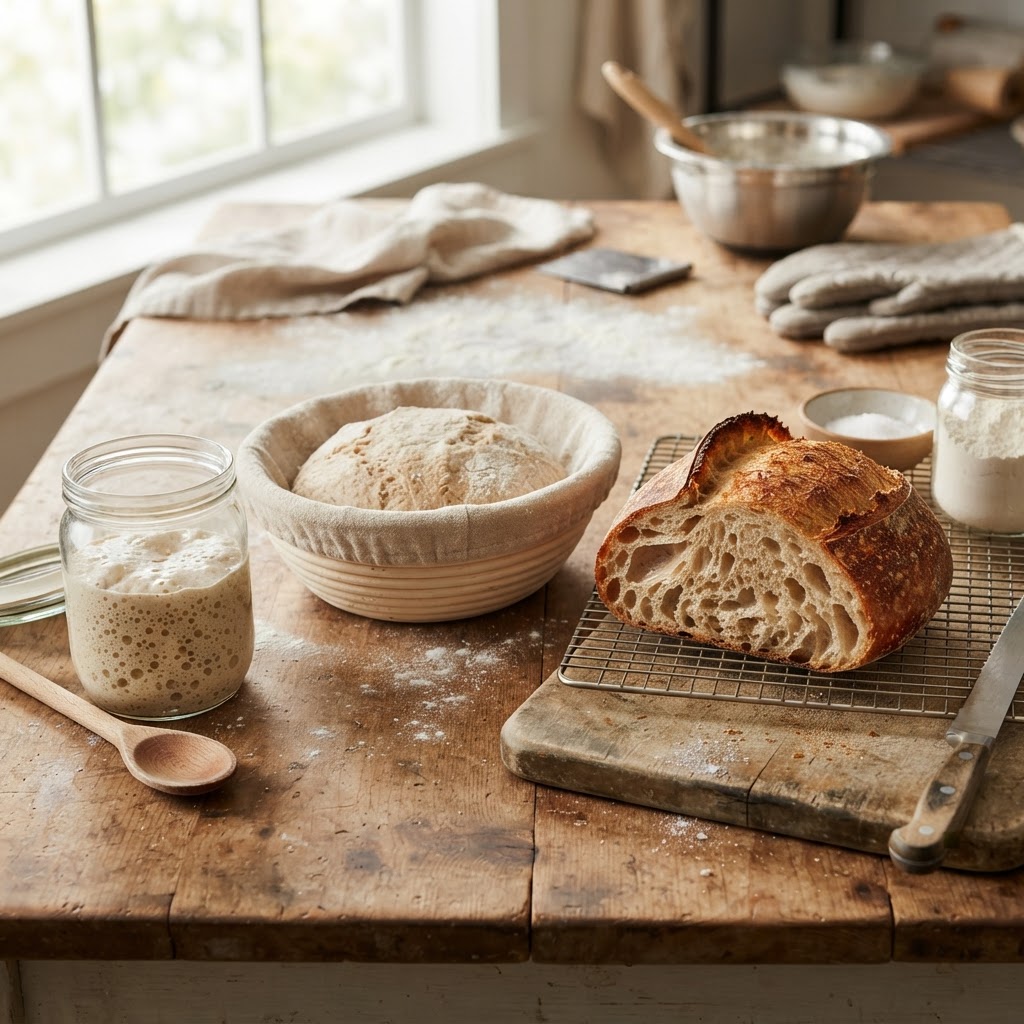
The Baker’s Guide to Hydration Ratios: Mastering Liquid-to-Flour Percentages for Consistent Crust, Crumb, and Texture in Artisanal Baking
The world of artisanal bread baking is often shrouded in mystery, filled with old-world folklore, temperamental starters, and an obsession with variables that can leave a home baker feeling utterly defeated. We have all stood in our kitchens at midnight, staring at a bowl of shaggy, uncooperative dough, wondering why our results never quite mirror the airy, blistered loaves seen in boutique bakeries. The secret, however, is rarely about magic or "gifted hands"; it is about mathematics. Specifically, it is about the Baker’s Percentage, a system that transforms baking from a guessing game into a precise, replicable science that guarantees consistent results every single time you fire up your oven.
At the heart of this mathematical approach lies the concept of hydration ratios. Whether you are chasing the elusive, wide-open crumb of a high-hydration ciabatta or the tight, tender structure of a sandwich loaf, the relationship between your water and your flour dictates the entire physical personality of your bread. Understanding these percentages allows you to manipulate your dough with confidence, knowing exactly how to adjust for the humidity in your kitchen or the specific absorption rate of your chosen flour. It is time to demystify the dough, strip away the intimidation, and treat your kitchen scale as the most important tool in your arsenal.
Welcome to the craft of controlled fermentation and structural integrity. Over the next few thousand words, we are going to explore the nuances of water, the protein content of various flours, and the delicate balance required to master the art of the perfect loaf. We will move beyond vague instructions like "add water until it feels right" and instead embrace the technical rigor that elevates a casual home cook into a skilled artisan. By the end of this guide, you will understand how to build your own formulas, troubleshoot your textures, and finally stop blaming the chef when the bread doesn't turn out—because, with these numbers, you will have the tools to ensure it always does.
The Architecture of Hydration: Understanding Baker’s Percentages
In professional baking, the Baker’s Percentage is the universal language of formulas. Unlike standard culinary recipes that rely on volume measurements—which are notoriously inaccurate—baking is governed by weight. In this system, the total weight of the flour is always considered 100%. Every other ingredient is then calculated as a percentage of that flour weight. This is not just a bookkeeping habit; it is a way to visualize the recipe, allowing you to see exactly how "wet" or "dry" your dough will be regardless of whether you are baking for two people or two hundred.
To calculate hydration, you simply divide the weight of the total water by the weight of the total flour and multiply by 100. For example, if you have 500 grams of flour and 350 grams of water, you have a 70% hydration dough. This ratio is the primary determinant of the final crumb structure, the crispness of the crust, and the ease with which you can handle the dough during the folding and shaping process. Mastering this allows you to scale recipes up or down without ever compromising the integrity of the bread.
When working with these ratios, it is essential to account for all liquids, including the water contained within your sourdough starter or poolish. Professional bakers do not treat the levain as a separate entity; they break it down into its flour and water components to ensure their hydration targets remain accurate. This level of precision is the difference between a loaf that spreads into a pancake and one that stands tall and proud in the oven.
"The true artisan does not fight the dough; they provide the environment for the dough to succeed. Hydration is the foundation upon which that environment is built."
The Relationship Between Protein and Water
Not all flours are created equal. High-protein flours, such as bread flour or durum, have a much higher capacity to absorb water than low-protein cake or pastry flours. When you mix water with these proteins, you facilitate the development of gluten, the elastic network that traps carbon dioxide produced by yeast. If your hydration is too low for the flour's capacity, the dough will be stiff and difficult to expand; if it is too high, the gluten structure will be too weak to support the gas, leading to a collapsed loaf.
Adjusting for Environment
Your kitchen environment significantly impacts how flour interacts with water. On a humid day, your flour may already be holding more moisture from the air, requiring you to hold back a small percentage of your recipe’s water. Conversely, in the dry, arid winter, you may find that your flour craves an additional 2-3% hydration to reach the same consistency. Being aware of these variables is what separates a novice from a master.
Navigating the Spectrum: Low, Medium, and High Hydration
The hydration spectrum typically ranges from 60% to 90% and beyond. Choosing the right hydration for the bread you intend to bake is a strategic decision. A low-hydration dough (60-65%) is incredibly manageable, firm, and ideal for beginners. It holds its shape during the final proofing stages and results in a tighter, more uniform crumb structure that is perfect for toast and sandwiches.
As you climb into medium hydration (70-75%), the dough becomes more supple and starts to exhibit the characteristics of artisanal bread: a thinner, crispier crust and a slightly more open crumb. This is the "sweet spot" for most home bakers. It is sticky enough to be interesting but manageable enough to shape without professional-grade experience. The crumb will be soft yet chewy, with enough structural integrity to hold butter or jam without it leaking through holes.
Moving into high-hydration territory (80% and above), you are entering the realm of the open crumb, the large, irregular "alveoli" that define a rustic sourdough country loaf or a classic ciabatta. These doughs are inherently sticky and slack. They require different handling techniques, such as coil folds or lamination, rather than traditional kneading, to develop strength. While the reward—a light, airy, deeply flavorful loaf—is immense, the learning curve is steep.
Strategies for High-Hydration Success
Managing Stickiness
If you are struggling with a high-hydration dough that refuses to stop sticking to your hands, stop using extra flour on your work surface. Instead, use a light misting of water on your hands or a very thin coating of oil. Excess flour incorporated into the final shaping process will create pockets of raw, powdery dough within your crust, which is a major aesthetic and textural defect.
The Role of Fermentation: How Hydration Influences Time
Hydration and fermentation are inextricably linked. Water is the medium through which yeast and bacteria move, feed, and reproduce. A wetter dough creates a more fluid environment, allowing for faster fermentation cycles. If you find your dough is over-proofing too quickly, check your hydration level; a high-hydration dough in a warm kitchen is a recipe for a flat, sour loaf that loses its structure before it even reaches the oven.
The bulk fermentation phase is where your bread gains its soul. When you maintain a consistent hydration, you can better predict your bulk fermentation times. A 75% hydration dough will typically ferment faster than a 65% dough, even if the temperature is identical. This is why temperature control is just as vital as weight. Using a digital thermometer to ensure your water and room temperature are consistent will allow you to calibrate your process to the minute.
"A loaf of bread is a story of time and temperature. If you rush the hydration or neglect the timing, you are simply writing a tragedy for your dinner guests."
Furthermore, the acidity produced by lactic acid bacteria is more pronounced in higher-hydration doughs. If you are aiming for a milder, more approachable bread, stick to the lower end of the hydration spectrum. If you want a punchy, bold, and complex sourdough with that signature tang, lean into the higher hydration levels and allow for a longer, cooler fermentation period.
Temperature Control Tips
Kneading Versus Folding: Techniques for Every Percentage
One of the most common mistakes home bakers make is using the same mechanical technique for every loaf. A 60% hydration baguette dough requires entirely different treatment than a 85% sourdough loaf. For lower-hydration loaves, kneading is appropriate. You want to work the dough until it passes the "windowpane test," meaning it is elastic enough to be stretched thin without tearing. This process relies on heavy physical work to align gluten strands.
Conversely, high-hydration doughs cannot be kneaded in the traditional sense; they are too wet to withstand the friction. Here, we rely on gentle manipulation. The stretch and fold technique involves grabbing the edge of the dough, pulling it upward, and folding it over onto itself. This aligns the gluten gently, building strength without tearing the delicate structure. Because the dough is so hydrated, it will naturally relax and settle over the course of the bulk fermentation.
If you are just starting out, prioritize consistency. Choose one formula—perhaps a 72% hydration loaf—and stick with it for five or six bakes. Do not change the flour brand, the temperature, or the timing. Once you have mastered that specific percentage, only then should you begin to pivot toward higher or lower ratios. This builds intuition, teaching your fingers how the dough "feels" when it is perfectly ready to be shaped.
Identifying "Dough Strength"
How do you know when your folding is done? Your dough should transition from a shaggy, tearing mess to a smooth, billowy, and cohesive mass. When you perform a fold, the dough should resist slightly, feeling like a tight, pressurized pillow. If it flows like heavy cream, you need more folds or a longer rest. If it resists significantly, you have built enough tension; stop and let the fermentation do the heavy lifting.
Shaping: The Final Frontier of Texture
Shaping is where the hydration ratio dictates your physical limitations. A loaf with 70% hydration is a joy to shape; it holds tension well and forms a smooth, taut skin that will blister beautifully in the oven. A 90% hydration loaf, however, requires a delicate, almost surgical touch. You must maintain the air bubbles you have spent hours cultivating while tightening the outer skin to prevent the loaf from spreading into a flat disc.
For higher hydration loaves, use the bench rest technique. After dividing your dough into portions, let it rest on the counter for 20 to 30 minutes. This relaxes the gluten, preventing the dough from snapping back when you try to perform your final shaping. When you are ready to shape, use a bench scraper to maneuver the dough, keeping your movements quick and decisive. The less you handle the dough, the more gas you retain, and the lighter your crumb will be.
Remember, the crust is a direct byproduct of the tension created during shaping. A well-shaped loaf, regardless of hydration, will have a tight "skin." During the bake, this skin resists the expansion of gases, forcing the dough to rise vertically and resulting in a beautiful oven spring. If your shaping is loose, the bread will expand horizontally, leading to a wider, flatter loaf with a lackluster crust.
The Importance of the Final Proof
Troubleshooting Common Issues
Even with the best math, things can go sideways. If your bread comes out of the oven with a "gummy" interior, your hydration might be too high for your baking duration, or you are cutting into the loaf while it is still steaming hot. Always let your bread cool completely, ideally for at least two to four hours. The cooling process is actually the final stage of baking; the starches are setting, and the moisture is redistributing throughout the crumb.
If your loaves are consistently spreading, you may have an issue with gluten development rather than hydration. Check the protein percentage on your flour bag; aim for at least 11.5% to 12.5% protein for bread baking. If you are using all-purpose flour, you might be at the limit of what that flour can structurally support, regardless of the hydration ratio you choose.
Finally, consider your scoring. A deep, well-angled score allows the steam to escape and provides a path for the bread to expand. If you don't score your bread, the steam will find its own way out, usually at the base or the sides, leading to an irregular, messy shape. A sharp lame or razor blade is non-negotiable. Angle your blade at 45 degrees, score firmly, and move quickly.
"A baker’s mistakes are always edible, but they are also the most efficient teachers in the room. Learn to love the failures, for they hold the secret to your next success."
The "Troubleshooting Checklist"
Final Thoughts
Mastering the art of baking is not about following a recipe until you can do it in your sleep; it is about understanding the why behind every gram of water and every minute of proofing. When you look at a hydration ratio, you should stop seeing a dry number and start seeing a roadmap for the finished loaf. You should be able to visualize the crumb, predict the crispness of the crust, and feel the elasticity of the dough before you even touch the flour.
The "Blame The Chef" philosophy is built on the belief that everyone can be a master of their own kitchen. We don't believe in magic, and we certainly don't believe in leaving things to chance. By using these percentages as your North Star, you remove the guesswork that leads to frustration. You are no longer "trying to bake bread"; you are "engineering a loaf." That shift in mindset changes everything.
Take these techniques, buy a reliable kitchen scale, and embrace the process. Start with a modest 70% hydration, document your results, and do not be afraid to adjust based on your specific kitchen environment. Bread baking is a lifelong journey, a dialogue between you and the ingredients that evolves with every bake. When you finally pull that loaf out of the oven—perfectly blistered, singing with the crackle of a cooling crust, and boasting that light, airy crumb—you will know that you didn't just get lucky. You earned it, one percentage point at a time. Go forth, keep your hydration precise, and happy baking.




Get the Next Recipe
Weekly recipes, techniques, and gear picks — straight to your inbox.
