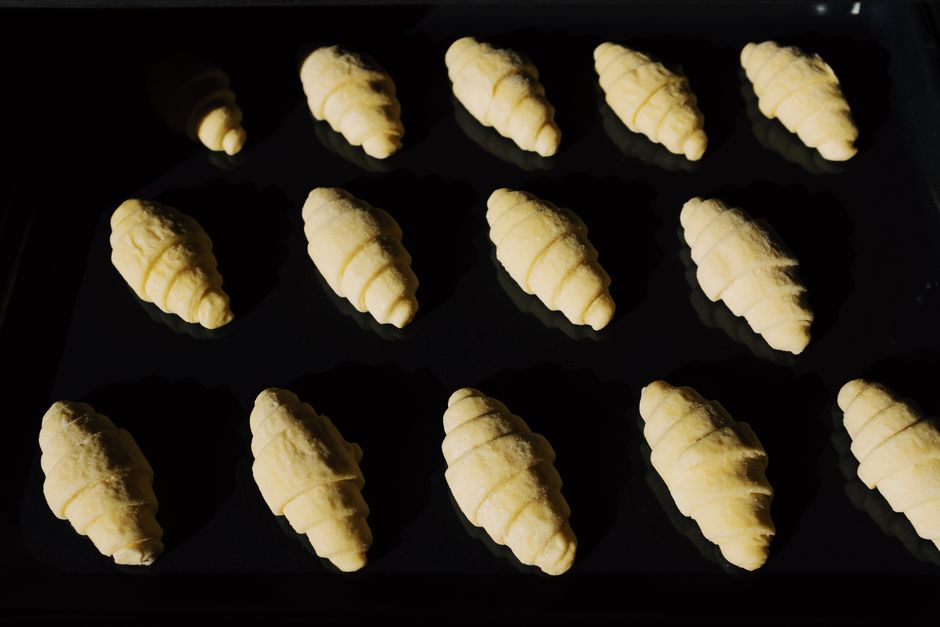
The Baker's Guide to Lamination: Folding Butter Layers for Flaky Croissants and Puff Pastry
The art of lamination is often whispered about in professional kitchens as the ultimate test of a baker’s patience, precision, and understanding of physics. It is the process of creating hundreds of microscopic layers of dough and butter, which, when exposed to the intense heat of an oven, expand to create the ethereal, shatteringly crisp structure we recognize as a perfect croissant or a mile-high puff pastry. Many home bakers shy away from this technique, intimidated by the need for exact temperatures and the fear of a butter-leaking disaster. However, with a methodical approach and a firm grasp on the underlying science, you can master this craft in your own home kitchen. It is not about magic; it is about managing the relationship between fats and carbohydrates under pressure.
To begin this journey, you must first shed the misconception that lamination is merely a recipe to follow; it is, in reality, a disciplined system of thermal management. You are essentially building a wall of alternating insulators, where the dough provides the structure and the butter provides the moisture and steam-release potential. When the dough enters the oven, the water content in the butter vaporizes, pushing the layers of dough apart while the flour proteins set. This creates the honeycomb interior that is the hallmark of a world-class viennoiserie. If the butter is too warm, it absorbs into the dough, resulting in a greasy, dense crumb; if it is too cold, it shatters, creating lumps rather than sheets.
Becoming proficient at lamination requires you to listen to your dough, understanding its resistance and its elasticity. You will need a reliable digital scale, a long-range laser thermometer, and, most importantly, a cold environment. Throughout the following guide, we will break down the essential ratios, the mechanical motions, and the troubleshooting steps that every professional chef relies upon. By the time you finish reading, you will possess the confidence to transform simple pantry staples like high-quality flour, cold water, and European-style butter into a bakery-grade masterpiece. Put on your apron, clear your workspace, and prepare to elevate your baking repertoire to a professional standard.
The Chemistry of Lamination: Why Fats and Flour Matter
Lamination is fundamentally about physical separation. When we talk about laminated doughs, we are describing the process of repeatedly folding a block of chilled butter into a lean yeast-leavened or unleavened dough. The butter must be kept in a solid, pliable state throughout the entire process so that it remains a distinct, continuous layer between the sheets of dough. The quality of your ingredients, particularly the fat content of your butter and the protein content of your flour, determines the final structural integrity of the pastry.
The most critical element in lamination is the butter, which should ideally be a European-style butter with a fat content of at least 82% to 84%. Lower-fat supermarket butters contain higher amounts of water, which will create steam too early and ruin the delicate structure you are working so hard to build. Furthermore, high-quality butter has a wider plasticity range, meaning it remains malleable without melting at lower temperatures, which is a massive advantage when you are working in a room that might not be a perfectly temperature-controlled professional patisserie.
Understanding Flour and Gluten
The flour you choose dictates the strength of your dough's "frame." You want a flour with a medium to high protein content, typically ranging from 11% to 12.5%. If the flour is too weak, the layers will break during the folding process; if it is too strong, the dough will be difficult to roll out and may cause the pastry to shrink back significantly during the baking process.
"Lamination is the architectural blueprint of pastry; if your foundation of dough strength is weak, the entire structure will collapse under the weight of the heat, regardless of how perfectly you folded your butter."
Bread Flour:* Excellent for croissants requiring a stable structure.
All-Purpose Flour:* Can work for puff pastry but yields a slightly less defined lift.
Protein Content:* Always check the back of your flour bag to ensure it matches your recipe needs.
Preparing the Butter Block (Le Beurrage)
The beurrage is the act of preparing the butter into a precise, uniform sheet before it ever touches the dough. This is a step where many home bakers cut corners, leading to uneven layers and butter streaks that disappear during the bake. Your butter must be tempered; if it is straight out of the fridge, it will be too brittle and shatter into shards when rolled. If it is too warm, it will smear into the dough.
To achieve the perfect butter block, take your room-temperature butter and place it between two sheets of parchment paper. Use a rolling pin to pound it into a square, roughly 15 to 20 centimeters across, depending on your recipe. The goal is to reach a uniform thickness of about 4 to 5 millimeters. Once flattened, fold the parchment edges over to create a sealed packet, then place this in the refrigerator until it is cool but still pliable.
The Importance of Temperature
A professional chef will tell you that the butter and the dough should be at the same consistency and temperature when they meet. If the butter is significantly colder than the dough, the butter will break during the first fold, causing holes in the pastry. You are looking for a plasticity where the butter bends without cracking.
The First Fold: Locking in the Fat (The Envelope)
The lock-in is the first encounter between your dough (the détrempe) and your butter block. Roll out your chilled dough into a rectangle roughly twice the size of your butter block. Place the butter block in the center, ensuring that it is centered perfectly. Fold the edges of the dough over the butter so they meet in the middle, sealing the edges well to prevent the butter from escaping during the initial rolling.
Once the butter is encased, you are ready for your first set of folds. Usually, this begins with a single fold (letter fold) or a double fold (book fold). The number of layers grows exponentially with each fold. A single fold triples the number of layers, while a double fold quadruples them. By the time you have completed three sets of folds, you have hundreds of microscopic layers ready to create that famous flaky finish.
Techniques for Rolling
When rolling, apply even, consistent pressure. Start from the center and move outward, keeping the dough rectangular to ensure the layers remain parallel. If you see the dough starting to resist (stretching back like a rubber band), STOP. It means the gluten is too tight. Place the dough back in the fridge for 20 minutes to relax before continuing.
"Patience is your most important tool in the kitchen. If you force the dough, you tear the butter, and if you tear the butter, you lose the lamination."
Single Fold:* Fold the dough into thirds like a business letter.
Double Fold:* Fold both ends to meet in the center, then fold the entire assembly in half.
Always Rotate:* Always rotate your dough 90 degrees before beginning the next set of folds to ensure even distribution in all directions.
Managing the Environment and Rest Times
Temperature is the invisible hand that governs the success of your lamination. In a professional bakery, the ambient temperature is kept strictly between 16 and 18 degrees Celsius (60 to 65 degrees Fahrenheit). In a home kitchen, you must improvise. If you find your kitchen is warmer, you must increase your rest times and perhaps even chill your rolling pin and work surface.
Between each fold, the détrempe needs to rest in the refrigerator. This is not just for the butter; it is essential for the flour. The flour needs time to hydrate and the gluten needs time to relax. If you try to roll out the dough without sufficient rest, the dough will snap back, making it impossible to achieve a thin, even layer, which will lead to a dense, chewy finished product.
Tips for Home Bakers
If you do not have a temperature-controlled room, use your refrigerator strategically. Use a thermometer to check your dough before rolling. If it exceeds 20 degrees Celsius (68 degrees Fahrenheit), put it back in the fridge immediately. Never compromise on chilling time, as this is the primary cause of butter leakage.
Troubleshooting Common Lamination Disasters
Even the most experienced bakers encounter issues with lamination. One of the most common problems is butter leakage in the oven. This happens because the layers were either not kept cold enough or the final proofing temperature was too high. If your butter melts out before the dough rises, you lose the steam power required for the lift, and your pastry will end up fried in a pool of butter rather than flaky and crisp.
Another frequent issue is uneven layers. This usually results from improper rolling technique or uneven dough thickness. If you press too hard on one side, you will push the butter out to the other side. Aim to be a "gentle giant" with your rolling pin; use the weight of the tool rather than your own strength to stretch the dough fibers.
Fixing Lamination Issues
If you suspect you have broken the butter, there is very little you can do to repair the current batch. However, you can use the dough for other purposes, such as an enriched bread or a galette base. Learn from the error: check your temperature, check your butter quality, and refine your rolling pressure.
Issue: Butter streaks:* Caused by the butter being too soft or the rolling being too aggressive.
Issue: Dough shrinks back:* Caused by under-resting; add an extra 15 minutes of fridge time next time.
Issue: Dense crumb:* Caused by the butter melting during the lamination process.
The Final Bake: Achieving Golden Perfection
The final stage of lamination is the bake. Your oven must be preheated thoroughly, often to a higher initial temperature (200-210 degrees Celsius) to create a sudden surge of steam, which forces the layers apart. After the initial 5 to 8 minutes, lower the temperature (to 175-180 degrees Celsius) to allow the center of the pastry to cook through without burning the exterior.
The color of your pastry is your best guide. You are looking for a deep, golden mahogany brown. A pale pastry is a sign of under-baking, which often leads to a gummy, unpleasant texture. Use an oven thermometer to ensure your oven is actually reaching the temperature set on the dial, as most home ovens are notorious for fluctuating.
Egg Wash Techniques
To get that professional sheen, apply an egg wash (a mixture of egg yolks and a splash of milk or cream) carefully. Avoid letting the wash drip down the sides of the pastry, as this will glue the layers together and prevent them from rising properly. Brush the top only, using a soft-bristled brush to avoid crushing the layers.
"A pastry is only as good as the final three minutes of its life in the oven. Watch it, respect the heat, and do not pull it out until it sings of caramelization."
Conclusion
Mastering the art of lamination is a marathon, not a sprint. It requires you to shift your mindset from "following a recipe" to "managing a process." By respecting the role of fats, flour, temperature, and rest, you can elevate your baking to a level that was previously reserved for professional patisseries. Do not be discouraged by your first, second, or even third attempt. Each time you fold, roll, and bake, you are learning the nuances of the dough and the unique quirks of your kitchen environment.
Remember that lamination is essentially the study of extremes: cold butter against cool dough, high heat against moisture. When these variables align, the results are nothing short of culinary alchemy. A perfect croissant should be light, airy, and buttery, with a distinct crunch that shatters upon the first bite. A perfect puff pastry should rise into a towering monument of golden, paper-thin sheets. Achieving this is a rewarding endeavor that connects you to centuries of baking history.
As you continue to practice, document your results. Note the ambient temperature of your kitchen, the brand of butter used, and how many folds you performed. This data will be your best asset as you refine your technique. Share your results with friends and family, and always keep experimenting. The beauty of the baker's life is that there is always another batch to make, another layer to fold, and another opportunity to improve. Now, step into your kitchen with the knowledge you have gained, and start building your layers. The result will be worth every moment of effort, every chill, and every turn. Happy baking, and enjoy the delicious fruits of your labor!
There is something inherently meditative about the process of folding dough. It forces you to slow down, to be present, and to engage with the tactile sensation of the ingredients. You are literally creating something beautiful from nothing more than flour, water, and fat. As you master the techniques described in this guide, you will find that lamination becomes less of a daunting chore and more of a deeply satisfying craft. You will begin to look at a simple croissant in a bakery window and see the hundreds of hours of practice that went into creating those layers, giving you a new appreciation for the profession.
As you continue your journey, keep in mind that the best bakers are also the most resilient. You will have days where the butter escapes, where the dough refuses to cooperate, or where the rise is less than spectacular. This is perfectly normal. Even the most renowned chefs in the world have had their fair share of failed batches. The goal is not perfection on the first try; the goal is consistent improvement. Every time you push through a difficult folding session, you are building your own "baker’s intuition."
If you find yourself struggling with the consistency of your dough, try adjusting the hydration levels. Even a small increase in water can make the dough more elastic, while a decrease can make it easier to handle for beginners. Do not be afraid to manipulate the variables to see how they change the final outcome. That is the hallmark of a true culinary artist. You are now equipped with the technical knowledge, the scientific understanding, and the troubleshooting skills to succeed. Your journey into the world of professional-grade lamination starts here, on your own terms, in your own home.
Finally, remember that baking is, above all else, an act of sharing. The joy of pulling a tray of fresh, golden croissants out of the oven is only matched by the look on the faces of those who get to enjoy them. When you take the time to learn these techniques, you aren't just making a pastry; you are creating an experience. Keep practicing, keep learning, and above all, keep the joy of the craft at the center of your work. The flaky, buttery rewards are waiting for you, and I can't wait to hear about your successes. Keep flour on your hands and passion in your heart as you continue to master the magnificent, complex, and utterly rewarding art of lamination.


Get the Next Recipe
Weekly recipes, techniques, and gear picks — straight to your inbox.
