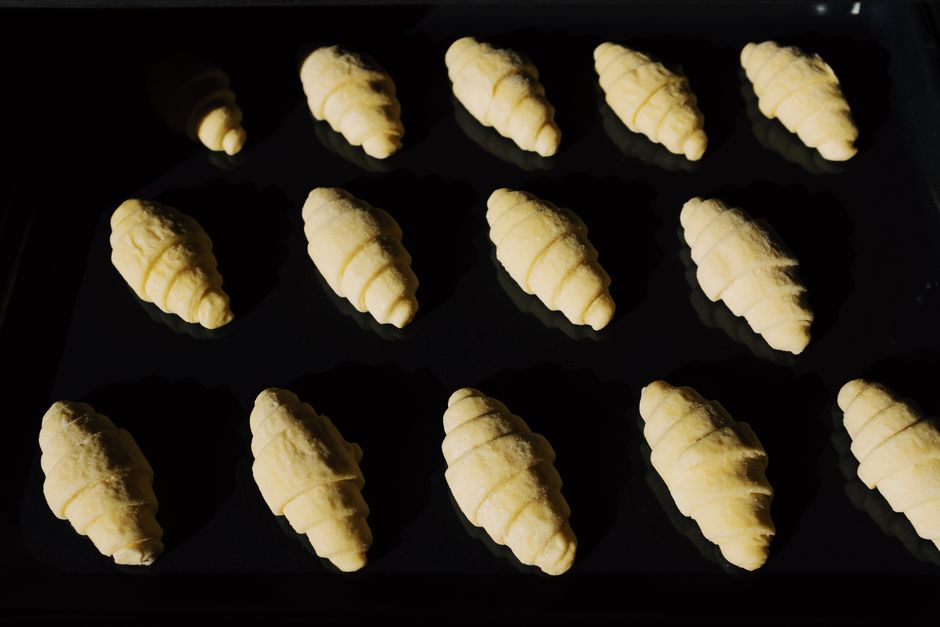
The Baker's Guide to Lamination: Understanding Butter Layers for Shatteringly Flaky Pastries
There is a singular, hypnotic beauty to a perfectly executed laminated dough, one that stands as the ultimate rite of passage for any serious home baker. When you pull a tray of croissants from the oven, watching them rise into golden, honeycombed architecture, you are witnessing the intersection of rigorous science and sheer culinary artistry. Many home cooks approach the process with a sense of trepidation, fearing the dreaded butter leak or the collapse of the crumb, but lamination is not a mystical secret reserved only for French patisseries. It is a methodical, tactile practice that rewards patience, temperature control, and a deep understanding of the relationship between fat and flour. At Blame The Chef, we believe that every kitchen should be filled with the scent of caramelized butter, and mastering this process is your ticket to achieving that professional standard.
The core principle behind lamination is surprisingly simple yet notoriously difficult to execute: it is the systematic layering of dough and fat through repeated folding and rolling. As the pastry bakes, the water content in the butter turns into steam, creating a physical lift that pushes the thin sheets of dough apart, resulting in the iconic "shatteringly flaky" texture we all crave. The real challenge, however, lies in maintaining the integrity of these layers without allowing them to merge into a singular, greasy mass. This requires a rhythmic dance with your environment, ensuring that the butter remains plastic and malleable while the dough stays cool and relaxed. Once you learn to "listen" to the dough, you move away from following strict, panicked instructions and begin to intuitively understand the physics of your pastry.
This guide is designed to strip away the intimidation factor and replace it with practical, technical expertise. We will break down the essential ratios, the importance of flour selection, the mechanics of the "lock-in," and the common pitfalls that often lead to a mediocre bake. Whether you are aiming for a classic croissant, a delicate danish, or a rustic puff pastry, the fundamentals of lamination remain constant. We are going to explore the chemistry behind protein development, the thermal properties of European-style butter, and the precise, measured movements that transform basic pantry staples into flaky, buttery gold. Put on your apron, sharpen your rolling pin, and prepare to elevate your baking repertoire to heights you previously thought were impossible.
The Chemistry of the Flake: Understanding Fat and Flour
At the heart of every great laminated pastry is the interaction between the protein structure of the dough—the détrempe—and the fat block—the beurrage. Flour provides the structure through gluten development, which is essential for trapping the steam produced during the bake. However, if the gluten is overdeveloped or too elastic, the pastry will shrink during baking and become tough, lacking that delicate crunch we associate with high-quality croissants. The goal is to develop just enough strength to hold the layers together without making the dough resistant to the rolling pin.
The selection of butter is equally paramount. You must seek out a European-style butter with a fat content of at least 82% to 84%. The lower water content is critical because excessive moisture in the butter can lead to steam bubbles that are too large, resulting in uneven lamination or, worse, a soggy crumb. Furthermore, the melting point of higher-fat butter is generally higher, providing a wider window of workability before the fat begins to absorb into the dough. If your butter becomes too soft, it will smear; if it becomes too cold and brittle, it will crack and create holes in your pastry, leading to a disastrous loss of definition.
The Role of Protein Content
You should aim for a flour with a protein content between 10% and 11.5%. Anything higher, like a bread flour, will make the dough too chewy. Anything lower, like a cake flour, will lack the necessary structural integrity to hold the expanding layers of butter. The hydration of your dough is also a key factor; a slightly lower hydration level creates a drier, easier-to-handle dough that pairs beautifully with the richness of the butter block.
"The perfect laminated pastry is a balancing act of physics, where the dough serves as the architecture and the butter acts as the engine of expansion."
Mastering the Beurrage and the Detrempe
The preparation phase is where most bakers lose the battle before they even start. The détrempe (the base dough) must be mixed gently and then allowed to rest thoroughly in the refrigerator. This rest period—what professionals call autolyse or bench rest—is non-negotiable. It allows the gluten to relax, which prevents the dough from snapping back when you try to roll it out. If your dough is fighting you, it is telling you it needs more time to chill.
The beurrage (the butter block) requires its own specific preparation. You want the butter to be pliable, ideally between 55°F and 60°F (13°C-15°C). A professional trick is to pound the butter between two sheets of parchment paper into a uniform, clean-edged square. If the butter is too cold, it will shatter during the lamination folds, leading to a "short" crust rather than a flaky one. If it is too warm, it will leak out of the edges. Take the time to measure your butter square, as it should be exactly half the size of your rolled-out dough rectangle for the lock-in.
The Lock-In Technique
The "lock-in" is the moment you seal the butter block within the dough. Ensure the dough is rolled to a thickness that allows it to fully encapsulate the butter. Fold the edges of the dough over the butter like an envelope, pinching the seams tightly to ensure no air bubbles are trapped inside. These trapped air pockets are the enemies of a clean lamination, as they can cause the butter to shift unevenly during the rolling process.
The Art of the Fold: Folds, Turns, and Resting
Once the butter is locked in, you begin the process of folding. We generally categorize these as single folds (letter folds) or double folds (book folds). A single fold involves dividing the dough into thirds and folding one-third over the other, followed by the final third. A double fold involves folding the ends into the middle and then folding the whole thing in half like a book. Both methods aim to exponentially increase the number of layers of butter separated by thin sheets of dough.
Temperature control is your constant companion during these turns. You should aim for a kitchen temperature of no more than 68°F (20°C). If you find the butter getting too soft, do not hesitate to slide the dough into the refrigerator for 20 to 30 minutes between each turn. This resting time is crucial because it allows the gluten to re-relax and keeps the butter at that ideal, wax-like consistency. Never rush the turns; consistency is the key to creating those millions of microscopic layers.
Managing the Layers
"A laminated dough is not a project you finish; it is a project you curate, allowing the cooling, rolling, and folding to build the texture naturally over time."
Troubleshooting the Laminated Dough
Even with the best intentions, things can go wrong. If you see streaks of butter on your counter during the rolling process, your butter was too soft. If the dough snaps back aggressively every time you roll, the gluten was not given enough rest. If you cut into your dough and find that the butter has merged with the flour to create a dense, cake-like center, you have likely over-worked the dough or allowed it to get too warm during the folding stages.
If you encounter butter leakage, you can sometimes save the pastry by dusting the area with a small amount of flour and continuing, but this is a sign that you need to be more aggressive with your cooling. Never try to force the dough to stretch. If it resists, walk away for fifteen minutes. Let the dough do the work; if you force it, you will tear the layers, and once the internal integrity of those butter sheets is compromised, it is impossible to repair.
Common Laminated Pastry Mistakes
Over-mixing the détrempe:* Keep the mixing minimal to prevent excessive elasticity.
Ignoring the temperature:* Use an infrared thermometer to check the surface temperature of your dough.
Inconsistent folding:* Aim for precise edges, as uneven dough leads to uneven layer distribution.
Failure to proof correctly:* Lamination creates the layers, but the final proofing before the oven creates the volume.
Professional Tips for the Home Baker
One of the most profound secrets of the bakery is the final proofing temperature. Many home bakers over-proof their pastries in a room that is too warm, which leads to the butter melting out before the dough structure has set. Aim for a proofing temperature of 78°F (25°C). Any higher, and the butter begins to liquefy and absorb into the flour, resulting in a dense, greasy pastry instead of a flaky one. If you don't have a proofing box, use your oven with the light turned on and a shallow pan of hot water to create a humid, steady environment.
Another professional tip involves the egg wash. Do not let your egg wash drip down the sides of the cut pastry. If the egg wash seals the edges of the layers, the pastry will be unable to expand in the oven. Apply the wash carefully only to the top, using a soft-bristled brush to avoid crushing the delicate layers you worked so hard to create. This simple attention to detail will ensure your pastries have that beautiful, high-rising, open crumb structure.
The Importance of Sharp Edges
Always use an incredibly sharp knife or a brand-new razor blade when cutting your dough. A dull knife will compress the layers together, effectively "gluing" them shut and preventing the lift you are aiming for. When you cut, make a firm, decisive stroke rather than a sawing motion. This preserves the individual layers and allows the heat to penetrate the pastry evenly from the moment it hits the oven.
Baking to Perfection: Heat and Steam
The final stage of the process—the bake—is the grand finale. You want your oven to be hot. Most professional bakers recommend starting at 400°F (205°C) to get that initial "oven spring," and then dropping the temperature to 375°F (190°C) to finish the baking. This high initial heat is necessary to convert the moisture in the butter into steam as rapidly as possible, forcing the layers to expand before the dough sets.
Do not open the oven door too early. The first ten minutes of the bake are the most critical. If the temperature drops significantly, the structure may collapse. Only once the pastry has achieved its final height and is beginning to take on a deep, mahogany-colored golden brown should you consider moving the tray or checking the bottom. The color is your primary indicator of doneness; a light, pale croissant will always be soft and under-baked inside.
The Cooling Rack Rule
Once you remove your pastries from the oven, they must go onto a wire cooling rack immediately. If you leave them on the hot baking sheet, the residual heat and trapped steam will soften the bottom, ruining that crisp, shattered texture. Allow them to cool for at least 15 to 20 minutes before serving. This allows the internal structure to stabilize, ensuring that the honeycombed layers stay light and airy rather than collapsing under their own weight.
"True mastery in baking is not the absence of failure, but the ability to recognize the subtle cues of the dough and adjust your rhythm accordingly."
Elevating Your Repertoire: Beyond the Croissant
Once you have mastered the classic butter croissant, the world of laminated dough becomes your playground. You can incorporate cocoa powder into your dough to create pain au chocolat with a twist, or fold in savory elements like aged gruyere and thyme for a sophisticated appetizer. You can even experiment with flavored butter blocks, incorporating lemon zest or toasted spices directly into the fat before locking it into the dough.
Do not be afraid to adapt these techniques to other classics, such as kouign-amann or palmiers. The principles of folding, chilling, and steam-generation remain the same, but the final shape and sugar content offer a different sensory experience. By treating lamination as a foundational skill rather than a single recipe, you unlock the ability to create infinite varieties of viennoiserie that will impress even the most cynical critics.
The Creative Potential of Lamination
Savory Danishes:* Use goat cheese, caramelized onions, and balsamic glaze.
Fruit Galettes:* Use a rough puff pastry base for a quicker, more rustic approach.
Twists and Spirals:* Utilize the strength of the dough to create elaborate shapes that hold their definition during the bake.
Conclusion
Lamination is a journey that requires more than just a recipe; it requires a mindset of precision, patience, and a willingness to learn from the dough itself. When you step into your kitchen to tackle this process, remember that every mistake is simply a lesson in thermodynamics. You are learning the language of fat and gluten, and once you become fluent, the results are nothing short of magical. From the first turn of the dough to the final, golden-brown pull from the oven, you are engaging in a culinary tradition that has defined high-end baking for centuries.
Never blame the oven, never blame the flour, and certainly don't blame yourself if the first attempt isn't perfect. Lamination is a skill that improves with every iteration, growing stronger and more reliable with practice. Keep your butter cold, keep your folds sharp, and keep your expectations grounded in the reality of the process. As you continue to refine your craft, you will find that the satisfaction of pulling a perfectly laminated pastry from the oven is unmatched by any other culinary achievement. Now, take these techniques, head to your kitchen, and start your own baking revolution—one layer at a time. The flaky, golden rewards await those who are willing to put in the time.



Get the Next Recipe
Weekly recipes, techniques, and gear picks — straight to your inbox.
