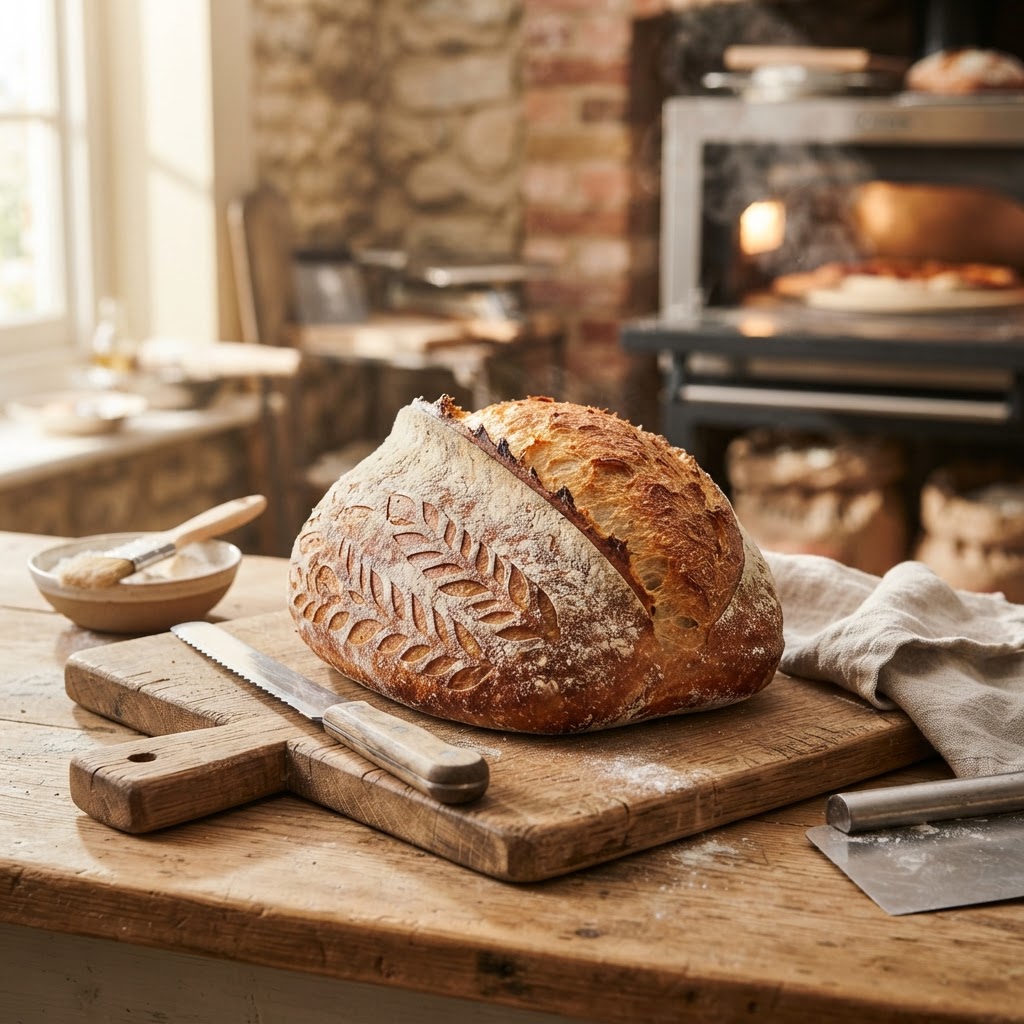
The Baker’s Guide to Oven Spring: Mastering Heat and Humidity for Perfectly Lifted Artisanal Loaves
The journey toward mastering the perfect loaf of sourdough is often paved with flat, dense, or unevenly baked experiments that leave many home bakers feeling defeated. We have all stood before our ovens, peering through the glass with held breath, hoping for that elusive, majestic expansion we call oven spring. It is the moment where the dough transforms from a static mass into a towering, airy cathedral of crumb and crust, and it remains one of the most intoxicating spectacles in all of culinary arts. Understanding this phenomenon is not merely about luck; it is a rigorous dance of chemistry, thermal physics, and biological timing that rewards those who pay attention to the smallest details.
At "Blame The Chef," we believe that the difference between a decent loaf and a professional-grade masterpiece lies in your command of the environment during those critical first ten minutes of the bake. Oven spring is the result of the yeast's final, frantic burst of activity before the heat finally renders it dormant, combined with the rapid expansion of water vapor and carbon dioxide. To achieve it, you must orchestrate a symphony of hydration, fermentation, and heat management that begins long before you even preheat your oven. If you have ever wondered why your bread lacks that coveted "ear" or why your crumb is tight instead of open, the answer likely hides in how you prepare your dough for this singular thermal explosion.
In the sections that follow, we are going to peel back the layers of professional bread baking to give you the technical vocabulary and the tactile confidence you need to excel. We will dissect the role of steam, the necessity of surface tension, and the delicate balance of proof duration to ensure your next loaf is nothing short of breathtaking. You are about to graduate from a novice who prays for rise to a technician who manufactures it with precision. Let us sharpen our bench scrapers, dust our proofing baskets, and dive deep into the science of the lift that defines the greatest artisanal loaves in the world.
The Foundation of Gas Retention: Building Strength
To achieve a dramatic oven spring, your dough must be structured like a scaffold. If the gluten network—the protein matrix formed by flour and water—is weak, it will be unable to contain the gases expanding within the crumb. Think of the gas bubbles produced by your sourdough starter as balloons; if the rubber (the gluten) is too thin or damaged, the balloon will burst rather than expand. This is why bulk fermentation and the subsequent folding techniques are the most critical steps in the structural development of your bread.
Strengthening Through Folding
During the bulk fermentation phase, rather than kneading the dough in the traditional sense, we utilize a series of coil folds or stretch and folds. By gently pulling the dough upward and folding it over itself at 30-minute intervals, you align the gluten proteins in a way that creates a sophisticated, layered structure. This method allows you to build significant strength without degassing the dough, preserving the vital air bubbles you have spent hours cultivating.
Coil Fold Technique*: Let the dough rest, then grab it from the center, lifting until the ends tuck under themselves.
Target Strength*: Aim for a smooth, taut surface after the third set of folds.
The Windowpane Test*: Gently stretch a small piece of dough; if it is translucent without tearing, your structure is ready for the next phase.
The Role of Protein Content
Not all flours are created equal, and for high-hydration loaves, you need a high-protein bread flour typically ranging between 12% and 14% protein. The protein provides the elasticity required to stretch without snapping as the internal pressure builds during the bake. If your dough feels "slack" or tends to spread outward rather than upward, you may need to increase the percentage of strong white bread flour in your blend or improve your handling techniques during shaping.
"A loaf that lacks structure is like a balloon without a skin; it can hold heat, but it can never hold the majesty of its own expansion."
Mastering the Art of Surface Tension
Once your dough is fully fermented and developed, the most important task is the pre-shape and the final shape. Many home bakers underestimate how much of the oven spring is physically dictated by the tension you create on the "skin" of the loaf during shaping. A tight, taut surface acts as a pressurized vessel, forcing the interior of the loaf to expand upward instead of outward, creating that high-domed profile we all crave.
The Importance of the Skin
When shaping a round boule or an elongated batard, your goal is to pull the outer membrane of the dough so that it is tight enough to hold its shape, yet supple enough to move. If you are too aggressive, you will tear the gluten skin, creating leaks where steam will escape, leading to a lopsided loaf. Use your bench scraper to apply gentle torque to the dough on the work surface, creating a "seam" that acts as the anchor point for the expansion.
The Final Cold Proof
The practice of a retarded proof—placing your shaped dough in the refrigerator for 12 to 24 hours—is not just for flavor development; it is a tactical advantage for baking. Cold dough is firmer and easier to score, and it maintains its structural integrity longer when it first hits the heat of the oven. This temperature differential allows the oven spring to be more controlled, giving you more time for the crust to develop before the interior sets completely.
The Physics of Steam: Preventing the Set
Perhaps the most common error in home bread baking is the lack of proper steam management. Steam is the secret ingredient that keeps the crust of your loaf soft and pliable for the first 10 to 15 minutes of baking. If the crust dries out and hardens too early—a process known as premature setting—the dough can no longer expand, effectively capping the loaf and stunting the rise. By keeping the surface hydrated, you allow the bread to keep growing until the internal structure stabilizes.
Generating Steam at Home
Professional deck ovens are equipped with steam injection systems, but at home, we have to improvise. The most effective method is using a Dutch oven or a heavy-duty covered baking vessel. The dough traps its own moisture during the initial bake, creating a steamy, humid micro-climate that is perfect for expansion. If you prefer baking on a stone, you must create a steam bath using a pan of boiling water placed at the bottom of the oven.
Preheat Duration*: Ensure your baking vessel is inside the oven for at least 45-60 minutes before loading the dough.
Water Capacity*: Use a cast iron pan filled with lava rocks or old metal bolts to maximize the surface area for the water to vaporize instantly.
Safety First*: Always be cautious when pouring water into a hot oven to avoid steam burns.
The Timing of the Lid
If you are using a covered vessel, keep the lid on for the first 20 minutes of the bake. This allows the loaf to achieve its full oven spring while the surface remains supple. After 20 minutes, remove the lid to allow the crust to caramelize and harden. This transition from a high-humidity environment to a dry, direct-heat environment is what produces a dark, crackly, and professional-grade crust.
The Precision of Scoring: Directing the Energy
Scoring is the act of making deliberate incisions on the surface of your dough, and it is far more than a decorative flourish. It is a functional requirement for directed expansion. Without a score, the dough will rupture at its weakest point, often resulting in a messy "blowout" that looks unappealing and prevents the loaf from reaching its full height. By scoring, you are giving the gas a specific channel to escape, which encourages the dough to "bloom" or "spring" upward.
The Angle of the Blade
The angle at which you hold your lame (a razor blade) is critical. For the coveted ear on a sourdough loaf, you should hold the blade at a 30 to 45-degree angle to the surface of the dough. This creates a "flap" of dough that lifts during the bake as the steam pushes it up, hardening into that crispy, golden edge. A perpendicular cut (straight down) will result in a loaf that opens wide and flat, losing some of its vertical potential.
Depth and Confidence
Many beginners are afraid to cut deep enough. You want to aim for a depth of about 1/2 inch. If your score is too shallow, the crust will seal over before the dough has finished expanding. If it is too deep, you might deflate the dough. The key is to score with one swift, confident motion. Do not hesitate or saw back and forth, as this will tear the dough and ruin the structural tension you worked so hard to build.
"A score is not just a cut; it is a blueprint for the loaf's architecture, defining exactly how the heat will sculpt the final form."
Understanding Heat and Thermal Momentum
The relationship between the oven temperature and the dough is a delicate balance of thermal transfer. You want a high initial temperature to shock the yeast into its final, desperate burst of carbon dioxide production. Most professional bakers start their ovens at a very high heat—typically 475°F (245°C) to 500°F (260°C)—and then drop the temperature once the loaf is inside or after the initial spring phase to ensure the center finishes baking without burning the crust.
Preheating the Baking Surface
Your baking surface—whether it is a heavy cast iron pot, a baking steel, or a ceramic stone—needs to hold a significant amount of heat energy. When you place the cold dough onto the hot surface, there is an immediate energy transfer. If your stone isn't hot enough, the bottom of your loaf will be dense and gummy, and you will lose the "kick" needed for the lift. Invest in a high-quality thermometer to ensure your oven is actually reaching the temperature the dial indicates.
Thermal Lag
Remember that opening the oven door to load the loaf causes a massive drop in ambient temperature. To compensate for this, preheat your oven at least 25 degrees higher than your target baking temperature, then turn it back down to your desired setting once the loaf is safely inside. This "thermal buffer" ensures that the air remains hot enough to facilitate a strong oven spring immediately upon closure.
Standard Bake Schedule*: Preheat at 500°F; bake with steam at 475°F for 20 minutes; remove steam/lid and finish at 450°F for 20-25 minutes.
Color Control*: If your crust is darkening too quickly, reduce the temperature by 15-20 degrees rather than removing the loaf early.
Troubleshooting Common Failures
Even with the best preparation, things can go wrong. If your loaf comes out looking like a pancake, do not be discouraged; use it as a data point to adjust your next bake. In the world of sourdough, every failure is an education. Let’s look at the most common culprits for poor oven spring and how to correct them for the next time you fire up the oven.
Over-Proofing vs. Under-Proofing
The most common mistake is misjudging the final proof. If your dough is over-proofed, the yeast has consumed all the sugars and the gluten network has begun to degrade; the loaf will be flat and lack any "spring" because the gas has already escaped. If it is under-proofed, the dough is too dense, and the gas hasn't developed enough to provide the lift.
The Poke Test*: Gently press the dough with a finger. If it bounces back instantly, it needs more time. If it leaves a slight indentation that slowly springs back, it is ready. If the indentation stays, it is over-proofed.
Degassing During Scoring
If you are too rough during the loading process, you are effectively deflating your hard work. Always move your dough from the parchment paper to the baking vessel with care. Treat your proofed dough like a delicate balloon; the more air you keep inside, the more potential energy you have for the oven spring to capitalize on during the bake.
The Aesthetics of the Crumb
While we spend so much time focusing on the outward appearance, the real reward for a baker is the inside of the loaf. An open, airy, and glossy crumb is the hallmark of a perfectly managed fermentation process. If your bread has big, gaping holes near the crust but is dense in the middle, this is a sign of uneven fermentation or improper degassing during the shaping phase.
The Role of Hydration
Higher hydration doughs (above 75%) are more prone to large, irregular holes, often called "alveoli." Managing this requires more experience, as high-hydration dough is sticky and harder to handle. If you are struggling with a consistent crumb, try dropping your hydration to 70% to gain more control over the gluten development. Once you master the handling of that, you can slowly increase the water content in subsequent loaves.
Patience is an Ingredient
The final lesson in the quest for oven spring is patience. You cannot rush the fermentation process. If your kitchen is cold, your dough will take longer to rise; if it is hot, it will move quickly. Trust your senses—the smell, the touch, and the look of the dough—rather than just the clock. When you align all these factors, you will find that the oven spring happens naturally, almost effortlessly.
Final Thoughts
Achieving that towering, artisanal loaf with a beautiful oven spring is a rite of passage for every baker. It requires you to step away from the rigidity of recipes and start listening to the language of your dough. You are not just following instructions; you are managing a living ecosystem. By focusing on building strong gluten, maintaining proper surface tension, mastering steam, and respecting the thermal limits of your oven, you are equipping yourself with the tools of a professional.
Do not be discouraged by the loaves that do not quite reach the heights you imagined. Every baker has a "bin" of bread failures behind them, and each one is a necessary step toward the perfect crust. Keep experimenting with your hydration percentages, keep track of your room temperature, and most importantly, keep enjoying the process of creation. Bread making is a slow, methodical, and profoundly rewarding craft that connects us to the history of human nourishment.
When you finally pull that loaf from the oven, listen for the "singing"—the crackling sound of the cooling crust—as it settles into its final form. Take a moment to appreciate the height, the crust color, and the potential of what lies inside. You have worked hard to master these variables, and the result is more than just food; it is a manifestation of your skill, your patience, and your dedication to the art of the bake. Now, let the bread cool completely, grab a serrated knife, and enjoy the fruits of your labor. You have truly earned it. Happy baking, and remember: if the crust is golden and the smell fills the room, you are already a master in your own right.




Get the Next Recipe
Weekly recipes, techniques, and gear picks — straight to your inbox.
