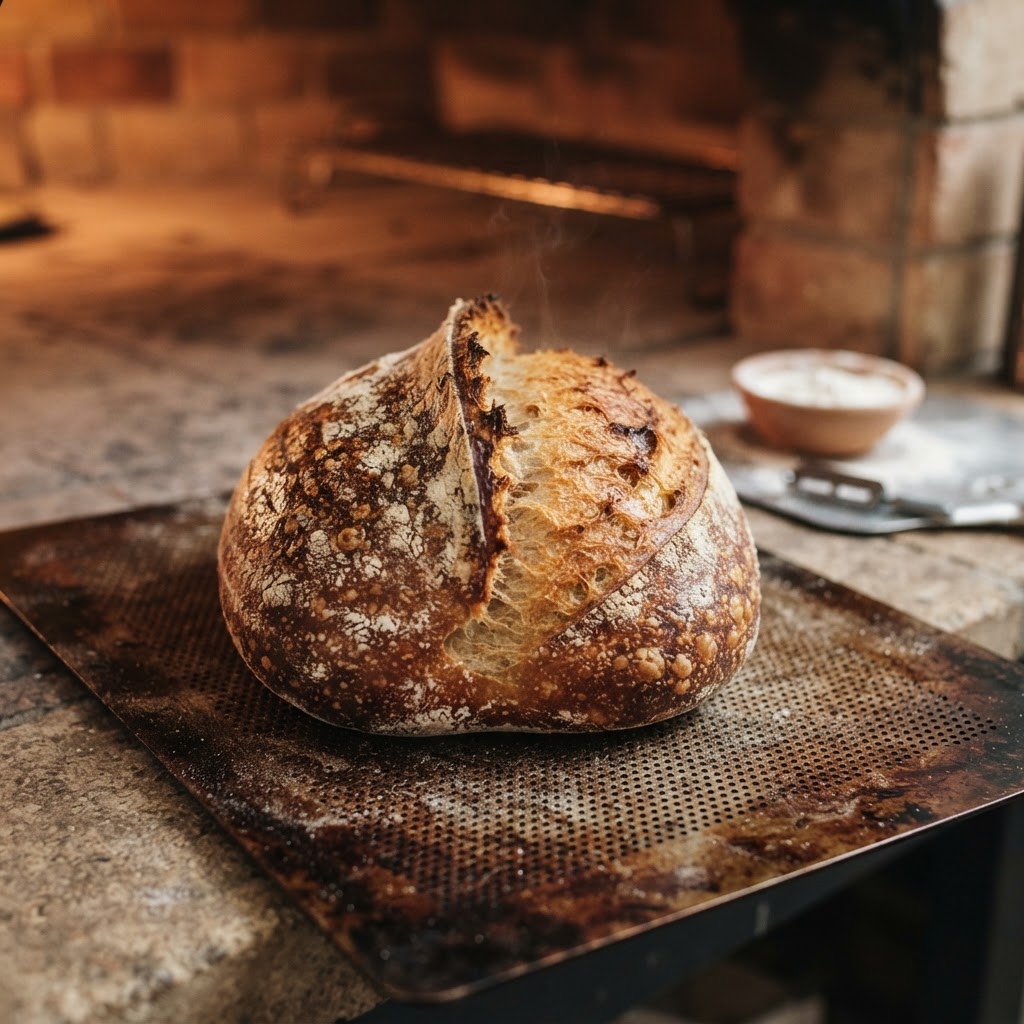
The Baker’s Guide to Oven Spring: Mastering Steam and Heat Control for Artisanal Loaves
There is a specific, heart-stopping moment in the life of every home baker that defines their journey from novice to artisan. It is the moment you peer through the oven glass, heart racing, waiting to see if your loaf will truly come to life or remain a dense, disappointing puck of flour and water. We have all stood there, squinting into the abyss of the oven, hoping for that miraculous expansion we call oven spring. This phenomenon is not merely a matter of luck; it is a complex, beautiful intersection of physics, chemistry, and timing. When everything aligns—the hydration, the fermentation, and the steam—the result is an airy, open crumb and a blistered, golden crust that feels like a professional triumph.
The journey toward mastery begins long before the dough hits the heat. It starts with the understanding that oven spring is essentially the final gasp of your yeast before the intense temperature renders it inactive. As the dough enters the oven, the residual heat causes the carbon dioxide trapped within the gluten network to expand rapidly. Simultaneously, the enzymes in the flour work at a fever pitch until the internal temperature reaches roughly 140°F, at which point the yeast dies and the structure sets. If your dough is weak, lacks tension, or hits the heat at the wrong stage of fermentation, the expansion will be stunted, leaving you with a loaf that feels more like a brick than a cloud.
In this guide, we are going to peel back the curtain on the mechanics of the oven. We will look at why steam is your most valuable ingredient, how to manipulate your oven environment for professional results, and why the scoring of your loaf acts as a roadmap for growth. Baking is a science, but it is one that rewards intuition and practice above all else. Whether you are struggling with flat loaves or simply looking to achieve those coveted, cavernous holes in your sourdough, you have come to the right place. Grab your apron, preheat your stone, and let’s get down to the business of making bread that sings.
The Foundation of Strength: Gluten and Fermentation
Before we talk about heat, we must talk about the architecture of your dough. A loaf of bread is essentially a balloon made of protein, and if the balloon has holes or lacks elasticity, it simply cannot hold the gas produced during that initial surge of heat. Gluten development is the primary driver of structure. Without a strong, extensible network of proteins, the gas bubbles will merge and escape before the crust has a chance to harden, leading to a loaf that spreads outward rather than upward.
Why Proofing Window Matters
The timing of your proof is perhaps the most critical variable in the entire process. If you push your dough too far during the bulk fermentation or the final proof, you exhaust the yeast's ability to produce that final, explosive push in the oven. Think of your dough like a runner—if they sprint the entire race, they have nothing left for the final kick. You want your dough to be proofed to about 80-90% capacity; if you touch it and it springs back slowly, leaving a gentle indentation, it is ready for the heat.
The secret to a great oven spring isn't just about the oven; it's about respecting the biological clock of the yeast. If you over-proof, you have already lost the battle before the dough even touches the stone.
The Role of Strength Building
Incorporating techniques like stretch and folds or coil folds during the bulk stage is essential for building that high-performance gluten structure. Unlike mechanical kneading, which can be aggressive, these gentle movements organize the gluten strands into a cohesive web. This strength is what allows the loaf to retain its shape and rise vertically. Remember, a loaf that can hold its own weight is a loaf that will rise beautifully under pressure.
The Magic of Steam: Why Humidity is Non-Negotiable
If you take only one thing away from this guide, let it be the necessity of steam. In a professional deck oven, steam is injected automatically to coat the surface of the loaf. This moisture keeps the crust soft and pliable for the first 10 to 15 minutes of the bake. By delaying the crust setting, the bread remains elastic, allowing the gases to expand fully without being prematurely constrained by a hard, dry shell.
Creating a Steam Chamber at Home
For the home baker, the most effective tool is a heavy Dutch oven or a cast-iron combo cooker. By trapping the moisture released by the dough itself, you create a perfect micro-environment for maximum expansion. If you prefer baking on a stone, you must be creative: add a tray of lava rocks to the bottom of your oven and pour a cup of boiling water into them the moment the bread goes in. This creates an instant burst of steam that mimics the professional environment.
Managing Steam Duration
The duration of steam is just as important as its presence. You want steam for the first half of the bake, but you must remove it to allow the crust to caramelize and harden. If you leave the steam in for the entire duration, your crust will end up leathery, dull, and lacking that deep, mahogany color we all crave. Usually, 15 to 20 minutes of steaming is the "sweet spot" for a standard 500-gram loaf.
Scoring: The Roadmap for Expansion
Many beginners fear the blade, but scoring is not just about aesthetics—it is a functional necessity. When your dough hits the hot oven, it expands aggressively. If you do not provide a path of least resistance, the gas will force its way through the weakest point, usually resulting in a lopsided, ugly blowout. A proper score creates a controlled outlet for that energy, directing the growth upward and outward.
The Angle of the Blade
The angle at which you hold your lame or razor blade is vital. For that classic "ear" or oven spring shelf, you should hold your blade at a shallow, 30-degree angle to the surface of the dough. This creates a flap of dough that peels back as it expands, creating a beautiful, crispy ridge. A vertical score will result in a more symmetric bloom but lacks that dramatic, bakery-style aesthetic.
Practice and Confidence
Scoring should be done with conviction. If you hesitate, the blade will drag and tear the surface of the dough, which will ruin your crust's surface tension. Take a deep breath, ensure your blade is sharp, and make one clean, swift motion. Even if the results aren't perfect the first time, you will notice the difference in how the loaf opens in the oven immediately.
A loaf is a living organism, and your score is the final conversation you have with it before it becomes bread. Be bold, be precise, and don't look back once the blade hits the skin.
Temperature Control: Calibrating Your Oven
Home ovens are notoriously fickle creatures. They have hot spots, they cycle off when they shouldn't, and their internal thermometers are rarely accurate. Investing in an external oven thermometer is the single best way to ensure your baking temperature is actually what you think it is. For most artisanal breads, you want to preheat your oven to at least 450°F to 500°F.
The Preheating Phase
You cannot rush the preheat. Your oven might beep after 15 minutes, but your baking stone or cast iron pot likely needs at least 45 to 60 minutes to reach full thermal saturation. That mass of heat is what drives the oven spring. If the stone is cold, the bottom of your loaf will set too slowly, and you will lose that precious vertical lift.
Managing Temperature Drops
When you open the oven door to load your bread, you lose a massive amount of ambient heat. To compensate, crank your oven 25 degrees higher than your target temperature just before you load the loaves. Once the door is shut and the bread is in, you can lower it back to your target temperature. This little trick accounts for the heat loss and gives your dough that initial high-temperature kick it needs to "jump."
The Science of Hydration and Flour Choice
The hydration percentage of your dough significantly impacts its behavior in the oven. High-hydration doughs (above 75%) are more prone to spreading if the gluten isn't strong enough, while lower-hydration doughs (around 65-70%) are much easier to handle and often provide a more predictable oven spring. If you are struggling with flat loaves, try dropping your hydration by 5% until you build the skill to handle wetter doughs.
Flour Protein Content
The flour you choose is the engine of your loaf. Hard red spring wheat, which has a higher protein content (typically 12-14%), provides the structural integrity needed to trap gas and support a tall loaf. Avoid using cake flour or pastry flour for your base; they lack the protein necessary to create the elastic web required for a great spring. Look for organic, high-quality bread flour for the best results.
The Role of Additions
Be careful with inclusions like seeds, nuts, or dried fruit. While they taste wonderful, they are essentially "dead weight" that can cut through your gluten network during the proofing process. If you want to include these, ensure they are hydrated properly—for instance, soak your seeds before adding them to the mix—so they don't leach moisture from your dough and weaken the structure.
Troubleshooting the "Flat" Loaf
If your bread still comes out flat, don't blame the chef—analyze the process. Usually, the issue lies in one of three buckets: over-proofing, weak structure, or lack of steam. Let's break down a simple audit you can perform on your next bake to ensure you’re moving in the right direction.
The Audit Checklist
Adjusting Your Technique
Remember that baking is iterative. Change only one variable at a time. If you suspect your dough is over-proofed, cut your bulk fermentation time by 30 minutes on your next bake. If you suspect it’s a strength issue, add two more sets of coil folds. By isolating the variables, you gain control over the outcome, turning your kitchen into a laboratory for delicious results.
Final Thoughts
Mastering the oven spring is a lifelong pursuit, one that bridges the gap between following a recipe and truly understanding the medium. It requires patience, a keen eye for detail, and the willingness to accept that even the most seasoned bakers have days where the oven wins. Do not be discouraged by a flat loaf; it is simply a lesson in disguise, an invitation to observe your process more closely and adjust your variables.
The joy of baking lies in the process—the way the dough feels in your hands, the intoxicating smell of caramelizing sugars as the crust browns, and the hollow sound of a perfectly baked loaf when tapped on the bottom. When you finally pull that loaf out, steaming and fragrant, with a wild, open crumb and a crisp, crackling crust, you will realize that all the theory and temperature management was worth it.
So, head back to your kitchen with confidence. Experiment with your steam, watch your hydration, and never fear the blade. Whether you are baking for your family, your friends, or just the sheer satisfaction of the craft, remember that every loaf is a chance to refine your technique. Keep pushing, keep practicing, and above all, keep baking. The perfect oven spring is waiting for you, hidden in the next batch of dough. Happy baking, and don't forget to enjoy every single slice.




Get the Next Recipe
Weekly recipes, techniques, and gear picks — straight to your inbox.
