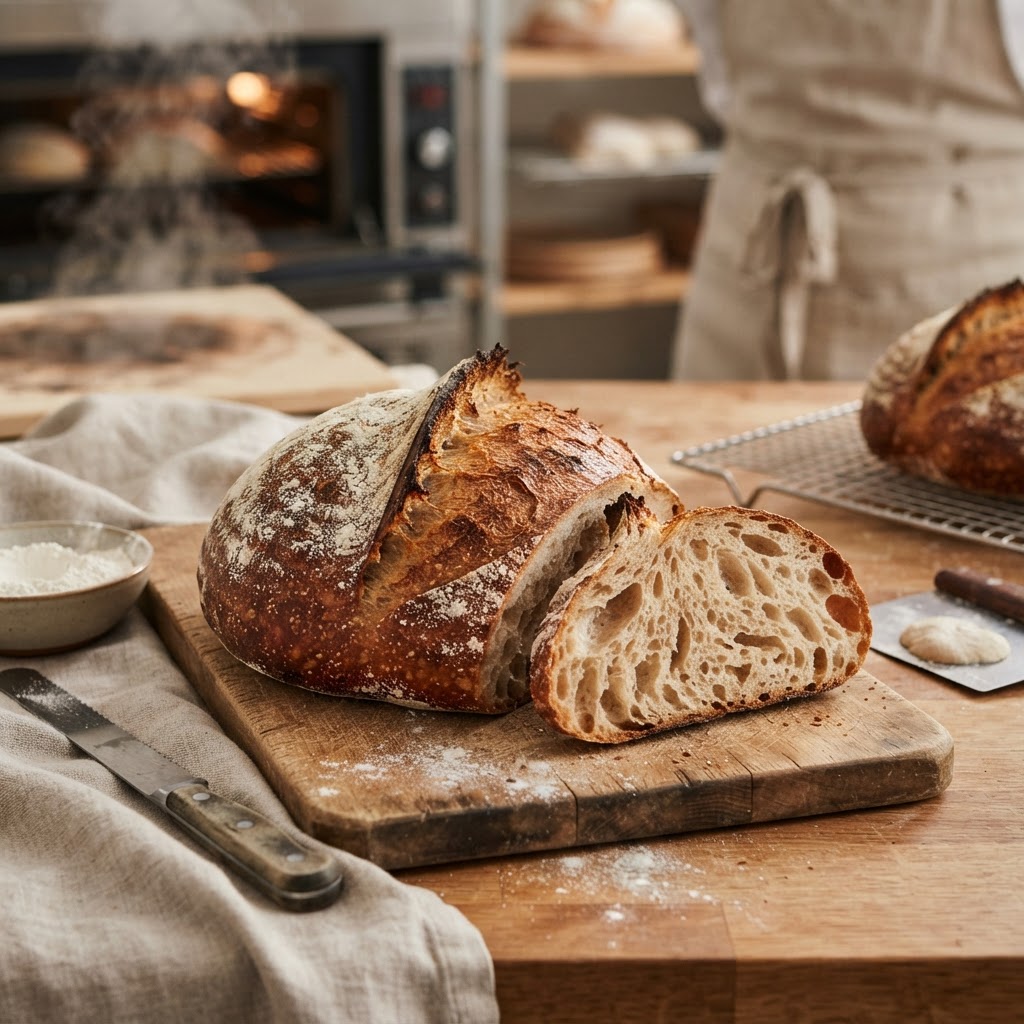
The Baker’s Guide to Oven Spring: Mastering Steam Injection and Thermal Shock for Professional-Quality Crust and Volume
There is a singular, transformative moment in the life of a loaf of bread that separates the amateur from the artisan: the first few minutes after the dough hits the searing heat of the oven. This phenomenon, known as oven spring, is the sudden, dramatic expansion of gases trapped within the dough structure before the yeast dies and the crumb sets. Watching a flat, scored round transform into a towering, golden-crusted boule is perhaps the most rewarding experience for any home baker. It feels like magic, but in reality, it is a masterclass in chemistry, physics, and the delicate management of heat. To capture this growth, you must understand how to orchestrate the environment inside your oven to favor structural expansion over premature crust formation.
For many home bakers, the struggle lies in achieving that elusive, open crumb and the blistered, crackling crust found in professional sourdough bakeries. The common culprit is rarely the dough’s hydration or the quality of the flour, but rather the failure to facilitate a perfect thermal shock during the initial bake. Without the right conditions, the dough can "lock up," hardening into a shell before it has finished rising, resulting in a dense, disappointing loaf. By mastering the variables of temperature, steam, and timing, you can stop blaming your lack of experience and start controlling the variables that yield commercial-grade results in a standard residential kitchen. It is time to treat your oven like the high-stakes laboratory it actually is.
In this comprehensive guide, we will peel back the layers of baking science to explain exactly how to achieve maximum volume and that signature glossy, shattered-glass crust. We will look at how to mimic the powerful steam injection systems of professional deck ovens using simple household tools, and we will explore why the geometry of your score dictates the flow of energy into the loaf. Whether you are baking a high-hydration country loaf or a classic, sturdy rye, the principles of gas expansion remain the same. Prepare to calibrate your gear, sharpen your blade, and embrace the heat; your best bread is only a few adjustments away.
The Science of the Rise: Why Oven Spring Matters
At its most fundamental level, oven spring is a race against time. As the dough enters the oven, the residual heat causes the gases—carbon dioxide, alcohol vapor, and water vapor—trapped within the gluten network to expand rapidly. Because the gluten is still elastic and the crust has not yet formed, the dough can stretch to accommodate this expansion. The volume of your loaf is essentially determined by how much gas you can generate and how long the gluten structure can stretch before the heat eventually kills the yeast and denatures the proteins in the flour, effectively turning the dough into a solid structure.
The Role of Fermentation Gases
The gas responsible for this lift is largely created during the bulk fermentation phase. If your dough is under-proofed, there isn't enough gas to expand, leading to a heavy, dense loaf. Conversely, if your dough is over-proofed, the gluten structure has begun to degrade, meaning the bubbles are too fragile to hold the expanding gases; they will pop, causing the loaf to deflate in the oven. The "sweet spot" is a dough that has reached about 75-80% of its potential volume before shaping, leaving enough energy for the final, violent push during the first 10 minutes of baking.
Denaturation and Setting the Crumb
As the internal temperature of the loaf approaches 140°F (60°C), the yeast dies, and the fermentation process stops completely. Shortly after, the starches begin to gelatinize, and the proteins coagulate, turning the soft, airy structure into the crumb we recognize. If your oven temperature is too low, this process happens too slowly, allowing the loaf to spread outward rather than upward. High heat is essential to set the structure quickly after the initial expansion, ensuring that the loaf holds its shape and exhibits the desired artisanal aesthetic.
"Oven spring is not just an event; it is the final act of your fermentation strategy. If you fail to prepare your dough for the heat, no amount of steam will save it."
Thermal Shock: The Catalyst for Expansion
Thermal shock is the sudden application of intense heat to the bottom of the dough, which triggers an immediate, aggressive rise. In a professional bakery, this is achieved by loading bread onto a stone hearth that has been preheated to upwards of 500°F (260°C). For the home baker, a standard sheet pan is simply too thin to hold enough energy to perform this task, which is why a baking stone or baking steel is the single most important investment you can make. A baking steel is particularly effective because of its high thermal conductivity, which transfers heat into the bottom of the loaf almost instantaneously.
Preheating Strategy
You should never rush your preheat. Even if your oven says it has reached 500°F after 20 minutes, your baking stone or steel will likely still be cold. You need to preheat your equipment for at least one full hour to ensure complete thermal saturation. This ensures that the moment the cold dough hits the hot surface, the bottom of the loaf begins to expand immediately, pushing the rest of the loaf upward. This provides the "kick" required to get a tall profile rather than a flat, pancake-like shape.
The Importance of Surface Tension
Even with the perfect steel, if your loaf lacks surface tension, it will expand horizontally rather than vertically. During the shaping process, you must create a taut "skin" on the exterior of the dough. This tension acts like a corset, forcing the internal gases to push against the structure and move upward. If your loaf is slack during the final proof, it will lose its shape the moment it hits the heat, regardless of how well you managed your thermal shock.
Mastering Steam Injection for the Perfect Crust
The crust of a loaf is defined by the Maillard reaction and the gelatinization of starches. Steam is the secret ingredient that keeps the exterior of the loaf soft for those crucial first ten minutes, allowing the dough to expand without being constrained by a premature, leathery crust. When steam hits the cool surface of the dough, it condenses and turns into a thin film of water. This water gelatinizes the starches on the surface, which eventually hardens into a thin, shiny, and crisp crust as the moisture evaporates and the heat takes over.
Household Steam Solutions
Since most home ovens lack steam injection, you have to get creative. The most effective method is using a Dutch oven or a cloche. These heavy, lidded vessels trap the moisture released from the bread itself, creating a self-contained humid environment that is perfect for the initial phase of baking. For those who prefer to bake on a stone, you can place a cast-iron skillet filled with lava rocks or old iron bolts at the bottom of the oven and pour a cup of boiling water into it just as you load your bread.
Why Steam is Non-Negotiable
Expansion:* It prevents the crust from drying and setting too early.
Color:* It promotes better caramelization, leading to a deep, dark golden-brown color.
Gloss:* It gives the loaf that professional, "varnished" appearance.
Shelf Life:* A properly developed, hydrated crust helps keep the interior moist for several days.
"Steam is the great equalizer in baking. It bridges the gap between the soft, doughy interior and the crisp, golden shell, giving the crust its characteristic shatter."
The Art of Scoring: Controlling the Flow
Scoring is the intentional act of creating a weak point in the surface of the loaf, allowing the dough to expand in a controlled manner. If you do not score your bread, the steam trapped inside will find the weakest point of the crust and burst through in an unsightly, jagged tear. By scoring, you are directing the expansion. A well-executed score—known as the ear—is the aesthetic hallmark of a loaf that has been properly managed throughout the fermentation and baking process.
Techniques for Effective Scoring
The angle of your blade, or lame, is crucial. You want to hold the blade at a 45-degree angle to the surface of the loaf. If you cut straight down, the loaf will open up like a volcanic crater. If you cut at an angle, you create a flap of dough that will lift as the loaf expands, creating a beautiful, crispy ridge. Do not be timid; you need to cut with confidence and purpose. A shallow score will heal over before the loaf has finished rising, while a deep score will cause the loaf to deflate. Aim for a depth of about 1/2 inch.
Geometry and Design
The pattern you choose serves a functional purpose. A single longitudinal score down the center of an oval loaf encourages maximum height. A series of cross-hatched scores on a round boule helps the loaf expand evenly in all directions. If you are baking a high-hydration dough, you may need a deeper score to accommodate the vigorous spring. Always use a brand new, razor-sharp blade. A dull blade will drag through the dough, tearing the gluten structure rather than slicing it cleanly.
Common Pitfalls and Troubleshooting
Even with the best equipment, things can go wrong. If your bread is flat, it is almost always a sign of either weak flour, insufficient fermentation, or a failure in the steam environment. If your crust is burnt but the inside is gummy, your temperature is too high. Learning to read your bread while it is in the oven is a skill that takes practice, but once you understand the signs, you can adjust your techniques in real-time.
The "Sourdough Flat" Syndrome
If your loaf spreads out like a pancake, check your baking time and temperature. If you aren't using a baking stone, start there. If you are using a stone but still getting flat loaves, look at your starter activity. Is your levain peaking before you mix it? Are you using enough strength-building folds (coil folds or stretch and folds) during bulk fermentation? Often, bakers blame the oven when the real issue is a lack of structural integrity developed in the hours leading up to the bake.
Managing Internal Temperature
Many home bakers rely purely on timing. This is a mistake. Ovens vary wildly in their heat distribution. A digital probe thermometer is your best friend. For a lean loaf, you are looking for an internal temperature of around 205°F to 210°F (96°C to 99°C). If you pull the bread too early, the crumb will be gummy and starchy; if you leave it too long, you risk drying out the delicate interior.
Advanced Techniques: The Cold Retard
One of the most effective ways to ensure success with oven spring is to incorporate a cold retard into your workflow. By placing your shaped dough in the refrigerator for 12 to 24 hours, you slow down the yeast activity while allowing the enzymes to break down starches into sugars. This not only deepens the flavor profile of the bread but also makes the dough much easier to score. A cold loaf is firmer and more stable, which prevents it from collapsing when you score it and allows for a more controlled expansion in the oven.
The Science of Cold Dough
When you score a warm, room-temperature dough, it can be floppy and difficult to manage. A cold, retarded dough holds its shape perfectly, allowing for intricate scoring designs and a much more explosive oven spring. Because the exterior of the dough is cold, it takes a moment longer to form the crust, giving the loaf that extra bit of time to reach its full volume. This is how professional bakeries achieve such consistent, high-volume results day after day.
Integrating the Retard into Your Schedule
Mix and Bulk:* Do your primary fermentation at room temperature.
Shape:* Perform your final shaping with care to maintain tension.
Retard:* Move the proofing basket to the fridge for at least 12 hours.
Bake:* Score and load the dough directly from the fridge into the hot oven.
"The refrigerator is not just a place to store your dough; it is a vital tool for developing complexity and ensuring that your loaves have the structural integrity required for a dramatic rise."
Scaling and Consistency: The Professional Standard
To move from "home hobbyist" to "serious baker," you must start weighing your ingredients in grams rather than cups. Flour density varies by brand and even by humidity, so using a kitchen scale is the only way to ensure your hydration percentage is accurate. Most artisanal loaves fall between 70% and 80% hydration. Higher hydration makes for a more open, airy crumb, but it also makes the dough stickier and harder to handle. Master the lower range (70%) before pushing the limits of your flour’s strength.
The Importance of Flour Strength
Not all flours are created equal. You need a flour with a protein content of at least 12-13% to provide the gluten network necessary for a high-volume loaf. If you are using an all-purpose flour with low protein, your dough will simply lack the elasticity to trap the gases produced during fermentation. Look for bread flour or, even better, high-protein organic wheat flour. The quality of your raw materials sets the ceiling for what your finished loaf can achieve.
Building a Workflow
Consistency comes from repetition. Keep a baking journal where you record your temperatures, hydration levels, fermentation times, and the final result of your loaf. If a loaf comes out perfectly, you want to know exactly what you did so you can replicate it. If a loaf fails, you want to identify the single variable that changed. Professional bakers don't guess; they measure, adjust, and repeat until the process is second nature.
Final Thoughts
Mastering the oven spring is a journey, not a destination. You will have loaves that are slightly under-baked, loaves that didn't rise as much as you hoped, and perhaps the occasional loaf that seems to defy the laws of physics. That is the beauty of the craft. By focusing on the fundamentals—thermal shock, steam management, dough tension, and the strategic use of cold—you are stripping away the excuses and putting yourself in the driver's seat. The next time you pull a steaming, golden-brown loaf from your oven, listen for that subtle crackle; that is the sound of success. It is the sound of a loaf that has been treated with the respect it deserves, from the initial mix to the final blast of heat. Stop blaming the chef, and start becoming the one in command. Your kitchen is the laboratory, your ingredients are the variables, and with patience, the perfect loaf is well within your reach. Keep baking, keep measuring, and most importantly, keep learning. Every loaf is a teacher, and every oven spring is a victory.




Get the Next Recipe
Weekly recipes, techniques, and gear picks — straight to your inbox.
