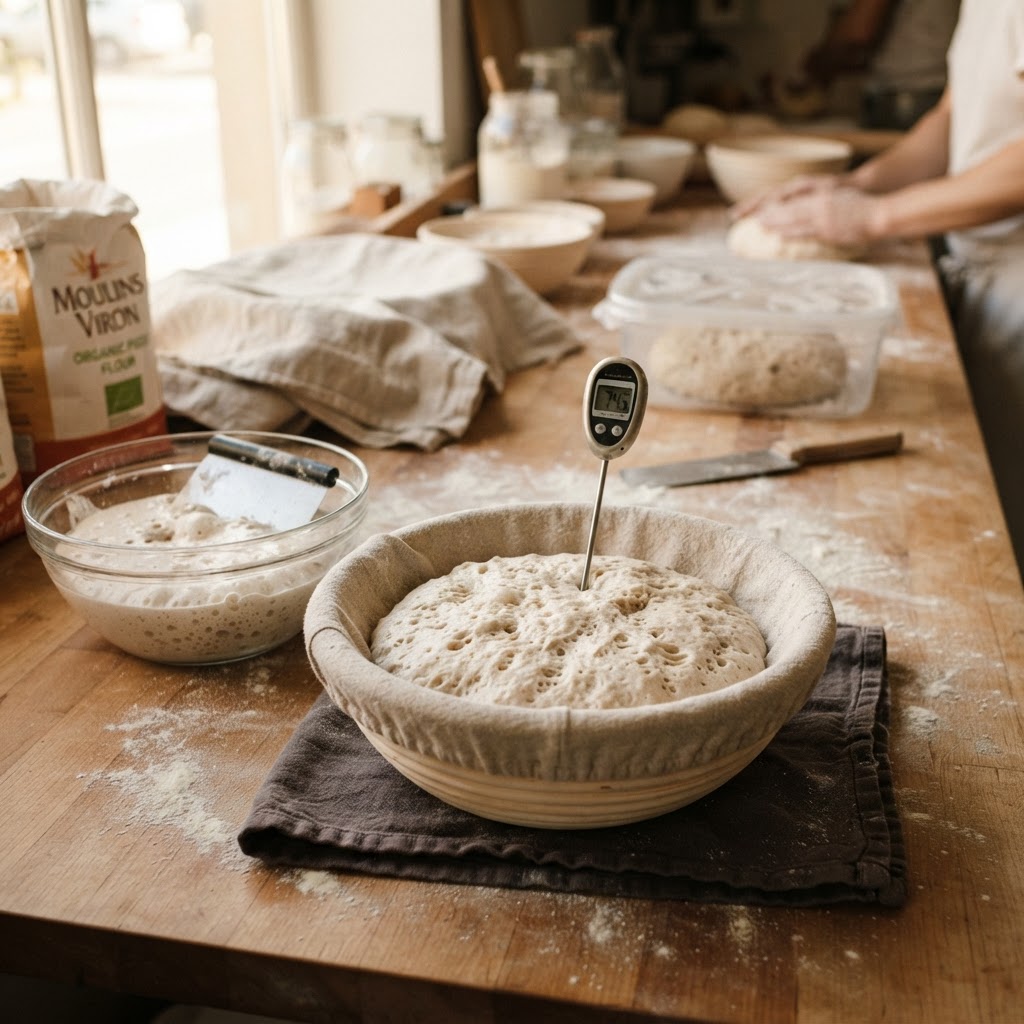
The Baker’s Guide to Proofing: Mastering Temperature, Time, and Bulk Fermentation for Better Bread
There is an almost mystical quality to the alchemy of flour, water, salt, and yeast, a transformation that has sustained civilizations for millennia. For the home baker, the journey from a shaggy, sticky mass of dough to a crusty, golden-brown loaf is often paved with equal parts triumph and frustration. We have all experienced the deflated sad-loaf, the gummy crumb, or the dense brick that seemed to follow the recipe perfectly but failed in the final moments of the bake. The secret, more often than not, lies not in the quality of your flour or the brand of your oven, but in the invisible, patient work of fermentation. Mastering the art of proofing is the divide between a casual hobbyist and a true bread artisan.
Proofing is not merely a waiting game; it is an active phase of flavor development, structural integrity, and structural reinforcement. When we talk about fermentation, we are really discussing the biological activity of wild or commercial yeast and the enzymatic breakdown of starches into sugars. This process creates the gas bubbles that provide the airy crumb we crave and the organic acids that offer that signature tangy depth. By understanding the variables of temperature and time, you move from being a follower of rigid instructions to an architect of your own crumb. Every degree of ambient temperature and every passing minute shifts the trajectory of your loaf, and learning to read these signals is the ultimate superpower in your kitchen.
In this deep dive, we are going to strip away the myths surrounding bread baking and focus on the mechanics of the dough. We will look at how to control your environment when your kitchen is too cold, how to judge when bulk fermentation has reached its peak, and why the final proof is often the most misunderstood stage of the process. Whether you are baking a standard sourdough boule or a delicate focaccia, the principles of proofing remain the universal language of great bread. Put on your apron, sharpen your bench scraper, and prepare to elevate your baking by focusing on the invisible science that happens inside the bowl.
Understanding Bulk Fermentation: The Foundation of Flavor
Bulk fermentation, often referred to as the "first rise," is the single most important period in the bread-making process. This is the stage where the dough develops its strength, flavor, and aeration. Many home bakers make the mistake of rushing this phase, treating it as a chore to be completed as quickly as possible. However, during these hours of rest, the gluten network is maturing, enzymes are actively breaking down proteins into amino acids, and the yeast is busy producing the carbon dioxide that will eventually become your crumb structure.
To master this stage, you must view your dough as a living, breathing entity. The duration of bulk fermentation is dictated entirely by temperature and the health of your leaven. If your kitchen is a balmy 78 degrees, the dough will move rapidly, requiring more frequent intervention. In a cooler 68-degree kitchen, the process will naturally slow, allowing for a longer, more nuanced flavor development. You are not looking for a specific clock time, but rather a specific state of the dough, often characterized by a 30 to 50 percent increase in volume and a visible change in texture.
The Importance of Dough Temperature
Temperature control is the cornerstone of professional baking. The Desired Dough Temperature (DDT) is a calculation used by professionals to ensure consistency across bakes. By measuring your ambient room temperature, your flour temperature, and your water temperature, you can hit a consistent target, usually between 75°F and 78°F. If your dough is too cold, fermentation stalls; if it is too hot, the dough can become over-proofed and enzymatic breakdown can happen too quickly, leading to a structure that cannot hold its own weight.
"Fermentation is the heartbeat of the bread; if you try to race the clock, you lose the soul of the loaf."
Measuring Progress Through Sight and Touch
Developing a "feel" for the dough is a skill that takes practice, but there are objective markers you can use. As fermentation progresses, the dough should feel lighter and more billowy. If you poke the surface with a floured finger, the indentation should spring back slowly rather than snapping back immediately or collapsing entirely. You should also notice small bubbles on the surface and along the sides of your container, signaling that gas production is steady and consistent.
The Science of Temperature and Yeast Activity
Yeast is a temperature-sensitive fungus, and its behavior is predictable once you understand the limits of its efficiency. Below 60°F, yeast activity slows to a crawl, which is why we often use the refrigerator for cold retarding to develop flavor. Above 90°F, you risk the yeast working too hard, creating an overly fermented dough that lacks the stamina to rise properly in the oven. The "sweet spot" for active bulk fermentation is consistently between 75°F and 82°F.
When your kitchen fluctuates, your bread fluctuates. A common professional trick is to use a "proofing box" or simply a warm corner of the house—like the top of the refrigerator or inside an oven with the light left on (but the oven off). Consistency is the enemy of failure. If you start your bulk fermentation at 78°F, try to keep it there until the very end. The metabolic energy of the yeast creates its own heat as it ferments, so your dough temperature will naturally rise by a degree or two over the course of several hours.
Cold Retardation: The Secret to Depth
One of the most effective tools in the baker’s arsenal is the cold retard. By placing your shaped loaf into the refrigerator, you effectively pause the yeast activity while allowing the lactic and acetic acid bacteria to continue their work. This results in a significantly more complex flavor profile and, perhaps more importantly, a dough that is firmer and easier to score. A cold-proofed loaf will often have a more pronounced "ear" and a blistered, crunchy crust that is the hallmark of a professional sourdough.
Managing Seasonal Fluctuations
Summer baking is fundamentally different from winter baking. In the summer, you might need to use ice-cold water to keep your dough from fermenting too quickly. In the winter, you may need to use warm water (around 85°F) to kickstart the yeast. Always invest in a digital probe thermometer; guessing the temperature of your water is the easiest way to sabotage your bake before you have even begun mixing the flour and salt.
Strength Building and Handling the Dough
Bulk fermentation is not just about time; it is about physical intervention. During the first two hours of bulk, you should focus on strengthening the dough through a series of stretch and folds or coils. These techniques serve two purposes: they align the gluten strands to create a robust structure capable of trapping gas, and they redistribute the temperature and nutrients for the yeast. The goal is to build strength without degassing the dough entirely.
When performing a stretch and fold, you are essentially working the dough on itself. By grabbing one side, pulling it up until you feel tension, and folding it over to the center, you create layers of structure. Repeating this on all four sides of the container is one cycle. Usually, three to four cycles spaced 30 minutes apart are sufficient for a standard wheat-based dough. Do not be afraid to be firm, but be gentle enough that you aren't tearing the delicate gluten networks you are trying to cultivate.
The Role of Gluten Development
Gluten is a protein complex formed when flour is hydrated and agitated. A well-developed gluten network acts like a balloon, holding the air bubbles created by the yeast. If your dough is weak, it will be unable to hold the gas, resulting in a flat, dense loaf. Watch for the "windowpane test"—take a small piece of dough and stretch it between your fingers; if it becomes translucent without tearing, you have achieved optimal development.
Gentle Handling in the Later Stages
As bulk fermentation nears its end, you must switch your approach. Early on, you can be aggressive with your folds. However, once the dough starts to become airy, you must be extremely delicate. If you handle the dough too roughly at the end of the bulk phase, you will pop all the bubbles you spent hours creating. Use a floured bench scraper to guide the dough, and treat it with the respect due to a living organism.
"The dough speaks to you through its texture; if it feels alive and elastic, you are on the right path."
The Final Proof: The Threshold of Success
The final proof—the time between shaping and the oven—is where the structure is solidified. This is the moment when the loaf needs to gain enough volume to be "oven-ready" without exhausting the remaining sugar supply for the bake. If you under-proof, the loaf will tear in the oven, creating a messy or "blown out" side. If you over-proof, the structure will collapse, leading to a dense, flat, and sour-tasting result that lacks the desirable "oven spring."
Determining the perfect finish line for the final proof is often the hardest part of the process. A common technique is the "poke test" again, but with a nuanced difference. If you poke the dough and it springs back immediately, it needs more time. If it leaves a dent that doesn't spring back at all, it is over-proofed. The ideal state is when the dent slowly fills back in about halfway. This indicates that the dough has plenty of gas and structure, but still has the potential for that dramatic final expansion in the heat of the oven.
Timing the Oven Preheat
Your final proof should be timed precisely with your oven’s readiness. There is nothing worse than having a perfectly proofed loaf and realizing your oven still needs 20 minutes to hit 500°F. Ensure your Dutch oven or baking stone is fully preheated for at least 45 to 60 minutes before you intend to bake. The intensity of the initial blast of heat is vital for achieving a good rise and a golden-brown crust.
Scoring: Controlling the Expansion
The score, or the cut you make on top of the loaf, is not just for aesthetics; it is a functional necessity. By providing a path of least resistance, you tell the bread exactly where to expand in the oven. Use a lame or a very sharp razor blade. A shallow cut will result in a messy break, while a deep, confident cut at a 45-degree angle will encourage the dough to bloom, creating that beautiful "ear" that separates professional loaves from amateur ones.
Common Pitfalls and Troubleshooting
Every baker, from the amateur to the professional, encounters hurdles. The most common issues during proofing usually stem from misinterpreting the environmental conditions or failing to account for flour variations. Whole grains, for example, ferment much faster than white flours because they contain more nutrients for the yeast and more bran that can cut through gluten strands. Always keep a baking journal to note the time, temperature, and specific flour blends used in each batch.
If you find that your bread is consistently dense, your issue is likely either under-fermentation or poor gluten development. If your bread is constantly spreading like a pancake, you might be over-proofing or using a flour with an insufficient protein content for your hydration level. Don't be afraid to adjust your hydration downward if you are struggling with a "wet" dough; a lower hydration (65–70%) is much easier to manage while you are learning the fundamentals of structure.
The Problem of Over-Fermentation
Over-fermentation is the most common reason for a loaf that refuses to brown properly. The yeast has consumed all the available sugars, leaving nothing behind for the Maillard reaction that creates that beautiful, dark, crusty finish. If your bread comes out pale and sour, look at shortening your bulk fermentation time or lowering the temperature slightly. It is almost always better to err on the side of slightly under-proofed than over-proofed.
Using Commercial Yeast vs. Sourdough
The principles described here apply to both commercial yeast and sourdough, but the timelines will differ wildly. Commercial yeast is highly active and predictable, often completing a bulk fermentation in two hours. Sourdough relies on a wild ecosystem that can take six to eight hours. Never compare the two blindly. Always bake to the visual and tactile cues of the dough rather than a fixed timer on your phone.
Essential Gear for the Home Baker
While bread can be made with little more than a bowl and a hot oven, a few select tools can dramatically improve your results. A digital kitchen scale is non-negotiable; measuring by volume (cups) is simply too inaccurate for the precision required in baking. A high-quality bench scraper is your best friend when working with sticky doughs, and a proofing basket (banneton) helps maintain the shape of your loaf during the final rise, ensuring it holds its form until it hits the hot stone.
For those serious about baking crusty artisan loaves, a Dutch oven is the gold standard. By trapping the steam released by the dough during the first 20 minutes of baking, you recreate the environment of a professional hearth oven. This steam keeps the crust soft, allowing the loaf to expand fully before the exterior sets and hardens. Without this steam, the crust sets too quickly, preventing the bread from achieving its full potential.
Investing in the Right Flour
Not all flour is created equal. For high-hydration loaves, you want a bread flour with at least 12-13% protein content. This higher protein count creates the strong gluten network necessary for a good "oven spring." If you are using supermarket all-purpose flour, you may find that the dough lacks the extensibility or strength of professional-grade bread flour. When in doubt, look for unbleached, high-protein flours from reputable millers.
Maintaining Your Tools
Keep your bannetons lightly floured with rice flour, which is naturally gluten-free and prevents sticking. After use, let your proofing baskets dry out completely before storing them to prevent mold. If your Dutch oven has a lid, make sure the seal is tight; if there is a gap, you can place a small piece of aluminum foil over the top of the pot before closing the lid to keep the steam trapped.
"True craftsmanship is not about perfection, but about the constant refinement of your relationship with the ingredients."
Final Thoughts
Mastering the art of proofing is a lifelong endeavor. It requires patience, observation, and a willingness to fail in the pursuit of a better loaf. Do not be discouraged if your first attempts do not yield the results you see in professional bakeries. The key is to change only one variable at a time: if your bread was too flat, adjust your hydration next time. If it was too sour, shorten the fermentation. If it was too pale, look at your oven temperature.
By focusing on the "invisible" work—the temperature, the timing, and the gentle touch—you will find that bread baking becomes less of a mystery and more of a rhythmic, meditative practice. The kitchen is your laboratory, and the dough is your greatest teacher. Take the time to understand the science, respect the biological clock of your yeast, and always, always keep a record of your bakes. Over time, you will find that the "perfect" loaf is not a destination, but a beautiful, recurring outcome of your growing expertise.
When you finally pull that loaf from the oven, listen for the crackle—that signature song of the cooling crust. That sound is your reward, the culmination of your patience and your understanding of the fermentation process. Share that bread with friends and family, and remember that every time you bake, you are participating in a tradition as old as humanity itself. Happy baking, and may your loaves always have the perfect rise, the most beautiful blistered crust, and the most flavorful, airy crumb imaginable. Stay curious, keep your bench clean, and remember that when the bread is good, the baker gets the credit—but when it's great, the fermentation deserves a bow.




Get the Next Recipe
Weekly recipes, techniques, and gear picks — straight to your inbox.
