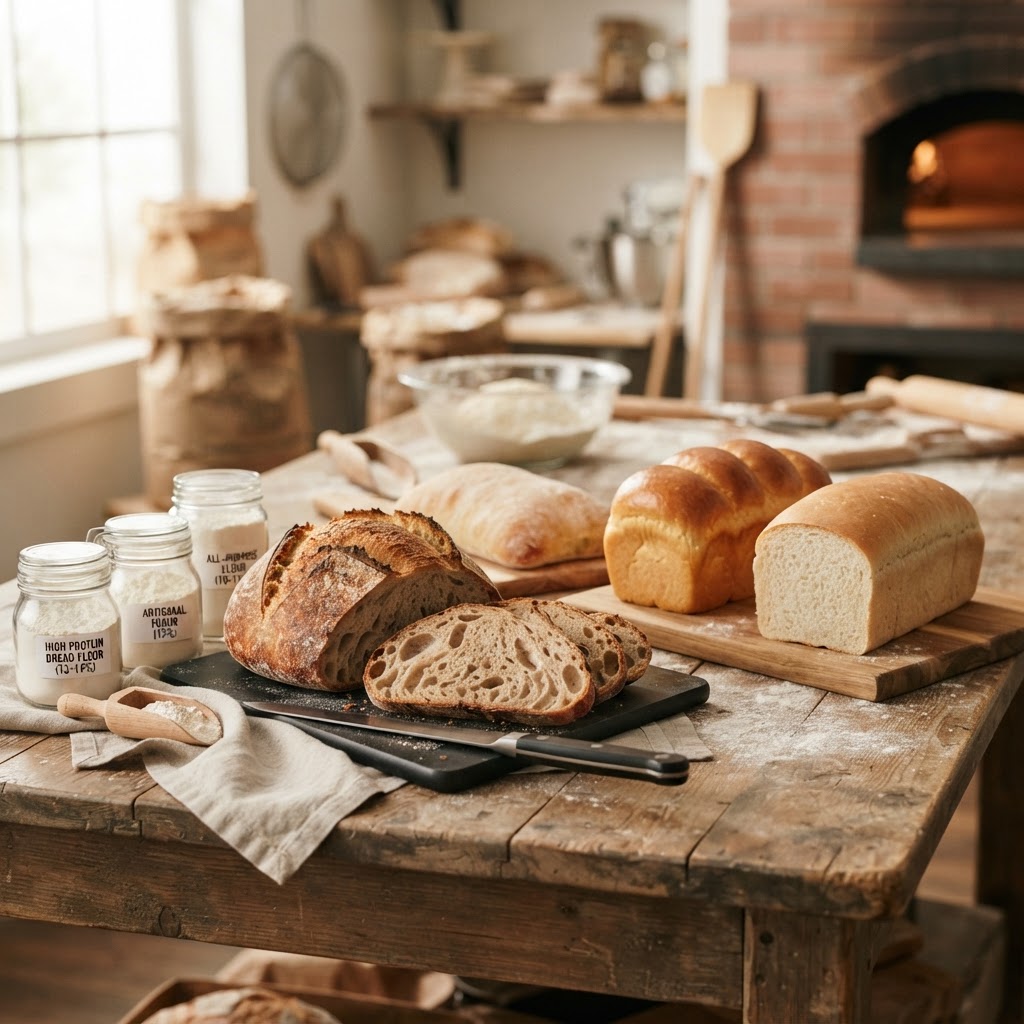
The Baker’s Guide to Protein Content: Mastering Flour Selection for Perfect Crumb and Crust Structure
Have you ever spent hours meticulously following a bread recipe, only to be met with a dense, gummy loaf that resembles a brick more than an artisan boule? It is a frustration shared by home bakers everywhere, and more often than not, the culprit isn’t your technique, your oven, or your starter—it is the flour. Many home bakers operate under the assumption that all-purpose flour is a universal tool, but in the professional kitchen, we view flour as the primary architectural material of our craft. Understanding the specific chemical composition of your grain, particularly the role of proteins, is the difference between an amateur hobbyist and a true master of the oven. This guide aims to pull back the curtain on the science of milling and protein to ensure your crumb structure is always light, airy, and open.
The magic of baking relies entirely on the complex interaction between two specific proteins: glutenin and gliadin. When these proteins meet water and are subjected to mechanical action—or simply time—they bind together to form gluten. This elastic network is what captures the gases produced by yeast or chemical leaveners, allowing your baked goods to rise and hold their shape during the intense heat of the oven. If your flour lacks the necessary protein percentage, that network will be too weak to support the structure, leading to collapse; if it is too high, you might end up with a chewiness that feels more like leather than a soft, pillowy roll. Mastering this balance is the first step toward reclaiming control over your kitchen results.
As we dive into the technical nuances of baking, I want you to remember that baking is as much an intuitive art as it is a precise science. While these numbers and ratios are essential guidelines, the "feel" of the dough—its resistance, its hydration, and its extensibility—is something you will only learn by doing. We are going to explore the distinct categories of flour, how protein content dictates your end product, and how to calibrate your pantry for everything from delicate pastries to robust, crusty sourdough loaves. By the end of this guide, you will be able to look at a recipe and immediately know whether you have the right flour for the job or if you need to head back to the local market for a specialized sack.
The Chemistry of Gluten: Understanding Protein Percentages
At the heart of every successful bread, cake, or cookie is the protein content of the flour. In professional baking, we define the "strength" of a flour based on how much protein it contains, usually ranging from 7% to 15%. This protein is not just a nutrient; it is the structural scaffolding of your baked product. When you mix water with flour, the proteins hydrate and begin to align themselves. The physical act of kneading acts as the catalyst for this alignment, turning a shaggy mass of ingredients into a supple, extensible, and elastic dough.
The protein content directly influences the water absorption capacity of your dough. A flour with a higher protein count (such as a hard red winter wheat) will generally be able to absorb more water, which is essential for achieving the open, "wild" crumb structure often sought after in high-hydration sourdough breads. Conversely, lower protein flours result in a more tender, delicate crumb, which is exactly what we want in a biscuit, a pie crust, or a soft, buttery croissant.
"The flour is the canvas upon which the baker paints. If the canvas is too coarse, the art suffers; if it is too fine, it cannot hold the weight of the expression. Always match your flour to the crumb you intend to build."
Protein Ranges and Their Applications
To simplify your workflow, it helps to categorize your flours by their protein content. Here is a breakdown of what you should keep on your shelves:
Cake Flour (7% – 9%):* Extremely fine, low-protein, and often chlorinated to weaken the gluten structure. Use this for cakes where you want a "melt-in-your-mouth" texture.
Pastry Flour (8% – 10%):* A middle ground between cake flour and all-purpose. Ideal for pie crusts, biscuits, and delicate cookies where you need a little bit of structure but minimal chew.
All-Purpose Flour (10% – 12%):* The workhorse of the home kitchen. It has enough protein for a standard loaf of sandwich bread but is low enough to make a decent muffin or pancake.
Bread Flour (12% – 14%):* Designed for yeast-risen breads. This provides the high protein needed for a robust gluten network that can withstand long, slow fermentations and high-heat baking.
High-Gluten Flour (14% – 16%):* Often used in commercial settings for bagels and pizza crusts, where extreme chewiness and significant oven spring are the primary goals.
The Impact of Flour on Crust Structure and Color
While crumb structure gets most of the attention, the crust is the primary sensory signal for quality. A crust should be shattering, flavorful, and beautifully caramelized. Protein content plays a surprising role here through the Maillard Reaction, a chemical process that occurs when proteins and sugars react at high temperatures to create that deep, golden-brown color and complex flavor profile we associate with a perfect crust.
When you use a high-protein flour, you have more available amino acids in the dough. During the bake, these amino acids interact with the natural sugars in the grain to accelerate browning. This is why a professional loaf of bread baked with a high-quality, high-protein bread flour will almost always have a deeper, more mahogany-colored crust than one baked with a generic, low-protein white flour.
Techniques for Enhancing the Crust
To maximize your crust, consider these adjustments to your process:
Mastering the Art of Hydration Ratios
Hydration, or the ratio of water to flour by weight, is the most critical variable after protein content. In the culinary world, we always weigh our ingredients using a kitchen scale rather than measuring by volume. Using a scale ensures consistency every single time. A simple formula for Baker’s Percentages is to treat the total weight of the flour as 100%. All other ingredients are then expressed as a percentage of that flour weight.
If you are aiming for a high-hydration dough (think 75% or higher), you absolutely must use a high-protein bread flour. If you try to hydrate a low-protein pastry flour to 80%, you will end up with a puddle of sticky, unmanageable mess. The gluten network simply won't be strong enough to hold that volume of water. As you increase the water, you must also increase your mechanical development—either through more kneading or a series of stretch-and-folds—to ensure the gluten is sufficiently organized to retain that liquid.
The Balancing Act
When adjusting your hydration, keep these tips in mind:
The 65% Baseline:* For most standard loaves, 65% hydration (650g water per 1000g flour) is the sweet spot for a dough that is easy to handle and produces a predictable crumb.
The 75%+ Threshold:* Once you pass 75%, the dough becomes very sticky. Use the "damp hand" method—keep your hands wet when working with the dough to prevent it from sticking to your skin—rather than adding more flour, which would ruin your hydration ratio.
The Autolyse Technique: If you are working with a high-protein flour, mix only the flour and water and let it sit for 30–60 minutes before adding salt or yeast. This process, known as the autolyse*, allows the flour to fully hydrate, making the dough much easier to knead and improving the final crumb elasticity.
"A well-hydrated dough is a living, breathing entity. Do not force it into the shape you want; guide it with patience and the correct protein-to-water ratio."
Troubleshooting Common Crumb Issues
Even with the right flour, you might face issues like a "tunneling" crumb, large holes at the top of the loaf (often called "flying crust"), or a dense, heavy base. Most of these issues are directly linked to how your gluten network is interacting with your leavening agent. A tunneling crumb, for instance, is usually a sign of over-mixing or using too high a protein flour for a quick-bread application, like muffins.
If your bread is flat, it could be a sign of a weak gluten structure caused by either under-kneading or using a low-protein flour that cannot hold the gas produced by your yeast. On the other hand, if your bread has a "rubbery" texture, you might be using too much high-protein flour for an item that should be tender, like a dinner roll. The key is to assess your results: if the bread is too tough, scale back on the protein; if it’s too flat, scale up.
Common Problems and Fixes
Dense/Gummy Crumb:* Often caused by cutting into the bread before it has fully cooled. The residual heat continues the cooking process. Wait at least 2 hours before slicing.
Large Holes (Tunneling):* Frequently caused by improper shaping or an over-proofed dough. Ensure your final shape creates enough tension on the surface of the loaf to control the expansion.
Pale Crust:* Likely due to a lack of simple sugars on the surface or an oven that isn't hot enough. Crank your oven to at least 450°F (230°C) and ensure you are using a pre-heated baking stone or steel.
The Role of Fermentation in Gluten Development
Fermentation is the biological way to develop gluten. While mechanical kneading is important for initial organization, the long, slow work of the yeast (or bacteria in a sourdough starter) actually strengthens the dough over time. During fermentation, yeast eats the starches and sugars, releasing carbon dioxide and alcohol. These gasses stretch the gluten strands, essentially "exercising" them.
When we talk about the "windowpane test"—where you take a small piece of dough and stretch it until you can see light through it without it tearing—we are looking for the final result of a successful, long-fermented dough. If you are using a high-protein flour, your dough will require a longer bulk fermentation to fully realize its potential. If you rush this process, you will end up with a loaf that feels tight and creates a tough, chewy crust rather than a light, airy crumb.
Professional Tips for Fermentation
Temperature Control:* Keep your dough between 74°F and 78°F for optimal activity. Use a proofing box or a warm spot in your kitchen.
The Finger Poke Test:* To see if your dough is ready for the oven, gently poke it. If it springs back immediately, it needs more time. If it leaves a slight indentation that slowly fills back in, it is ready to bake.
Avoid Over-Proofing:* An over-proofed dough will lose its gas and collapse in the oven. When in doubt, it is better to bake your bread slightly under-proofed than over-proofed, as the oven spring will take care of the rest.
Specialty Flours: Rye, Spelt, and Whole Grains
Not all flours are created equal, even within the same protein percentages. Ancient grains like spelt and rye have vastly different gluten structures than modern wheat. Rye, for example, contains almost no gluten-forming proteins but is rich in pentosans, which absorb a massive amount of water. If you try to make a 100% rye loaf using the same technique as a white flour loaf, you will end up with a sticky, dense, wet mess that never rises.
When incorporating whole grains, remember that the bran and germ physically cut through the gluten strands as the dough expands. This is why a 100% whole wheat loaf will always be denser than a white loaf—the sharp edges of the bran act as tiny razors against the gluten network. To counter this, many bakers use a technique called soaking (or "soaking the bran"), where you mix your whole grains with water for a few hours before adding them to your white flour base. This softens the bran and allows for a better rise.
How to Mix Grains Effectively
"The inclusion of ancient grains is a direct line to the history of the craft. Approach these flours with respect, and they will reward you with flavors that modern, mass-produced flour simply cannot replicate."
The Baker’s Workflow: A Step-by-Step Approach
To bring all of this together, let’s look at a standard workflow for a professional-grade loaf of country sourdough. By adhering to this structure, you eliminate the guesswork and ensure that your protein content, hydration, and fermentation time are perfectly aligned.
Final Thoughts
The journey to the perfect crumb is a lifetime pursuit. As you continue to bake, you will find that your intuition regarding flour, hydration, and timing becomes second nature. Do not be discouraged by the loaves that don't quite meet your standards; every "failed" loaf is a masterclass in chemistry and structural integrity. By understanding the protein content in your pantry, you have taken the single most important step toward professional-level results in your home kitchen.
Remember to source your flour carefully. If possible, seek out local mills or high-quality, unbleached flour brands that provide technical specifications on their packaging. The more you know about the origin and the makeup of your ingredients, the more consistency you will bring to your baking. Keep your kitchen scale handy, respect the science of the protein, and above all, enjoy the process of turning simple dust and water into something truly extraordinary. Happy baking, and may your crusts always be shatteringly crisp and your crumb always perfectly airy.
As you move forward, consider keeping a baker’s journal. Document the brand of flour used, the protein percentage, the room temperature during bulk fermentation, and the final hydration ratio of your successful loaves. This data will become your most valuable asset, allowing you to troubleshoot and iterate with the precision of a professional pastry chef. Whether you are baking a standard sourdough for a Tuesday night dinner or a complex, enriched brioche for a special occasion, the principles of protein management remain the constant foundation of your success.
Never stop experimenting with your ratios. While this guide provides the foundational rules, the beauty of baking lies in pushing those boundaries. Try blending flours, adjusting your proofing times, or experimenting with different hydration levels to see how they impact your final structure. The more you explore, the more you will understand that flour is not just a shelf-stable ingredient; it is a complex biological framework that you have the power to manipulate. You are the architect of your crumb, and every bake is an opportunity to refine your design.
Finally, remember that the most important ingredient in any kitchen is a positive mindset. Even the most seasoned chefs encounter challenges, but they view them as opportunities for growth rather than personal failures. Treat your dough with kindness, monitor your environment with care, and embrace the rhythm of the fermentation process. Your patience will be evident in every bite, from the crackle of the crust to the complex, tangy flavor of a well-developed crumb. Stay curious, stay hungry, and keep those ovens running. Your best loaf is yet to come, and with the right flour in your hands, it is only a matter of time before you achieve that elusive, bakery-quality result. Keep refining, keep measuring, and most importantly, keep enjoying the beautiful, rewarding work of the baker. Happy, high-protein baking!




Get the Next Recipe
Weekly recipes, techniques, and gear picks — straight to your inbox.
