The Baker’s Guide to Reverse Creaming: Mastering Ingredient Integration for Velvety, Fine-Crumb Cakes
If you have spent any time in a professional kitchen or deep-dived into the mechanics of baking, you have likely encountered the classic "creaming method." For generations, we were taught that the path to a light, airy cake begins with beating softened butter and granulated sugar together until pale and fluffy, followed by the careful addition of eggs and dry ingredients. While this method remains the gold standard for many sponge cakes, it is not the only way to achieve that elusive, bakery-style crumb. The reverse creaming method—sometimes referred to as the paste method—flips the traditional process on its head, offering a transformative approach for home bakers seeking a tighter, more velvety texture that defies the typical "bread-like" interior of conventional cakes.
The science behind reverse creaming is as elegant as it is effective. By coating the flour particles in fat before introducing any liquid, you are physically inhibiting the development of gluten strands. When you mix flour with liquid first, as you would in a traditional creaming method, you provide the water necessary for protein chains in the flour to link up and create structure; however, when you coat that flour in a lipid layer—the butter—those proteins are "waterproofed," resulting in a cake that is remarkably tender, dense in the best way possible, and incredibly moist. This technique is the secret weapon behind those professional-grade cakes that have a fine, uniform crumb structure rather than the large, airy pockets you might expect from a standard butter-based sponge.
Embracing this technique requires a fundamental shift in how you approach your mise en place. You aren't looking for the light, aerated mass of a butter-sugar mix; instead, you are aiming for a sandy, breadcrumb-like consistency that creates the foundation for your batter. It is a more forgiving method in many respects, as it is nearly impossible to overwork the batter once the flour has been protected by the fat. For those who find the standard creaming method finicky or prone to curdling when adding eggs, the reverse method provides a sense of control and consistency that is truly a revelation in the home kitchen. Welcome to "Blame The Chef," where we stop blaming our equipment and start mastering the science of the crumb.
Understanding the Chemistry of the Crumb
The distinction between the traditional creaming method and the reverse method lies primarily in how the flour proteins interact with moisture. In traditional baking, the creaming process builds an air-trapped matrix of butter and sugar, which then acts as a leavening assistant. In contrast, the reverse creaming method focuses on shortening the gluten strands to ensure the cake remains soft, buttery, and uniform. This is why the reverse method is particularly favored for high-ratio cakes—cakes where the weight of the sugar and liquids exceeds the weight of the flour.
The Role of High-Ratio Fats
To achieve the best results, you must consider your fat source. Using room-temperature, high-quality unsalted butter is paramount, but some professional pastry chefs swear by a combination of butter for flavor and high-ratio shortening for structure. Because the reverse creaming method relies on the fat coating the flour, you need a fat that is malleable enough to coat the particles completely without clumping. If your butter is too cold, you will end up with stubborn butter-lumps in your flour; if it is too warm, you will not achieve the desired "sandy" texture and will instead create a gummy paste.
Achieving the Perfect Sandy Texture
The goal of the first step in this method is to mix your dry ingredients—flour, sugar, baking powder, salt, and, if applicable, cocoa powder—with the softened fat until the mixture resembles coarse, damp sand. You should use a stand mixer fitted with the paddle attachment on the lowest speed. Do not rush this process. It is this specific consistency that dictates the final crumb. If you see chunks of butter larger than a pea, the coat is uneven, and your cake will bake with inconsistent holes.
The reverse creaming method is a masterclass in texture control; by prioritizing the encapsulation of flour particles, we effectively silence the development of gluten, ensuring a cake that is as delicate as it is durable.
The Sequential Addition of Liquids
Once your flour and fat are sufficiently combined, the liquids must be introduced in stages. This is where the emulsification process truly begins. You should have your eggs, extracts, and milk (or other liquids like sour cream or yogurt) measured out, preferably at room temperature to prevent the butter from seizing and turning granular.
The Importance of Emulsion
You want to introduce your liquid ingredients in at least two, preferably three, distinct additions. With each addition, allow the mixer to run for a set amount of time—usually thirty to sixty seconds—to ensure the liquid is fully absorbed into the flour-fat matrix. This creates a stable emulsion. If you dump all your liquids at once, you risk breaking the emulsion, which can lead to a cake that is dense or greasy on the bottom but dry on top.
Maintaining Temperature Equilibrium
Professional chefs often emphasize that "room temperature" is not just a suggestion, it is a technical requirement. If your eggs are refrigerator-cold, they will cause the butter to harden immediately, resulting in little streaks of fat throughout your batter that will leave spots in your baked cake. Ensure your eggs, milk, and butter are all kept at roughly 68-72 degrees Fahrenheit (20-22 degrees Celsius). This equilibrium allows for a smooth, homogenous batter that holds its structure throughout the baking process.
Achieving the Fine, Velvet Crumb
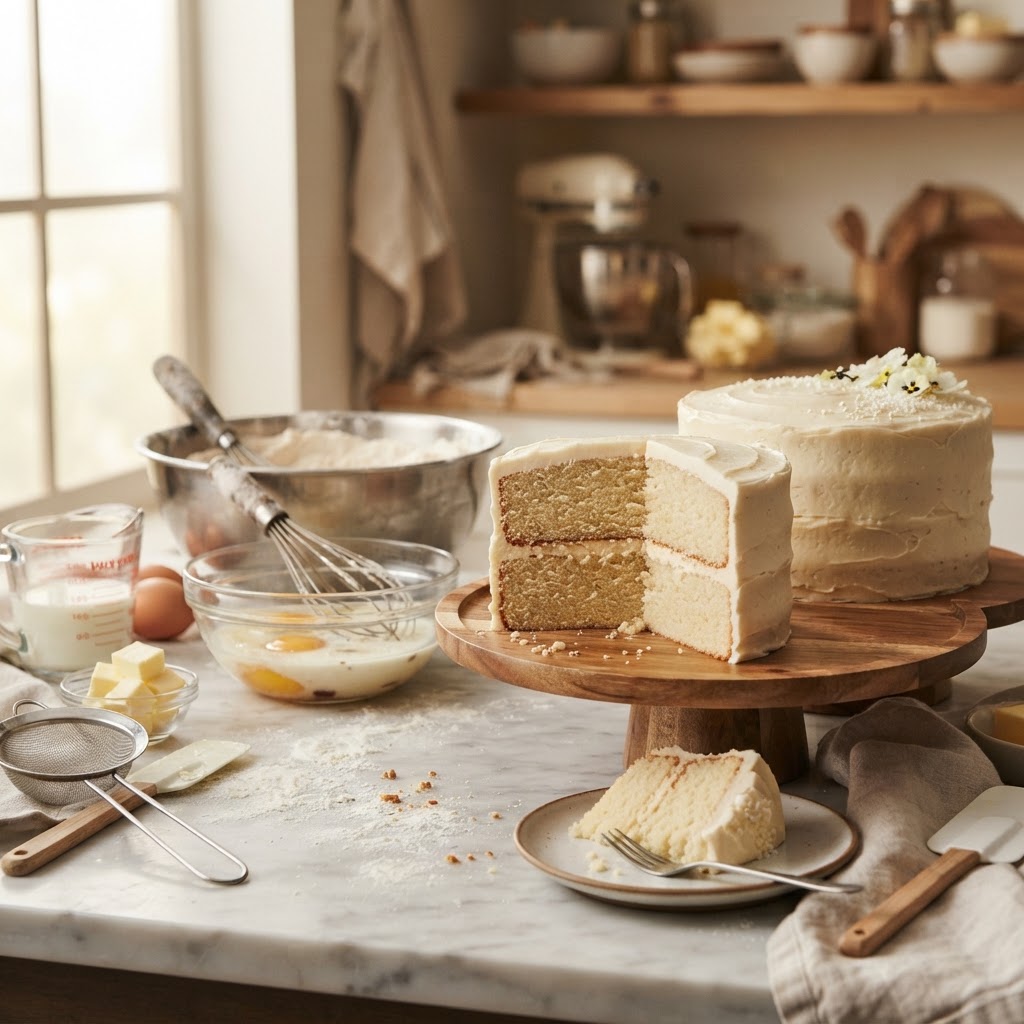
The most coveted aspect of a cake produced via reverse creaming is the "fine crumb." When you slice into a slice of cake made this way, you notice the lack of large, irregular air holes. Instead, you see a tight, uniform, almost cloud-like texture. This is ideal for tiered cakes, as the structural integrity of the cake is superior to that of a whipped-butter sponge.
Why This Method Prevents Tunneling
"Tunneling" occurs in cakes when the batter is over-mixed, leading to the development of elastic gluten networks that stretch and trap air in long, gaping holes. Because the reverse creaming method coats the flour in fat before any water is introduced, the flour is "waterproofed." This essentially prevents the development of those long gluten chains. You can mix the batter with slightly more vigor than you would with a traditional sponge, knowing that the flour is shielded.
Adjusting for Different Flour Types
If you are working with a lower-protein flour, such as cake flour, you will achieve an even more delicate, "melt-in-your-mouth" texture. However, because cake flour has less protein to support the structure of the cake, you may need to rely slightly more on your chemical leaveners like baking powder or baking soda. Always ensure your leavening agent is fresh. A cake made with the reverse method will not rise with the same aggressive spring as a traditional sponge; its rise will be more subtle, consistent, and level.
Equipment and Mise En Place Requirements
You do not need a laboratory, but you do need precision. A stand mixer is almost essential for this method because the process requires constant, consistent motion to coat the flour and then emulsify the liquids. Hand-held mixers often struggle with the thickness of the initial "sandy" stage, leading to uneven fat distribution.
The Tool Kit
Stand Mixer* with a sturdy paddle attachment.
Digital Kitchen Scale* for exact ingredient weights.
Fine-mesh Sieve* for sifting dry ingredients.
Silicone Spatulas* for scraping the bowl during each stage.
High-quality baking pans* with light-colored finishes to prevent burning.
The Importance of Sifting
Never skip the sifting step in a reverse-creaming recipe. Because you are creating a sandy mixture with fat, any lumps in your flour or cocoa powder will remain as solid, dry clumps throughout the mixing process. Sifting ensures that your dry base is aerated and homogenous, which makes it significantly easier for the butter to distribute evenly. A lump of flour in your final batter will manifest as a dry, powdery white spot in your otherwise moist cake, which is a cardinal sin in professional baking.
When we talk about professional-grade results, we are really talking about the discipline of the process; the reverse creaming method rewards the patient, methodical baker who understands that every turn of the paddle has a purpose.
Troubleshooting the Reverse Creaming Method
Even with the best techniques, things can go wrong. Perhaps your batter curdled, or your cake didn't rise as much as you had hoped. These issues are rarely a failure of your ability, but rather a sign that a specific variable in the chemical process was missed.
What if the Batter Curdles?
If your batter looks like cottage cheese, it has "broken." This usually happens when the liquid is added too quickly or is too cold compared to the fat. If this occurs, do not panic. Continue mixing for another minute or two on medium speed; often, the friction and the continued addition of the remaining flour or liquids will pull the emulsion back together. If it refuses to incorporate, add a tablespoon of flour—this can often act as a stabilizer to help the fat and water rejoin.
Flat Cakes and Leavening Issues
If your cake comes out of the oven feeling like a brick, you may have used too much fat or failed to properly incorporate your leavening agents. Because the reverse method creates a tighter crumb, it relies heavily on your chemical leaveners. If your baking powder is expired or your oven temperature is slightly off, the cake will not have the power to lift the heavier, denser batter created by this method. Always calibrate your oven with a secondary oven thermometer to ensure you are truly baking at the indicated temperature.
Professional Chef Tips for Consistency
Professional bakers often have a "gut feeling" for when a batter is ready, but that feeling is built on years of observing the physical changes in the ingredients. When you are using the reverse creaming method, look for the color change. As you emulsify the liquids into the flour-fat base, the batter should shift from a dull, matte yellow (or brown, if using cocoa) to a slightly glossy, paler shade. This transition is a visual indicator that the fat and liquid have successfully emulsified.
The Power of Scraping
Never underestimate the importance of scraping your bowl. With the reverse method, ingredients tend to cling to the bottom of the mixing bowl, specifically the butter-coated flour that didn't fully integrate with the liquids. If you don't scrape the bowl between each liquid addition, you will have pockets of dry, un-emulsified flour that will ruin the texture of the finished cake. Stop the mixer, get in there with a sturdy silicone spatula, and turn that batter over by hand before returning to the mixer.
Controlling the Bake
Since reverse-creamed cakes are often richer and denser, they benefit from a slightly slower bake at a lower temperature. If a recipe calls for 350 degrees Fahrenheit, consider dropping it to 325 degrees and adding a few extra minutes to the bake time. This allows the cake to rise uniformly without the edges setting before the center has had a chance to bloom. This is especially helpful for large, tiered cakes where you want to avoid a domed, cracked top.
Flavor Infusion and Enhancements
Once you have mastered the technical side of the reverse creaming method, the real fun begins: flavor. Because the fat coats the flour so effectively, this method is an excellent vehicle for fat-soluble flavors. Think of infusing your butter with citrus zest, vanilla bean paste, or even dry ground spices like cardamom or espresso powder during the initial "sandy" phase.
Infusing the Fat
By rubbing your lemon or orange zest into your sugar and then incorporating it into the butter, you are releasing the essential oils into the fat. Since the fat will then coat every particle of flour, your cake will have an incredibly uniform, deep, and aromatic flavor profile. You aren't just swirling flavor into the batter; you are embedding it into the structural foundation of the crumb.
Cocoa and Acidic Ingredients
If you are making a chocolate cake, the reverse creaming method is almost mandatory. Cocoa powder is notoriously drying and difficult to incorporate. By mixing it with the flour and fat, you ensure that the cocoa is perfectly distributed. Furthermore, the use of acidic ingredients like buttermilk or sour cream works beautifully with this method, as the acid helps tenderize the gluten that is already being suppressed by the fat, creating a cake that is impossibly soft and moist.
A great baker knows that flavor is not just about what you add to the bowl, but how you integrate it into the structure of the bake; the reverse creaming method makes flavor an structural element rather than an afterthought.
Final Thoughts
The reverse creaming method is far more than just a technique; it is a philosophy of baking that prioritizes precision, control, and, ultimately, a superior culinary experience. By shifting the focus from aeration to encapsulation, you gain the ability to create cakes that possess a sophisticated, velvety texture that is often missing from the home kitchen. It requires patience and a commitment to the process—the careful sifting, the slow emulsification, and the constant attention to bowl scraping—but the result is a cake that stands up to any professional bakery product.
Do not be intimidated by the departure from the traditional creaming method. Baking is a science, and like any science, it rewards those who experiment, test, and learn the underlying rules of the reaction. Whether you are baking a birthday cake for a loved one or a complex tiered masterpiece, the reverse creaming method provides the structural reliability and decadent texture that will elevate your work to the next level. Remember, when you find yourself frustrated by a crumb that is too coarse or a texture that is too dry, don't just blame the ingredients; look to your method.
As you move forward in your baking journey, keep a record of your results. Note the temperature of your ingredients, the time spent on the emulsion, and the specific ratios of fat to flour. These notes will become your own personal textbook, guiding you toward consistent success. The "Blame The Chef" kitchen is a space for growth, and today, you have added a powerful new tool to your repertoire. Go forth, preheat your ovens, and enjoy the transformative power of a perfectly executed, fine-crumb cake. The science is on your side, and the results will speak for themselves on every plate you serve. Happy baking!



Get the Next Recipe
Weekly recipes, techniques, and gear picks — straight to your inbox.
