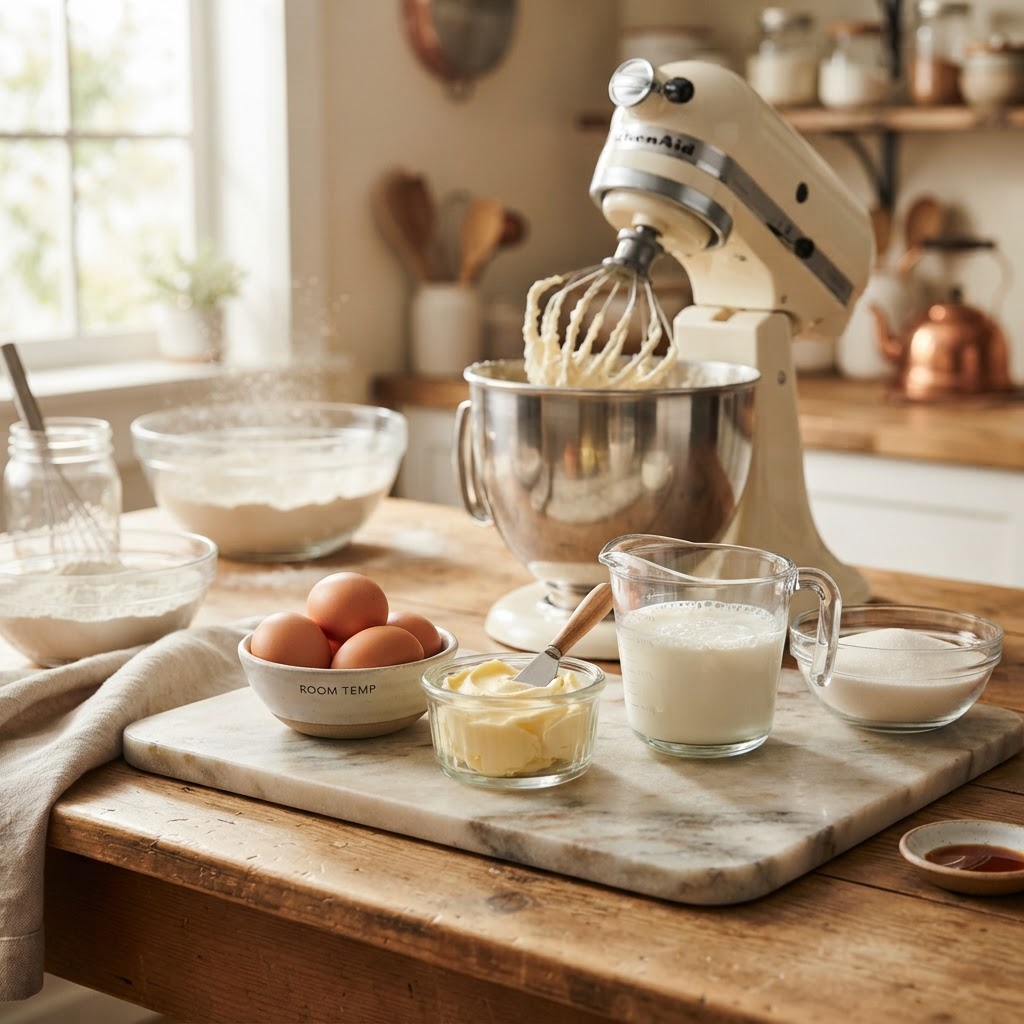
The Baker’s Guide to Room Temperature Ingredients: Why They Are Non-Negotiable for Emulsions and Rise
Every baker, from the amateur enthusiast experimenting with weekend sourdough to the seasoned pastry professional working in a high-pressure commercial kitchen, has at some point ignored the instruction to bring ingredients to room temperature. It feels like a minor, tedious step—a hurdle between you and the delicious outcome of your labor. You stare at the cold butter, hard as a rock, and the chilled eggs sitting in the refrigerator, and you think, "Surely, the oven's heat will do the work for me." That assumption is, quite frankly, the silent killer of texture, lift, and consistency in almost every baked good you will ever attempt to produce. Baking is fundamentally a science of chemistry and thermodynamics, and when we shortcut these prerequisites, we are essentially fighting against the laws of physics before we have even turned the dial on the oven.
The insistence on room temperature ingredients—typically defined as 68°F to 72°F (20°C to 22°C)—is not some arbitrary gatekeeping by recipe developers intended to make your life more difficult. Instead, it is the cornerstone of creating the stable, aerated structures that define world-class pastries, cakes, and breads. When ingredients like butter, eggs, and dairy are at the correct temperature, they possess the physical capability to incorporate air, emulsify fats and liquids, and react properly with leavening agents. By failing to temper your ingredients, you are effectively handicapping your batter or dough from the start, leading to dense cookies, split buttercreams, and cakes that fail to reach their full potential. Understanding the "why" behind this requirement is the secret to moving from a cook who follows recipes to a baker who masters the craft.
In this deep dive, we are going to unpack the mechanics of temperature, the dangers of cold-shocking your mixtures, and the professional techniques used to ensure your pantry staples are ready for action without compromising quality. We will explore the specific ratios of fat-to-liquid emulsification and the enzymatic reactions that govern how your dough rises. Whether you are troubleshooting a cake that sank in the middle or trying to perfect your laminating technique, the answer often lies in the thermometer. Grab your apron, leave the butter on the counter, and let us dissect the essential science of baking at room temperature.
The Chemistry of Creaming: Butter and Sugar
The process of creaming is perhaps the most critical step in cake baking, and it relies entirely on the mechanical interaction between fat and sugar crystals. When you combine softened butter with granulated sugar, you are not simply mixing them until they look combined; you are forcing the sharp edges of the sugar crystals to cut into the fat, creating microscopic air pockets. These bubbles are the foundation of your cake's structure. If your butter is too cold, it will remain rigid, preventing the sugar from creating these essential air cells, resulting in a cake that is dense and lackluster rather than light and tender.
Why Softened Butter Matters
Softened butter—specifically, butter that yields to light pressure but still holds its shape—retains its viscosity and plasticity. This state allows it to trap air during the creaming process, which later expands when it hits the heat of the oven, providing the "lift" or leaven. When your butter is too cold, you are essentially trying to whip a solid brick; when it is too warm or oily, the air pockets you create will collapse instantly. The goal is to reach that "sweet spot" where the butter is pliable yet cool enough to maintain a structural matrix.
The Impact on Emulsification
Once you have created that airy, aerated mixture of butter and sugar, you begin to add eggs. This is where emulsification comes into play. A stable emulsion is a mixture of two substances that don't naturally blend—in this case, fat and water. If your eggs are refrigerator-cold, they will shock the butter, causing the fat to harden and solidify prematurely. This "breaks" the emulsion, resulting in a curdled, grainy mess that will separate in the oven, leading to an uneven bake, oily streaks, and a greasy mouthfeel in your final product.
"Baking is not a passive activity; it is a calculated series of chemical reactions. When you use cold ingredients in a creaming method, you are preventing the fat from ever truly holding onto the air it needs to rise."
The Role of Eggs in Structural Integrity
Eggs are the versatile workhorses of the baking world, acting as both an emulsifier, a leavening agent, and a binding structure. The proteins in egg whites and the fats in egg yolks behave very differently depending on their temperature. At room temperature, the proteins in the egg are more relaxed and flexible. This allows them to bond more effectively with the fats in your batter. If you have ever noticed your cake batter "curdling" after adding that second or third egg, it is almost certainly a temperature disparity between your butter and your eggs.
Temperature and Aeration
If you are making a sponge cake, a genoise, or a meringue, the temperature of your eggs is non-negotiable. Cold eggs simply do not whip into a stable, high-volume foam as effectively as room-temperature ones. The albumin in cold egg whites is more viscous and tight, requiring significantly more mechanical energy to incorporate air, and even then, the resulting bubbles are often less stable. By letting your eggs come to room temperature, you allow the proteins to stretch more easily, trapping more air and creating a froth that provides superior lift and a delicate, cloud-like crumb.
Preventing "Curdling" in Batters
Professional pastry chefs understand that the ratio of fat to moisture is a delicate balance. When adding cold eggs to a room-temperature butter and sugar mixture, the rapid cooling causes the butter to lose its aeration and turn into small, solid beads. This ruins the homogeneity of your batter. To avoid this, always aim for your eggs to be at approximately 70°F (21°C). If you find yourself in a rush and need to warm your eggs quickly, place them in a bowl of warm water (not hot) for five to ten minutes. This ensures they reach the proper temperature without cooking the yolks or disrupting their chemical composition.
Dairy: The Unsung Hero of Texture
Whether you are using milk, buttermilk, sour cream, or yogurt, the temperature of your dairy influences the final crumb of your baked goods. Cold milk added to a batter with butter will instantly solidify the butter, undoing all the work you did during the creaming process. Furthermore, when dairy is at room temperature, it integrates more fluidly into the dry ingredients, ensuring that the leavening agents (like baking soda or baking powder) are distributed evenly and hydrated properly.
Balancing the pH
Many recipes, particularly those using buttermilk or sour cream, rely on the acidity of the dairy to react with baking soda. This reaction is temperature-dependent. In a colder environment, the rate of the chemical reaction slows down significantly. If your batter is cold, the leavening reaction may not start until the batter has already begun to set in the oven, leading to a compromised rise or an uneven, tunnel-filled interior. Room temperature dairy ensures that the pH balance is active from the moment the wet and dry ingredients meet.
The Emulsification Ratio
In recipes that require a large amount of liquid, like pound cakes or high-ratio cakes, the dairy acts as the bridge between your dry ingredients and your fat. You are aiming for a smooth, stable emulsion that can suspend the weight of the flour and sugar. If your dairy is cold, you create a thermal shock that threatens this delicate balance. Keeping your liquids at a consistent temperature with your fats allows for a "smooth-flow" batter that is stable, consistent, and capable of producing an even bake every single time.
Yeast, Rise, and the Science of Fermentation
If creaming is the science of cakes, then fermentation is the science of bread. Yeast is a living organism, and like all living things, it is highly sensitive to its environment. While the water or milk used in bread baking is often heated to activate yeast, the flour and other ingredients (such as eggs or butter in enriched doughs like brioche) should also be at room temperature to avoid stalling the process. A dough that starts at 50°F is going to take significantly longer to proof than a dough that starts at 70°F, and this inconsistency can ruin a baking schedule.
Proofing Windows
When working with enriched doughs, such as babka or cinnamon rolls, the temperature of your butter is paramount. If you try to knead cold butter into a dough, it will leave streaks of fat throughout the flour, preventing proper gluten development. If your butter is too hot, it will melt, making the dough a sticky, greasy mess that cannot hold its shape. Room-temperature butter incorporates seamlessly into the dough, providing the richness and silkiness required for that characteristic brioche crumb without compromising the structure of the gluten network.
Controlling the Environment
Professional bakeries often use "proofing boxes" to control the temperature and humidity, but as a home baker, your best tool is simply patience and planning. By keeping all your ingredients at room temperature, you ensure that the yeast works at a predictable, steady rate. This is critical for flavor development. If a dough proofs too fast because the room is too hot, it lacks complexity. If it proofs too slowly because of cold ingredients, it can become over-acidic and lose its structural integrity.
"A consistent dough temperature is the hallmark of a professional baker. It isn't about working faster; it is about working at a tempo that allows the ingredients to perform the way they were designed to."
Troubleshooting Common Baking Failures
Even when you follow a recipe to the letter, things can go wrong. If you are experiencing "sunk" cakes, rubbery textures, or dense, heavy crumbs, you are likely dealing with a temperature-related failure. Troubleshooting is much easier once you understand that the ingredients are not just "stuff" you mix together; they are reagents in a chemical experiment. By standardizing your starting temperatures, you eliminate one of the biggest variables in the baking equation.
Signs of Temperature Mismanagement
Split Batter:* If your batter looks like cottage cheese, your fat and liquids were not at the same temperature.
Dense or Rubbery Crumb:* This often results from over-mixing to compensate for cold, poorly aerated ingredients.
Sunken Centers:* This happens when the leavening reaction occurs too late or too unevenly because the batter temperature was too low when it entered the oven.
Greasy Mouthfeel:* This is caused by fat that didn't properly emulsify, leaving oil pockets in the finished cake or cookie.
Pro-Tips for Tempering
Techniques for Perfect Emulsions
Creating a perfect emulsion is an art form, but it is also a technical skill. An emulsion occurs when you create a stable, homogeneous mixture of fat and water-based ingredients. When you are making a butter-based cake, you are building an emulsion from the first stir. By ensuring your fats and liquids are at the same temperature, you are ensuring they stay in that state throughout the mixing process, which is critical for the final volume of the product.
Monitoring Your Mixing
Invest in a high-quality infrared or probe thermometer. Taking the temperature of your butter is just as important as taking the temperature of your oven. When you see your butter is at 70°F, you know you are entering the zone where it will cream perfectly with sugar. Likewise, ensuring your eggs are within 5 degrees of your butter temperature is a simple way to guarantee that your batter stays silky and smooth.
The "Add Slowly" Technique
Even when your ingredients are at the correct temperature, you must incorporate your liquids into your fats slowly. If you dump all your eggs into your butter at once, you will overwhelm the fat's ability to hold the liquid, even if both are at 70°F. Add your eggs one at a time, or in small splashes, allowing the fat to fully absorb each addition before adding more. This controlled addition ensures that you maintain a stable emulsion, which is the secret to a perfectly light and airy cake crumb.
The Professional Standard: Consistency
Professional pastry chefs are obsessed with consistency for a reason. In a restaurant or bakery, the product must be the same on a Tuesday morning as it is on a Saturday night. This requires a rigorous adherence to protocol, including the temperature of every ingredient entering the mixing bowl. By adopting this professional standard, you will find that your baking becomes more predictable, more successful, and far less stressful. You stop guessing if the cake will rise and start knowing that it will.
Why Precision Pays Off
Precision in baking isn't just about using a scale for your flour; it is about respecting the physics of the ingredients. When you bake with room-temperature ingredients, you are giving your recipe the best possible chance to succeed. The crumb becomes more even, the texture becomes more consistent, and the flavors are properly distributed. You spend less time worrying about why your bake failed and more time enjoying the process of creation.
Building Your Baking Routine
Start your baking process by "staging" your ingredients. Set your butter out on a plate, pull your eggs from the carton, and measure your liquids into a bowl. Let them sit on the counter while you preheat your oven and prep your pans. This simple routine ensures that by the time you are ready to mix, your ingredients are ready for you. It transforms baking from a chore into a methodical, relaxing, and ultimately, far more rewarding experience.
Final Thoughts
At the end of the day, baking is a dialogue between you and your ingredients. When you use cold, un-tempered ingredients, you are effectively shouting over the ingredients, forcing them to behave in ways that defy their chemical nature. When you use room-temperature ingredients, you are working in harmony with them, allowing the butter to cream, the eggs to aerate, and the liquids to emulsify exactly as the recipe developer intended. It is a small, quiet act of respect for the process, and it is the single most effective way to elevate your baking from "good enough" to truly exceptional.
Remember that temperature is a tool, just like your mixer, your oven, or your spatula. It is not something to be feared or ignored, but something to be managed. As you continue to refine your craft, pay closer attention to the state of your ingredients. Notice how the butter feels, watch how the batter emulsifies, and observe how the dough reacts. These small observations will provide you with more insight into baking than any single recipe ever could. By mastering these foundational elements, you are not just following directions; you are gaining an understanding of the science that makes baking the most beautiful, edible form of chemistry we have. Keep your kitchen at a comfortable temperature, keep your ingredients prepared, and keep exploring the wonderful, precise, and delicious world of baking. Your cakes, breads, and cookies will thank you for it, and your kitchen will quickly become the center of your culinary world.
If you ever find yourself rushing, take a deep breath. Baking is inherently slow, deliberate, and rewarding. There is no joy in fighting a block of cold butter. Give your ingredients the time they need to reach that ideal state, and you will be rewarded with a superior product that proves exactly why these rules exist. From the lightest genoise to the richest brioche, the difference between a mediocre bake and a masterpiece is often just a matter of a few degrees. Embrace the process, trust the science, and always—always—blame the chef (or thank them) for the wisdom to wait for that butter to soften. Happy baking, and may your emulsions always be stable, your crusts always golden, and your crumbs always perfectly, beautifully tender. The journey to becoming a better baker starts on your countertop, right in the bowl of your mixer, one room-temperature ingredient at a time.




Get the Next Recipe
Weekly recipes, techniques, and gear picks — straight to your inbox.
