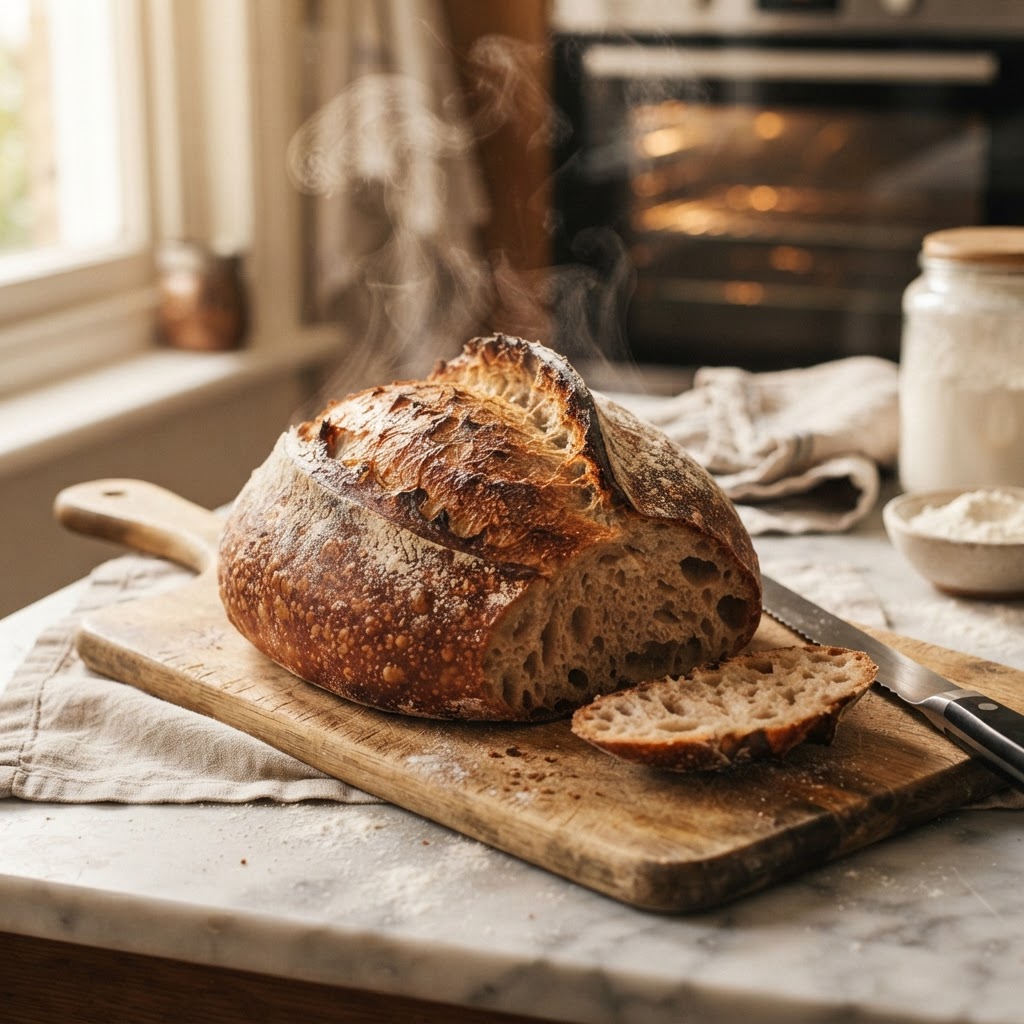
The Baker’s Guide to Steam Injection: How to Create Bakery-Quality Crusts in Your Home Oven
There is an undeniable magic that happens when you pull a loaf of artisanal sourdough or a crusty baguette from the oven, the crust singing with the characteristic crackle of cooling bread. For the home baker, bridging the gap between a standard domestic oven and the professional deck ovens found in high-end boulangeries often comes down to one elusive factor: humidity. When you walk into a professional bakery, you are greeted by the hum of equipment and the distinct smell of caramelizing flour, but you are also witnessing the power of steam injection. This process allows the loaf to expand fully before the crust sets, resulting in that elusive, deep-mahogany finish and an open, airy crumb structure. If your home loaves often feel a bit lackluster or the crust lacks that shatter-crisp texture you crave, understanding how to replicate this environment is the missing piece of your baking puzzle.
Transitioning from a casual hobbyist to a serious baker requires moving beyond simple measurements and leaning into the science of thermal dynamics and moisture management. Many home cooks struggle because they view the oven as a dry, static box, but in reality, it is a living part of the fermentation and expansion process of your dough. When steam hits the cold surface of a loaf during the first few minutes of the bake, it keeps the outer layer gelatinized and supple, preventing the dough from setting prematurely. This extra time allows for "oven spring," the dramatic expansion of the loaf that separates an amateur effort from a masterpiece. We will dive deep into the mechanics of steam, the best tools for your specific kitchen setup, and the timing required to achieve professional results without needing to invest in a commercial-grade hearth oven.
Welcome to the world of "Blame The Chef," where we take the intimidation out of advanced techniques and turn them into your kitchen's greatest strengths. Today, we are demystifying the art of the crust, ensuring that every loaf you slide onto that baking stone comes out looking like it was pulled from a Parisian window display. Whether you are working with a basic Dutch oven or trying to rig a more complex system in a standard gas range, we have the strategies to help you elevate your artisan bread game. Prepare to embrace the heat, manage the humidity, and produce the kind of bread that makes friends and family wonder if you’ve actually been moonlighting as a professional baker.
The Science Behind the Crust
Gelatinization and Heat Transfer
At the molecular level, the crust is a complex tapestry of starch and protein transformations. When a loaf of bread enters the oven, the heat initiates the gelatinization of the starches on the surface of the dough. Under normal, dry conditions, this process happens too quickly, forming a hard, dry skin before the yeast has completed its final push for growth. By introducing moisture via steam, we delay this hardening process significantly. The steam provides a film of water on the surface of the loaf, which maintains the suppleness of the crust. This allows the internal gases to continue expanding the dough, leading to a much larger loaf with a more developed internal structure.
The Maillard Reaction and Steam
The Maillard reaction is the chemical reaction between amino acids and reducing sugars that gives browned food its distinctive flavor and color. While this reaction typically requires high heat, steam plays a crucial role in creating the perfect conditions for it to occur throughout the baking process. When steam condenses on the cool dough, it carries heat efficiently into the bread, and the sugars on the surface are moistened and redistributed. This leads to a more uniform, deep-brown color once the steam is vented and the dry heat takes over. It is this combination of moisture-assisted expansion and high-heat browning that creates the "bakery-quality" profile we are all chasing.
The secret to a world-class crust isn't just about the recipe or the flour; it is about how you manage the atmosphere inside your oven during those critical first ten minutes of the bake.
Understanding Oven Spring
Oven spring is that final, rapid burst of fermentation and gas expansion that occurs as the dough hits the intense heat of the oven. If the crust forms too early, the bread is essentially locked in place, leading to a dense crumb and a small, squat loaf. Steam acts as a release valve, keeping the exterior elastic. When the dough is properly hydrated on the outside, it doesn't just grow; it leaps, creating the characteristic "ear" on a sourdough boule or the well-defined bloom on a baguette. By mastering steam, you are essentially giving your yeast a longer leash to perform its final, most dramatic act of the bread-making process.
Methods for Home Steam Injection
The Dutch Oven Technique
For the majority of home bakers, the Dutch oven is the gold standard for steam retention, and for good reason. It acts as a miniature, self-contained hearth oven. When you place a lid on a preheated cast iron pot, the water evaporating from the dough itself is trapped inside the vessel, creating a localized, super-saturated steam environment. This is the most efficient and low-effort way to mimic a professional deck oven's steam injection system. The key here is the seal; if your lid is loose, you may want to ensure it fits tightly or even consider using a heavy-duty lid to maximize the pressure of the steam.
The Lava Rock Method
If you are baking multiple loaves at once or do not have a Dutch oven large enough to accommodate your sourdough, the lava rock method is a professional-grade alternative. This involves filling a cast-iron skillet or a shallow metal tray with clean lava rocks and placing it on the floor of the oven while it preheats. When you slide your bread onto the baking stone, you carefully pour a half-cup of boiling water onto the hot rocks. This creates an immediate, violent cloud of steam that fills the oven chamber. This is an aggressive method, so be sure to use oven mitts and be prepared for the sudden burst of heat and moisture that will escape when you close the door.
The Spray Bottle Strategy
While often debated, the spray bottle technique is better than nothing, though it is the least effective of the three. This involves opening the oven door during the first few minutes of the bake and spritzing the walls of the oven—and occasionally the loaves—with water. The risk here is the drastic loss of temperature every time you open the door. If you choose this route, you must work with lightning speed to minimize the heat escape. I recommend focusing on spraying the walls of the oven rather than the dough itself, as direct water contact can sometimes lead to an uneven, blistered surface rather than the crisp, uniform crust we desire.
Mastering the Baking Environment
Preheating for Success
One of the most common mistakes in home baking is failing to preheat the oven long enough. A standard oven might reach your desired temperature setting in 20 minutes, but your baking stone or cast iron pot will need significantly longer to reach a true, heat-saturated state. For a professional result, preheat your oven for at least 45 to 60 minutes. This ensures that the radiant heat is consistent. When the dough hits the hot surface, the energy transfer is immediate, which is exactly what you need to trigger the initial expansion and set the base of the loaf before the steam wears off.
Positioning and Airflow
The placement of your bread within the oven is critical. Most home ovens have hot spots near the heating elements, which can lead to burnt crusts before the interior is fully cooked. If you are using a stone, position it in the middle rack to allow for even airflow above and below the loaf. If you are using a Dutch oven, the thick metal will provide insulation, but you still want to ensure it isn't sitting directly on a rack that is too high, as this could cause the top of the bread to char. Always leave enough space around your equipment for air to circulate, as stagnant air pockets can lead to uneven coloration.
"Baking is a conversation between the baker and the fire; the steam is the language through which the bread reveals its true potential."
Temperature Calibration
Investing in an oven thermometer is perhaps the most cost-effective upgrade a baker can make. Many domestic ovens have sensors that are off by 25 to 50 degrees Fahrenheit. Because the Maillard reaction and steam-setting rely on precise thermal benchmarks, you need to know exactly how hot your oven is. If your recipe calls for a 450°F (232°C) start, ensure your independent thermometer confirms this. Baking is a game of millimeters and degrees; when you tighten your control over the environment, you remove the guesswork that often leads to inconsistent crusts.
The Timeline of the Bake
Phase One: The Steam Injection (0-12 Minutes)
This is the most critical phase of the baking cycle. During the first 10 to 12 minutes, your goal is to keep the oven as humid as possible while maintaining the heat. Whether you are using a lid or boiling water on rocks, do not open the oven door during this time. This is when the dough is at its most vulnerable, expanding rapidly as the yeast reaches its final state of activity. If you break the seal too early, the steam will dissipate, and your crust will set before the loaf has reached its full potential volume.
Phase Two: The Drying Phase (12-25 Minutes)
Once the loaf has finished its initial rise, you must remove the steam. If you used a Dutch oven, take the lid off. If you used the lava rock method, you can carefully remove the tray of rocks or simply allow the steam to vent naturally by opening the door for five seconds. This phase is about transitioning from expansion to browning. The surface moisture needs to evaporate so that the crust can begin to dehydrate and firm up. This is where the color moves from pale white to deep, toasted gold.
Phase Three: The Final Set (25+ Minutes)
The final stage of the bake is all about internal structure and crust crispness. By this time, the loaf should be dark and fragrant. You want to bake until the interior reaches approximately 205°F to 210°F (96°C to 99°C). Many home bakers pull the bread too early because it looks "done" on the outside. Do not be afraid of a dark, mahogany crust; this is where the flavor lives. A deep color indicates a complex, toasted profile that is absent in paler, under-baked loaves. Always rely on the weight of the loaf—if it feels light for its size and sounds hollow when tapped on the bottom, it is ready.
Essential Tools for the Artisan Kitchen
Heavy-Duty Baking Stones
A high-quality baking stone or baking steel is the foundation of a good home bakery. Baking steels are particularly effective because they conduct heat much faster than stone, providing that massive initial blast of energy that the bottom of the loaf needs for a good "spring." When selecting a stone or steel, go for the thickest one you can find. The more mass, the better it holds heat, which protects the oven temperature when you open the door to load your bread. This thermal mass is what separates a professional baker's crust from a casual home version.
The Scoring Blade (Lame)
Scoring is not just for decoration; it is a vital part of managing the expansion of the loaf. When the dough is under pressure from the steam and the yeast, it will crack at its weakest point. A well-placed score using a sharp lame (a razor blade holder) gives the gas a path of least resistance. If you don't score the bread, the crust will burst in random, unattractive places. A proper score, held at a 45-degree angle to the surface of the dough, allows for that beautiful ear or bloom to develop, which is only enhanced by the steam injected earlier.
Digital Scales and Timers
Baking is a chemistry-heavy discipline, and precision is paramount. Using volume measurements (cups and spoons) is a recipe for disaster. Invest in a digital kitchen scale and measure everything in grams. A few extra grams of flour or water can be the difference between a loaf that holds its shape and one that spreads into a pancake. Similarly, use a digital timer for every step of the process. Bread is sensitive to timing, and being off by even five minutes can change the hydration of the crust or the internal crumb structure.
Troubleshooting Common Crust Issues
Pale and Soft Crust
If your crust is pale and soft, you likely aren't getting enough heat or you aren't baking for long enough. A common misconception is that the bread is done when the outside looks golden. Real artisan bread should be baked to a deep, dark brown. If your oven temperature is accurate, try extending the final bake time by 5-10 minutes after removing the steam. Additionally, ensure you are not using too much flour on the outside of your dough before baking, as excess flour can act as a barrier to proper browning.
Tough and Leathery Crust
A leathery crust usually indicates that the steam was not properly vented, or the loaf was left in a humid environment after baking. Once you pull the bread from the oven, it is crucial to move it to a wire rack immediately. If you leave it on the hot tray or inside the Dutch oven, the residual steam will be trapped and will soften the crust, turning that perfect crunch into a chewy, leathery texture. Furthermore, ensure you are baking at a high enough initial temperature; a lower temperature will create a thicker, tougher crust rather than a crisp, thin one.
Dense, Heavy Crumb
If your bread is crusty on the outside but dense on the inside, the issue usually lies in the fermentation process rather than the steam injection. Steam helps the rise, but it cannot fix an under-proofed or over-proofed dough. Ensure your bulk fermentation is sufficient, allowing the yeast to build the necessary structure. If the dough has been over-proofed, it will lose its strength and fail to rise regardless of how much steam you use. Practice, observation, and patience are the only ways to fine-tune your fermentation timing.
"The sound of a crust cracking as it cools is the baker's applause—it is the proof of a job well done, of moisture mastered, and of heat harnessed."
Final Thoughts
The journey toward achieving the perfect, bakery-quality crust in your own home oven is one of the most rewarding endeavors a cook can undertake. It demands a marriage of science, intuition, and practice. You are learning to manipulate the very elements of your kitchen, turning a basic mixture of flour, water, salt, and yeast into a symphony of textures and flavors. By focusing on the role of steam injection, you are taking a massive step away from "home-style" baking and moving toward the deliberate, calculated artistry of the professional.
Do not be discouraged if your first few attempts are not perfect. Even the most seasoned professional chefs have days where the oven doesn't cooperate or the proofing goes slightly sideways. The beauty of bread is that it is a forgiving medium; even a loaf that doesn't reach the aesthetic heights you intended will still be delicious. Take notes, observe how your oven behaves, and don't be afraid to experiment with your steam methods until you find what works for your specific setup.
Remember that baking is not just about the final product; it is about the quiet, meditative process of shaping, waiting, and nurturing the dough. When you pull that loaf out, watch the steam rise, hear the crust sing, and know that you have mastered a technique that has been used for centuries. Keep your blades sharp, your oven hot, and your curiosity alive. "Blame The Chef" is here to support you in every loaf you pull from the heat, and we look forward to seeing your kitchen transform into the neighborhood's favorite bakery. Happy baking, and may your crusts always be golden, crisp, and perfectly crackled.
As we conclude this guide, I want to emphasize that the most important ingredient in any artisan loaf is the baker's persistence. You are building a skill set that serves you for a lifetime, one that turns humble pantry staples into luxury goods. Whether you are baking for your family, your friends, or simply for the quiet satisfaction of a morning project, you are participating in a craft that links us to our history. Continue to refine your methods, trust your senses over the recipe's word when necessary, and never stop pushing the boundaries of what your home kitchen can produce. The perfect crust is waiting for you, and with each bake, you are getting closer to that hallmark of excellence.
Consider this your invitation to embrace the variables. Every flour, every ambient temperature change in your kitchen, and every slight variation in your shaping technique will influence the final outcome. Instead of fearing these variables, lean into them. The best chefs are those who learn to adapt to the environment rather than fighting against it. If your kitchen is humid, adjust your water ratios. If your oven is prone to temperature drops, preheat your stone even longer. The mastery of bread is a lifelong pursuit, and there is always a new lesson to be learned in the fold of a dough or the rise of a crust.
So, gather your bowls, get your scale ready, and do not hesitate to make a mess. A clean kitchen is a sign of a baker who isn't pushing themselves hard enough. Embrace the flour on your apron, the heat on your skin, and the incredible aroma of baking bread filling your home. You have all the knowledge you need now; it is time to turn on the oven and get to work. Your artisanal, crusty, bakery-quality loaves are just one bake away. We hope this guide serves as a staple in your culinary repertoire, a reference to return to whenever you feel the need to troubleshoot or simply refresh your memory on the mechanics of the bake.
In closing, remember that baking is a sensory experience. Listen for that crackle, smell the deep, toasted notes of caramelization, and feel the lightness of the loaf as you hold it. These are the rewards for your effort and the signs of your success. When you eventually share that loaf—warm, buttery, and perfectly crusty—you will understand exactly why we go through all this trouble. There is nothing quite like the pride of handing someone a slice of bread that you crafted with your own hands, utilizing the science of steam to bring it to life. Keep baking, keep learning, and keep blaming the chef when the bread is so good that you eat the whole loaf in one sitting.
The evolution of a baker is never truly finished. Even after you have mastered the steam injection technique, there will always be more to explore—from ancient grains and long-fermented starters to unique inclusions and shaping styles. Each of these will challenge your understanding of how heat and moisture affect your dough. View every bake as a data point, an opportunity to learn something new about your equipment and your flour. Over time, you won't even need the recipes; you will simply understand the dough. That is the moment where the real magic happens.
Thank you for being part of the "Blame The Chef" community. Your commitment to elevating your home cooking inspires us to continue digging deeper into these techniques. Whether you are a weekend warrior or a daily baker, the principles of professional baking are now yours to command. Go forth, fill your home with the scent of fresh bread, and enjoy the fruits of your labor. The crust is yours to conquer, and we have no doubt you will do it with the same passion and dedication that you bring to every other endeavor in your kitchen. Until next time, may your ovens be hot, your steam be plentiful, and your loaves be nothing short of legendary.
Final reminder: always keep a log. Writing down the hydration percentage, the ambient room temperature, the total bulk fermentation time, and the steam duration will turn you into a master of your own domain. If a loaf comes out perfect, you can replicate it. If it comes out less than perfect, you can identify the exact variable to adjust next time. Data-driven baking is the secret weapon of the professional, and it is now your secret weapon, too. Now, get that oven preheated and start your next masterpiece. The bakery is officially open, and you are the lead chef. Enjoy the process, the learning, and most of all, the delicious results.




Get the Next Recipe
Weekly recipes, techniques, and gear picks — straight to your inbox.
