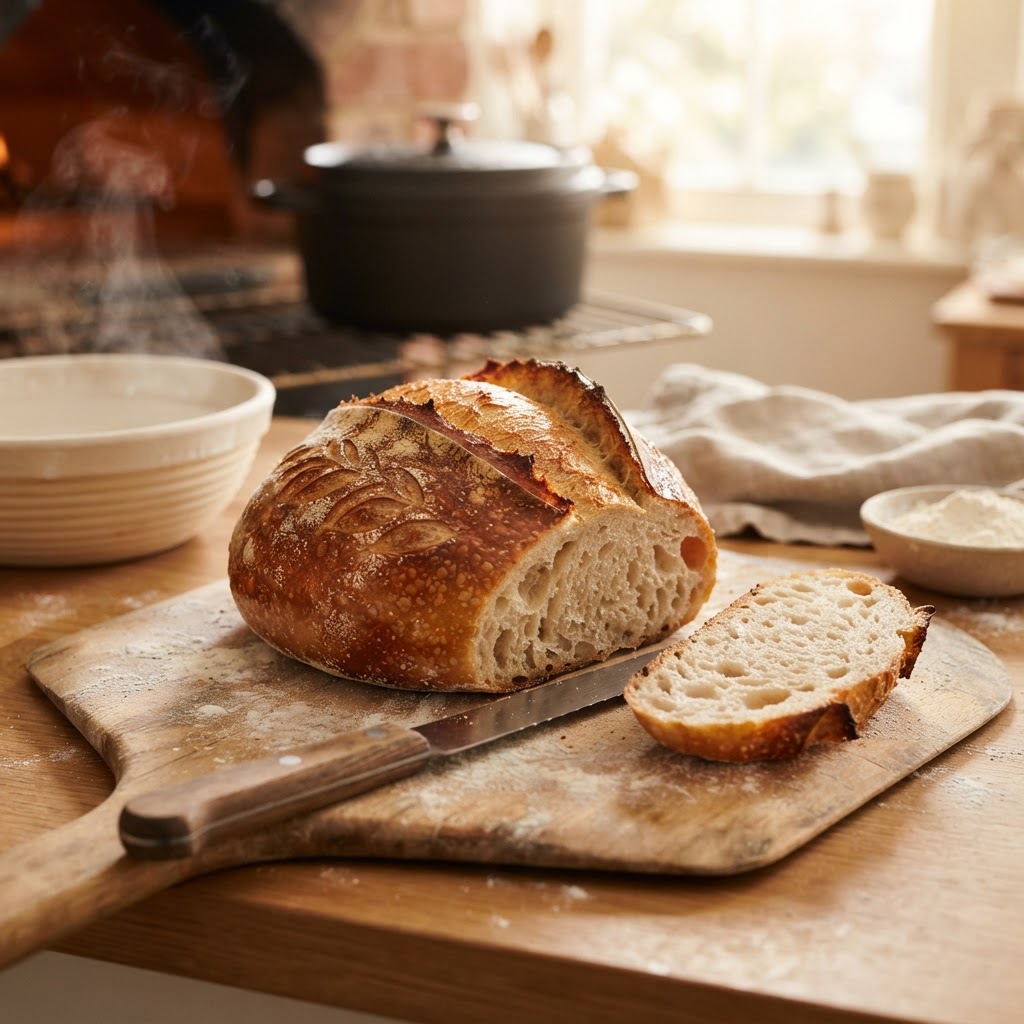
The Baker’s Guide to Steam Injection: Mastering Crust Development and Expansion in Home Ovens
There is a singular, transformative moment in the life of every home baker when they transition from producing soft, pale sandwich loaves to achieving the deeply caramelized, shattered-glass crusts found in professional artisan boulangeries. For years, I struggled to understand why my crusts remained flaccid, dull, and prematurely set, regardless of how much I obsessed over my hydration percentages or proofing times. The secret, as it turns out, has very little to do with the dough itself and everything to do with the environment inside your oven during those critical first ten minutes of the bake. Steam is the silent partner in every successful loaf, acting as a catalyst for expansion and a sculptor for the final texture that separates the amateur from the master.
When we talk about steam injection, we are discussing the physics of heat transfer and gelatinization. In a professional deck oven, steam is pumped into the chamber at the push of a button, keeping the surface of the dough moist and pliable as the internal gases expand. At home, we must replicate this environment using clever physics and household tools, because a dry oven is the enemy of a high-quality crust. Without humidity, the surface of your loaf dries out, hardens, and locks in the shape before the yeast has completed its final "oven spring" surge. By mastering the art of humidity, you effectively retard the setting of the crust, allowing for maximum oven spring, superior crust caramelization, and a final product that boasts professional-grade ear development.
Understanding this process requires a shift in perspective from seeing the oven as merely a heat source to viewing it as a climate-controlled laboratory. Every element of your bake, from the initial preheat temperature to the way you vent your oven, dictates the final color and crunch of your bread. In this guide, we will break down the mechanics of steam, the specific equipment required to mimic commercial conditions, and the precise timing necessary to orchestrate a perfect loaf. Whether you are baking a classic sourdough boule or a crusty French baguette, these techniques will fundamentally alter your relationship with your oven and elevate your baking to a standard that will have your friends and family blaming the chef for every empty crumb tray left behind.
The Science of Oven Spring and Starch Gelatinization
To understand why steam is non-negotiable, we must first look at what happens to a loaf of bread the second it hits the heat. As the temperature of the dough rises, the yeast cells work overtime in a final, frantic burst of activity known as oven spring. Simultaneously, the gases trapped within the dough expand, pushing against the gluten structure. If the exterior of the loaf dries out too quickly due to the desiccating heat of a standard home oven, that crust becomes a rigid shell, effectively creating a cage that prevents the bread from reaching its full volume. This results in dense, tight crumbs and a lack of aesthetic lift.
The Gelatinization Process
The key to a glossy, dark, and crunchy crust lies in the gelatinization of starches on the loaf’s surface. When water vapor hits the cooler surface of the dough, it condenses, providing the moisture necessary for the starches to gelatinize. This process creates a thin, tacky film that eventually dehydrates into a distinct, crackling shell. Furthermore, the presence of water facilitates the Maillard reaction—the chemical reaction between amino acids and reducing sugars that gives bread its complex flavor and rich, mahogany-colored exterior. Without that initial steam, your loaves will likely turn out pale, matte, and lacking that signature "shattered glass" bite.
Regulating the Environment
The timing of your steam is just as critical as the volume of moisture you provide. You want the highest concentration of steam during the first 8 to 12 minutes of baking. After this initial phase, the structure of the loaf has "set," and the crust no longer needs to be pliable. At this point, removing the steam allows the crust to transition from a soft, gelatinous state into a crisp, caramelized finish. If you leave steam in the oven for the entire duration of the bake, you will end up with a soggy, chewy crust that ruins the contrast between the interior crumb and the exterior crunch.
"Steam is the invisible sculptor of the artisan loaf; it holds the crust at bay, allowing the dough to reach its full, explosive potential before the oven seals its fate."
Mimicking Professional Steam Injection at Home
Unless you happen to have a commercial steam-injected deck oven in your kitchen, you must improvise. Fortunately, home bakers have developed several highly effective methods for creating a high-humidity environment. The most common and reliable method is the use of a Dutch oven or a heavy-duty cast iron combo cooker. By placing your dough inside a preheated vessel, you trap the moisture released naturally by the dough, creating a mini steam-injection chamber that is incredibly efficient for boules and batons.
The Dutch Oven Method
When using a Dutch oven, the bread is essentially baking in its own steam. Because the space is small, the moisture evaporated from the dough during the first ten minutes is trapped, maintaining a 100 percent relative humidity environment. To maximize this, many bakers skip the parchment paper for the first few minutes or add a single ice cube on the side of the hot pot (taking care not to touch the dough) to boost the steam concentration even further. This produces a consistent, high-quality result that is difficult to replicate with any other method.
The Open-Bake Approach
For those who prefer to bake on a stone or steel, you will need to manually inject steam into the oven chamber. This involves placing a heavy-duty baking pan or a skillet filled with lava rocks or stainless steel chains at the bottom of the oven during the preheat phase. When you load your loaves onto the baking stone, you pour a cup of boiling water into the hot, preheated pan and quickly shut the door. The resulting steam burst must be contained, so ensure your oven seals are in good condition. You may even consider covering the loaves with an inverted hotel pan or a large stainless steel bowl for the first ten minutes to keep the steam directly in contact with the dough surface.
Essential Equipment for the Steam-Focused Baker
Success in baking is rarely about luck; it is about the intersection of technique and the right tools. If you are serious about developing that elusive, professional crust, you should invest in a few key pieces of hardware that will help you manage heat retention and moisture control. While you don’t need an industrial setup, these items are considered industry standards for a reason.
The Heavy-Duty Baking Stone or Steel
A baking steel is generally superior to a stone for home ovens because it has higher thermal conductivity. This means it absorbs heat from the oven and transfers it to the base of your dough much faster, which is essential for "oven spring." If you are using a stone, ensure it is at least 3/4-inch thick. You should preheat your steel or stone for at least 45 to 60 minutes before loading your bread to ensure a deep, sustained heat reservoir that will counteract the cooling effect of opening the oven door.
Moisture Delivery Systems
To create an effective steam burst, you need a way to move water into the oven safely. A simple spritzer bottle is often insufficient, as it doesn't provide enough volume. Instead, use a heavy-duty metal pan—cast iron is best because it retains heat well—placed on the lowest rack. A professional tip: add a layer of lava rocks to this pan. The rocks provide a massive surface area that turns water into steam instantaneously, rather than simply boiling it, which is exactly what you want for that immediate, explosive puff.
Managing Temperatures and Timing for Perfection
Temperature management is the heartbeat of a successful loaf. Most artisan breads thrive with a high-temperature start followed by a moderate-temperature finish. A standard approach is to preheat your oven to 500°F (260°C) and drop the temperature to 450°F (230°C) the moment you load the dough. This initial high heat triggers the yeast to go into overdrive, while the lower final temperature ensures the crust develops a deep mahogany color without the exterior burning before the crumb is fully baked.
Monitoring Internal Temperature
Do not rely solely on time. An artisan loaf is finished when its internal temperature reaches between 205°F and 210°F (96°C to 99°C). If you pull the bread too early, the starch inside will remain gummy, and the crust will soften almost immediately as it cools. Use an instant-read digital thermometer to ensure you are hitting that sweet spot. The crust should feel firm and sound hollow when tapped, and the bottom should be deeply browned and sturdy.
The Role of Venting
Venting the oven is a crucial step that many home bakers overlook. Once the crust has set and you’ve achieved your desired expansion, the steam has done its job and is now a liability. By removing the lid of your Dutch oven or taking the water pan out, you allow the moisture to escape. This allows the oven to return to a "dry" environment, which is necessary for the final browning and crisping phase. If you notice your bread is coloring too quickly, you can rotate the pan, but do not drop the temperature too low, or you will end up with a pale, sad loaf that lacks that final artisanal snap.
"A loaf that hasn't been allowed to finish in a dry, vented oven is like a sculpture that hasn't been polished; the structure is there, but the surface lacks the brilliance it deserves."
Troubleshooting Common Steam-Related Failures
Even with the best intentions, things can go wrong. If your bread is spreading flat rather than rising up, you may be over-proofing or using a flour with too low of a protein content. If the crust is tough and leathery, you likely did not provide enough steam during the first stage, or you left the lid on too long during the browning phase. Learning to read your crust is a skill that comes with repetition and observation.
Dense, Heavy Crumb
If your loaf is dense, despite getting good color, you are likely failing at the initial blast of heat. Ensure your stone or steel is truly saturated with heat. Place an oven thermometer inside to verify that your oven is actually reaching the temperature set on the dial—many home ovens can be off by as much as 25 to 50 degrees. If the oven isn't hitting 475°F to 500°F at the start, you won't get the lift necessary for an airy crumb.
The Pale, Soft Crust
If you are struggling with a pale crust despite long baking times, you might be using too much steam for too long. Alternatively, consider your dough recipe. Are you using enough diastatic malt powder? A small amount of malt powder added to your flour mix can significantly enhance browning and caramelization. Ensure your bread has enough natural sugars available to react to that initial steam blast; sometimes, a longer, cooler fermentation helps break down starches into simpler sugars that contribute to that beautiful deep brown color.
The "Blistering" Effect
Occasionally, you might see small, raised blisters on the surface of your crust. This is actually a sign of a very good bake! These blisters occur when the dough is fermented properly and the steam injection is effective, causing the surface to expand rapidly at the very start of the bake. Don't be alarmed if your loaf looks like it has a "bumpy" surface; it is a hallmark of high-quality, long-fermented bread that has been baked in the correct atmospheric conditions.
Advanced Techniques: The Scoring Factor
Steam injection and scoring go hand-in-hand. The steam keeps the crust soft, but the score provides the path of least resistance for the bread to expand. If you have perfect steam but a poor score, the bread will still struggle to rise, or it will burst out of the bottom of the loaf in an unsightly "blowout." A sharp, confident cut at a 45-degree angle is the key to creating that signature "ear" that every home baker covets.
Mastering the Angle
When scoring, hold your lame (a razor blade tool) at a steep angle. You are not trying to cut deeply into the loaf—just a clean, shallow incision about 1/4 to 1/2 inch deep. If you cut straight down, the loaf will struggle to open up. If you cut at a shallow angle, you create a flap of dough that will lift and crisp into a beautiful ridge as the bread rises. This creates the aesthetic drama that makes artisan bread so visually appealing.
Confidence is Key
The biggest mistake beginners make is hesitating while scoring. If you drag the blade or stop midway, you will tear the gluten structure, which will create a jagged, unattractive opening. Perform the motion in one quick, fluid stroke. Practice on a piece of parchment paper or a cold dough ball if you are nervous. Once you learn how the tension of the dough interacts with the sharp blade, the scoring process becomes intuitive and rhythmic.
Final Thoughts
Mastering steam injection is the ultimate leveling-up moment for any home baker. It changes the way you approach your recipes and, more importantly, it changes how you understand your equipment. You no longer have to rely on guesswork; you now have a repeatable, scientific method for producing professional-grade loaves in a domestic kitchen. The combination of high-heat preheating, intentional steam release, and proper ventilation creates the "holy trinity" of bread success: that perfect, shattered-glass crust, a light and airy crumb, and a complex flavor profile that only a perfectly caramelized exterior can provide.
Remember that baking is as much an art as it is a science. Do not be discouraged if your first few attempts at steam management don't yield the perfection you see in high-end bakeries. It takes time to learn the quirks of your specific oven, to understand how your hydration levels interact with the ambient humidity of your kitchen, and to build the confidence to score with authority. Keep a baking journal, note your temperatures and your steam timings, and don't be afraid to experiment with the amount of water you use.
Ultimately, the goal of this guide is to give you the agency to create something truly exceptional. When you pull that loaf out of the oven, listen for the "singing" of the crust as it cools—that faint crackling sound is the music of a successful bake. It is the reward for your patience, your attention to detail, and your refusal to settle for mediocre bread. So, the next time your family asks why the bread is so good, or perhaps why the kitchen is filled with steam, you can simply smile and say that it is all part of the process. Keep kneading, keep scoring, and never stop pushing the boundaries of what your home kitchen can achieve. You are now well on your way to becoming a master of your own oven, and I suspect you will find that the best loaves are always just one bake away.




Get the Next Recipe
Weekly recipes, techniques, and gear picks — straight to your inbox.
