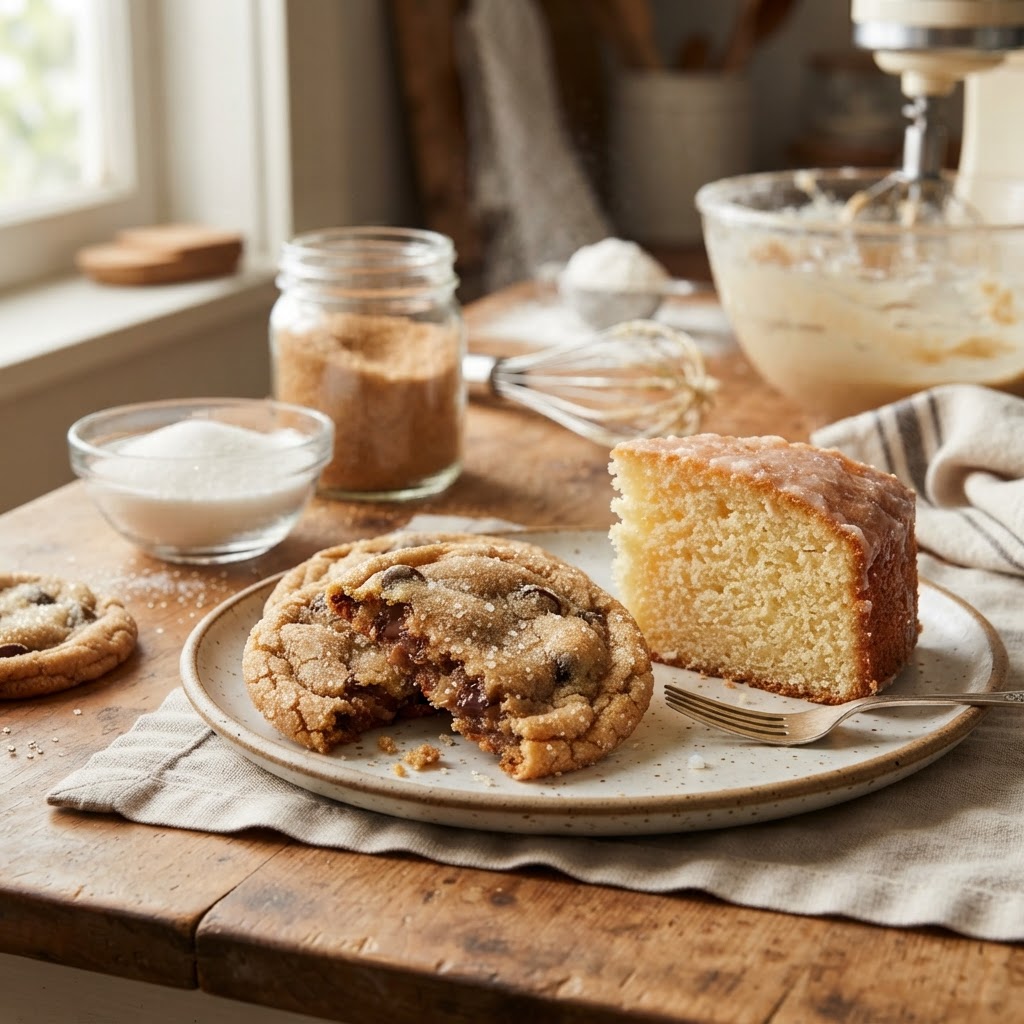
The Baker’s Guide to Sugar Crystallization: Mastering Texture, Crunch, and Stability in Cookies and Cakes
Baking is often described as a science, yet for many home cooks, it feels more like an act of faith. We measure our flour, crack our eggs, and cross our fingers, hoping that the alchemy of the oven will transform these raw components into something magical. At the heart of this transformation lies the humble sugar crystal, an ingredient so ubiquitous that we often overlook its structural importance. Understanding sugar isn't just about achieving sweetness; it is about manipulating physical states to control the structural integrity, tenderness, and shelf-life of your final product. When you master the behavior of sugar, you move from being a follower of recipes to a true architect of dessert.
Many bakers struggle with cookies that spread too much or cakes that turn rubbery, failing to realize that these issues are almost always rooted in how sugar interacted with fat and moisture. Sugar is hygroscopic, meaning it loves to bind with water, and this single property dictates everything from the crispness of a ginger snap to the velvet crumb of a Genoise. By learning how to control crystallization, you take the guesswork out of the kitchen. You begin to see the ingredients on your counter not as mere flavors, but as building blocks for texture and stability. It is time to peel back the curtain on this crystalline world and elevate your baking to a professional standard.
In this guide, we will traverse the landscape of sugar chemistry, from the molecular level to the tangible reality of a cooling rack. We will explore how different sugars influence the aeration of butter, the caramelization processes during the bake, and the ways in which you can prevent unwanted graininess in your icings and syrups. Whether you are a novice looking to improve your batch of chocolate chip cookies or an aspiring pastry chef aiming to perfect a mirror glaze, the principles remain the same. Prepare to treat your pantry staples with a new level of respect, and remember: if the dessert turns out poorly, you can always blame the chef—but after reading this, you will have no one to blame but the perfectionist in you.
The Molecular Role of Sugar in Structural Aeration
When we speak of sugar, we aren't just talking about a sweetener; we are talking about a structural tool. In the context of cakes and cookies, the most vital stage of the process occurs before the oven is even turned on: the creaming method. During this phase, sugar crystals act as microscopic serrated edges that cut into the fat. As you beat room-temperature butter with granulated sugar, these crystals create tiny air pockets within the fat matrix. These air pockets are essential for leavening; when the heat hits the batter, the gases trapped in these bubbles expand, providing the lift that gives your cake its light, airy crumb.
If you don't cream your sugar and fat sufficiently, your cake will be dense, and your cookies will be leaden. The sugar crystals provide the mechanical friction necessary to aerate the fat. This is why you must pay attention to the state of your butter. If it is too cold, the sugar cannot cut into it. If it is too oily, it cannot hold the air. Professionals aim for a temperature of 65°F to 68°F for butter when beginning the creaming process. This provides the optimal malleability for capturing air bubbles without collapsing under the weight of the other ingredients.
"Sugar is not merely a flavor enhancer; it is the structural scaffolding upon which the delicate architecture of a cake is built. Control the crystal, and you control the crumb."
Choosing the Right Sugar for Aeration
Not all sugars are created equal. The size of the crystal affects the surface area and, consequently, the aeration process. Standard granulated sugar is the benchmark, but in professional settings, we often look for superfine or caster sugar when a more delicate crumb is required. Because the crystals are smaller, they dissolve more quickly and create a more uniform distribution of air pockets throughout the batter, leading to a finer, more tender texture.
Granulated Sugar:* Standard, reliable, and provides excellent mechanical aeration.
Caster/Superfine Sugar:* Dissolves faster, perfect for delicate sponge cakes.
Brown Sugar:* Contains molasses, which adds acidity. This acidity reacts with baking soda to provide extra lift, but the moisture can interfere with the creaming of butter if not handled carefully.
The Chemistry of Crystallization and Texture
Crystallization is the process by which sugar molecules reorganize into a solid, structured form. In some applications, like hard candy, we encourage this; in others, like buttercream or ganache, we work tirelessly to prevent it. Unwanted crystallization is what leads to "grainy" frostings or "sandy" fudge. This occurs when sugar molecules find a nucleus—a stray grain of undissolved sugar or a bit of dust—and begin to stack themselves into large, detectable crystals. To avoid this, chefs utilize interfering agents.
Interfering agents are substances that get in the way of sugar molecules finding each other. When you are making a syrup, you might add a splash of lemon juice (acid) or a spoonful of corn syrup (glucose). The acid helps invert the sucrose into glucose and fructose, which are less prone to forming large crystals. The glucose in corn syrup acts as a physical barrier, effectively blocking the sucrose molecules from locking together. By mastering the use of these agents, you ensure that your sugar-based creations remain smooth and silky.
Temperature Control and the Sugar Stages
Temperature is the ultimate arbiter of crystallization. As you heat a sugar solution, water evaporates and the concentration of sugar increases. If you heat it too far, you reach the hard-crack stage, where the solution is almost pure sugar, and upon cooling, it forms a glassy structure. If you stop too early, it remains a syrup. Monitoring this with a high-quality thermometer is essential, as the difference between a chewy caramel and a brittle candy is often only five degrees.
The Influence of Sugar on Moisture and Shelf-Life
Because sugar is hygroscopic, it has an incredible ability to hold onto water long after the oven has been turned off. This is why high-sugar baked goods, like soft-batch cookies or fruit cakes, stay moist for days. In the professional kitchen, we often adjust sugar ratios to control the "water activity" of a product. If you want a cookie that stays soft for a week, you increase the ratio of inverted sugars or brown sugar, which contains more moisture-retaining molasses.
However, there is a limit. If you use too much sugar, the product can become overly sticky or even "weepy," especially in humid environments. The sugar absorbs so much moisture from the air that the structural integrity of the cookie or cake begins to fail. This is why we store delicate meringues in airtight containers with desiccant packs. The sugar is essentially trying to "breathe" the air around it, and in a humid kitchen, that can spell disaster for a perfectly crisp treat.
Balancing Moisture with Fat
The interplay between sugar and fat is a delicate dance. Fat acts as a hydrophobic barrier, coating the flour proteins and preventing the gluten from toughening. Sugar, conversely, competes with the flour for moisture. When you have a high sugar content, the sugar pulls water away from the flour proteins, which prevents them from forming a strong gluten network. This is the secret to a tender, melt-in-the-mouth texture. If you want a chewy cookie, you want some gluten development; if you want a tender cake, you want to inhibit that development through high sugar and fat ratios.
"The true secret to professional baking is the balance between moisture and structure; sugar is the tool that keeps the moisture locked in, while fat provides the velvet finish that defines a masterwork."
For Tenderness:* High sugar and high fat ratios.
For Chewiness:* Higher protein flour (bread flour) combined with a balance of sugars that allows for some gluten structure to remain intact.
For Stability:* Higher sugar concentrations, often supported by structural proteins like egg whites, which coagulate to hold the sugar's weight.
Managing Caramelization and the Maillard Reaction
While we talk about crystallization, we cannot ignore the evolution of flavor through caramelization and the Maillard reaction. Caramelization occurs when sugar is heated until it decomposes, creating complex nutty, toasted, and bitter notes. The Maillard reaction is a different, yet related, process involving the interaction between amino acids (proteins) and reducing sugars. Together, these two processes create the golden-brown crust on your cookies and the deep, rich color of a perfectly baked cake.
Achieving the perfect bake color is about managing the sugar content at the surface of the item. This is why many chefs brush their pastries with an egg wash or a sprinkle of coarse sugar before baking. The sugar provides an immediate source for the Maillard reaction, ensuring a deep, appealing color and a crisp texture. However, because sugar has a lower burn point than flour, you must be careful. If the temperature is too high, the sugar on the surface will reach the point of carbonization—turning bitter and black—before the center is fully cooked.
The Role of pH in Browning
The pH of your batter significantly impacts how quickly your sugar browns. A slightly alkaline batter (thanks to baking soda) will promote faster, more intense browning through the Maillard reaction. This is why cookies made with baking soda develop that characteristic deep-brown, flavorful edge. If you find your cookies are pale, you may need a touch more alkaline ingredient; if they are browning too fast and bitter, you may need to introduce a mild acid like cream of tartar or buttermilk to slow the reaction.
Troubleshooting Common Crystallization Failures
We have all been there: a batch of perfectly smooth caramel that suddenly turns into a gritty, grainy mess. This is the nightmare of every pastry cook. In most cases, this happens because of seeding. Seeding occurs when a single undissolved crystal of sugar clings to the side of the pot and falls back into the syrup, acting as a "seed" that causes all the surrounding sugar molecules to crystallize around it. It is a chain reaction that is impossible to stop once it begins.
To prevent this, always wash down the sides of your saucepan with a wet pastry brush during the cooking process. Alternatively, you can place a lid on the pot for the first few minutes of boiling; the condensation will wash the sides of the pot naturally, ensuring no stray crystals remain. If you do notice graininess, do not stir the sugar once it has begun to boil. Stirring introduces movement and air, both of which provide surfaces for crystals to grow.
The "Rescue" Protocol
Can you save a grainy syrup or fudge? Sometimes. If the sugar has only just begun to crystallize, you can occasionally dissolve it back into the mixture by adding a tiny amount of water and heating it gently. However, if the entire batch has crystallized into a solid mass, it is best to start over. Professional chefs do not waste time trying to "fix" a crystallization disaster; they treat it as a lesson in temperature control and move on to the next batch. Remember, even the best pastry chefs in the world have dumped a ruined batch of caramel down the drain.
Avoid Seeding:* Use a wet brush to clean pot edges.
Do Not Agitate:* Once the boil starts, keep your spoon out of the pot.
Patience is Key:* Use a digital thermometer; don't rely on sight alone.
The Art of the Glaze: Achieving the Perfect Shine
A high-gloss glaze or a mirror-finish frosting is the hallmark of a professional pastry. These rely on the precise control of sugar concentration and temperature. When you make a simple glaze, you are creating a supersaturated solution. As the glaze cools, the sugar begins to come out of the solution, creating that smooth, opaque coating we see on donuts and petit fours. To get that perfect shine, you want the sugar to set as a thin, uniform film rather than a thick, crystalline crust.
To achieve this, you need to ensure your icing is properly aerated but not over-whipped. Excessive whipping introduces air bubbles that will mar the surface of your glaze. Professionals often let their glazes rest before applying them; this allows the air bubbles to rise to the surface and pop, resulting in a glass-like finish. Furthermore, the viscosity must be perfect—a "coat-the-back-of-the-spoon" consistency is generally the goal. If it is too thick, it will be lumpy; if it is too thin, it will slide right off.
Mirror Glaze Secrets
For the elusive mirror glaze, we move into the realm of gelatin and chocolate emulsions. The sugar here is used to create a syrup that is stabilized by the gelatin, preventing the sugar from forming crystals entirely. This creates a glassy, semi-transparent or opaque coating that is reflective. The key is working temperature; you must pour the glaze when it reaches exactly 86°F to 90°F. Anything hotter will melt the cake; anything colder will set in the bowl before you can pour it.
"A mirror glaze is a study in controlled reflection; it requires the precise cooling of a sugar-gelatin emulsion to achieve that signature, high-gloss finish that defines elite pastry."
Patience:* Let your glaze sit to release trapped air bubbles.
Temperature:* Invest in an infrared thermometer for non-contact accuracy.
Consistency:* Test your glaze on a plate before pouring it over a completed cake.
Integrating These Principles into Your Home Kitchen
Transitioning from theoretical knowledge to practical application is where the real growth happens. Start by changing your routine. Next time you bake, pay close attention to the creaming stage. Set a timer for three minutes, and actually watch the texture of your butter and sugar change. It should transform from a gritty, yellow mixture into a pale, fluffy, and cohesive pale-yellow cream. That change is the physical evidence of your success in building the structure of your dessert.
Secondly, invest in the right tools. A high-quality digital scale is non-negotiable in baking. Volume measurements like cups and spoons are simply too imprecise for the delicate chemistry of sugar and flour. One extra tablespoon of flour can throw off your moisture-to-sugar ratio, leading to a dry result. If you are serious about mastering texture, treat your kitchen like a laboratory. Weigh your ingredients in grams, and you will find that your results become exponentially more consistent.
The Chef’s Final Checklist for Success
Final Thoughts
The path to mastering sugar crystallization is not a short one, but it is one of the most rewarding journeys a home cook can take. By understanding the science behind the sweetness, you stop playing the guessing game and start exercising real control over your results. You learn that a cookie is more than just flour and sugar; it is a carefully balanced composition of structural aeration, moisture retention, and perfectly timed caramelization. When you respect the physics of your ingredients, the baking process becomes less about hoping for a good result and more about executing a precise, creative vision.
Do not be discouraged by the occasional failure. Even the most seasoned chefs have had to deal with seized chocolate, grainy fudge, or cookies that turned into puddles in the oven. The difference between a home baker and a professional is not the absence of mistakes; it is the ability to diagnose them using the principles we have discussed. If your cake is too dense, you know to focus on your creaming method. If your glaze is grainy, you know you have a seeding issue or a temperature problem. These are not failures; they are data points that make you a better baker.
As you move forward in your culinary practice, keep experimenting. Try reducing the sugar in a recipe by five percent to see how it affects the moisture. Test the difference between using superfine sugar and standard granulated sugar in your next sponge cake. The more you manipulate these variables, the more intuitive your baking will become. You will eventually reach a point where you can walk into a kitchen and know exactly how to achieve the texture you desire, whether it is a crisp, snap-able ginger cookie or a soft, pillowy layer cake.
Ultimately, baking is a gift we give to those we care about, and there is something profoundly satisfying about presenting a dessert that is not only delicious but technically flawless. You have the tools, the knowledge, and the curiosity to push your boundaries. Continue to explore the chemistry, continue to refine your technique, and above all, continue to enjoy the process. Whether you are whipping up a simple batch of cookies or tackling an elaborate multi-layered confection, remember that you are the master of your kitchen. The next time something goes wrong, you can blame the chef—but you’ll likely find that you’re busy enjoying the perfect texture of your latest success. Happy baking, and keep reaching for that golden-brown finish.
The beauty of baking lies in the fact that it is a lifelong pursuit of perfection. There will always be a new technique to master, a new ratio to balance, and a new flavor profile to explore. Don’t settle for "good enough" when your baked goods have the potential to be truly extraordinary. By applying these scientific insights, you are effectively leveling up your home kitchen into a professional-grade space. Keep your thermometer handy, your scale calibrated, and your curiosity peaked. The world of pastry is wide and wonderful, and you are just getting started. Every batch is an opportunity to learn, to refine, and to delight those lucky enough to taste your work. Go forth and create something spectacular, and don't forget to appreciate the magic hidden in every single crystal of sugar.



Get the Next Recipe
Weekly recipes, techniques, and gear picks — straight to your inbox.
