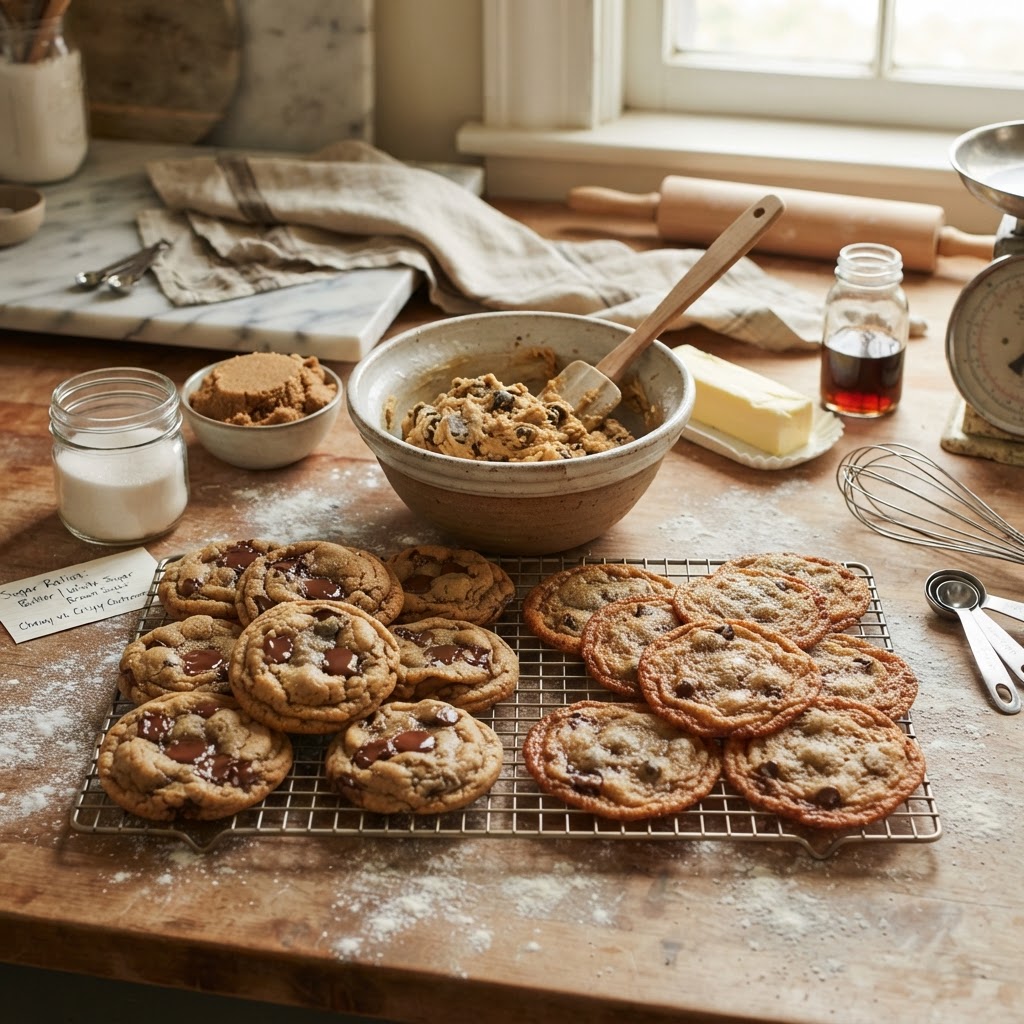
The Baker’s Guide to Sugar Ratios: Mastering Sweetener-to-Fat Percentages for Consistent Cookie Spread and Texture
There is a lingering myth in the world of amateur baking that cookies are merely a matter of following a recipe to the letter, trusting that if you measure your flour correctly, the result will always be perfect. The truth, as any professional pastry chef will tell you, is that baking is an exacting science governed by chemical ratios that dictate everything from the structural integrity of your crumb to the precise diameter of your spread in the oven. When you understand the relationship between your sugars and your fats, you cease to be a recipe-follower and start to become a true baker. Every cookie is a balancing act, and once you master these invisible variables, you gain the freedom to create recipes from scratch that cater exactly to your personal preference for crunch, chew, or lift.
The architecture of a cookie is primarily built upon the creaming method, a process that introduces air into the fat and sugar matrix, creating the foundation for the cookie's rise and texture. When you beat butter and sugar together, you are physically forcing sugar crystals to cut into the fat, creating tiny pockets of air that expand when exposed to the heat of the oven. If your ratios are skewed—if there is too much fat, the dough will liquefy and spread into a flat puddle; if there is too much sugar, the cookie may become overly crisp or prone to burning before the center sets. This guide is designed to strip away the guesswork and provide you with the fundamental mathematical framework necessary to achieve consistent, professional-grade results every single time you preheat your oven.
To begin this journey, we must strip away the mysticism and look at the Baker’s Percentages that govern these sweet treats. While professional bakers use grams to measure every ingredient, the home baker often struggles with volume-based measurements that fluctuate wildly depending on how tightly packed a cup of flour might be. By shifting your focus toward the weight-based ratios of sugar to fat, you enable a level of repeatability that transforms your kitchen into a controlled laboratory. We are looking for the sweet spot—literally—where the hygroscopic nature of sugar and the shortening power of fat work in perfect harmony to produce a cookie that is not just edible, but truly masterful.
The Chemistry of Sugar and Fat Interactions
The interaction between sucrose (granulated sugar) and fat (usually butter) is the single most important factor in determining the structural outcome of your dough. Granulated sugar is a coarse crystalline structure that, when creamed with butter, provides the aeration necessary for a lighter cookie. Brown sugar, conversely, contains molasses, which adds acidity and moisture; this acidity reacts with chemical leaveners like baking soda to promote browning and a more tender, chewy interior. Mastering the ratio of these two is how you manipulate the balance between a crisp edge and a soft center.
Understanding the Role of Granulated Sugar
Granulated sugar is the architect of structure and snap. Because it does not contain the moisture-rich molasses found in darker sugars, it encourages the edges of the cookie to caramelize quickly. When you increase the percentage of granulated sugar relative to the fat, you are effectively encouraging a thinner, crispier cookie. If you notice your cookies are spreading too thin or lack that pleasant crunch, the ratio of granulated sugar to fat is likely too high, or your butter was introduced at a temperature that allowed it to lose its structural integrity before the bake began.
The Impact of Molasses-Rich Sugars
Brown sugar acts as a stabilizer. The moisture trapped within the molasses prevents the gluten strands in your flour from developing as rapidly, which leads to a softer, denser, and more "chewy" bite. When you are looking for that classic bakery-style cookie that stays soft for days, you are leaning on the hygroscopic properties of brown sugar. Remember that the darker the brown sugar, the more moisture you are introducing to the dough. Too much moisture, however, can result in a cakey cookie rather than a dense, chewy one, so you must always balance this against the total amount of flour in your formula.
"Baking is not a passive pursuit of following steps; it is an active exercise in chemistry where the baker acts as the lead scientist, manipulating the structural bonds of fats and sugars to engineer the perfect sensory experience."
The Science of Creaming and Temperature
Temperature is the invisible hand that guides your bake. The temperature of your fat at the moment of incorporation determines the size of the air cells you create during the creaming stage. If your butter is too cold, it will not properly cream with the sugar, resulting in a dense, clumped dough that lacks lift. If your butter is too warm—nearing a liquid or "greasy" state—it will fail to trap the air bubbles you’ve worked so hard to create, leading to a cookie that spreads into a translucent, brittle sheet rather than a robust, structured treat.
Managing Butter Temperature
For the standard creaming method, your butter should be at "cool room temperature," typically between 65°F and 68°F. At this temperature, the butter is soft enough to yield to a finger’s pressure but still retains enough structural rigidity to hold the tiny air pockets created by the sugar crystals. If you find yourself in a rush, resist the urge to microwave the butter; this often creates localized hot spots of melted fat that will ruin your entire batch. Instead, cut your butter into small cubes and let it sit at room temperature for thirty minutes to ensure an even, consistent temperature throughout.
The Importance of Creaming Duration
You should spend no less than three to five minutes creaming your butter and sugar on medium-high speed. During this time, the color of the mixture will shift from a deep, buttery yellow to a pale, off-white hue. This change in color is a visual indicator that the sugar has successfully cut into the fat and air has been sufficiently aerated into the mixture. If you stop too early, your cookies will be dense and flat; if you go too long, you might over-aerate the dough, which can lead to the cookies rising rapidly in the oven and then collapsing once removed.
Balancing Ratios for Consistent Spread
The concept of spread is the bane of many home bakers. When a cookie enters the oven, the fat begins to melt, the structure relaxes, and gravity takes over. If the structural integrity provided by the flour and the aeration from the sugar-fat matrix isn't balanced, the cookie will lose its form. Controlling this requires a keen eye on your total fat percentage. As a rule of thumb, most classic cookies thrive with a fat-to-flour ratio of approximately 1:2 by weight, though this can be adjusted depending on the inclusion of eggs and leavening agents.
Why Cookies Spread Too Much
If your cookies are consistently flattening into pancakes, you likely have an imbalance between your fats and your structure-builders. Aside from the temperature issues mentioned previously, this is often a result of using too much sugar relative to the flour, or perhaps the butter you used had a high water content (common in many grocery store brands). High-moisture butter can turn into steam too quickly, causing the dough to collapse. Additionally, if you are working in a warm kitchen, the dough itself may be at the incorrect temperature when it hits the baking sheet.
Using Chilling as a Structural Tool
Never underestimate the power of a chilled dough. Chilling your scooped dough balls for at least one to two hours—or ideally overnight—allows the flour to fully hydrate and the fats to re-solidify. When the dough enters the oven in a cold state, the edges set before the fat has a chance to melt and cause excessive spread. This process also deepens the flavor, as the starches have more time to break down into simple sugars, resulting in a more complex, professional taste that is impossible to achieve with a "mix-and-bake" approach.
"A chilled dough is a baker’s greatest secret weapon, providing the necessary structural stability to prevent a chaotic spread while allowing for a richer, more nuanced flavor development that sets your work apart from the rest."
Flour Selection and Gluten Development
While this guide focuses on sweeteners and fats, we cannot ignore the vessel that carries them: the flour. The protein content of your flour is a critical component in your cookie’s texture. All-purpose flour generally has a protein content of 10% to 12%, which is ideal for a standard, balanced cookie. If you use cake flour, which has lower protein, you will get a more tender, delicate, and "short" cookie. Conversely, bread flour, with its higher protein content, will create more gluten, leading to a much chewier, tougher, and more structured cookie.
The Dangers of Overmixing
Once you add your dry ingredients—your flour, baking soda, salt, and any inclusions—the game changes. At this stage, your primary goal is to incorporate the ingredients until they are just combined. Every rotation of the mixer beyond that point is actively developing gluten. While gluten is essential for bread, it is the enemy of a tender cookie. If you overmix your dough, you will find that your cookies become tough, rubbery, and prone to shrinking in the oven, regardless of how perfect your sugar-to-fat ratio was.
Measuring Flour Correctly
We must address the "cup" measurement. If you dip a measuring cup into a bag of flour, you are likely packing the flour and potentially adding 20% to 30% more product than a recipe intends. This imbalance will dry out your cookies and make them taste like flour-heavy bricks. You must use a digital scale. If you do not have a scale, use the "spoon and level" method: spoon the flour into the measuring cup until it is overflowing, then use the flat back of a knife to sweep away the excess. This keeps the flour aerated and ensures your ratios remain consistent.
Troubleshooting Common Cookie Failures
Every baker will eventually face the dreaded batch of "failed" cookies. Whether they came out too oily, too hard, or simply burnt, understanding the why is the key to preventing it from happening again. Most failures stem from a misalignment of the variables we have discussed. If your cookie is too hard, you likely used too much flour or cooked it at too low a temperature for too long. If your cookie is too greasy, you likely had an issue with the butter temperature or a failure to properly cream the sugar.
The Oily Cookie Phenomenon
If you pull your baking sheet out of the oven and see a pool of grease surrounding your cookies, your fat-to-flour ratio is significantly off. This often occurs when a recipe is missing a binding agent, such as an egg, or when the flour has been severely under-measured. Additionally, check your sugar-to-fat ratio; if the sugar didn't have enough surface area to bond with the fat during the creaming process, the fat will simply render out as liquid in the heat of the oven rather than holding the dough together.
The "Cakey" Cookie Mistake
If your cookies are puffy and resemble small cakes, you have likely incorporated too much leavening (baking soda or baking powder) or have over-aerated your butter and sugar. While some people enjoy a cakey cookie, if you are chasing a dense, chewy, or crispy result, you need to pull back on the mechanical aeration. Don't worry about the sugar-to-fat ratio as much as the speed and duration of your creaming. Keep your leavening to the bare minimum required to get a slight lift, and you will find your cookies becoming much more refined in their profile.
Ingredient Ratios for Different Cookie Profiles
Once you have mastered the basics, you can begin to experiment with your own recipes. The following ratios are meant as a baseline for a standard 350-gram flour batch. You can scale these up or down depending on the size of the batch you wish to bake. Remember that the "fat" in this scenario includes all sources of fat, including butter, margarine, or shortening, while the "sugar" includes both white and brown sugars combined.
The Chewy Cookie Profile
For a chewy cookie, target a ratio that favors brown sugar over white sugar by a 2:1 margin. Keep your butter content moderate, and ensure you include an extra egg yolk. The extra fat and protein from the yolk, combined with the molasses in the brown sugar, will keep the cookie moist and pliable. Aim for 125g of fat and 200g of sugar per 350g of flour.
The Crispy Cookie Profile
For a classic, snap-heavy cookie, increase your granulated sugar content and decrease the brown sugar. You may also want to use a slightly higher fat ratio or even replace a small portion of the butter with shortening, as shortening has a higher melting point and helps the cookie hold its shape while the edges caramelize to a crisp. Aim for 150g of fat and 220g of sugar per 350g of flour, focusing heavily on granulated sugar for that signature crunch.
"True culinary mastery is not found in the rigidity of a single recipe, but in the understanding of the underlying mathematical relationships that allow a chef to iterate, adapt, and invent with absolute confidence."
Final Thoughts
Mastering the baker's art is a lifelong endeavor, but it begins with the humble cookie. By focusing on the interplay between your sugars and your fats, you are moving away from the role of a passive baker and stepping into the role of a creator. You are learning to read the dough, to understand how temperature influences structure, and to trust the numbers when your intuition is unsure. Whether you are aiming for the perfect chewy center or a delicate, crispy snap, the path to consistency is paved with these fundamental ratios.
Do not be discouraged by failures; they are merely data points in your journey toward excellence. Every batch of cookies that doesn't turn out as planned is teaching you something about how your specific oven, your specific brand of flour, and your specific climate interact with the ingredients. Keep a notebook, track your weights in grams, and document the temperatures of your kitchen. Over time, you will find that you no longer need the crutch of a written recipe to create something extraordinary. You will have developed the internal map required to navigate the world of baking on your own terms.
As you continue to practice, remember that the warmth and the joy of baking are just as important as the precision of the scale. Share your creations, invite feedback, and don't be afraid to experiment with bold flavors like browned butter, toasted sugars, or infusions of herbs and spices. When you control the ratios, the world of possibilities is essentially limitless. Happy baking, and may your cookies always have the perfect snap, the perfect chew, and the perfect flavor to bring a smile to everyone who tastes them. Remember, if something goes wrong, you can always just blame the chef—but with these techniques, you'll find there’s very little left to blame.
The science of baking is a beautiful dance of chemistry and creativity, a blend of strict rules and artistic expression. As you move forward in your culinary journey, treat each batch of dough as a blank canvas. By mastering the ratios of fat and sugar, you are not just baking a cookie; you are building a foundation of knowledge that will serve you well in every area of the pastry arts. From delicate shortbreads to complex, layered bars, the principles of weight, temperature, and timing remain your most reliable allies. Keep your scale calibrated, your butter at the right temperature, and your curiosity piqued. The perfect cookie isn't a destination; it's a practice, and with every tray you pull from the oven, you are refining your skill and becoming the confident, capable baker you’ve always aspired to be.
If you ever find yourself struggling to recreate a specific texture, look back to this guide and re-examine your ratios. Ask yourself if you had enough sugar to provide the necessary structure, or if perhaps the fat was too warm to maintain the airy pockets created by the creaming process. Baking is a game of small adjustments. A gram here, a degree there, and a few minutes of extra chilling time can change a cookie from "acceptable" to "extraordinary." Stay committed to the process, embrace the scientific method in your kitchen, and most importantly, never lose the love for the craft. The results will speak for themselves in every bite.




Get the Next Recipe
Weekly recipes, techniques, and gear picks — straight to your inbox.
