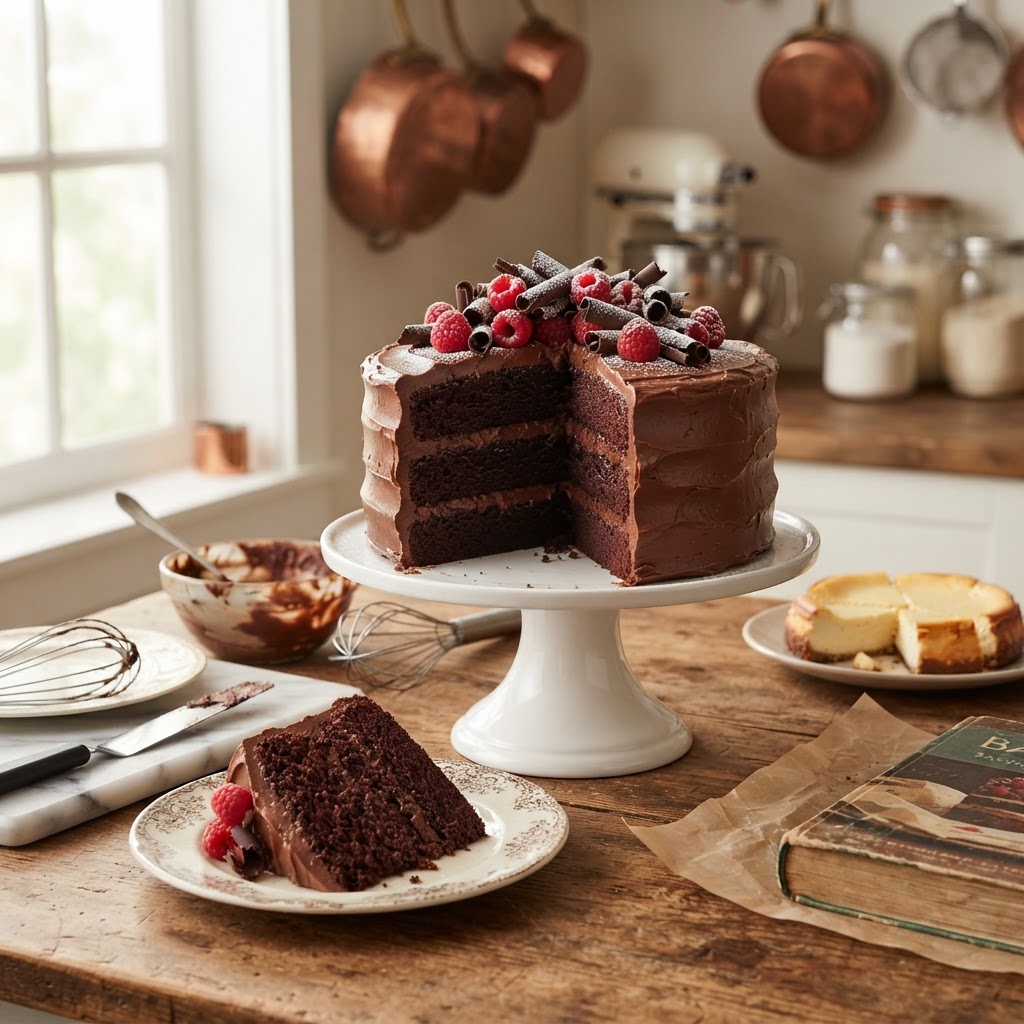
The Baker’s Troubleshooting Handbook: How to Save Collapsed Cakes, Cracked Cheesecakes, and Dense Batters
Baking is often described as a science, a rigid discipline of chemistry where a single misplaced gram can turn a masterpiece into a puddle. For the home cook, this reality can be incredibly daunting, leading to the infamous "baking anxiety" that keeps people away from their ovens. At Blame The Chef, we believe that every culinary disaster is actually an undercover masterclass waiting to happen. When a cake sinks in the middle or a soufflé decides to deflate the moment it touches the air, you aren't failing—you are learning the intricate language of heat, protein, and moisture.
The beauty of baking lies in its predictable nature; unlike sautéing or grilling, where adjustments happen in real-time, baking relies on pre-emptive care and a deep understanding of your ingredients. We have all stood in front of a glass oven door, praying for a rise that never quite manifests, or staring at a cracked cheesecake with a mixture of despair and hunger. The transition from a novice to a seasoned home baker is defined not by how perfectly you execute a recipe, but by how skillfully you pivot when things go sideways. With a few professional techniques tucked into your apron pocket, you will find that almost every "ruined" bake can be rescued, repurposed, or at the very least, understood for next time.
This handbook is designed to be your kitchen companion during those frantic moments when the timer goes off and the result isn't what you expected. We will dissect the anatomy of the most common baking failures, exploring why they happen at a molecular level and, more importantly, how to fix them. Whether you are dealing with a batter that refuses to fluff, a crust that refuses to set, or a center that stays stubbornly liquid, there is a pathway to salvage. Put down the rolling pin for a moment, take a deep breath, and let’s turn that kitchen catastrophe into a triumph.
The Mystery of the Collapsed Cake
There is perhaps no sight more disheartening for a baker than opening the oven door to find a cake that has cratered in the center. A collapsed cake is almost always the result of a structural failure during the baking process, usually occurring when the air bubbles trapped in the batter escape before the proteins have set. If you pull your cake out and see a dip, the first thing to check is your oven temperature and your leavening agents. Using an oven thermometer is the single most important habit a home baker can adopt, as most built-in oven thermostats are notoriously inaccurate, often drifting by 25 degrees or more.
When the oven temperature is too high, the outside of the cake sets before the heat can penetrate the center, causing the middle to rise rapidly and then collapse under its own weight. Conversely, if your baking powder or baking soda is expired, the initial lift will be weak, leading to a sunken, gummy texture. Another common culprit is the undermixing or overmixing of your dry and wet ingredients. Over-creaming your butter and sugar introduces too much air, which expands rapidly and then dissipates, leaving you with a delicate, fragile structure that cannot support itself once the cake cools and the gases contract.
The secret to a perfect rise isn't just in the ingredients; it is in the patience you exhibit while the oven does the heavy lifting. Never open the oven door during the first two-thirds of the bake time, as the sudden drop in ambient temperature will cause the air pockets to deflate instantly.
How to Save a Sunken Sponge
If you have a cake that has already sunken, don't throw it out. The texture is usually still edible, just aesthetically compromised. You can slice the top off to create a level surface and use it for a layered trifle or a cake pop base. If you must serve it as a cake, use a thick layer of ganache or buttercream to fill the hole and mask the depression. By building up the edges with frosting, you create a "well" that makes the defect look like a deliberate design choice, especially if you top it with fresh fruit or candied nuts.
Taming the Cracked Cheesecake
Cheesecake is the diva of the dessert world, demanding precise cooling times and a controlled environment. A crack in your cheesecake is almost always caused by a sudden change in temperature or a lack of moisture in the oven. When the cake cools too quickly, the proteins contract rapidly, pulling away from the edges of the pan and tearing the top surface. This is why we insist on the water bath—or bain-marie—method. By surrounding your springform pan with a protective layer of water, you ensure that the heat is distributed gently and the ambient humidity remains high enough to prevent the surface from drying out and snapping.
Overbaking is the second most common reason for those jagged fissures across the top of your dessert. You are looking for a "jiggle" in the center—about two inches in diameter—when the pan is nudged. If the center is completely firm, you have gone too far, and the eggs have scrambled slightly, causing the cake to tighten and crack. Always remove the cheesecake when the center is still slightly loose, as the residual heat will carry it to the perfect creamy consistency while it sits in the oven with the door cracked for an hour.
The Repair Strategy
If you find yourself staring at a canyon-sized crack, do not panic. The flavor is likely perfect, even if the appearance is less than professional. Use a warm, thin-bladed knife to smooth the edges of the crack, or simply cover the entire surface with a thin layer of sour cream topping or a blanket of fresh seasonal berries. A light dusting of powdered sugar can also diffuse the light and make surface imperfections much less noticeable to your guests.
Solving the Density Crisis
Dense, heavy batters are often the result of an imbalance between fats, liquids, and leavening. A cake should ideally be light and airy, but when it turns out like a brick, it usually means the gluten network was developed too much or the aerated fats collapsed. When you mix your flour into your wet ingredients, the protein in the flour begins to form gluten strands. If you continue to mix vigorously at this stage, you are effectively turning a tender cake into a tough, chewy loaf of bread. Fold, don't beat, is the mantra of a successful baker.
Another factor for density is the temperature of your ingredients. If your butter is melted rather than softened, or if your eggs are cold straight from the fridge, they will not emulsify properly with the sugar. Cold eggs can cause the butter to solidify into small clumps, preventing the incorporation of the air that you worked so hard to achieve during the creaming stage. Always aim for room temperature ingredients (around 68-70°F) before you even touch your mixer.
Troubleshooting Your Batter
If you suspect your batter is too dense before it even goes into the oven, look for a thick, gummy consistency that clings to the whisk rather than ribboning off it. You can attempt to save it by adding a tablespoon of boiling water or milk to loosen the emulsion, though do this sparingly. If the cake has already baked and is dense, it is best repurposed as a base for a bread pudding or a trifle, where the heavier texture is actually an advantage as it holds onto sauces and creams without dissolving.
Mastering the Science of Emulsions
Successful baking is essentially the mastery of emulsions—the forced marriage of fat and water. Whether you are making a butter cake, a pound cake, or a simple batch of muffins, you are dealing with an emulsion of butter, sugar, eggs, and flour. When an emulsion breaks—typically manifested as a curdled-looking batter—it is usually because the ratio of liquid to fat is off, or because ingredients were added too quickly. Adding your eggs one by one is not a suggestion; it is a vital technique to allow the fat to absorb the moisture of the egg before moving on.
If you notice your batter looking like scrambled eggs after adding your wet ingredients, your emulsion has split. Do not add the flour yet! Instead, add one tablespoon of your measured flour to the mixture. This acts as a stabilizer, binding the liquid and the fat together and providing a structure for the rest of the ingredients to cling to. Once the mixture looks smooth again, you can continue adding the rest of your ingredients carefully.
A broken batter is not the end of the world. With a little bit of flour and a steady hand, you can coax an emulsion back into a smooth, cohesive state, ensuring your cake has that elusive, tender crumb.
Why Temperature Matters
Keeping your pantry staples, particularly butter, at a consistent temperature is crucial for the emulsification process. If your butter is too warm, it won't hold air; if it is too cold, it won't incorporate with the sugar. Professional chefs often use a digital probe thermometer to ensure their butter is at exactly 65°F before beginning. This precision guarantees that the air bubbles trapped during the creaming stage are small and stable, providing the lift needed for a superior bake.
The Art of the Perfect Crust
Pie crusts and shortbreads are perhaps the most temperamental bakes, governed entirely by the temperature of the fat. The goal of a flaky crust is to keep the butter in small, solid chunks throughout the dough. When these chunks hit the hot oven, they melt, creating steam that forces layers of dough apart, resulting in that coveted flaky texture. If your kitchen is too warm, or if you handle the dough too much, the butter will melt into the flour, resulting in a greasy, tough, and hard crust.
To avoid this, use ice water exclusively and chill your dough repeatedly. Every time you touch the dough with your warm hands, you are melting the fat. Work in short bursts, and if the dough feels soft or sticky, stop immediately and put it back in the refrigerator or freezer for 15 minutes. A "resting period" is not just for the dough to relax its gluten; it is for the fat to solidify again, which is the secret weapon for a professional-grade finish.
Rescuing a Tough Crust
If you have already baked a crust and it turned out hard or crumbly, it is often due to the amount of liquid used. A crust should have just enough water to hold it together. If it is too tough, you can brush it with a light simple syrup or a fruit glaze to soften the texture before serving. If it is too crumbly to hold, it likely lacked enough binding, so consider serving it as a "deconstructed" dessert in glass jars, layered with fresh whipped cream and compote.
Beyond the Oven: Environmental Factors
Often, we blame the chef, but sometimes, the kitchen itself is the culprit. Humidity, altitude, and even the type of pan you use play massive roles in the success of your bake. High humidity can wreak havoc on delicate sponges, preventing them from drying out properly and often making them feel "soggy" even when fully cooked. In very humid environments, you might need to increase your baking time by five to ten minutes or slightly decrease the amount of liquid in your recipe.
Pan material is another frequent oversight. Light-colored aluminum pans are the gold standard for most cakes, as they reflect heat and promote even baking. Dark, non-stick pans absorb heat aggressively, which often leads to burnt edges and an undercooked center. If you must use dark pans, reduce your oven temperature by 25°F and check for doneness five minutes earlier than the recipe suggests. Always ensure your oven rack is in the center of the oven, unless the recipe specifically dictates otherwise, to avoid uneven browning.
Essential Gear for Troubleshooting
Oven Thermometer:* To verify the actual temperature of your oven.
Digital Scale:* Precision is the enemy of baking failures.
Bench Scraper:* For handling sticky doughs without over-kneading.
Whisk and Spatula:* The primary tools for controlling the aeration of your batter.
Parchment Paper:* The only way to guarantee a clean release every time.
Advanced Techniques for Rescue
When all else fails, you must rely on your culinary creativity. The beauty of baking is that once you understand the core components—structure, fat, moisture, and sugar—you can manipulate them into a new form. A collapsed cake becomes a trifle. A cracked cheesecake becomes a mousse cup. A dense batch of cookies becomes a crumb topping for a fruit crumble. The professional chef knows that the plate is the ultimate destination, and if the original vision doesn't work, a new vision is always on the table.
Always keep a stash of "rescue" ingredients in your pantry. Heavy cream for whipping into chantilly, high-quality dark chocolate for melting into ganache, and fresh seasonal fruit for compotes can hide a multitude of sins. These elements don't just mask mistakes; they elevate the final product. A simple, slightly dry pound cake becomes a gourmet dessert when served with a warm, spiced berry compote and a dollop of fresh cream.
Innovation is born from the ashes of a failed soufflé. The true test of a chef is not the ability to follow a recipe, but the ability to salvage a mistake and make it delicious.
A Note on Patience
The most common mistake amateur bakers make is rushing the cooling process. A cake needs to cool in the pan for at least 15 minutes before being flipped onto a wire rack. If you rush this, the structure—which is still setting as the temperature drops—will be compromised, leading to breakage and crumbles. Patience is a key ingredient in every single recipe, from a loaf of sourdough to a delicate macaron.
Final Thoughts
Baking is a lifelong journey of trial and error, and every failure brings you one step closer to mastery. Do not let the fear of a sunken cake or a cracked surface keep you from the joy of creating something beautiful from scratch. Each time you troubleshoot an issue, you are developing a more intuitive understanding of how ingredients behave, which is a skill that no cookbook can teach as effectively as experience.
When you find yourself in the middle of a baking mishap, remember to look at the process objectively. Was the oven too hot? Did you over-mix the flour? Was the butter at the right temperature? By analyzing the "why," you turn a frustrating afternoon into a valuable lesson. The "Blame The Chef" philosophy is all about empowerment; we take the blame for the mistake so we can own the success of the next attempt.
Continue to bake with curiosity and a sense of adventure. Use high-quality ingredients, invest in a reliable scale and thermometer, and most importantly, keep your sense of humor. If the cake collapses, just add more frosting. If the cookies spread, make them into a sundae. At the end of the day, baking is meant to bring joy—both to the baker and to those lucky enough to share the results. Keep your oven clean, your whisk ready, and your spirits high. The next bake will be better, and the one after that will be perfect. Happy baking!



Get the Next Recipe
Weekly recipes, techniques, and gear picks — straight to your inbox.
