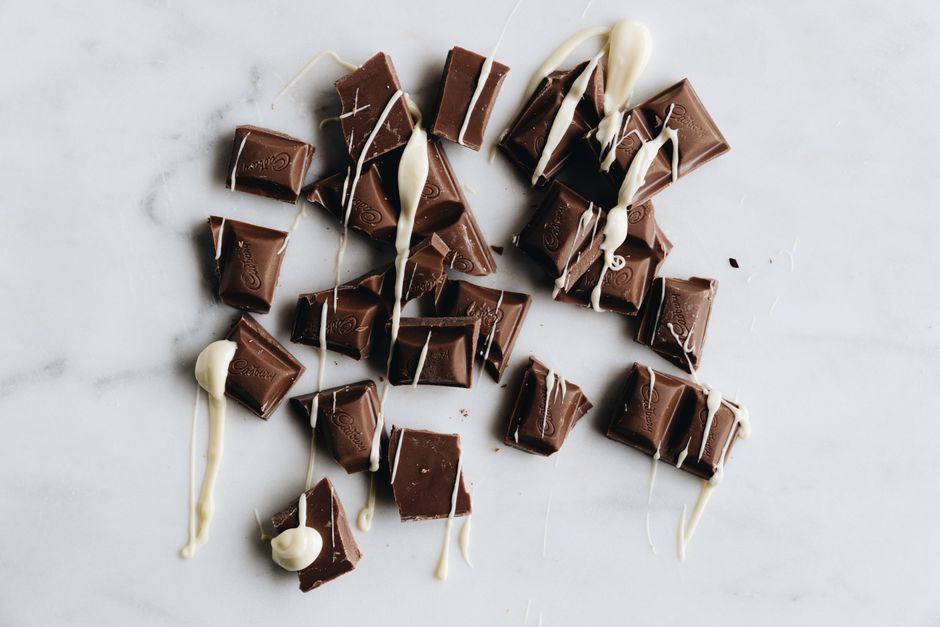
The Complete Guide to Baking with Chocolate
Baking with chocolate is a delightful endeavor that can elevate any dessert from ordinary to extraordinary. Whether you are crafting a rich chocolate cake, delicate cookies, or decadent brownies, understanding the nuances of baking with chocolate is essential for achieving the best results. With a variety of chocolate types available, including dark, milk, and white chocolate, mastering their properties and pairings will set you on the path to chocolate baking success. Each type of chocolate brings a distinctive flavor and texture, making it crucial to know how to utilize them effectively in your recipes.
In the world of baking, chocolate can act as the star of the show or serve as a subtle complement to other flavors. The good news is that you don’t have to be a professional pastry chef to create sumptuous chocolate desserts. With a bit of knowledge about ingredient ratios, melting techniques, and baking times, you can confidently whip up mouthwatering treats that your friends and family will adore. The bliss of baking with chocolate lies not only in its taste but also in the way it elevates simple ingredients into something luxurious and indulgent.
Moreover, the art of baking with chocolate involves a bit of science. Understanding how temperature affects chocolate, how it interacts with other ingredients, and how to achieve the desired consistency in your batters and doughs is fundamental. This guide will take you through everything you need to know, from selecting the right chocolate to the finishing touches that will make your desserts shine. Get ready to indulge your senses and enhance your baking repertoire as we explore the complete guide to baking with chocolate.
Understanding Chocolate Varieties
When it comes to baking with chocolate, the first step is knowing the different types of chocolate available. Each type offers unique flavors and textures that can dramatically impact your final product. The three main categories are dark chocolate, milk chocolate, and white chocolate, each with its distinct characteristics.
Dark Chocolate
Dark chocolate is composed primarily of cocoa solids, cocoa butter, and sugar, with little to no milk content. It typically boasts a higher cocoa percentage, which can range anywhere from 50% to 90%, and this variance affects its flavor profile. The higher the cocoa content, the more intense and slightly bitter the chocolate will be.
For baking, using dark chocolate allows for a rich, robust flavor that can stand up to other bold ingredients. It works beautifully in brownies, cookies, and cake recipes, imparting a complex taste that can satisfy even the most discerning chocolate lovers. As a general rule, when substituting dark chocolate for milk chocolate in a recipe, you may wish to adjust the amount of sugar to compensate for the less sweet flavor of dark chocolate.
Milk Chocolate
Milk chocolate is sweeter and creamier due to the addition of milk solids and a higher sugar content. It typically contains less cocoa than dark chocolate, making it an excellent choice for those who prefer a milder chocolate flavor. Milk chocolate is perfect for recipes where a softer, sweeter taste is desirable, such as in chocolate chip cookies or chocolate ganaches.
When using milk chocolate in your baking, it’s essential to be mindful of melting temperatures, as it can seize easily if overheated. A good melting point for milk chocolate is around 110°F (43°C). If you prefer the creaminess of milk chocolate but want a more complex flavor, consider using semi-sweet or bittersweet chocolate, which can bridge the gap between dark and milk chocolate in terms of flavor.
White Chocolate
White chocolate, while technically not chocolate because it doesn’t contain cocoa solids, is made from cocoa butter, sugar, and milk solids. Its creamy texture and sweet flavor make it a wonderful addition to various desserts. White chocolate is often used for decorative purposes or in unique flavor combinations, such as pairing it with fruits or spices.
While baking with white chocolate, be aware that it does not behave like regular chocolate. It has a higher sugar content, and its melting point is lower; hence, care must be taken to avoid burning. Ideal melting for white chocolate occurs at around 100°F (38°C). When using white chocolate in baking, it can significantly sweeten any dish, necessitating adjustments in the sugar content elsewhere in your recipe.
The Basics of Melting Chocolate
Melting chocolate is a foundational skill for any baker. Whether you are creating a ganache, a chocolate glaze, or incorporating melted chocolate into a batter, knowing how to melt chocolate correctly will ensure smooth, silky results.
Double Boiler Method
One of the most popular methods to melt chocolate is the double boiler technique. This method minimizes the risk of burning or seizing the chocolate. To use this method:
The gradual heat from the steaming water provides an even temperature that delicately melts the chocolate.
Microwave Method
For those short on time, the microwave method is both efficient and convenient. However, it requires close attention to prevent overheating. Here’s how to melt chocolate using a microwave:
While this method is faster, be vigilant to avoid scorching the chocolate.
Chocolate Seizing and How to Prevent It
Nothing can dampen a baking session quite like chocolate seizing. This occurs when water or moisture comes into contact with melted chocolate, causing it to clump and become grainy. To prevent this:
“Mastering the melting of chocolate is akin to laying the foundation in any structure: without it, the rest is bound to crumble.”
Tools for Working with Chocolate
Having the right tools can make working with chocolate far more manageable and enjoyable. Here are essential tools you'll want in your chocolate-baking arsenal:
Chocolate Chopper or Knife
Invest in a good-quality chef’s knife or a specialized chocolate chopper for chopping chocolate. Uniform pieces ensure even melting, which is crucial for achieving that perfect texture.
Heat-Proof Bowls
Select heatproof bowls made of glass or ceramic for melting chocolate. These materials retain heat well and won’t warp, unlike some plastics.
Silicone Spatula
A silicone spatula not only makes it easy to stir melted chocolate but also helps scrape every last bit of chocolate from the bowl.
Piping Bags
Use piping bags for decorating with melted chocolate or ganaches. They allow for precise application and creativity in designs, ensuring that you can create stunning finishes on cakes and pastries.
Candy Thermometer
For precise temperature control, a candy thermometer is invaluable, especially if you're making tempering chocolate. This ensures that you keep your chocolate at the right melting temperatures without risk of overheating.
The Art of Tempering Chocolate
Tempering chocolate is a technique that gives chocolate a beautiful sheen and a satisfying snap when broken. It’s essential for dipping and molding because it ensures that the chocolate sets correctly and has a smooth texture.
Why Temper Chocolate?
Tempering is necessary because it stabilizes the cocoa butter crystals in chocolate, leading to a uniform texture and a longer shelf life. When properly tempered, chocolate will not only look professional, but it also has a better mouthfeel.
The Tempering Process
- Melt two-thirds of your chopped chocolate in a bowl over a double boiler or in the microwave until it reaches 120°F (49°C) for dark chocolate, or 110°F (43°C) for milk or white chocolate.
- Remove from heat and add in the remaining third of the chocolate gradually, stirring continuously until it melts and cools down to about 88°F (31°C) for dark chocolate or 86°F (30°C) for milk/white chocolate.
Common Tempering Mistakes
“Tempering chocolate is like mastering the art of patience and precision: it rewards those who practice with a perfect end product.”
Baking Chocolate Recipes
Now that you have a solid understanding of chocolate varieties, melting techniques, and tempering, it’s time to put this knowledge into action! Below are three delightful chocolate recipes that perfectly showcase your newfound skills.
Rich Chocolate Brownies
Ingredients:
Instructions:
Classic Chocolate Chip Cookies
Ingredients:
Instructions:
Decadent Chocolate Ganache
Ingredients:
Instructions:
Pairing Flavors with Chocolate
Part of the joy of baking with chocolate lies in the beautiful flavors that can complement it. Choosing the right additions can elevate your dishes to new heights.
Fruits
Fruits bring a freshness and acidity that balance chocolate’s richness. Popular choices include:
Nuts
Nuts add texture and a savory element to chocolate. The following work particularly well:
Spices
Adding spices can introduce warmth and depth to chocolate desserts. Consider incorporating:
Spirits
Using spirits in chocolate desserts can add depth and complexity. Here are fitting suggestions:
Conclusion
Baking with chocolate is an art form that combines both creativity and precision. By understanding the different types of chocolate, mastering melting techniques, and learning to temper, you can unlock a world of rich, indulgent desserts. With the recipes and pairings provided, you’re equipped to elevate your baking to new heights.
Remember that practice is key; don’t hesitate to experiment with flavors and techniques. The joy of baking lies not only in the final product but also in the journey of discovery along the way. So, roll up your sleeves, put on your apron, and indulge in the satisfying world of chocolate baking. Let the aroma of warm chocolate infuse your kitchen, and watch as delight fills the hearts of those who gather around your table. Happy baking!



Get the Next Recipe
Weekly recipes, techniques, and gear picks — straight to your inbox.
