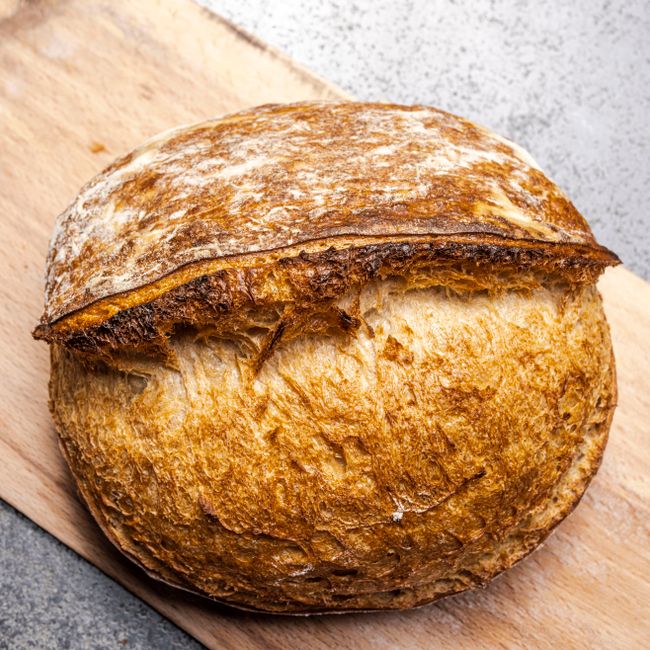
Sourdough bread holds a special place in the hearts (and stomachs) of many home bakers. With its tangy flavor and beautifully chewy texture, making sourdough can seem both daunting and wildly rewarding. The best part? Anyone with a bit of patience, the right ingredients, and the willingness to learn can master this age-old craft. In this guide, we’ll navigate through the entire process, from cultivating the perfect sourdough starter to achieving a deliciously crispy crust right out of your home oven. Let’s embark on this journey together and transform you into a confident sourdough baker.
What makes sourdough different from other types of bread? Sourdough bread is unique due to its use of naturally occurring lactic acid bacteria and wild yeast. This fermentation process gives sourdough its distinctive tang and chewy texture. Unlike store-bought breads that rely on commercial yeasts, sourdough baking necessitates a more involved, yet rewarding method. It requires time and a bit of understanding of the dough’s behavior, but the payoff is worth every minute spent watching, waiting, and eventually indulging.
To truly understand sourdough, you must first grasp the integral role of the sourdough starter. This living mixture of flour and water captures wild yeast and beneficial bacteria from the environment, serving as the leavening agent. Over time, by feeding it the right amounts of flour and water, your starter becomes a robust community of microorganisms that can transform mere flour and water into an extraordinary loaf of bread. With that foundational knowledge, let’s delve deeper into creating and nurturing your sourdough starter.
Understanding Sourdough Starters
A sourdough starter, in its essence, is a simple mixture of flour and water that undergoes fermentation. This process develops the wild yeast and bacteria needed to leaven the dough, giving it that characteristic sour flavor. In this section, we’ll explore how to create your starter, the ideal feeding schedule, and maintenance tips to keep it healthy and thriving.
Creating Your Starter
Creating a sourdough starter is an art form that begins with just two ingredients: flour and water. Here’s a simple method to make your own starter:
1.Choose Your Flour: Whole grain flours, such as whole wheat or rye, are preferable as they contain more nutrients and natural yeast. You can, however, use all-purpose flour if that’s what you have on hand.
2.Mix Ingredients: In a clean glass jar, combine 100 grams (about ¾ cup) of flour with 100 grams (about ⅓ cup) of water. The water should be at room temperature—preferably around 75°F (24°C)—to promote yeast activity.
3.Stir and Cover: Mix until there are no dry clumps of flour. Loosely cover the jar with a lid or a piece of cloth. This allows your starter to breathe but prevents contaminants from falling in.
4.Let It Ferment: Leave the jar at room temperature (ideally between 68°F (20°C) and 78°F (26°C)), away from direct sunlight, for 24 hours.
5.Feed Regularly: After 24 hours, you may not see much activity yet, but that’s okay! Discard half of the mixture and add another 100 grams of flour and 100 grams of water. Repeat this process daily until your starter doubles in size within 4 to 6 hours of feeding and develops a pleasant tangy smell.
Nurturing Your Starter
A healthy starter is essential for good sourdough. You will need to maintain its health through proper feeding schedules and storage methods.
●Feeding Schedule: Once your starter is active, it’s best to feed it every 12 to 24 hours if kept at room temperature. If you don’t plan to use it daily, you can store it in the refrigerator and feed it once a week. Before baking, make sure to take it out, let it come to room temperature, and feed it at least twice to reactivate it.
●Hydration Levels: Most starters have a hydration ratio of 1:1, meaning equal parts flour and water. However, you can experiment with slightly different ratios (e.g., 1:1.5) for different textures and flavors.
●Watch for Signs: Your starter is ready to bake with when it has bubbles throughout, has doubled in volume, and emits a pleasant, sour smell, generally occurring about 4 to 6 hours after feeding.
Troubleshooting Your Starter
As with any living culture, things can go awry. Here are common issues and how to solve them:
●No bubbles: Your starter may be too cold or you may not have fed it enough. Try a warmer location or increase the feeding frequency.
●Hooch formation: If you see a layer of liquid (hooch) forming on top, it indicates your starter is hungry. Simply stir it back in and feed it more frequently.
●Off smells: If your starter smells funky or has an unpleasant odor, discard it and start over. Be sure to use clean utensils and jars to prevent contamination.
**“A good starter is like a good friend; it requires care and attention but will offer you a lifetime of delicious bread in return.”**
With a healthy and active starter, you are now ready to delve into baking sourdough bread! Let’s move on to the essentials of the bread-making process.
The Sourdough Baking Process
Baking sourdough involves several steps, each crucial to developing the loaf's flavor and texture. In this section, we’ll break down each part of the bread-making journey, from mixing and autolyse to shaping and baking.
Mixing the Dough
Start with the ingredients: you will need:
●500 grams of bread flour (or a mix of bread and whole wheat flour)
●350 grams of water (at room temperature)
●100 grams of active sourdough starter
●10 grams of salt
Here's how to combine these ingredients effectively:
1.Autolyse: In a large mixing bowl, combine the flour and 350 grams of water. Mix until no dry flour remains, then cover the bowl and let the mixture rest for about 30 minutes to an hour. This process allows the flour to hydrate, which improves extensibility and gluten development of the dough.
2.Incorporate the Starter and Salt: After the autolyse, add the active sourdough starter and salt to the dough. Wet your hands to keep the dough from sticking and mix thoroughly until the starter and salt are fully integrated.
3.Kneading: While traditional kneading is effective, sourdough benefits greatly from the stretch and fold technique. Every 30 minutes for the first two to four hours of bulk fermentation, stretch the dough and fold it over itself four times—once from each side. This strengthens the gluten structure without over-kneading.
Bulk Fermentation
The bulk fermentation phase is crucial for developing flavor and strength in your dough. This phase typically lasts anywhere from 4 to 8 hours, depending on the temperature of your environment.
●Temperature Matters: Ideally, the temperature for effective fermentation should be between 75°F (24°C) and 80°F (27°C). If the temperature is lower, fermentation will slow down, and if it's warmer, it will speed up.
●Signs of Fermentation: Look for the dough to increase in volume (about 1.5 to 2 times), become puffy, and develop a lacy structure with bubbles on the surface and throughout.
Pre-shaping and Bench Rest
Once the dough has properly fermented, it’s time to shape it.
1.Pre-shape: Lightly flour your work surface and turn the dough out onto it. Using your hands, gently pre-shape the dough into a round. Allow it to rest for about 20 to 30 minutes. This bench rest lets the gluten relax, making final shaping easier.
2.Final Shaping: After the bench rest, shape the dough into its final form (round or oval) by using a tight, smooth motion. Consider using a bench scraper to help shape the dough without degassing it too much.
**“The secret to beautiful bread is not just in the ingredients, but in the tender care with which you shape it.”**
Proofing
The proofing stage is where the shaped dough rises before baking. You can choose to proof at room temperature or in the refrigerator for a longer fermentation.
●Room Temperature Proof: For a warm proof (2 to 4 hours), place the shaped dough in a lightly floured proofing basket seam-side up. Cover it with a cloth or plastic wrap to prevent it from drying out.
●Cold Proof: For a cold proof (12 to 24 hours), place the shaped dough in the refrigerator. This method enhances flavor and offers more manageable timing for bakers. If using this method, remember to take the dough out and let it warm at room temperature for about 30 minutes before baking.
Baking Your Sourdough
The moment of truth has arrived—it's time to bake your sourdough! Proper baking techniques will help you achieve that crusty exterior with a soft and airy interior. Here’s how to do it effectively.
Preheating Your Oven
●Oven Temperature: Preheat your oven to 450°F (232°C) about 30 minutes before you plan to bake. If you’re using a Dutch oven or baking stone, add it to the oven during preheating to ensure it’s hot enough for a proper oven spring.
Scoring the Dough
Prior to baking, you need to score your dough, which allows steam to escape and controls the expansion of the loaf.
1.Use a Sharp Blade: A sharp razor blade or a lame is ideal for scoring. Make a single stroke along the top of the dough, cutting about ½ inch deep.
2.Pattern Choice: You can create decorative patterns or simple slashes, but keep it bold to allow for maximum oven spring.
Baking in a Dutch Oven
Using a Dutch oven enhances steam generation, creating a more conducive environment for crust development. Follow these steps:
1.Transfer Dough: Carefully invert the proofed dough onto a piece of parchment paper or directly into the hot Dutch oven.
2.Cover and Bake: Cover the pot with the lid and bake for 30 minutes at 450°F (232°C).
3.Uncover to Brown: After 30 minutes, remove the lid for an additional 15 to 20 minutes, allowing the bread to develop a deep, golden-brown crust.
Cooling and Storing Your Bread
Once baked, your sourdough needs time to cool down before slicing.
●Cooling: Let the bread cool for at least an hour on a wire rack. This ensures the interior continues to set and prevents a gummy texture.
●Storage: Sourdough is best enjoyed fresh but can be stored at room temperature for a couple of days. If you need to keep it longer, slice it and store it in the freezer, wrapping it tightly to keep it from freezer burn.
Advanced Sourdough Techniques
Now that you've mastered the basics, it’s time to delve into advanced sourdough techniques to elevate your bread-making skills.
Flavor Enhancements
Experimenting with add-ins can create a variety of flavors and textures in your sourdough bread.
●Grains and Seeds: Incorporating nuts, seeds, or grains can add both nutrition and crunch. Consider adding a handful of sunflower seeds, flaxseeds, or chopped walnuts during the mixing stage.
●Herbs and Spices: Fresh herbs or spices such as rosemary, garlic, or cinnamon can elevate your bread from classic to gourmet.
Using Levain
For an even more complex flavor, you can incorporate levain, which is a portion of your starter mixed with fresh flour and water before adding it to the dough:
1.Make Levain: Mix 100 grams of your active starter with 100 grams of flour and 100 grams of water. Let it ferment for about 4 to 6 hours until bubbly and active.
2.Use in Dough: Replace some (or all) of your starter with this levain in the bread dough mix for a more nuanced flavor profile.
Gluten-Free Sourdough
For those following a gluten-free diet, sourdough can be made using gluten-free flours. Some key points include:
●Flour Choice: Use a mix of gluten-free flours like brown rice flour, almond flour, and tapioca starch.
●Hydration Adjustments: Gluten-free flour absorbs more water; adjust your water additions accordingly.
●Additional Support: Consider adding xanthan gum or psyllium husk powder to help with structure and elasticity.
Final Thoughts
Baking sourdough is a beautiful process that offers not only delicious results but also a sense of accomplishment and connection to an ancient culinary tradition. Each loaf you bake tells a story of patience, persistence, and personal touch, with each ingredient blended into a masterpiece that's a reflection of your culinary journey.
Armed with the foundational knowledge and advanced techniques outlined in this guide, you're well on your way to mastering sourdough. Whether you're sharing your loaf with family, friends, or enjoying it with a cozy cup of tea, each bite will carry the fruits of your labor and love for this timeless craft. Remember, baking is as much about the process as it is about the result; embrace the opportunities to learn and enjoy every moment spent in your kitchen. So roll up your sleeves, grab your flour and water, and let the adventure begin!