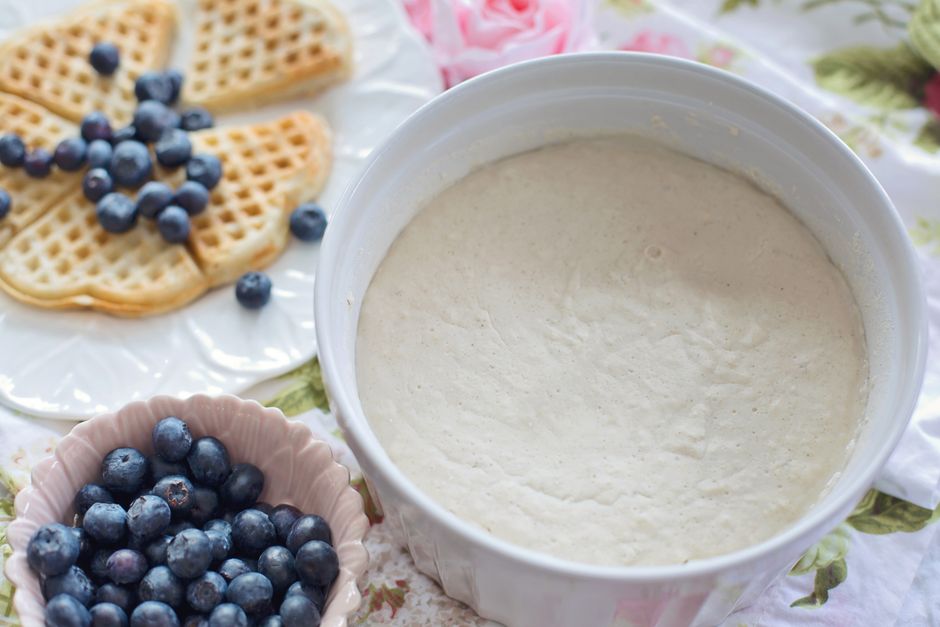
The Complete Guide to Sourdough Starter
A thriving sourdough starter is often regarded as the holy grail of baking, a beautiful culture that transforms the simplest ingredients—flour, water, and time—into a complex, flavorful, and textured bread. The alchemy of bubbling, fermenting dough not only gives sourdough its distinct tangy flavor but also produces airy loaves that are coveted by bakers and bread lovers alike. For many, the process of creating and maintaining a sourdough starter is both an art and a science—one that connects you with culinary traditions that span across continents and centuries.
Embarking on the journey of sourdough baking can be intimidating for many home cooks, especially with the false presumption that it requires specialized equipment and expert knowledge. Yet, the beauty of sourdough lies in its accessibility. With simple ingredients from your pantry and a bit of patience, anyone can cultivate a sourdough starter that breathes life into hearty loaves, delectable pancakes, and even pastries. This guide is designed for everyone, from novices to seasoned bakers, who wish to master the craft of sourdough.
Through this comprehensive guide, we will explore the foundations of sourdough starter, every step of the feeding process, optimal flour types, hydration levels, troubleshooting common issues, and how to utilize your starter in various recipes. With each section, you’ll find tips that demystify this age-old baking method and lead you to confidently bake your own sourdough bread. By the end of this journey, you’ll not only understand the science behind your bubbling jar of dough but also develop a deep appreciation for the wonders it can create in your kitchen.
Understanding Sourdough Starter
Sourdough starter, often referred to as a "mother" or "leaven," is a living culture composed of wild yeasts and lactobacilli bacteria that thrive when flour and water are mixed. It serves as a natural leavening agent, replacing commercial yeast in traditional bread-making methods. The wild yeasts produce carbon dioxide during fermentation, creating the air bubbles that contribute to the bread’s texture, while the lactobacilli lend the bread its characteristic sour flavor.
The relationship between yeasts and bacteria in a sourdough starter is symbiotic; they rely on one another for survival and thrive in a balanced environment. Yeasts, including various species of Saccharomyces, are responsible for alcohol fermentation and gas production. Conversely, lactic acid bacteria (LAB) like Lactobacillus contribute acidity to the dough, which enhances flavor and improves the bread's shelf life by inhibiting spoilage microorganisms. The perfect balance of these organisms varies according to the specific environment and the type of flour used, resulting in unique flavors and textures.
The Importance of Temperature
Temperature plays a crucial role in the fermentation process of sourdough starter. Generally, you want to maintain a range between 70°F to 78°F (21°C to 26°C) for optimal activity. At lower temperatures, fermentation slows down, while higher temperatures can accelerate the process but may create an imbalance between yeast and bacterial growth. This is important to note as it can affect the flavor profile and overall health of your starter.
In colder environments, the starter may take longer to rise and develop flavor. If the temperature drops below 65°F (18°C), you may find that your starter becomes sluggish and may take longer to become bubbly and active. On the other hand, if it gets too warm, say above 85°F (29°C), you risk creating a sour starter that may lack the depth of flavor you desire for your final bread product. Be mindful of your kitchen environment, and adjust feeding schedules or storage locations accordingly to keep your sourdough starter at its best.
Creating Your First Sourdough Starter
The process of creating a sourdough starter begins with just two ingredients: flour and water. While you can use various types of flour, whole grain flours, such as whole wheat or rye, tend to encourage rapid growth of wild yeasts due to their nutrient density. You can eventually switch to all-purpose flour or a blend as your starter develops, but starting with whole grains can yield quicker results.
Ingredients
Step-by-Step Instructions
Feeding Schedule
During the first week, you will need to feed your starter regularly. Follow this feeding schedule:
Maintaining Your Sourdough Starter
Once your sourdough starter is established and bubbling vigorously—usually around 7 to 14 days after its inception—it's time to learn how to maintain it effectively. A well-maintained starter can last indefinitely, providing you with countless opportunities to create delicious baked goods.
Feeding Technique
The typical feeding ratio for a healthy starter is 1:1:1 (equal parts of starter, water, and flour). However, you can adjust the ratios to manage the hydration and strength of your starter:
Ideal Storage Conditions
Reviving Your Starter
If your starter has been in the fridge for an extended time or shows little to no activity:
Troubleshooting Common Issues
Sourdough starters can be sensitive, and new bakers may encounter a few challenges along the way. Understanding common issues can help you successfully cultivate a robust and active starter.
Problem: No Bubbles or Growth
If your starter is not bubbling or rising, it may be too cold, or the yeast may not be active enough.
Problem: A Layer of Liquid (Hooch)
Sometimes, you might see a layer of grayish liquid (known as hooch) forming on the surface of your starter. This indicates that the yeast has used up its food and is producing alcohol.
Problem: Off Odors or Mold
If your starter develops an unpleasant smell (like rotten or putrid) or visible mold, it’s best to discard it. Wild yeasts are usually resilient, but certain contaminants can disrupt the balance.
Using Your Sourdough Starter
Having a healthy, active sourdough starter opens the door to a wealth of baking possibilities. Beyond bread, sourdough can be incorporated into a variety of recipes, making it a versatile ingredient in your kitchen.
Baking Sourdough Bread
To make traditional sourdough bread, you'll typically use your starter, flour, water, and salt. A basic sourdough bread recipe consists of:
Step-by-Step Directions
Other Uses
Don’t stop at bread; your starter can enhance a variety of dishes:
Sourdough Recipes to Explore
Once you’ve mastered the basics of sourdough starter and bread-making, take the opportunity to explore a variety of recipes that celebrate this unique ingredient.
Sourdough Pancakes
These fluffy pancakes are perfect for a lazy weekend brunch!
#### Ingredients
#### Instructions
Sourdough Crackers
Simple and delightful, these crackers make a great snack!
#### Ingredients
#### Instructions
Conclusion
Cultivating a sourdough starter is a rewarding journey that embodies patience and creativity in baking. With just a little flour and water, you’re not only creating a leavening agent but also engaging in a practice steeped in history. As you observe the bubbles rising in your jar and smell the intoxicating aroma of fermentation, you’ll build a connection to your food that many modern cooking methods lack.
By understanding the science of sourdough and embracing the art of maintaining your starter, you unlock endless culinary possibilities. Whether you're whipping up a classic loaf, creating delectable pancakes, or experimenting with unique recipes like sourdough crackers, the joy of baking with your homemade starter is unparalleled.
So roll up your sleeves, embrace the process, and get ready to unleash the wonderfully delicious world of sourdough baking. Remember, every bake teaches you something new, and with each rise and fall, your starter becomes more robust, reflecting your commitment and care. Happy baking!




Get the Next Recipe
Weekly recipes, techniques, and gear picks — straight to your inbox.
