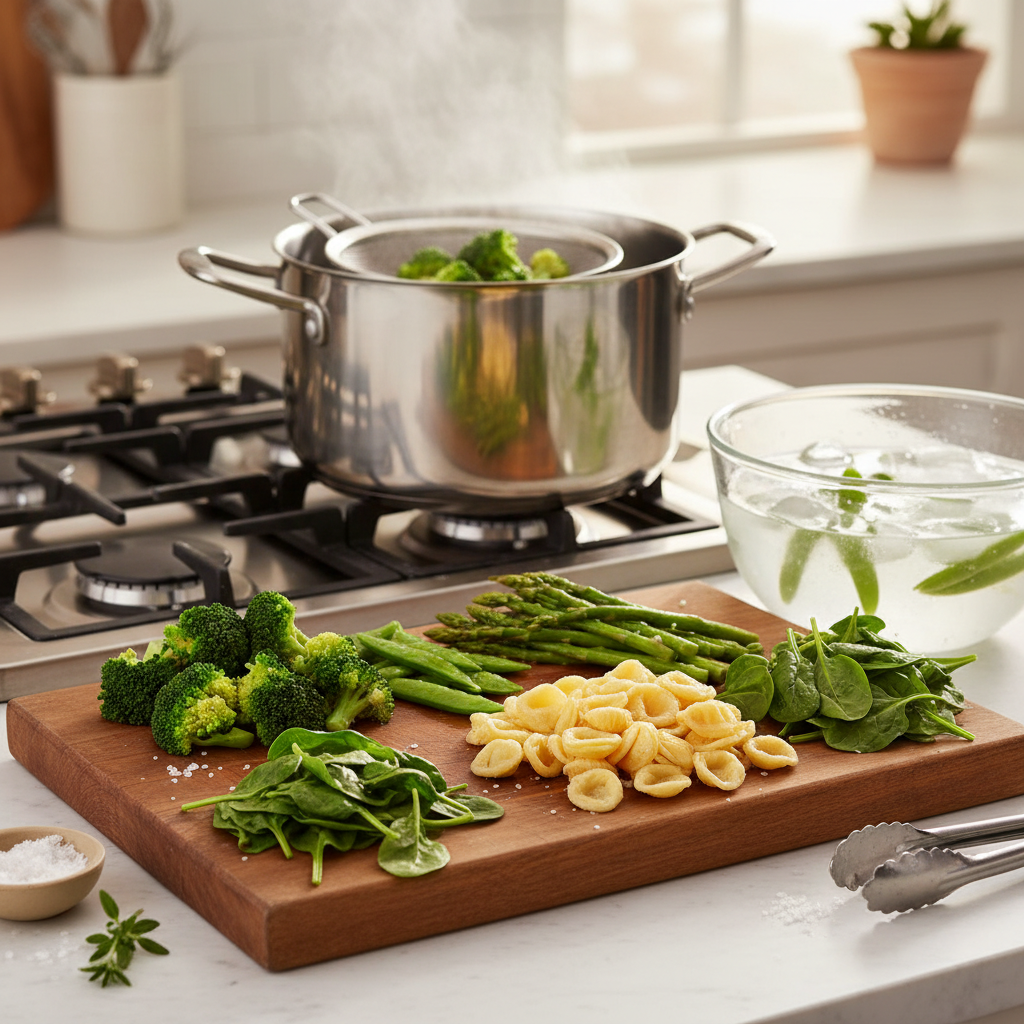
The Essential Guide to Mastering the Art of Blanching: Techniques for Perfect Vegetables and Pasta
Blanching is one of those culinary techniques that, once mastered, can dramatically enhance both the quality of your dishes and the efficiency with which you prepare them. Although it may sound simple—a quick dip in boiling water followed by an ice water bath—there are nuances that can significantly impact your results. For home cooks looking to elevate their skills, understanding the art of blanching will allow you to maintain vibrant colors, preserve nutrients, and achieve the perfect texture in vegetables and pasta. In this essential guide, we will explore everything from the science behind blanching to practical applications and expert tips that will make your meals shine.
The process of blanching offers amazing benefits that go beyond aesthetics. It helps to set the color of vegetables, making them more visually appealing in a dish. It also plays a crucial role in preparing vegetables for freezing, as blanching stops enzymatic processes that can lead to spoilage. Properly blanched vegetables retain their nutrition and flavor much better than those simply frozen raw. When it comes to pasta, blanching helps to control the cooking process, making it easier to achieve that perfect al dente texture.
This guide will delve into the two primary applications of blanching: preparing vegetables and cooking pasta. We will take you through the necessary tools, techniques, and timings to ensure your results are consistently perfect. By the end of this article, you will not only know how to blanch like a pro but will also appreciate the role this technique plays in professional kitchens and home cooking alike. So let's cut through the confusion and get you started on the path to mastering the art of blanching!
Understanding the Science of Blanching
Blanching isn't just a culinary technique; it's a fascinating interplay of science and art. This method involves briefly cooking food in boiling water or steam before cooling it in ice water. The short exposure to heat helps to denature enzymes responsible for degradation. Without blanching, vegetables left in the freezer can suffer from loss of flavor, color, and texture—even if they've been stored properly.
The Role of Enzymes
Enzymes are proteins that speed up chemical reactions within food. In vegetables, these enzymes can cause undesirable changes over time, leading to spoilage. Blanching temporarily deactivates these enzymes, slowing down the deterioration process. This is particularly important for frozen vegetables, as fresh produce can lose up to 30% of its quality within six months if not properly blanched.
Color Enhancement and Nutrient Preservation
The visual appeal of your dishes is greatly affected by the color of your ingredients. Blanching brightens the natural colors of vegetables, making greens vibrant and other hues more pronounced. Additionally, blanching helps to lock in water-soluble vitamins like Vitamin C and some B vitamins, which can leach out during long cooking times. In essence, this technique not only preserves quality but can enhance the eating experience by providing food that looks and tastes fresh.
Timing is Everything
While blanching may seem straightforward, timing is crucial. Over-blanching can lead to mushy vegetables that lose their flavor and nutrients, while under-blanching may not adequately halt enzyme action, leading to spoilage. Each type of vegetable requires a specific blanching time to achieve optimal results. As a general guideline, most vegetables should be blanched for anywhere between 1 to 5 minutes, depending on their texture and thickness.
Essential Tools for Blanching
Before you begin your blanching adventure, gather the necessary tools to ensure a smooth process. The right equipment can make a world of difference in achieving perfectly blanched vegetables or pasta.
Pot and Lid
A large pot is essential for blanching; ideally, it should have a lid to allow water to boil more rapidly. You'll want a pot that can accommodate the amount of food you'll blanch, usually at least 5 quarts for vegetables.
Ice Bath Setup
An ice bath is crucial for stopping the cooking process immediately after blanching. To prepare, fill a bowl with cold water and ice cubes; a good ratio is about 1 part ice to 2 parts water. This will quickly cool the vegetables and help them retain their bright color and crisp texture.
Slotted Spoon or Spider
Use a slotted spoon or a spider to carefully remove the blanched food from the boiling water. This tool is useful for allowing excess water to drain off, making handling easier and minimizing mess.
Tongs
A pair of tongs is indispensable for handling vegetables in the boiling water and transferring them to the ice bath. Ensure they’re sturdy enough to grip heavier vegetables like green beans or broccoli.
Timer
Having a timer at hand will help you keep track of your blanching times for each type of vegetable. Consistent timing is key to avoiding overcooked produce.
The Blanching Process
Now that you're equipped with the right tools, let's get down to the actual process of blanching. This method can be broken down into a few simple yet crucial steps that will ensure success every time.
Step-by-Step Guide to Blanching Vegetables
Blanching Times for Common Vegetables
Here is a quick reference table for blanching times for common vegetables:
| Vegetable | Blanching Time |
|------------------|----------------|
| Asparagus | 2-3 minutes |
| Broccoli | 3 minutes |
| Green Beans | 2-3 minutes |
| Carrots | 2-5 minutes |
| Peas | 1-2 minutes |
| Cauliflower | 3 minutes |
| Spinach | 1-2 minutes |
"The key to great blanching is being attentive to timing—it's a precision game!"
Blanching Pasta for Perfect Texture
While blanching is often associated with vegetables, it plays an equally important role in preparing pasta. Blanching pasta helps control the cooking process, leading to a more consistent texture, especially if you're using it in dishes that involve baking or reheating.
Why Blanch Pasta?
Blanching pasta is not only about cooking it quickly; it's about achieving the perfect al dente texture. When making lasagna or other baked dishes, partially cooking the pasta via blanching ensures that it won't turn mushy during the final cooking process. This is crucial for layered pasta dishes that require a longer cooking time.
Blanching Process for Pasta
Common Mistakes to Avoid
Creative Uses for Blanched Vegetables
Once you've mastered blanching, you'll find an abundance of ways to incorporate these vibrant, freshly blanched vegetables into your meals. Beyond mere side dishes, blanched vegetables can elevate countless recipes.
Salads and Cold Dishes
Blanched vegetables can serve as a refreshing addition to salads, adding both color and crunch. A simple blanched asparagus salad with a citrus vinaigrette can be a stunning appetizer or side.
#### Recipe Idea: Blanched Vegetable Salad
- 1 cup blanched green beans
- 1 cup blanched asparagus, cut into pieces
- ½ cup cherry tomatoes, halved
- Zest and juice of 1 lemon
- 2 tablespoons olive oil
- Salt and pepper to taste
1. In a large bowl, combine blanched vegetables and tomatoes.
2. In a jar, mix lemon zest, juice, olive oil, salt, and pepper.
3. Shake well and pour over the salad before tossing.
Stir-Fries and Sautéed Dishes
Blanched vegetables can also serve as a quick base for stir-fry dishes. Their pre-cooking gives you a head start, allowing you to retain their bright colors and crisp textures.
#### Recipe Idea: Quick Vegetable Stir-Fry
- 1 cup blanched broccoli
- 1 cup blanched carrots, sliced
- 1 cup blanched bell peppers, strips
- 2 cloves garlic, minced
- 2 tablespoons soy sauce
- 1 tablespoon sesame oil
1. Heat sesame oil in a pan over medium-high heat.
2. Add garlic and sauté until fragrant.
3. Toss in the blanched vegetables and stir-fry until heated through.
4. Drizzle in soy sauce and stir to coat before serving.
Freezing for Later Use
Blanching isn't just a cooking technique; it's a vital step for preserving vegetables for future use. Once blanched and cooled, vegetables can be frozen to maintain their quality over time.
Professional Chef Tips for Successful Blanching
As with any culinary technique, a few pro tips can make a world of difference in mastering the art of blanching. Here are some insights directly from the pros.
Temperature Control
Batch Blanching
Use of Salt
Conclusion
Blanching is an essential technique in any home cook's arsenal, providing a simple yet effective method for enhancing the flavor, texture, and appearance of vegetables and pasta. By understanding the science behind blanching and applying proper techniques, you can drastically improve the quality of your meals while also extending the shelf life of your produce through freezing.
As you experiment with various vegetables and dishes, remember to pay close attention to your timing and method. The difference between perfectly blanched vegetables and overcooked mush often comes down to just a few seconds. Embrace this technique and explore its versatility in your culinary creations, and soon you will find yourself confidently serving dishes that shine with vibrant colors and fresh flavors.
With this essential guide, you’re now well-equipped to tackle blanching with ease. Whether it’s preparing sides, incorporating vegetables into salads, or freezing for later use, the possibilities are endless. As you continue your culinary journey, keep refining your techniques and remember the art of blanching—your taste buds and loved ones will be grateful!

Get the Next Recipe
Weekly recipes, techniques, and gear picks — straight to your inbox.
