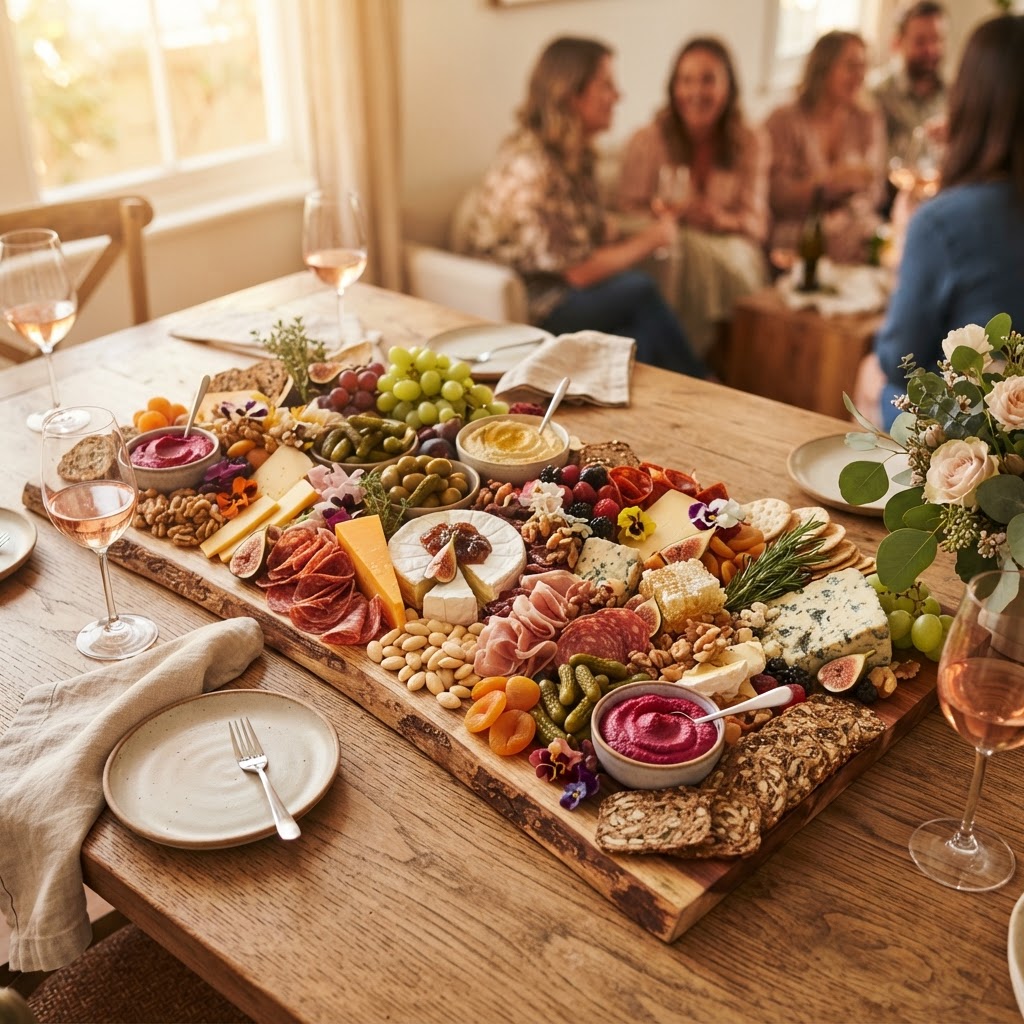
The Grazing Board Blueprint: How to Curate a Pro-Level Spread for Every Occasion
There is something inherently magical about a sprawling grazing board that serves as the centerpiece of a gathering. It invites guests to slow down, pick at their leisure, and engage in the kind of low-stakes culinary exploration that defines great entertaining. While many home cooks feel intimidated by the sheer abundance seen on social media, the art of the board is less about professional training and more about understanding the architecture of flavor. A truly great spread isn’t just a pile of cheese and crackers; it is a meticulously curated landscape that balances salt, fat, acid, and texture to guide the palate from one bite to the next.
At "Blame The Chef," I believe that entertaining should be an expression of hospitality, not a source of pre-party anxiety. When you understand the basic ratios—the "blueprint," if you will—you can assemble a board that feels effortlessly elegant, regardless of the occasion. Whether it is a cozy Friday night for two or a raucous holiday party for twenty, the underlying principles remain the same: prioritize quality over quantity, embrace variety, and never underestimate the power of a well-placed garnish. This guide will walk you through the essential components and the assembly techniques that transform basic grocery store finds into a masterpiece worthy of a professional kitchen.
The secret to a successful board is the staging process, which is an art form unto itself. We aren't just placing items on a board; we are creating a narrative of textures and colors that entice the eye before a single cracker is tasted. From the selection of your base—be it a massive piece of reclaimed wood or a sleek marble slab—to the final dusting of fresh herbs, every decision serves a purpose. By following these professional guidelines, you will move from being a mere host to a curator of experiences, ensuring that your table is the place everyone wants to gather around when the sun goes down.
The Foundation: Selecting Your Vessel and Base
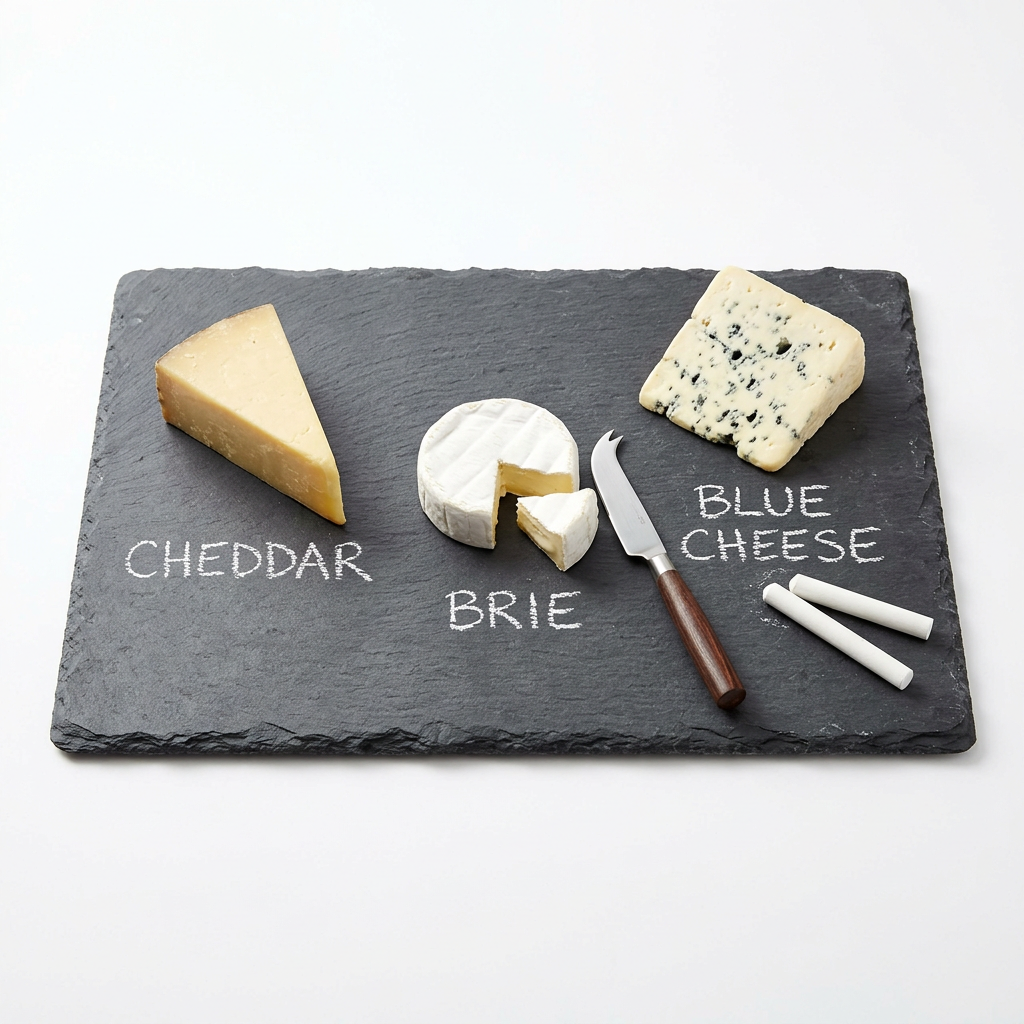
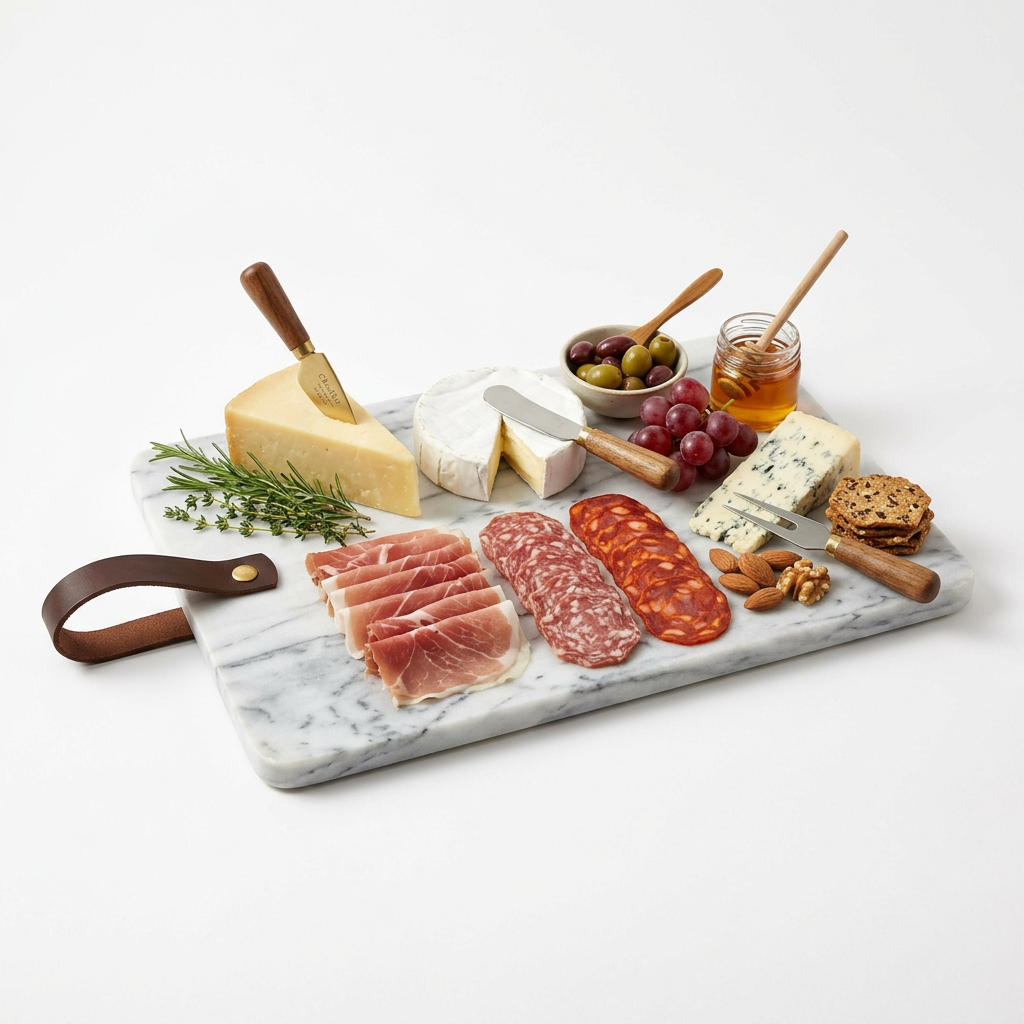
Choosing your board is the first step in the design process. You need a surface that is large enough to prevent overcrowding but small enough that it doesn't look empty if you are catering to a smaller group. I always suggest having a variety of materials on hand: live-edge wood for rustic charm, slate for a modern, dramatic contrast, or marble to help keep soft cheeses cooler for longer durations. Remember that the board is the canvas, and its texture will dictate the vibe of the entire spread.
Managing Surface Area and Scale
When you select your board, consider the number of guests. A general rule of thumb is to allow for about 3 to 4 ounces of cheese and 2 to 3 ounces of charcuterie per person. If you are serving a heavier meal afterward, you can scale this back, but for a standalone grazing event, these proportions ensure nobody goes hungry. Always keep a few extra small bowls or wooden boards nearby to refresh the supply once the initial spread starts to dwindle.
The Importance of Risers and Depth
Professional chefs understand that height is everything. If everything lies flat on the board, the food loses its visual impact. Use small ceramic ramekins, tiered stands, or even inverted bowls hidden under a linen napkin to create elevation. By placing your honey jars or bowls of olives on a slight incline or riser, you draw the eye upward and make the board feel bountiful rather than flat.
"A board without elevation is just a collection of ingredients; a board with height is a curated landscape that invites movement and discovery."
The Cheese Architecture: The Rule of Three
The heart of any grazing board is the cheese. To build a balanced profile, you should aim for the Rule of Three: one soft/creamy, one hard/aged, and one bold/blue or unconventional cheese. This ensures a spectrum of intensities that cater to every type of palate. Always remember to serve your cheese at room temperature—take it out of the refrigerator at least 45 to 60 minutes before serving. This allows the fats to soften, releasing the true aromatic compounds that make premium cheese worth the investment.
Curating the Profile
For your soft category, a triple-cream Brie or a fresh, herb-rolled goat cheese is essential. For the hard category, look for an aged Gouda or a sharp white cheddar that offers that delightful crystallization. For your bold selection, a creamy Gorgonzola or a firm, nutty Manchego provides the necessary punch. Mixing cow’s milk, goat’s milk, and sheep’s milk cheeses adds an extra layer of complexity that your guests will surely notice.
Handling and Slicing Techniques
Don't just leave a massive block of cheese on the board. Pre-slice a few pieces of the hard cheeses to make them approachable. For soft cheeses, provide a dedicated knife so guests don't have to mash a butter knife into a delicate rind. I prefer to keep one or two cheeses whole to serve as anchors, with a knife resting nearby to encourage interaction. Professional tip: Slice your harder cheeses at varying angles to create jagged edges, which are visually more interesting than uniform squares.
Charcuterie and Proteins: Salty, Cured, and Savory
Once your cheeses are anchored, it is time to fill in the gaps with charcuterie. The goal here is contrast in both texture and salt content. You want a mix of prosciutto (delicate, thin, salty), salami (cured, peppery, firm), and perhaps a pâté or rillettes if you want to elevate the board to a bistro-level spread. When handling delicate meats like prosciutto, I like to create "ribbons" or "roses" rather than laying them flat. This adds volume and makes the meat easier for guests to grab with a cocktail fork or a cracker.
Folding and Styling Meat
Do not underestimate the power of how meat is placed. Salami rounds can be overlapped in a line to create a "river" across the board. Prosciutto should be ruffled or folded into loose bundles. This creates pockets of air that make the board look more luxurious. If you are using a cured sausage like soppressata, cut it into thin, coin-shaped slices, but feel free to leave a few larger pieces whole to show off the quality of the grind.
Accompaniment Ratios
The secret to the perfect bite is the pairing. Every meat should have a corresponding pairing partner nearby. For example, place your spicy salami near a milder, sweeter cheese, or tuck some cornichons and pickled onions right next to the saltier cured meats. The acid from the pickles cuts through the fat of the salami, acting as a palate cleanser that readies the mouth for the next taste.
The "Fillers": Crackers, Breads, and Vessels
A board is only as good as its delivery system. You need a mix of carriers: crunchy, toasted, and soft. I recommend at least two types of crackers—a neutral water cracker for the bold cheeses and a seeded or rye cracker for the earthier ones. Never forget the bread. A toasted baguette or rustic sourdough sliced into thin rounds adds a necessary chew that crackers simply cannot provide.
The Art of the Cracker Placement
I prefer to fan my crackers out, radiating from the corners of the board or snaking around the cheese anchors. If you have the space, place the crackers directly on the board, but keep a small basket of extra bread nearby to replenish the supply. Nothing kills the vibe of a board faster than running out of carbohydrates while there is still plenty of expensive cheese left on the platter.
Managing Moisture
One common mistake is placing wet items like fruit or dips directly against crackers. The crackers will soften, and the crispness will vanish within minutes. Use small glass bowls or ramekins for your wet items like honey, mustard, or jam, and place them on the board first, treating them as anchors around which you build the rest of your ingredients. This physical barrier ensures your bread stays crunchy until the very last guest leaves.
"Texture is the unspoken language of the grazing board. If everything is soft, the experience is boring; if everything is crunchy, the experience is exhausting. Aim for the middle ground."
Fruits, Nuts, and Briny Accents: The Final Polish
Now that the foundation, cheese, and meats are in place, it is time to address the "garnish" layer. This is where you introduce pops of color and necessary acidity. Fresh fruit—such as grapes, figs, berries, or thinly sliced pears—not only breaks up the monotony of the savory items but also provides a fresh, sweet counterpoint to the salty meats. Dried fruits like apricots or dates also work beautifully, offering a chewy, concentrated sweetness.
The Importance of Acid
Briny, pickled items are non-negotiable for a professional board. Think castelvetrano olives, pickled caper berries, or marinated artichoke hearts. These high-acid items are the "reset button" for the palate. If you have been eating rich, triple-cream brie all night, a single sharp, acidic pickle will refresh your tongue and make the next bite taste just as intense as the first.
Nuts and Texture
Nuts provide the crunch that crackers can't always satisfy. Marcona almonds are a classic choice because they are buttery and lightly salted. Walnuts pair beautifully with blue cheese, while pistachios add a vibrant pop of color. To really elevate your board, lightly toast your nuts in a dry pan with a pinch of sea salt and a touch of rosemary for three minutes before serving. The warmth and the aroma will make your guests feel like they are in a high-end wine bar.
Professional Chef Tips for Longevity
Maintaining a board for a multi-hour party requires a bit of strategy. Keep in mind that cheese begins to lose its integrity if left out for more than two hours in a warm room. If you are planning an evening-long event, do not put all your inventory out at once. Keep a "replenishment board" in the kitchen that is ready to be swapped out or added to. This keeps the presentation looking fresh and hygienic throughout the night.
Temperature Control
If your room is warm, place your soft cheeses on a piece of chilled marble or a board that has been kept in the refrigerator for an hour before setup. Similarly, if you are hosting outdoors, try to find a shady spot, as direct sunlight will cause your chocolate and soft cheeses to weep and lose their form.
The Garnish Strategy
Fresh herbs are the final touch that makes a board look "styled." Use small sprigs of rosemary, sage, or thyme to fill in any empty spaces between the cheese and the nuts. Not only do they look professional, but they also provide a beautiful, aromatic scent as guests reach for their food. It is the subtle, sensory details that separate a chaotic plate of food from a thoughtful culinary experience.
The Art of the Pairing: A Pro Perspective
When you are choosing components for your board, consider the "theme" of the evening. A Mediterranean-themed board might focus on feta, hummus, pita, and olives, while a Winter comfort board might prioritize aged cheddar, salami, dried figs, and warm honey. Understanding the relationship between these items will allow you to curate boards that feel cohesive and purposeful.
Understanding Flavor Profiles
When pairing, try to keep the "intensity" of the items matched. A very delicate goat cheese will be completely overwhelmed by a bold, spicy, dry-cured sausage. In that instance, serve a lighter, herb-infused salami or a mild prosciutto instead. On the other hand, a bold blue cheese can handle the company of a robust, spicy salami or a tart, pickled fig.
The Role of Sweeteners
Honey is the unsung hero of the grazing board. Whether you use a standard clover honey or an artisanal, spicy-infused honey, it serves as the bridge between the savory components. I like to provide a small honey dipper made of wood. It looks sophisticated and prevents guests from getting sticky fingers. Pairing a sharp, aged sharp cheddar with a drizzle of honey is perhaps the single most effective way to demonstrate the power of flavor balancing to a guest.
"If you are unsure of your pairings, stick to the classics: cheese + fruit, meat + pickle, bread + fat. It is a formula that has survived centuries because it works every single time."
Troubleshooting Common Grazing Board Failures
Even professionals hit snags. Perhaps the crackers are wilting, or the cheese looks unappealingly oily. The most common error is overcrowding. If you find that you have simply too much food, do not be afraid to pull some items off. A board that is perfectly full but not overflowing is much more attractive than one that looks like a pile of leftovers.
Managing "Wilted" Ingredients
If your fruit is browning or your crackers have softened, replace them immediately. This is why having extra stock in the kitchen is essential. Don't worry about keeping the board looking identical to how it started; a grazing board should evolve as the night progresses. It is a living, breathing component of your party.
The Hygiene Factor
Always provide small serving utensils for every bowl and block of cheese. While some guests may be tempted to use their fingers, providing cheese knives, cocktail forks, and small tongs encourages a cleaner, more refined atmosphere. It also prevents the cross-contamination of flavors, ensuring that the honey doesn't end up in the olive bowl.
Final Thoughts
Building a grazing board is ultimately an exercise in generosity. It is about creating a space where people can congregate, share a conversation, and enjoy the simple pleasure of good food. By focusing on quality ingredients, paying attention to the interplay of textures and flavors, and keeping your presentation intentional, you will create a centerpiece that elevates any occasion. Do not overthink the process or get caught up in the "perfection" you see online; the most successful boards are the ones that are enjoyed fully and emptied completely.
Take these principles—the Rule of Three for cheese, the layering of textures for meats and crackers, and the necessary acid from briny accents—and make them your own. Use the board as an opportunity to showcase your favorite local products, experiment with new flavor pairings, and above all, provide a warm welcome to your guests. At "Blame The Chef," we know that the most memorable gatherings aren't the ones with the most expensive ingredients, but the ones where the host creates an environment that feels welcoming, abundant, and carefully considered.
As you prepare for your next event, remember that the "blueprint" is merely a guide. Your personal taste and your comfort level with your ingredients should always take precedence. Start small, refine your technique as you gain confidence, and don't be afraid to take risks. Whether you are hosting an intimate dinner or a holiday bash, your guests will appreciate the effort, the artistry, and the delicious variety you have laid out before them. Go forth, curate your landscape, and let the grazing begin. You have all the tools you need to become the ultimate master of the board—now, get to work and make something beautiful.
The beauty of this craft is that it never truly stops evolving. As seasons change, so too will your board. In the spring, lean into fresh berries, soft goat cheeses, and bright, herbaceous flavors. In the fall, embrace the earthier tones of aged cheddars, dried figs, roasted nuts, and perhaps even a fig jam or a spiced apple butter. By following the seasons, you ensure that your grazing board remains relevant and exciting, no matter how often you entertain.
Remember to keep your ingredients accessible. A beautiful board is a wasted effort if guests feel like it is a museum display that is too precious to touch. Encourage your friends and family to dig in, to mix and match the flavors, and to experiment with the pairings you have so carefully arranged. That interaction is what transforms a simple meal into an evening of genuine connection and culinary discovery.
Finally, do not be afraid to seek out local producers for your ingredients. A wedge of artisanal cheese from a nearby farm or a jar of honey from a local beekeeper adds a layer of depth and story that supermarket brands simply cannot replicate. It gives you something to talk about when a guest asks, "Where did you find this?" and it strengthens the community around your table. Host with confidence, curate with passion, and keep your kitchen filled with the sights and smells of a life well-lived. That is the true spirit of the Grazing Board Blueprint.
One final note on the logistics of storage. Always keep a clear path to your kitchen where the backup supplies are held. If you are doing a large-scale event, consider having multiple smaller boards scattered around the space rather than one massive, immovable object. This keeps the crowd moving, prevents bottlenecks around the buffet, and makes for a more fluid party environment. The blueprint is adaptable, flexible, and entirely up to your creative vision. Now, let’s get those boards ready for the weekend. The kitchen is waiting, and the guests are arriving.
As you finish your final arrangements, take a moment to step back and look at your work. Does the height vary? Is the color palette balanced? Are there enough places for guests to grab a bite without creating a crowd? If the answer is yes, then you have succeeded. The architecture of your board is sound, the flavors are balanced, and you are ready to be the host everyone talks about long after the music has faded and the wine is gone. Enjoy the process, and enjoy the party. You’ve earned it.
When you think about the vast history of the grazing board, you realize it is just a modern iteration of the charcuterie platter that has been shared for generations. It is a timeless way of showing care for those you invite into your home. By taking the time to curate these elements, you are saying to your guests, "I value your presence, and I want your experience here to be extraordinary." That, above all else, is the most important ingredient in any recipe for entertaining.
Enjoy the journey of curating your own signature style. Over time, you will find yourself reaching for the same reliable producers and creating your own "classic" combinations that define your hosting personality. That is where the real joy of this craft lies—in the repetition and the refinement, the quiet moments of assembling the board, and the loud, happy moments of seeing it disappear under the hands of your guests. Go forth and create, for the world can always use more beauty and flavor at the dinner table.
I’ve provided you with the foundational tools, but the rest is up to your imagination. Perhaps you add a bowl of marinated artichokes, or perhaps you swap out the traditional crackers for some house-made crostini. The rules aren't meant to restrict you; they are meant to set you free. By mastering the blueprint, you become the captain of your own culinary ship, ready to navigate any party, any season, and any group of friends with ease and confidence.
It is truly a pleasure to help you on your culinary journey here at "Blame The Chef." We emphasize these methods because they work, and we encourage this creativity because it keeps the art of cooking alive in the home kitchen. Every board you make is an opportunity to learn something new about your own tastes and the preferences of those you love. So, keep building, keep sharing, and keep the table full. There is no better feeling than a room full of people and a table full of food, and with this blueprint, you are more than ready to make that happen.
Keep in mind that the best tools for your work are often the simplest. A sharp paring knife, a good wooden board, and a collection of mismatched ceramic bowls are really all you need to start. Do not let the lack of "professional" gear stop you from building something extraordinary. Your eyes and your palate are your most important instruments, and they will tell you exactly what the board needs to reach its final, beautiful form.
Finally, make sure you take a photo of your work before the first guest arrives. It serves as a great record for what worked and what didn't, allowing you to learn and grow for the next event. The more you do this, the more intuitive the process becomes, and soon enough, you’ll be putting these boards together in minutes rather than hours. It is a skill that lasts a lifetime, and it will serve you well at every turn in your entertaining career.
Keep it simple, keep it fresh, and most importantly, keep it social. The grazing board is designed to be the life of the party, a place for interaction, and a catalyst for great conversations. Now, put your apron on and get to the board—your guests are waiting for the show. You’ve got this, and with these techniques in your back pocket, you are going to create something that everyone will be talking about. The final assembly is yours to command.

Get the Next Recipe
Weekly recipes, techniques, and gear picks — straight to your inbox.
